Anh Escape Pod Scratchbuild

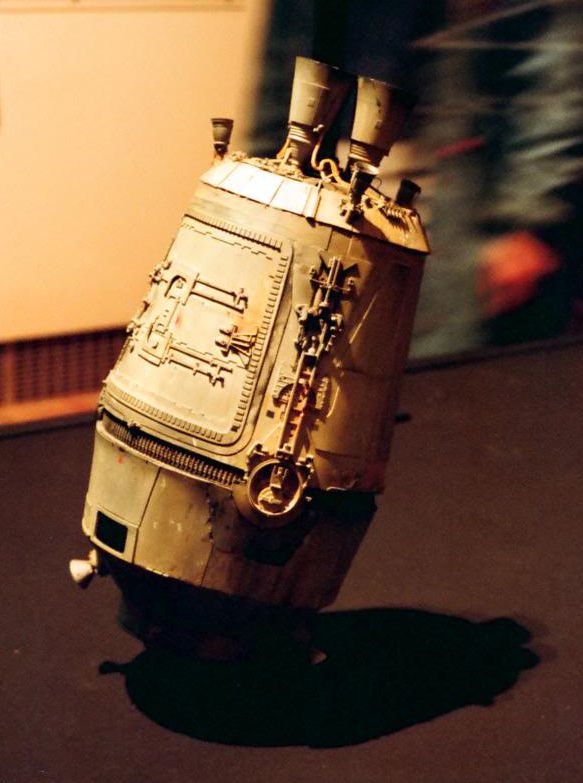
Rick you also built a beautiful Pod.
Did you sheet in sections or one sheet?

Believe it or not, I used the buckets themselves. I had no time to get it wrong the first try. I then used a spare bucket sliced and unrolled to get the curve accurate for the layers of hull plating and the hatch, which I did in styrene.
 
Looking good there omes72!
I found this on the internet today. It from a exhibit in SF around 1995.
I adjusted the second one to help show some detail. I thought it might help out a little with your build.
Darren
escapepod1.jpg

escapepod2.jpg
 
Thanks.
Well Im reserved to this being a mock up build to get stuff figured out.
Ive got the upper trench cone on & now working on the upper cone. Gotta say I was scratchin my head over how to achieve this one. Its amazing how the brain works stuff out sometimes. :wacko
So Ive got it on in 2 sections as Im running out of larger pieces of styrene to use until I get to the supplier.
After a few goes I think Ive got right & just need to trim the lower edges without damaging the other section.
Again thats where using 0.5mm would have been better.
Getting there slowly & once Ive made all my templates I will start from scratch.
 
Thanks for the comments.
A little less tribulation & some more building now I sort of have a handle on things.
These curves a reall difficult but not impossible.
A little ruff at the moment but will fix all that up on the next run. :love
 
Sorry about the late reply, i used two layers of thin (0,5 mm) styrene to sheet my pod. The seam on the first layer was locked onto one of the ribs which i made wider to stabilize the seam. The next layer was overlaying the first seam. The surface hull sections were also 0,5 mmm styrene which made the overall thickness 1,5 mm
 
Thanks everyone.
Lasse cheers for those tips mate.
0.5mm styrene is definately the way to go for doing this sort of stuff with conical shapes.
The 0.25 is just too thin & fragile.
The build started clean & looks clean in the pictures but she's not now :rolleyes
The cones are really tricky to get on & if I recall Lasses said he made his in sections which would definately also be the better option.
It would just make the clean up of skinning so much easier in seperate sections then join them all together.
At least with the second skin no one will ever see how messy it started out.
Im still most likely going to start from scratch again now though & use this as my test piece.
Thanks for the input fellas I really appreciate it.
 
Second skin is on.
I have to say it was much easier than the first as I had plenty to glue to.
Had a couple of slips trimmimg the excess which was nasty & this is where constructing each section apart would be much better.
You would have an easier & safer time cleaning up individual sections.
That is what I am doing for ANH ESCAPE POD 1.2:)
So Ive bogged up some slips using the Weldon glue which works ok.
Have to get me some car bog I think though :lol
I will now start mapping out the plating & panels.
So apart from a bit of repair & clean up I am happy with how she has progressed.
 
Thanks Rick. The 0.5mm styrene is so much easier to work with. Ive been looking at the plating which is confusing me a little on the different layers. I also still have to make the dome on the top & mount position. I am starting on the V1.2 this week which will be consyructed in individual sections which should mske my work alot cleaner.
 
Thanks Rick. The 0.5mm styrene is so much easier to work with. Ive been looking at the plating which is confusing me a little on the different layers. I also still have to make the dome on the top & mount position. I am starting on the V1.2 this week which will be consyructed in individual sections which should mske my work alot cleaner.

I know what you mean by confusing. When I built mine I was unfamiliar with the details. I found that they are 1 sided, 2 sided, 3 sided and 4 sided. Getting them all in the right place made me dizzy. You'll do a great job I'm sure!
 
Thanks for the kind words. Hope I can pull it off.
So this afternoon Ive been head first into this model research.
I started some maps in the research thread & this afternoon have workd on the diameters of each section.
From scaled pictures & some kit parts Ive come up with the following. For now. Everything is subject to reworking though am confident Im close.
I laid some parts on the measurements I got for the engine base diameter & it looks pretty close to me.
Its amazing how the Sea Lab parts fit exactly snug into slots each side of the Saturn V rocket base.
Almost as if they were meant to be there :ninja
Im going to build my body from styrene.
Actually Lasse Henning did a beautiful build of this which he primarilly scratch built most of all the parts.
This one will use only actual donors though :eek
Thanks for looking.
All feedback more than welcome.

Jase I would like to know what that vertical measurement is between
15.7 and 20.3...thanks:thumbsup
 
Back
Top