You are using an out of date browser. It may not display this or other websites correctly.
You should upgrade or use an alternative browser.
You should upgrade or use an alternative browser.
ANH DL-44 Denix question
- Thread starter jheilman
- Start date
Mara Jade's Father
Master Member
This subject has re-interested me in my blaster. I have the wrong wooden grips on mine so I am going to get a set of those $50 ones listed above. However, I am waiting till working hours on Monday. If you do the research, you will find that if you call their order number, they have an automated message for a coupon code you can use on line to save some money.
Like Treadwell said, the grips fit on by pressure using the bolt. However, I checked the ones I currently have on there now and they are not epoxied and they don't shift. Still, epoxy is not a bad idea. I think I may use some silicone cement on the new set. Not as good a hold as epoxy but should have just enough to do the job. I like it because if you need to remove it, you can.
Like Treadwell said, the grips fit on by pressure using the bolt. However, I checked the ones I currently have on there now and they are not epoxied and they don't shift. Still, epoxy is not a bad idea. I think I may use some silicone cement on the new set. Not as good a hold as epoxy but should have just enough to do the job. I like it because if you need to remove it, you can.
Mara Jade's Father
Master Member
I got my grips today. I immediately went and fitted them to my blaster. Since my blaster was already modified for real grips, I only had to modify the grips themselves.
I originally tried to use a file as the tutorial showed however that would is pretty tough so I opted to use a Dremil with a grinding will to do the job. It probably took about 10 minutes.
Good luck on your build jheilman.
I originally tried to use a file as the tutorial showed however that would is pretty tough so I opted to use a Dremil with a grinding will to do the job. It probably took about 10 minutes.
Good luck on your build jheilman.
jheilman
Sr Member
Worked on my new grips and frame mods this weekend. I was very nervous about using a dremel on the grips. Afraid I'd accidentally cut too deep. But filing alone was looking painfully slow. So, I used my razor saw to hack out the sections needed then filed for a final fit.
Will get some pics up. Not that the process is anything new to the gang here. :lol
Will get some pics up. Not that the process is anything new to the gang here. :lol
jheilman
Sr Member
OK, a few pics. Here is a comparison of the standard Denix wood grips (right) next to my new walnut Mauser grips from Numrich. Grips, 1896, Walnut Military - w/o Red 9, Includes Escutcheons & Screw
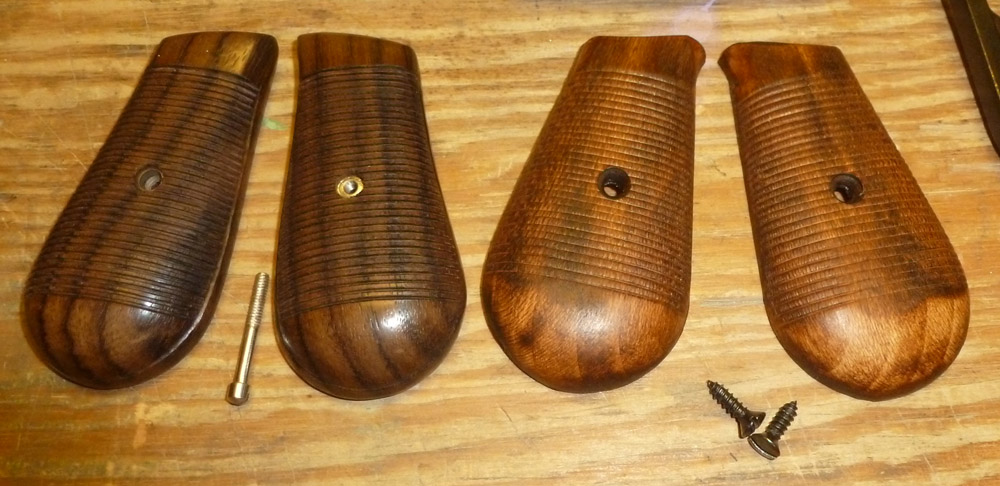
Fortunately, they are much lighter in color than the picture on their website. No need to bleach and restain. Not only are the correct grips narrower than the Denix grips, they are rounder and taller in profile as seen here.

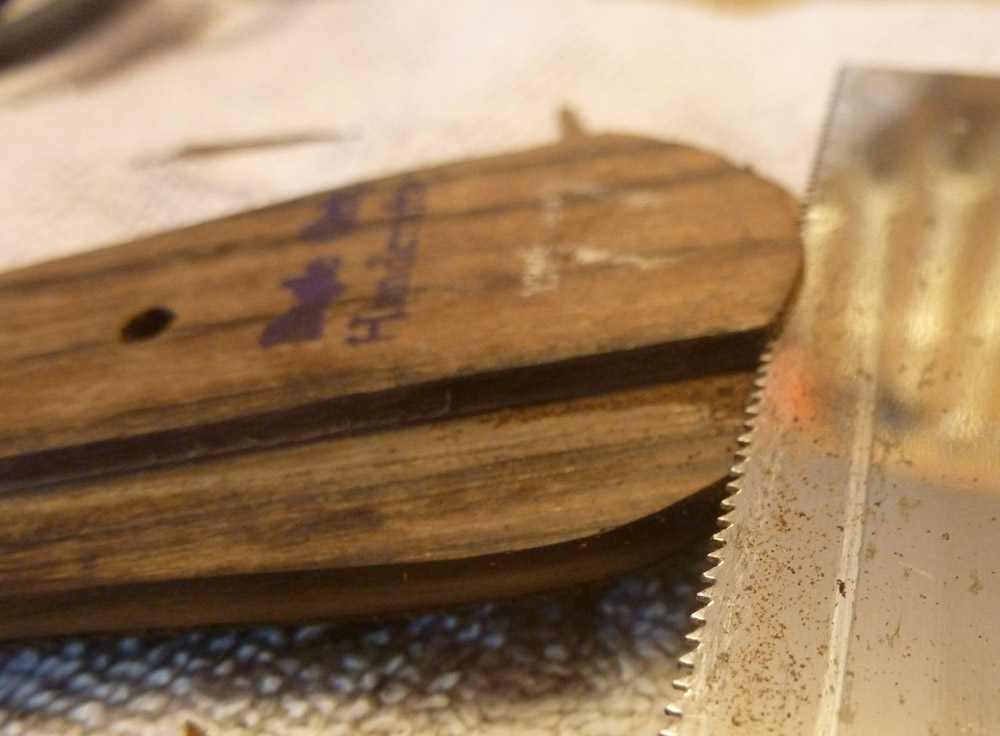
As I said, I was too nervous to take a dremel to my new grips. So, I traced a rough outline where I needed to remove material and used a razor saw to cut most of it out. Then filed the rest of the way.
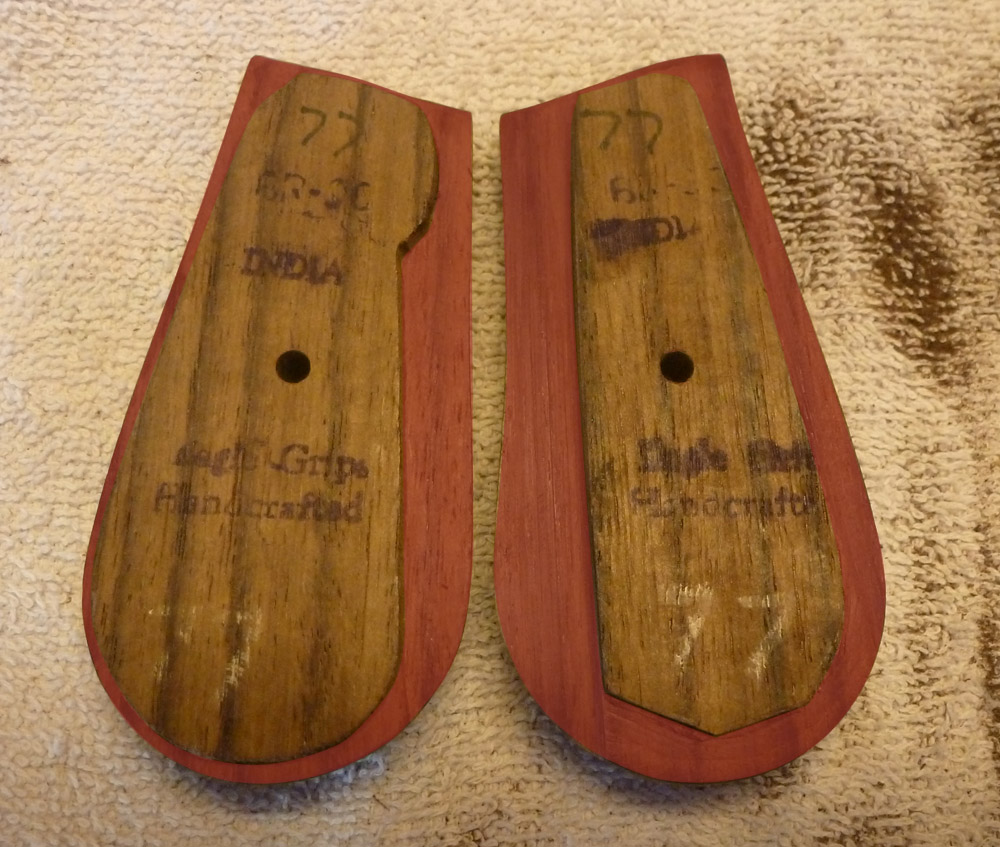
It's tough to see in a photo where the cut lines are. So, I highlighted with a red tint. The original, unaltered grip is on the left and the grip on the right shows what needs to be removed to fit the Denix frame.
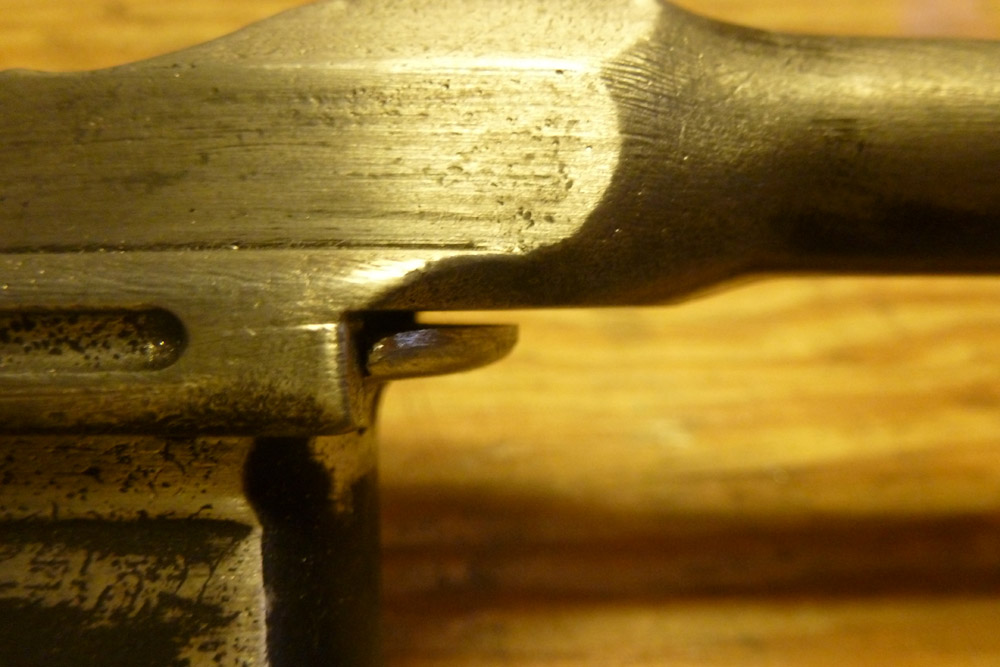
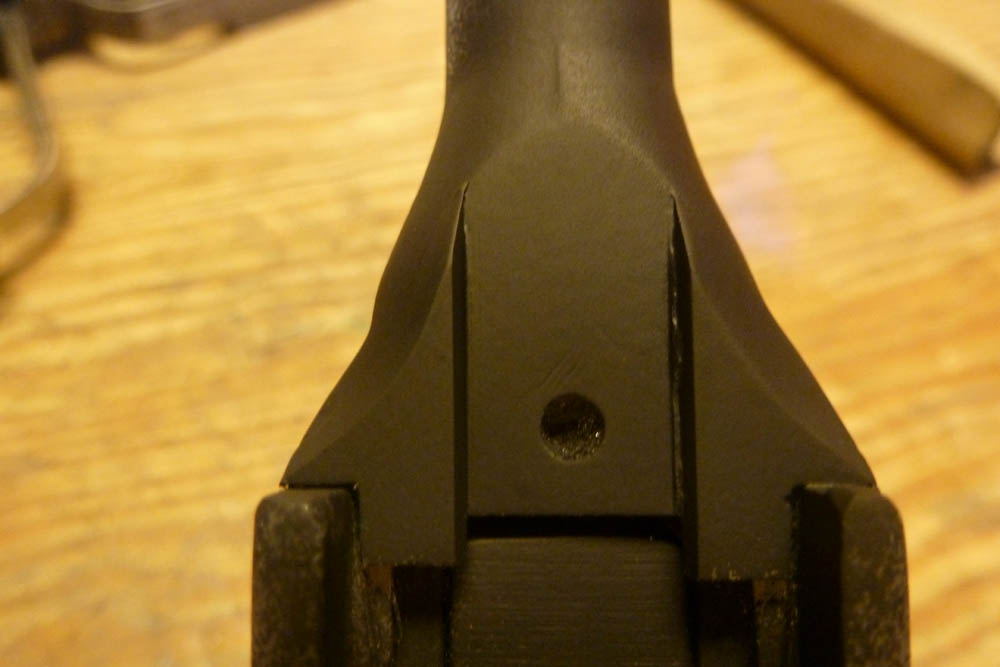
And here is the first pic of the modified grips on the partially stripped gun. The bare metal really shows how much of the frame needs to be removed.
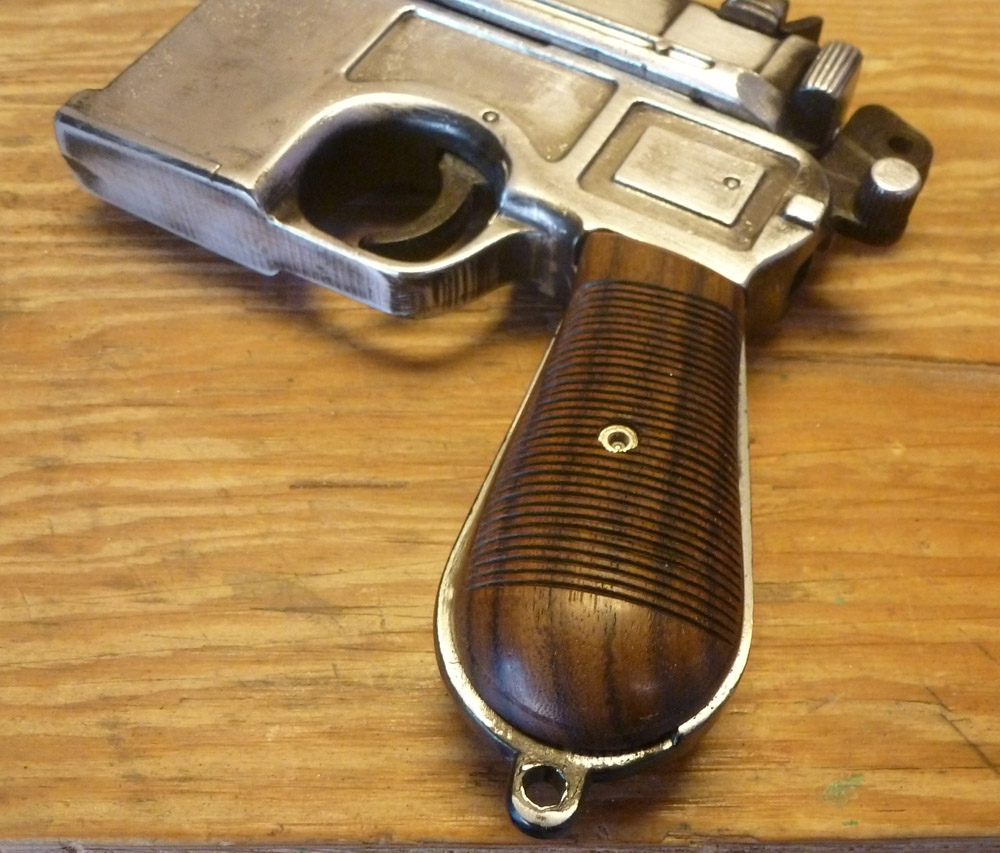
Anyone with a genuine Mauser, I'd love to see pics of the frame minus grips to compare the thickness. I'm guessing the Denix frame is also thicker than the original. The new screw and escutcheon barely meet. I get a solid half turn once they connect before everything's tight. Makes me want to thin out my frame a bit, but I'd like dimensions off the real thing first.
I spent a lot of Saturday filing and grinding down the frame to match the new grips. About 95% done. Will finish that up Monday.
Next question. Who has disassembled a Denix? Not sure if I need to, but I've always believed that if you're going to repaint something it's best to strip it down to the component parts first. I'm concerned about removing the attaching pins, but more concerned about putting them back. Since the metal is so soft, I'm afraid I'd damage it. Who has done this? Please advise about how difficult it is and if it's worth the effort.
Thanks.
Fortunately, they are much lighter in color than the picture on their website. No need to bleach and restain. Not only are the correct grips narrower than the Denix grips, they are rounder and taller in profile as seen here.
As I said, I was too nervous to take a dremel to my new grips. So, I traced a rough outline where I needed to remove material and used a razor saw to cut most of it out. Then filed the rest of the way.
It's tough to see in a photo where the cut lines are. So, I highlighted with a red tint. The original, unaltered grip is on the left and the grip on the right shows what needs to be removed to fit the Denix frame.
And here is the first pic of the modified grips on the partially stripped gun. The bare metal really shows how much of the frame needs to be removed.
Anyone with a genuine Mauser, I'd love to see pics of the frame minus grips to compare the thickness. I'm guessing the Denix frame is also thicker than the original. The new screw and escutcheon barely meet. I get a solid half turn once they connect before everything's tight. Makes me want to thin out my frame a bit, but I'd like dimensions off the real thing first.
I spent a lot of Saturday filing and grinding down the frame to match the new grips. About 95% done. Will finish that up Monday.
Next question. Who has disassembled a Denix? Not sure if I need to, but I've always believed that if you're going to repaint something it's best to strip it down to the component parts first. I'm concerned about removing the attaching pins, but more concerned about putting them back. Since the metal is so soft, I'm afraid I'd damage it. Who has done this? Please advise about how difficult it is and if it's worth the effort.
Thanks.
jheilman
Sr Member
Yes, it does. The denix is about 7mm at the thin portion of the grip frame and almost 12mm at the thick. Not the same ratio as the original. Since I've already modified the grips for a specific ratio of thick to thin, I'll leave them as is and possibly thin down the frame a millimeter or so. It would probably be OK as is, but I'd like it to feel a bit more secure when tightened. And more accurate is always a good thing.
jheilman
Sr Member
Just read through a very detailed build thread from FakeBritishAccent and am not sure I need to post anything here until the project is complete. His thread covered all the same territory and he did much more scratch-building than I intend to do.
http://www.therpf.com/f9/han-solo-anh-hero-dl-44-heavy-137661/
http://www.therpf.com/f9/han-solo-anh-hero-dl-44-heavy-137661/
Yes, you're right. The Hero blaster was based off a c1896 (1912) Mauser.
The Mauser itself was NOT in pristine condition and today would only be worth around $250. Mausers of the same type in pristine condition can be worth $800 or more. The lowest price replica would be the Denix and then the MGC. MR probably made the best looking replica with their last Hero blaster.
Here's a photo of a Hero I built using the Denix replica with wood grips:
Okay, I'm not a gun guy so forgive my stupidity but isn't the Han blasters based off a 1896 Mauser? And if so, isn't it an internal magazine that is loaded by stripper clip and can be unloaded by opening the panel on the bottom. I do not think a removable magazine was introduced till the Spanish made M1932. That is like the Mauser the airsoft is replicated (the one with the wedge shaped lever on the side)
jheilman
Sr Member
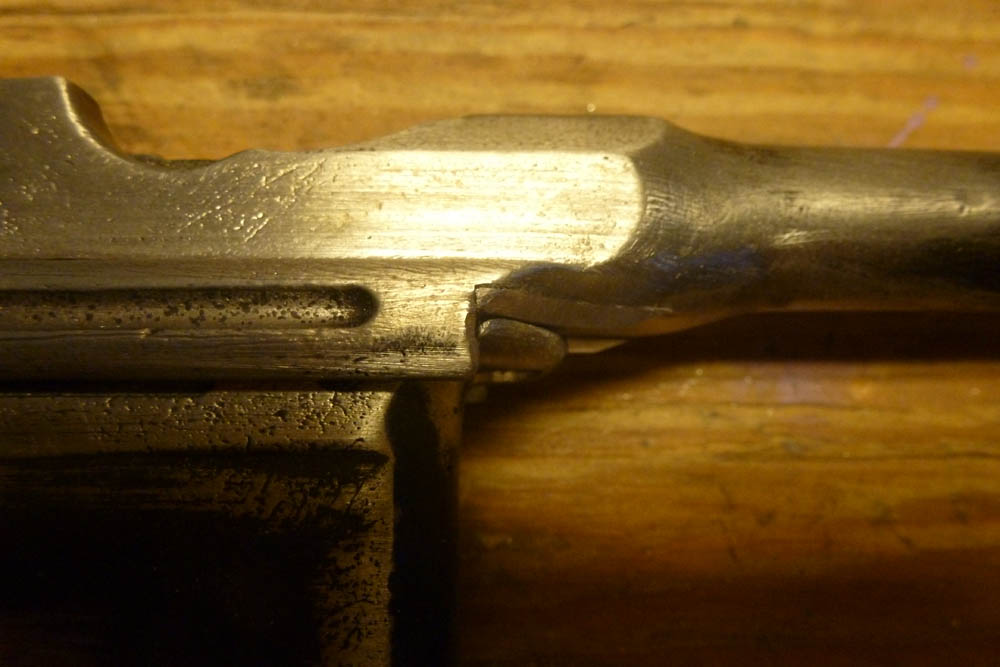
OK, did solve a problem with the Denix alignment between the upper and lower half. The gap at the front (where the attachment screw is located) really bugged me. So I finally pulled the pins and separated the pieces. I filed down the area completely hoping they would mesh together better.
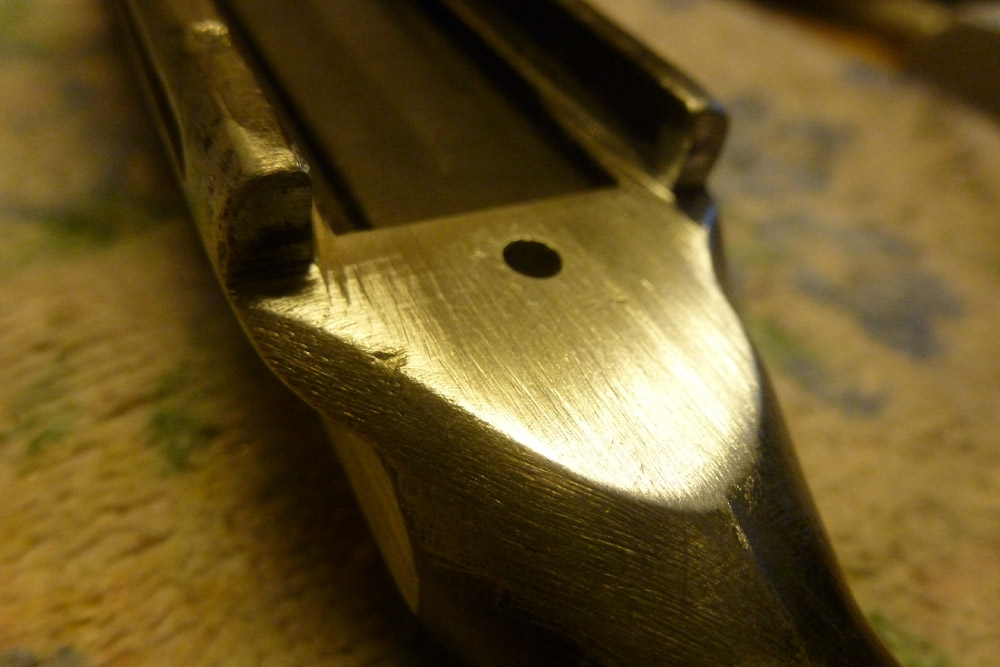
It helped some. If I tightened the screw, the gap went away. But there was still some pivot point where the pieces joined. If the front was tight, the back wouldn't go together and vice versa. So, I had minimized the gap, but it was still there.
What to do?
Hmm...
YES!!
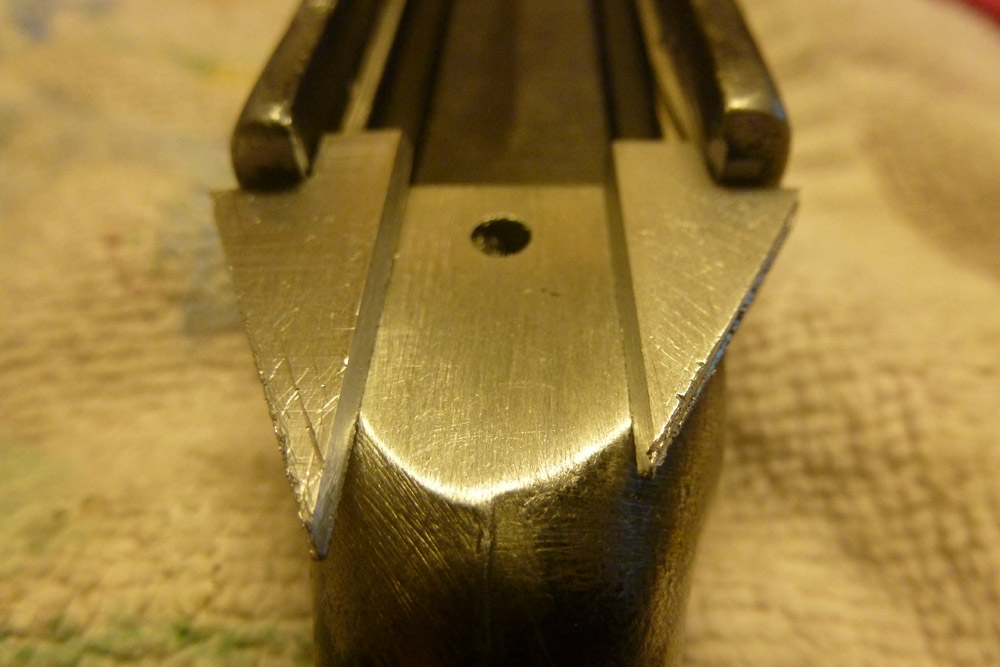
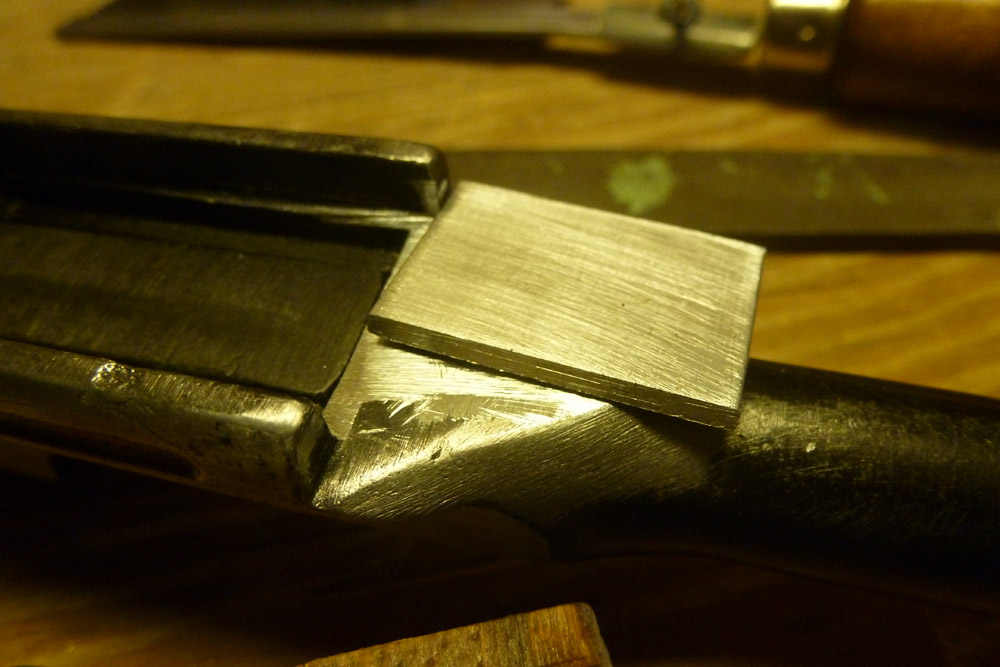
Scrap aluminum sheet with beveled inside edges to replicate the trench on the real mauser. Dremel and file and sand and...
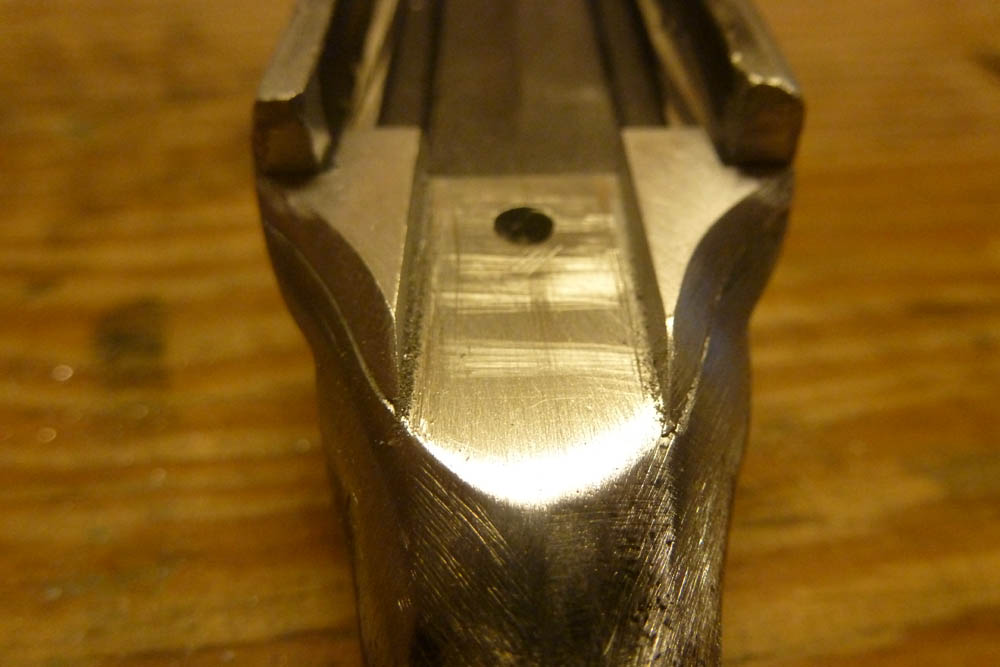
Gap's gone.
A little primer and a few tweaks and the seams will also be gone.
It's certainly not an exact replica of the mauser trench, but it goes a long way in making it look less like a Denix and now my upper and lower half align perfectly. I like it!
It helped some. If I tightened the screw, the gap went away. But there was still some pivot point where the pieces joined. If the front was tight, the back wouldn't go together and vice versa. So, I had minimized the gap, but it was still there.
What to do?
Hmm...
YES!!
Scrap aluminum sheet with beveled inside edges to replicate the trench on the real mauser. Dremel and file and sand and...
Gap's gone.
A little primer and a few tweaks and the seams will also be gone.
It's certainly not an exact replica of the mauser trench, but it goes a long way in making it look less like a Denix and now my upper and lower half align perfectly. I like it!
Similar threads
- Replies
- 1
- Views
- 172
- Replies
- 1
- Views
- 518
- Replies
- 93
- Views
- 8,079
- Replies
- 27
- Views
- 2,509