You are using an out of date browser. It may not display this or other websites correctly.
You should upgrade or use an alternative browser.
You should upgrade or use an alternative browser.
Anakin Starkiller's New Luke ROTJ Hero saber design thread
- Thread starter Anakin Starkiller
- Start date
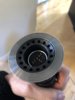
I can't really say for sure. I designed it to hold a led and a thin walled blade like my 2018 v2 run. There will be a recessed space in the emitter that is 1.011" wide and .671" deep. I think that you should be able to put a neopixal socket in there and have about 10mm of space to grab the blade. But, I've never done one of these builds myself, so I can't say for sure. I was asked by a couple of people to add an extra recess behind this section of 20mm width and 7mm depth to specifically accommodate the neopixal socket. But, there was no room for this given the external dimensions of the emitter section.
Me too. But, I'm trying to be as transparent about what I don't know.Dan, reading about other thin necks this week and neopixal adapters, 10mm seems to be the sweet spot, I’m no expert but I think it will work just fine if it’s 10mm
")
So with inner cup sabers like this, it's pretty easy to do a pixel install with a recessed pcb in the blade. Generally what you would do is cut the pixel cup down with a pipe cutter or lathe to have a depth of the led heat sink cup to 8mm. Then there are a number of pogo pin PCB holders on shapeways from wolf69, Goth3D and shtokyd.
the Blade also has a recessed pogo holder that sits inside the blade tube some. This lets you make use of the entire emitter depth while still allowing a pixel.
the hilt side winds up working like attached.
This is a MK1 that has a similar type of heat sink cup to Anakin Starkiller's hilt.
Punchline: pixel install totally possible and still leverages the entire emitter socket. Some very minor modification to the heat sink cup is all that is needed. (And if you have access to a 3D printer you could build a hilt side holder that is the same depth and would not even need to modify the heat sink cup. Some of shtokyd's pin lit connectors also won't require mod to the cup.
btw Dan. Hilt looks great!
Attachments
Last edited:
Thanks for that. So, there you go... what he said
I will also add, I _think_ you could leave the cup out and do an adapter at the floor of the emitter. However, the issue I think will be emitter socket depth. A pixel holder is usually at minimum 8mm so... if you do a flush blade with a holder at the floor, you are losing about 8mm of the (iirc 20mm or so of the available socket depth)... that leaves 12mm or blade support by the socket. Kinda starting to get shallow.
so while both are possible, I would recommend the approach I outline above.
you bet, Anakin Starkiller. Happy to help. I am really liking your Yuma box. Slider on the Yuma lever is pure genius.
so while both are possible, I would recommend the approach I outline above.
you bet, Anakin Starkiller. Happy to help. I am really liking your Yuma box. Slider on the Yuma lever is pure genius.
So with inner cup sabers like this, it's pretty easy to do a pixel install with a recessed pcb in the blade. Generally what you would do is cut the pixel cup down with a pipe cutter or lathe to have a depth of the led heat sink cup to 8mm. Then there are a number of pogo pin PCB holders on shapeways from wolf69, Goth3D and shtokyd.
the Blade also has a recessed pogo holder that sits inside the blade tube some. This lets you make use of the entire emitter depth while still allowing a pixel.
the hilt side winds up working like attached.
This is a MK1 that has a similar type of heat sink cup to Anakin Starkiller's hilt.
Punchline: pixel install totally possible and still leverages the entire emitter socket. Some very minor modification to the heat sink cup is all that is needed. (And if you have access to a 3D printer you could build a hilt side holder that is the same depth and would not even need to modify the heat sink cup. Some of shtokyd's pin lit connectors also won't require mod to the cup.
btw Dan. Hilt looks great!
wicked!
Question, will I need a special heatsink adapter? I am assuming a modified tri cree or such will need to be used.
No. An aluminum heatsink is included
Goodie2325
Active Member
What's the best copper color paint to use for the neck?
mindaramblin
Active Member
What's the best copper color paint to use for the neck?
I’m going to try this copper paint by Tamiya on my V3. It doesn’t have any flakes or specks in it.
Ace hardware make a color that's sort of half way between bronze and copper. I think that this is what was used
mindaramblin
Active Member
Ace hardware make a color that's sort of half way between bronze and copper. I think that this is what was used
Gotta search for this color now! If I find it, I will certainly post a photo of it here.
Edit: I believe I found it!
mindaramblin
Active Member
No Halliwax shed is complete with out is starkiller color of choice on the self!!
View attachment 1085285
I’m so happy I got the right color without help from the master!
If you want screen-accurate, the color you want is aged brass. Remember, the neck color for the Luke ROTJ sabers can be traced back to the aged brass windvane of the OB1 hero.


The rails and circuit card strips as seen on screen are also aged brass:

That said, the neck, rails, and and circuit card strips on the saber as it appears today are a warmer color than what was seen on screen or in most original photographs. Definitely not copper, but warmer than aged brass.
Some "antique gold" aerosols are on the yellower side, and appear more like aged brass, so you could use those to match the original saber, since aerosols specifically labeled as "aged brass" or "antique brass" aren't as plentiful. If you want to match the current saber as it appears today, you'd use a warmer/redder brand of the antique gold color. The "antique gold" posted above seems to me (and I may be wrong, since judging colors by how they look on computer screens is problematic) to be warmer than what was seen on screen (scroll up and down between it and the pics above to decide for yourself), and instead more closely matches the saber's current condition—again, my opinion only.
Copper...wouldn't match the saber as seen on screen, or as it appears today. If you use copper, you'd just be matching earlier incorrectly-colored replicas instead of the actual prop.
The rails and circuit card strips as seen on screen are also aged brass:
That said, the neck, rails, and and circuit card strips on the saber as it appears today are a warmer color than what was seen on screen or in most original photographs. Definitely not copper, but warmer than aged brass.
Some "antique gold" aerosols are on the yellower side, and appear more like aged brass, so you could use those to match the original saber, since aerosols specifically labeled as "aged brass" or "antique brass" aren't as plentiful. If you want to match the current saber as it appears today, you'd use a warmer/redder brand of the antique gold color. The "antique gold" posted above seems to me (and I may be wrong, since judging colors by how they look on computer screens is problematic) to be warmer than what was seen on screen (scroll up and down between it and the pics above to decide for yourself), and instead more closely matches the saber's current condition—again, my opinion only.
Copper...wouldn't match the saber as seen on screen, or as it appears today. If you use copper, you'd just be matching earlier incorrectly-colored replicas instead of the actual prop.
Last edited:
mindaramblin
Active Member
I believe that the antique gold color from Ace with some nice red/brown dry brushed over it would give a very accurate look to the saber. I will be testing a variety of methods to achieve what it seen on screen once I receive the hilt from Anakin Starkiller.
I did a thread on this a while back, and really the problems I ran into were with current options.
I mean, I did my Yuma the same way they probably did, grabbing an off the shelf item to paint up the stunts, and all the golds, antiques, brass, etc. all were too silver in my opinion. I couldn't find any that were a warmer gold, until AS put me onto this specific Ace metallic color.
Really, I think what you need to look for is a straight up gold color that doesn't give you the silvery gray undertones. Straight up gold with some brown and red tones in it.
Similar threads
- Replies
- 9
- Views
- 1,178
- Replies
- 10
- Views
- 422