Minor typo here in the windvane painting section, Flat Brown should be 214085.
Good catch, fixed
Minor typo here in the windvane painting section, Flat Brown should be 214085.
This may be a silly question, or a super known question. Does Anakin Starkiller sell his V2's strictly through the RPF here? Or does he have a website?
Thanks so much man!He has a website called At Stars End. I think it’s mostly for remaining/leftover stock from his runs. Looks like there are v2 builders kits available.
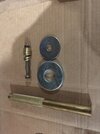
Halliwax, why doesn’t the mystery chunk look like the boot studs? Come along, I’ll show ya!
View attachment 1350560
If you don’t mind, Please subscribe to my channel, trying to reach 1000 subscribers so I can live stream.
-Halliwax, out
Hey I remember you showing what drill bit you used for the chunk, what drill bit was it again?UPDATE: if you saw my video, please hold up
DO NOT do anything to your chunks until further notice, we are working on this
I do mine by hand based on all the references we have to date. I try to do it within about 2-4 hours of painting so it chips rather easily! Scroll through some threads as well as google to find all the angles of it and save them to a folder on your phone as a personal reference.I went through these videos again because I gotta get back on this project and needed to see what I had to buy paint-wise, and I gotta say fantastic work as always Halliwax ! The windvane stuff with the paint layers is awesome, and I was happy to see the kabob skewer trick. I had thought of that too because I noticed a lot of V2 paintjobs around where the paint looks way too new and even, especially on the edges where it should look like it's scraped off. I was going to use coffee stirrers to get the same effect , but a kabob skewer seems way better so thanks for that! My only big question is are there any good patterns/reference for the ring chips? That's the only part I'm not too sure about now. I know the stencils don't have anything for the rings, but I noticed in the video you seem to have a good idea where they were and had put some masking tape in certain places on the paint video. Any help would be much appreciated!I
Gotcha. Thank you! I will do what I can! I figured I could eyeball it, but I wasn’t sure if there was a lack of reference for the grenade section because Trooper Trent didn’t put them in the stencils. I thought it might be kind of futile to look for references I don’t have access to or something and maybe Halliwax might know something he doesn’t IDK. Basically I was overthinking it!I do mine by hand based on all the references we have to date. I try to do it within about 2-4 hours of painting so it chips rather easily! Scroll through some threads as well as google to find all the angles of it and save them to a folder on your phone as a personal reference.
Hope this helps man
Halliwax I just received my Roman's STEEL v2... Can I use that same Bernzomatic torch to the emitter on steel? Or will I need something a little more heavy duty? (apologies if you've answered this already, I just can't seem to find where you did if you have already) Thanks!
Not recommended, but can be done. It’s very difficult to do without leaving marks. Interested to see your video.I seriously do not recommend denying the Romans emitter
I have a video coming out next week with my steel v2 And what I did to it
Steel doesn’t dent like aluminum and it doesn’t look right at all..
I ended up, well wait for the video it’s a surprise
But I seriously don’t recommend denting the romans


YIKES! I applaud you for being able to do that and I'd definitely like to see your process. But holy hell that looks like it took some effort. You can just see it in the bends that it' not like aluminum at all!Not recommended, but can be done. It’s very difficult to do without leaving marks. Interested to see your video.
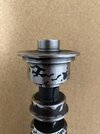
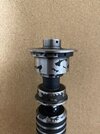
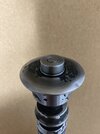
View attachment 1433803View attachment 1433804View attachment 1433805
Well it did require a lot of heat, brass drive pinch, and a large hammer.Y
YIKES! I applaud you for being able to do that and I'd definitely like to see your process. But holy hell that looks like it took some effort. You can just see it in the bends that it' not like aluminum at all!

