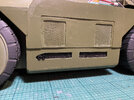
Aliens APC 1:18 scale with interior

A couple of small jobs got done today. I added some mesh to the engine exhaust port and painted it up. It'll get a drybrush coat of olive drab then I'll lightly sand some of to show the metal underneath.

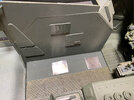
The mesh is glued to the back panel of Gorman's console, which I'm keeping removable. That panel is very slim and prone to warping so I added a section of brass C channel at the bottom to keep it straight.
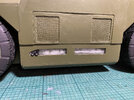
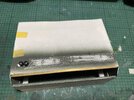
APC_24020400.jpg APC_24020401.jpg APC_24020402.jpg

I also figured out how I can secure the gunner's position and driver's seat without gluing them in. I added small but powerful magnets to each, then securely glued two small squares of very thin steel sheet under their positions. The sheets are large enough that there's wiggle room if needed.
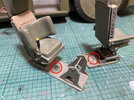
APC_24020403.jpg APC_24020404.jpg
 
Update.

First off, by way of explanation - family ‘stuff’ has happened, taking my focus elsewhere. Plus, A build by a guy called Szabó Gilbert came out of nowhere and hit the socials a while ago.It really took the wind out of my sails. Whilst his build is quite inaccurate it has a lot of detail / lighting and presses all the right buttons for your average fan. I was reluctant to carry on with mine.

I feel a lot more philosophical about it now and I’m ready to pick this up again.

Right, let’s get stuck in.

APC_25022201.jpg


Started on exterior detail.

I've been thinking about how to handle these things - ECM stations (I think).

APC_250222a.jpg


APC_250222b.jpg


They’re going to need to be done in sheet metal if they’re to be accurate. They’re also going to have to be quite thick so that they don’t bend too easily once done.

Luckily I have a small sheet of fairly thin metal from a PC teardown that will do.

APC_25022202.jpg


After getting dimensions from Graham Langridge’s blueprints I sketched out a 1:1 scale drawing.

APC_25022203.jpg


Cut / bend marks were scribed in - I would have used engineer’s blue if I had any.

APC_25022204.jpg


APC_25022205.jpg


With my small snips I was just about able to make the cuts I needed. Excuse the unfortunate shape that resulted.

APC_25022206.jpg


After a few more cuts I flattened out the blanks.

APC_25022207.jpg


APC_25022208.jpg

Then bent them up into the correct shape and did a dry fit to check size etc.

APC_25022209.jpg


They got a coat of paint - more as a primer than a final coat, then I searched for greeblies for the elements visible in the centre - as seen in Graham’s plans.

APC_25022210.jpg


APC_25022211.jpg


Those done, it’s time to tidy up until the next update.
 
Thank you Yaris, Joberg. Speaking of intricate - these flippin' tow shackles were a very fiddly little job.

I would have liked some thicker gauge, slightly softer wire to work with but you gets what I've got! Solder was far too soft for this job.

Tow Blanks.JPG


Tow 01.JPG


Tow 02.JPG


Of course the more I worked this wire - the harder it got to bend but we got there. Just got to do it again for the other.

Tow 03.JPG


And there we go. A little clean up with the dremel and they'll be ready for attachment.
 
Thank you Yaris, Joberg. Speaking of intricate - these flippin' tow shackles were a very fiddly little job.

I would have liked some thicker gauge, slightly softer wire to work with but you gets what I've got! Solder was far too soft for this job.

View attachment 1909537

View attachment 1909540

View attachment 1909538

Of course the more I worked this wire - the harder it got to bend but we got there. Just got to do it again for the other.

View attachment 1909539

And there we go. A little clean up with the dremel and they'll be ready for attachment.
Fiddly little pieces :eek: That's why I like Bigatures:lol: Looking good, btw!
 
Scratch building small fittings using rod, tubing, plate and other structural shapes from metal is time consuming but the realism shows in the finished product. Enhances the overall model detail look significantly. Nice work.
 
Thanks Joberg, Searun - doing these small parts this way is actually a lot quicker than 3d modelling and printing them - and is definitely better for one-offs like these. I've been adding the last bits of 'furniture' to the roof of the APC too - more pics on those soon.
 
Progress Update!

After the towing hitches were done:

APC Towing Hitches Final.jpg


.. it was time to finish off all the other roof details – and add a small strip where there was a bad fit with the cabin front. There are a couple of panels, two hand-holds, what looks like a small vent, and a cylindrical device at the front with what looks like brush-guards.

APC Roof 01.JPG


APC Roof 02.JPG


APC Roof 03.JPG


I also gave the front windscreen glass a test.

APC Glass.JPG


Looking to the inside, I fitted the rear cabin ceiling details: the ammo boxes that have a date with Gorman’s head, and the wonky basket full of kit.

APC IntCeil.JPG


I worked out a refined mount for the smart-gun clips – small magnets and a ‘C’ shaped metal piece to stop the gun from swivelling.

APC SG CLip01.JPG


APC SG CLip02.JPG


APC SG CLip03.JPG


There was a wall/ceiling joint to work out above Ripley / Burke’s seats.

APC IntCeil 01.JPG


APC IntCeil 02.JPG


APC IntCeil 03.JPG


Lastly, I started addressing a couple of gaps in the rear swing-out hull.

APC IntCeil 04.JPG


Right, that’s it for now. Lots of kit packs and greeblies to be added to the interior ceilings soon.
 
Thanks Dean O! It's been a long road but I'm nearly there. :)

I put that pic up on Bluesky too and got a like from Col Price - concept artist on Alien Romulus - which is super cool.
 
Thanks Dean O! It's been a long road but I'm nearly there. :)

I put that pic up on Bluesky too and got a like from Col Price - concept artist on Alien Romulus - which is super cool.
That is cool. BTW, I checked out that build you mentioned by Szabó Gilbert. Yes it is cool, but pales in comparison to yours.
 
Back
Top