You are using an out of date browser. It may not display this or other websites correctly.
You should upgrade or use an alternative browser.
You should upgrade or use an alternative browser.
A Stylized MAG - A Scratch Build - Almost Complete
- Thread starter cavx
- Start date
cavx
Master Member
Re: A Stylized MAG Build
I've painted the soles grey and I am now in the process of gluing the bits together now. After the Shoe Goo sets, I should be able to post different shots.
Any chance of a shot in lower light to see how the reflective strip works under that sole?
I've painted the soles grey and I am now in the process of gluing the bits together now. After the Shoe Goo sets, I should be able to post different shots.
If you can do a one piece sole, then do that. This multi piece thing I am doing is a right PITA aligning up the bits.I'm still debating over whether to have a one piece sole that wraps around like the MP or try what you're doing with multiple pieces..
Re: A Stylized MAG Build
I'm leaning on going that way. Hell, at least i'll have an advantage over most MP conversions.
I was actually wondering when the MP shoes would sell out.
If you can do a one piece sole, then do that. This multi piece thing I am doing is a right PITA aligning up the bits.
I'm leaning on going that way. Hell, at least i'll have an advantage over most MP conversions.
I was actually wondering when the MP shoes would sell out.
cavx
Master Member
Re: A Stylized MAG Build
By making clear soles? How will you do them?
Yeah. They are supposed to be a limited line, so either:
1. not as many have been bought as we thought,
2. The limited run was HUGE or
3. They are still in production.
If 3 is even a possibility, then why did they not move to make clear soles or other sizes.
I'm leaning on going that way. Hell, at least i'll have an advantage over most MP conversions.
By making clear soles? How will you do them?
I was actually wondering when the MP shoes would sell out.
Yeah. They are supposed to be a limited line, so either:
1. not as many have been bought as we thought,
2. The limited run was HUGE or
3. They are still in production.
If 3 is even a possibility, then why did they not move to make clear soles or other sizes.
Re: A Stylized MAG Build
I think the production run was HUGE. It's the only thing which makes sense.
The soles i'm making as I think I said before are made by pressing a pattern into heated rubber sheet and then trimming to fit.
Only problem is my custom waffle print is a little faulty and the best alternative is a clear copy of the MP using a grid pattern.
Not sure whether to persist with the custom waffle or just go the grid pattern as that one is easier.
cavx
Master Member
Re: A Stylized MAG Build
Probably was. I still remember the first time I saw these on the net marketed by a guy going by the name "euthanasia".
I get my Vac Pump next week and I already have a Vacuum Chamber. I hope that under a vacuum, the bubbles problems this batch got plagued with will be resolved.
I think the production run was HUGE. It's the only thing which makes sense.
Probably was. I still remember the first time I saw these on the net marketed by a guy going by the name "euthanasia".
The soles i'm making as I think I said before are made by pressing a pattern into heated rubber sheet and then trimming to fit.
Only problem is my custom waffle print is a little faulty and the best alternative is a clear copy of the MP using a grid pattern.
Not sure whether to persist with the custom waffle or just go the grid pattern as that one is easier.
I get my Vac Pump next week and I already have a Vacuum Chamber. I hope that under a vacuum, the bubbles problems this batch got plagued with will be resolved.
cavx
Master Member
Re: A Stylized MAG Build
UPDATE: The Cold Cast Clear Elastomer sole was made flat and because I have been wearing my MAG, their soles have become "round". As the Shoe Goo cures, it has caused the back to come away. Not a big problem, just means that I will have to cut out any lumps and re-glue the backs down.

It is interesting how these now have that weird NIKE MAG 2011 lean.
UPDATE: The Cold Cast Clear Elastomer sole was made flat and because I have been wearing my MAG, their soles have become "round". As the Shoe Goo cures, it has caused the back to come away. Not a big problem, just means that I will have to cut out any lumps and re-glue the backs down.
It is interesting how these now have that weird NIKE MAG 2011 lean.
cavx
Master Member
Re: A Stylized MAG Build
I have glued all the parts on and still waiting for the glue to cure before removing the tape. Shoe Goo is exothermic (as I discovered when I attempted to make the "waffle" in my clear sole thread) and the front parts had to be glued a 2nd time this morning as the heat had warped them where there was not enough glue.
Images coming soon.
If anyone knows the colour of the MAG and splatter, could you please use THIS colour chart. The Dulux colour swatches I found today were close but either too dark or not dark enough. The guy said he can mix any colour so maybe he can do a custom job.
cavx
Master Member
Re: A Stylized MAG Build
That is interesting. I have a pressure pack can of emerald green. I wonder if I can find india blue?
Well, when I took a print out of the least biased pic of the Mag I could find to a paint shop thay gave me a mix but not a name. The mix I got was a 50/50 mix of emerald green and india blue.
That is interesting. I have a pressure pack can of emerald green. I wonder if I can find india blue?
Re: A Stylized MAG Build
Be careful though as i'm sure different companies have different ideas of what a specific colour is.
The mix I got looks dead on in real life to the paint in the photos though.
Once again, I love the way the textured sole and the splatters give this illusion of changing colour. Sometimes it looks like a sky blue sole and at times it looks green. Even on my sole it kind of does that depending on distance.
Just glued the ovals to my shoes. Can't find my camera cable so had to use my tablet cam. POS. Need to take some paint remover to it. Accidentally got some paint on the heel when dropped. D'oh.
cavx
Master Member
Re: A Stylized MAG Build
The problem we face is that colours will look very different on an illuminated screen compared to how we see them in real life. My wife scrap books and I am tempted to make her a back lit board (like used for viewing x-rays) so she can pin her printed photos up and get a better visual comparison to the images on her PC.
I imbedded your photo. I love the way your splat has turned out. Awesome job!
I was tempted to do my splatter before I glued the clears on so that I had splatter under the clear as well. I was not sure if that was the right thing to do and didn't like the colour of the paint I had at the time, so didn't. It is just grey.
I couldn't help myself tonight, so here are my "first wear" shots with the clear soles")


They actually feel good. I was worried that maybe I would not get them level or even and it seems I have done this right [celebrate!]. There is bulge at the sides but it does not appear as over done as I had initially thought. I think it will only improve as I smooth out the lines with more Shoe Goo.
After that, plan of attack is:
Be careful though as i'm sure different companies have different ideas of what a specific colour is.
The mix I got looks dead on in real life to the paint in the photos though.
The problem we face is that colours will look very different on an illuminated screen compared to how we see them in real life. My wife scrap books and I am tempted to make her a back lit board (like used for viewing x-rays) so she can pin her printed photos up and get a better visual comparison to the images on her PC.
Once again, I love the way the textured sole and the splatters give this illusion of changing colour. Sometimes it looks like a sky blue sole and at times it looks green. Even on my sole it kind of does that depending on distance.

I imbedded your photo. I love the way your splat has turned out. Awesome job!
Just glued the ovals to my shoes. Can't find my camera cable so had to use my tablet cam. POS. Need to take some paint remover to it. Accidentally got some paint on the heel when dropped. D'oh.
I was tempted to do my splatter before I glued the clears on so that I had splatter under the clear as well. I was not sure if that was the right thing to do and didn't like the colour of the paint I had at the time, so didn't. It is just grey.
I couldn't help myself tonight, so here are my "first wear" shots with the clear soles
They actually feel good. I was worried that maybe I would not get them level or even and it seems I have done this right [celebrate!]. There is bulge at the sides but it does not appear as over done as I had initially thought. I think it will only improve as I smooth out the lines with more Shoe Goo.
After that, plan of attack is:
- Next stage is to add the splatter and then finish the edges with more Shoe Goo [though it does not need to be done in that order].
- Use the shoe to make a "last" by wrapping the upper in masking tape.
- Carefully cut off the masking tape to allow me to convert the 3D shape into a 2D pattern being sure to increase the height.
- Make a card stock [or EVA foam] mock shoe and do shape [toe, lace slot and ankle] correction
- After that, I think the uppers can come off :love
Re: A Stylized MAG Build
Thanks. The splatter is as close to the original as I could get.
What I suggest doing is getting a strip of thin plastic and cutting three V shaped notches in the top. All you then do is dip it in the pait and pull the top back and let it flick forward.
I did the splat this way and it gives a much more accurate splat and it's less messy than using forks etc.
It gives the "comet" shaped splat mark you see on the shoe.
Re: A Stylized MAG Build
I love the look of you soles. How durable are they now that they are cured?
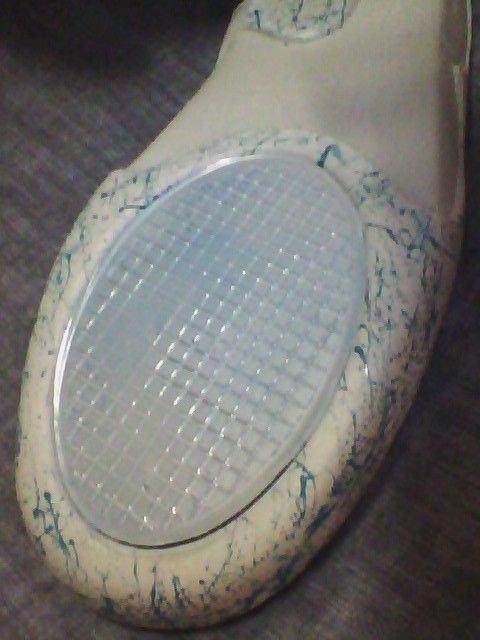
Btw, that's not splatter under the sole. Just some paint I accidentally got on the sole when droped. Some paint remover will get it off. The soles are actually backed so none of the imperfections in the midsole show through.
I love the look of you soles. How durable are they now that they are cured?
Btw, that's not splatter under the sole. Just some paint I accidentally got on the sole when droped. Some paint remover will get it off. The soles are actually backed so none of the imperfections in the midsole show through.
Last edited:
cavx
Master Member
Re: A Stylized MAG Build
So the tool you used (plastic with 3 Vs) looks like a a DIY fork? I am sure I have plastic knives and forks here that I can sacrifice to this cause. I just need to find the right colour before doing it. I thought some more about it, and realistically, this can be done anytime before the new uppers are made and fitted. I am not too fussed about the way these current PVC [or what ever they are] uppers look and why you can see over spray [shine] on some parts in these latest shots.
Thank you I am really liking the fake EL too. They are looking so much better than they did out of the box or even before the black soles were removed. That grey sole has made a massive improvement as well.
I probably should not have worn them at this stage as the Shoe Goo is not 100% cured. They made a funny squishing noise (from the waffle) as I walked on the tiles tonight. They grip good and even though the shore hardness is 80, they are not uncomfortable at all.
OK. Backing them is actually a good idea. The backs of mine are air cured and even when I do the Vacuum Chambered ones for the Poon Shoes, they too will be open back cured so that I don't get any contaminates that could prevent the CCCE from being glued on later.
Thanks. The splatter is as close to the original as I could get.
What I suggest doing is getting a strip of thin plastic and cutting three V shaped notches in the top. All you then do is dip it in the pait and pull the top back and let it flick forward.
I did the splat this way and it gives a much more accurate splat and it's less messy than using forks etc.
It gives the "comet" shaped splat mark you see on the shoe.
So the tool you used (plastic with 3 Vs) looks like a a DIY fork? I am sure I have plastic knives and forks here that I can sacrifice to this cause. I just need to find the right colour before doing it. I thought some more about it, and realistically, this can be done anytime before the new uppers are made and fitted. I am not too fussed about the way these current PVC [or what ever they are] uppers look and why you can see over spray [shine] on some parts in these latest shots.
I love the look of you soles. How durable are they now that they are cured?
Thank you
I am really liking the fake EL too. They are looking so much better than they did out of the box or even before the black soles were removed. That grey sole has made a massive improvement as well. I probably should not have worn them at this stage as the Shoe Goo is not 100% cured. They made a funny squishing noise (from the waffle) as I walked on the tiles tonight. They grip good and even though the shore hardness is 80, they are not uncomfortable at all.
Btw, that's not splatter under the sole. Just some paint I accidentally got on the sole when droped. Some paint remover will get it off. The soles are actually backed so none of the imperfections in the midsole show through.
OK. Backing them is actually a good idea. The backs of mine are air cured and even when I do the Vacuum Chambered ones for the Poon Shoes, they too will be open back cured so that I don't get any contaminates that could prevent the CCCE from being glued on later.
cavx
Master Member
Re: A Stylized MAG Build
Tonight I used the rest of the Shoe Goo, a syringe and an ice cube to smooth out the edges of the clear soles.

Whilst there is still more work to do, I am very happy with how these have turned out.
The nozzle on the Shoe Goo tube is quite large and the goo oozes out quite thick, usually full of air bubbles and is generally difficult to manage. So tonight I took a syringe (I use these for gluing plastic with products like Weldon) and removed the plunger because the goo was too thick to suck up. I then loaded the tube from the back. Once full, I pushed the plunger back in and suddenly had a much easier to control flow of clear gel. Because the syringe places the Shoo Goo under some pressure, most of the air bubbles in the goo popped as well.
The Shoe Goo skins when it touches water and an ice cube is perfect to push and mold the goo into shape. I find that even a wet finger leaves the surface looking rough and this method (found on YouTube) works best for me.
When finished, I just ran water through the syringe and the remaining goo instantly went to a gel state that could be scrapped off and thrown out.
Tonight I used the rest of the Shoe Goo, a syringe and an ice cube to smooth out the edges of the clear soles.
Whilst there is still more work to do, I am very happy with how these have turned out.
The nozzle on the Shoe Goo tube is quite large and the goo oozes out quite thick, usually full of air bubbles and is generally difficult to manage. So tonight I took a syringe (I use these for gluing plastic with products like Weldon) and removed the plunger because the goo was too thick to suck up. I then loaded the tube from the back. Once full, I pushed the plunger back in and suddenly had a much easier to control flow of clear gel. Because the syringe places the Shoo Goo under some pressure, most of the air bubbles in the goo popped as well.
The Shoe Goo skins when it touches water and an ice cube is perfect to push and mold the goo into shape. I find that even a wet finger leaves the surface looking rough and this method (found on YouTube) works best for me.
When finished, I just ran water through the syringe and the remaining goo instantly went to a gel state that could be scrapped off and thrown out.
cavx
Master Member
Re: A Stylized MAG - A Build From The Ground Up Pg 7
Colour Coded Laser Cut Letting
Today I managed to get these.


The photo might not show it, but the MAG colour is almost the same as aqua on my MP MAGs.
I've glued them to this clear plastic and hopefully this will prevent the letters from distorting when I heat form them.
Colour Coded Laser Cut Letting
Today I managed to get these.
The photo might not show it, but the MAG colour is almost the same as aqua on my MP MAGs.
I've glued them to this clear plastic and hopefully this will prevent the letters from distorting when I heat form them.
Similar threads
- Replies
- 36
- Views
- 1,686
- Replies
- 52
- Views
- 5,309
- Replies
- 1
- Views
- 801