You are using an out of date browser. It may not display this or other websites correctly.
You should upgrade or use an alternative browser.
You should upgrade or use an alternative browser.
4 Hales and a Booster
- Thread starter newmagrathea
- Start date
newmagrathea
Sr Member
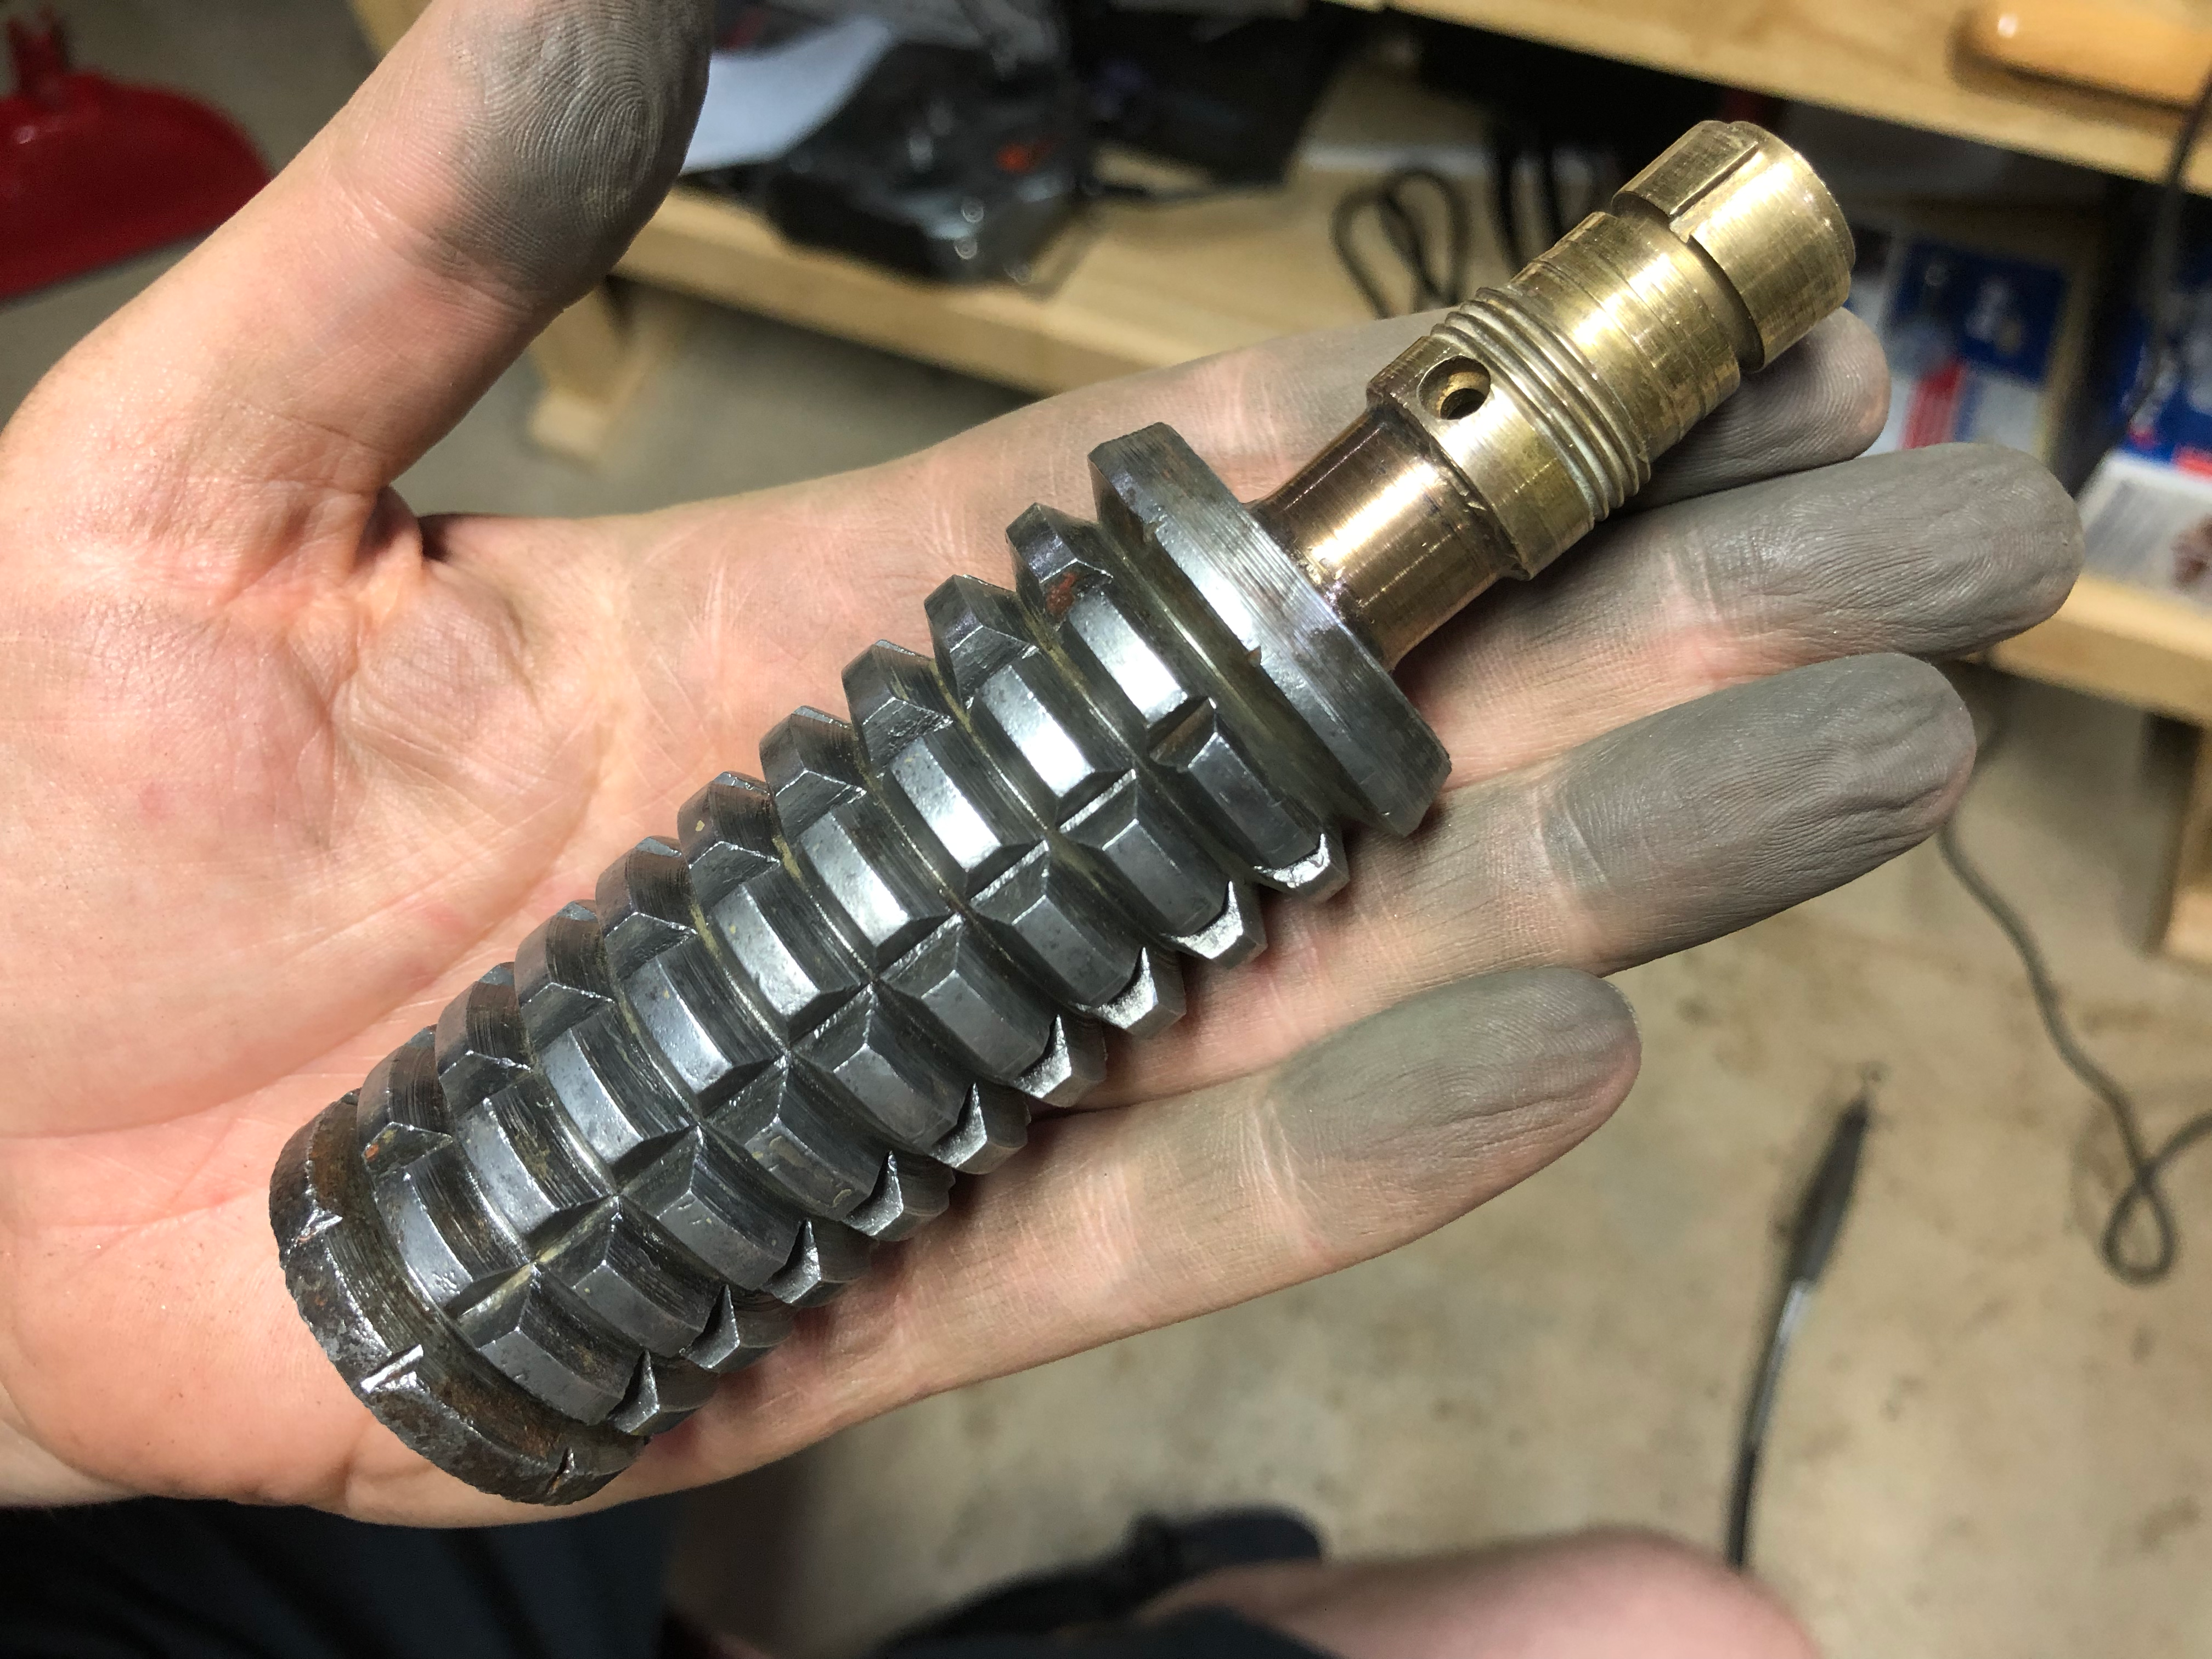
First bit of progress, and this took so much longer than I expected. I tried to get the neck off the painted grenade but it would not budge at all. Then I turned my attention to the bottom plug and it was also frozen in place. I wound up drilling out the bottom plug, not how I wanted to remove it, I'm not a fan of destroying things.
It's pretty rusty inside.

And what's left of the bottom plug

And of course here is a video of the struggle.
It's pretty rusty inside.
And what's left of the bottom plug
And of course here is a video of the struggle.
newmagrathea
Sr Member
Watching you lightly tap out the threaded portion was oddly satisfying. Did you see any gunk or anything on the brass or steel threads?
nice work, I gave up on mine and drilled holes in that brass sleeve you popped out to shake out any garbage
Not really in the threads but there was some stuff on the back of the plug that was not rust, it's that shiny stuff you see in the video. That could be whatever they put on the threads that squeezed out, just a theory. It could just be a bunch of rust.
Thread-locking fluid - Wikipedia
sometimes used to halt corrosion, maybe they did this to "preserve" the stupid thing
sometimes used to halt corrosion, maybe they did this to "preserve" the stupid thing
newmagrathea
Sr Member
Gee Dustin this has been a process... you even considered my crazy soldier theory applying super glue as a practical joke to piss-off his buddy lol!!
I am still thinking you needed a bigger hammer...
View attachment 1009221
I have a bigger hammer, but I only bring it out on special occasions.
newmagrathea
Sr Member
Here is the naked grenade.

The re-blued frag body

And I darkened the neck below the windvane to match reference photos.

I've still got a few more things to do to this one, but it's getting close to done. Video is coming soon.
The re-blued frag body
And I darkened the neck below the windvane to match reference photos.
I've still got a few more things to do to this one, but it's getting close to done. Video is coming soon.
Here is the naked grenade.
The re-blued frag body
View attachment 1017679
And I darkened the neck below the windvane to match reference photos.
View attachment 1017680
I've still got a few more things to do to this one, but it's getting close to done. Video is coming soon.
Looking sweet Dustin
")
You could've tried some serious penetrating oil like Kano Kroil, let that sit and work its magic for a few days, then apply a little heat, and a little cold, that might've broken things up enough to disassemble.
But, I understand the choices you made, and things are looking good!
But, I understand the choices you made, and things are looking good!
newmagrathea
Sr Member
yea, that is like almost factory finish. incredible.
brass black for the neck?
If you look at reference photos you'll notice that the windvane and the neck below the windvane are darkened.
You could've tried some serious penetrating oil like Kano Kroil, let that sit and work its magic for a few days, then apply a little heat, and a little cold, that might've broken things up enough to disassemble.
But, I understand the choices you made, and things are looking good!
I've not heard of Kano Kroil before. I've tried all kinds of stuff trying to get the neck to come off, most of it was edited out because of cussing.
Mouse Vader
Sr Member
sometimes used to halt corrosion, maybe they did this to "preserve" the stupid thing
Your ref to thread lock - you may note it was invented in 1953. Contemporary methods (if used) may have been pitch based or shellac based. From many years experience disassembling old rusty things, heavily oxidised (ie very old) oil with fine rust will produce a gummy, sticky, brown, goo when heated.
newmagrathea
Sr Member
Yea! I should have clarified, I was asking what you used to darken the brass
I have a theory that the whole grenade was dark and they stripped the upper neck so they could weld on the emitter, and that crap is flash from welding and not glue
Ok, I misunderstood. I used Birchwood Casey Aluminum Black to darken the brass. Interesting theory.
That happened to me! Oxidized oil and rust, it is so strongYour ref to thread lock - you may note it was invented in 1953. Contemporary methods (if used) may have been pitch based or shellac based. From many years experience disassembling old rusty things, heavily oxidised (ie very old) oil with fine rust will produce a gummy, sticky, brown, goo when heated.
Mouse Vader
Sr Member
Just watched the disassembly video, the sort of thing I've been doing for the last 30yrs. Some observations:
As you've found out files make poor tommy bars.
As I say above thread lock wasn't available until the 1950/60's.
I've researched a lot old rusty things in museums & first hand, under certain rust forming conditions & esp in soil, rust can form with a glossy surface which is usually very hard but also people do apply varnish. Varnish tends flake, wear or can be cut off to normal looking rust underneath the glossy rust doesn't. Yours looks like glossy rust & probably a field find.
That same grenade looks like it's been through a slightly dodgy dealer & I'd ascribe the brass paint to 'restoration'. This sort of thing gets done by certain antique dealers to 'dupe' the less savvy buyer into thinking somethings in better condition than it is. Sometimes it's just a non-collecter owner wanting to spruce things up. I've met it before & say it's unlikely to be a factory thing.
You could do with a proper bench vice, or if you have one some slip on or magnetic jaw pads. I'm tight so use scrap aluminium angle. You can exert more pressure than with wood. Only down side is sometimes you end up with ally smears but these usually clean off. I have also used copper & lead depending on how delicate or not the item is.
As you know using heat to expand metal can work. Sometimes this needs to be done several times, each cycle helping crack the rust. In extreme cases & if no damage is likely to result I go to red heat. However hot I always quench in oil (usually motor oil) as when hot this can penetrate the joint. Sometimes though you just have drill out as you did.
Finally a tip I only learned recently (from a slightly dodgy antique dealer). If you have a lot of rust shake loose, esp from hard to reach places, use electrolysis. You need a small 'bath' for the electrolyte which is just acidified water, some of that vinegar will do just fine. A little caustic soda works too but that's an alkali. You need a battery with leads - he said 12v car type, I've used a motorcycle mains battery charger as it had crocodile clips, A decent Lipo should work too. The rusty part is attached to the positive lead (anode) & a piece of metal (I used copper water pipe) at the negative lead (cathode). It's very effective. So effective you have to be careful you don't start eating away good metal so keep an eye on it. The rate will depend on how strong a current you are using so I can't be more specific than that except to say no over nighters, you might have nothing left in the morning.
It's the basis for electroplating too - metal being removed from the anode metal & deposited at the cathode.
There's another caution - no ignition sources near either - pref. outdoors. Gas is produce from the metal parts, oxygen & hydrogen & in perfect proportion to go bag if allowed to build up in a confined space. It would take quite while to get to that stage but it's something you need to take into account - so a double no over nighters. Just have ventilation & regular checks every few mins or so to start so know how fast things are going & you should be fine. It's no more dangerous than charging a lead acid wet battery but those same warnings are given for the same reasons.
Liver of sulphur paste or solution (warm) gives an excellent dark patina to brass & copper.
As I have said elsewhere you can't weld unlike metals together eg brass to steel they just won't do it. You can braze (brass soldering), silver solder or lead/tin solder.
Hope some or all of that is of use.
As you've found out files make poor tommy bars.
As I say above thread lock wasn't available until the 1950/60's.
I've researched a lot old rusty things in museums & first hand, under certain rust forming conditions & esp in soil, rust can form with a glossy surface which is usually very hard but also people do apply varnish. Varnish tends flake, wear or can be cut off to normal looking rust underneath the glossy rust doesn't. Yours looks like glossy rust & probably a field find.
That same grenade looks like it's been through a slightly dodgy dealer & I'd ascribe the brass paint to 'restoration'. This sort of thing gets done by certain antique dealers to 'dupe' the less savvy buyer into thinking somethings in better condition than it is. Sometimes it's just a non-collecter owner wanting to spruce things up. I've met it before & say it's unlikely to be a factory thing.
You could do with a proper bench vice, or if you have one some slip on or magnetic jaw pads. I'm tight so use scrap aluminium angle. You can exert more pressure than with wood. Only down side is sometimes you end up with ally smears but these usually clean off. I have also used copper & lead depending on how delicate or not the item is.
As you know using heat to expand metal can work. Sometimes this needs to be done several times, each cycle helping crack the rust. In extreme cases & if no damage is likely to result I go to red heat. However hot I always quench in oil (usually motor oil) as when hot this can penetrate the joint. Sometimes though you just have drill out as you did.
Finally a tip I only learned recently (from a slightly dodgy antique dealer). If you have a lot of rust shake loose, esp from hard to reach places, use electrolysis. You need a small 'bath' for the electrolyte which is just acidified water, some of that vinegar will do just fine. A little caustic soda works too but that's an alkali. You need a battery with leads - he said 12v car type, I've used a motorcycle mains battery charger as it had crocodile clips, A decent Lipo should work too. The rusty part is attached to the positive lead (anode) & a piece of metal (I used copper water pipe) at the negative lead (cathode). It's very effective. So effective you have to be careful you don't start eating away good metal so keep an eye on it. The rate will depend on how strong a current you are using so I can't be more specific than that except to say no over nighters, you might have nothing left in the morning.
It's the basis for electroplating too - metal being removed from the anode metal & deposited at the cathode.
There's another caution - no ignition sources near either - pref. outdoors. Gas is produce from the metal parts, oxygen & hydrogen & in perfect proportion to go bag if allowed to build up in a confined space. It would take quite while to get to that stage but it's something you need to take into account - so a double no over nighters. Just have ventilation & regular checks every few mins or so to start so know how fast things are going & you should be fine. It's no more dangerous than charging a lead acid wet battery but those same warnings are given for the same reasons.
Liver of sulphur paste or solution (warm) gives an excellent dark patina to brass & copper.
I have a theory that the whole grenade was dark and they stripped the upper neck so they could weld on the emitter,
As I have said elsewhere you can't weld unlike metals together eg brass to steel they just won't do it. You can braze (brass soldering), silver solder or lead/tin solder.
Hope some or all of that is of use.
Similar threads
- Replies
- 5
- Views
- 429