1/72 Black Pearl kit from Zvezda

Yeah.
I have all the images on file.

I watched the bonus disks from 2-3 last night, not a lot there.
P2 did have a pic of the ships wheel unpainted on the sound stage.
There is a lot of layered paint going on with these ships giving credence to her originally being burned when she sank.
I have no idea what the source material is but she was supposedly the Wicked Wench originally.
Could explain all the red and gold under the black.

I also noticed a bit of gold on the mermaids flanking the cabin door just like the ones on the stern.
 
Here are some pics of my build in progress.

It may help to understand that while I am 49 years old, my model skills are just a step or two above where I was at when I out models together when I was 12. :)

I used Floquil black primer on entire ship and have gone back and brushed with Polly acrylics, a mix of blacks, grays and browns...trying to give it a weathered look to match as best I can how it appears in screen caps and the larger scale model they used for filming.

Not sure whether to do second row of cannons in or out -- I am leaning towards keeping doors shut over cannons. While I am up for trying to do as much string rigging as I can, don't think I'm gonna do the cannon door rigging...especially if doors closed...pending on whether this will drive me nuts if I don't.

Not all weathering is done...I intend to touch up here and there once I have outer deck assembled. I have also ordered these 1:72 pirate figures that I think I'll put on deck:


1/72 English Pirates 72001 44 figs | eBay

there are also these guys, but I didn't get them:

Mars 1:72 #72009 Pirates Of The Caribbean | eBay

Well, as you might imagine, building this lady is slow going, even for someone like me with modest skills who is building it straight from box.

P1110259.jpg


P1110257.jpg


P1110254.jpg


P1110242.jpg


I'll post more once I've made some progress...painting sails and the three thousand parts that comprise the teeny tiny cannons :)
 
Making some nice progress.
I'm just a year behind you my friend.

I was looking at those same figures, post a revue when they arrive.

I've got probably 2 dozen plus models in different stages of assembly, the painting is all experimental at this point since I was away from model building for about 15 years.

One thought I just had was a layered job using the hair spray method many armor builders use.
Guess I'll have to experiment with it since it's something I have read about but never tried.

I decided it would be easier to use a casting of the lower deck trimmed on the sides to replace the main deck, fixing the need to fill in areas where parts have been moved as per the pic I just posted.


I've been looking at LED Tea lights for putting in the interior for the flickering candle light.
I saw a 6 pack at the hardware store for $5.
Still looking since I might be able to find a chain of lights in orange since it's Halloween season
 
Last edited:
I wish i had the patience/skill to put lights in mine...or to mod it so it is more accurate. i did build an AMT bridge model that I put lights in...

http://www.therpf.com/f11/lighted-amt-bridge-model-90762/

while i enjoy the actual act of building models, i have a tremendous challenge balancing the "process" of building vs. "getting it done and on the shelf." i envy those of you that have the skills/patience/time to make your various models look like museum-quality displays.

i also have a Flying Dutchman build in progress...modifying a WASA model...but when Pearl came out, I dropped that to work on the Pearl.

that said, i will forge ahead and get the Pearl done a little every day or so...just so hard to find the time with kids, life, work, etc.

I will post pics of the PIRATE figures when they come in.

t
 
I tend to get distracted with other things so most of my models (all) haven't been finished.
I have 2 PBY's that have been sitting near completion for over 2 years.

With some models it's months of research a few weeks of building then I start on something else that has caught my interest. (the curse of internet forums)
Some just get left for a while since I have to get all my supplies on line so it tends to slow things down considerably.

They are supposed to be putting in a Hobby Lobby here in town about a block from where I work, I just hope they carry a decent selection of paints and supplies.

I don't know anything about electrical but it's shouldn't be to hard to run wires to a main power source and switch from the stripped down lights.

Here's a link on doing the hair spray weathering I mentioned for anyone interested.
There are several other methods to this done by others over on the Fine Scale Forum.
 
Last edited:
wow -- hairspray technique looks AMAZING! thanks for posting, d6.

Hobby Lobby does carry a pretty nice selection of paints, but not nearly as complete as you might find at a dedicated model/hobby shop. That said, I fimd myself at HL about 2 to 3 a month whether I need anything or not. :)
 
Pretty cool stuff.
You should see some of the cars over on Fine Scale.

Does HL carry Model Master and Tamiya Paints?
What about Evergreen or Plastruct plastics?

I was just by where the store is going in, the signage is up now.
 
i do not believe the Hobby Lobby i go to has those paints...but i'll double check next time i'm there...they used to carry more in model section but have scaled back....i do not think they have any plastruct. they are mainly dedicated to crafts and such...the two aisles they have dedicated to models in my store are mainly model kits, and not a bad selection compared to what you would find at walmart, kmart or target, and a full selection of testors enamel and acrylic paints and maybe model master sprsy paints, and some scale figures, but not as many as they used to carry. they do have miniature scale train supplies like foliage and such, but as for the kind of stuff you/i/people on this forum typically seek out, it's really hit and miss...with more misses, unfortunately.

i consider HL to be more of a glorified Michael's, if that helps you understand the inventory any better.
 
Thanks.
I'll check it out when they open but it sounds like I will have to continue with my on line shopping.

The nearest real hobby shop is in north Modest but that's about a 3.5 hours round trip.
 
been painting/weathering the sails...and adding patchwork on them as seen in some screen caps (to simulate what I am guessing are patches of fabric sewn over holes is the sails/masts -- forgive my poor terminology, as I don't speak good pirate :)


anyways, as I get antsy working on the same thing for too long, I switched over and started assembling some of the cannons. Geesh -- each cannon is comprised of SEVEN pieces...and they are SMALL pieces. And I have BIG fingers. So, I actually got TWO cannons assembled and I decided to quit for the night...but now I am debating whether I want the lower deck cannons sticking out the little ports...but even more puzzling, is that in the instructions, they still suggest you build them all and install them into kit, just further back. WHY WOULD THIS BE? If you are going to put hatch doors over the port holes, why would you make another 14 or so cannons and install them if nobody is ever going to see them? Or am I missing something. D6, any clue on this one?

well, i can tell you now that i am going to need to take a few chill pills and just accept that this build is gonna take a while for me. I wonder how quickly the people at Zevezda built the one that had on display at the various toy shows it was shown at?
 
It's your model build it the way you want.
If you don't see the guns then there is no need to build them.

I picked up a set of those led tea lights and took them apart.
extending the wires shouldn't be a problem.
They are orange in color but should work fine.
I'll try to unsolder 3 of them from the little board that makes them flicker so I can extend the leeds and place them in the stern lamps.

I also piked up a string of 30 mini leds in orange that use 3 AA's.
 
The guns may be very slightly visible through the deck gratings and stairwells, I guess. Or more so if you left the gratings off, as in the Keira trampoline scene. :)

In CotBP the sails are tattered layers of gauze. Zombie/ghost sails, they'd never take even a slight breeze in reality.

In DMC and AWE, the sails are ordinary black sailcloth, but heavily patched. I guess it's intended to suggest that they're the same sails as Film 1, just repaired once the ship was back in the world of the living.
 
When Keira first exits the salon the hatches are covered then all of the sudden the covers are missing.

Sadly the Pearl went from being a ghost ship to just a regular ship.
No more fog or heavy winds to push her along.

btw she had new sails at the end of CotBP.
 
ok, progress report -- build has been slow going...5 minutes here, 20 minutes there...i imagine many of you can relate to that.

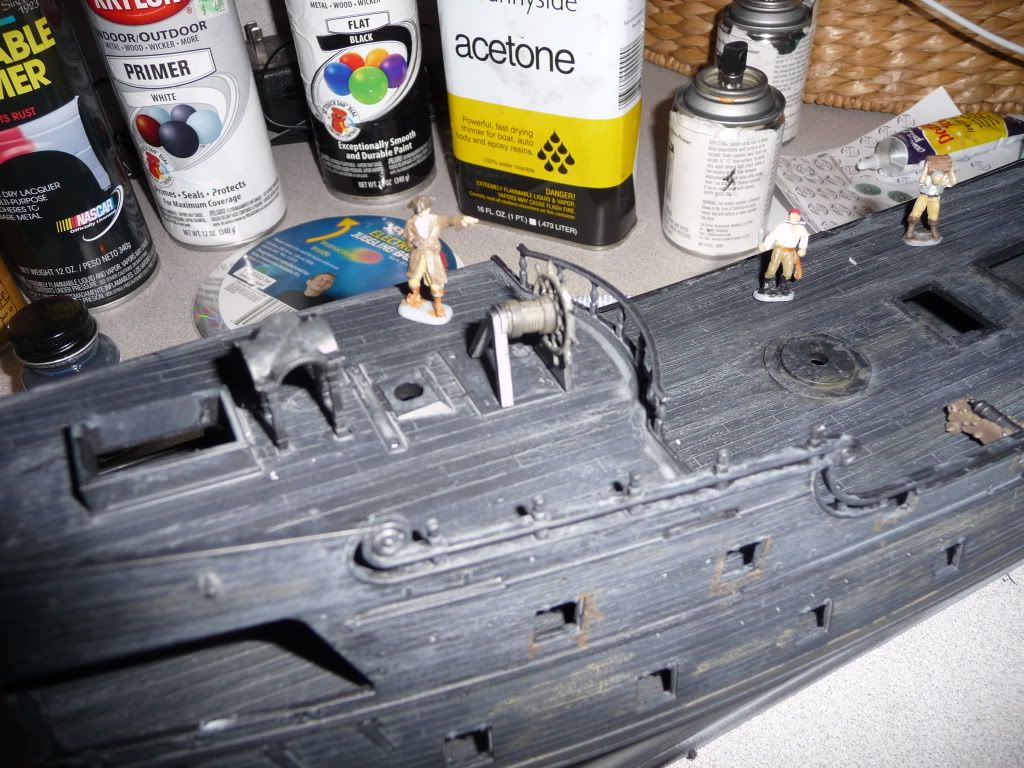
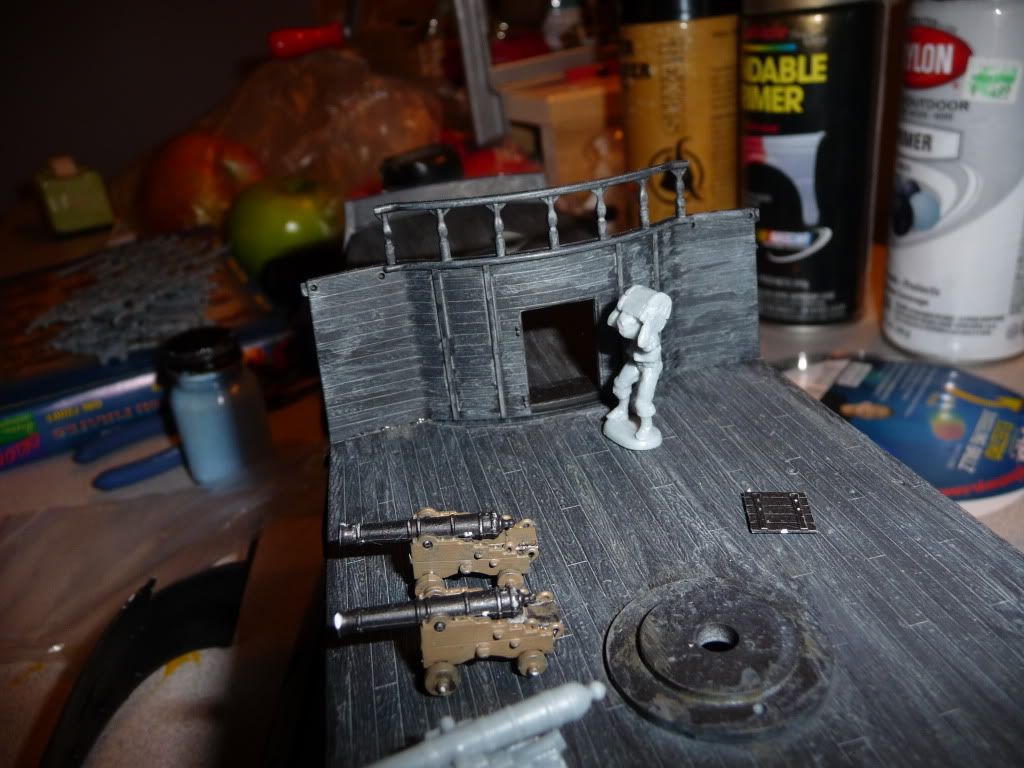
pics below show where i'm at -- i decided NOT to have cannon hatches open, all will be closed, saving me the additional time of having to build all those freakin' teensy tiny cannons!! :)

seriously, as much as i like the action scenes in the pirates movie, when asked what the Pearl really meant to Jack, his answer was "freedom." i thought that was a very poetic response...espeically for ol' jack, but it is, in part, why i decided to leave hatches down and depict the Pearl as she would look roaming the high seas for adventure, and not looking for a battle.

that said, i envy any of you who decide to build yours full out with all those cannons ready for action.

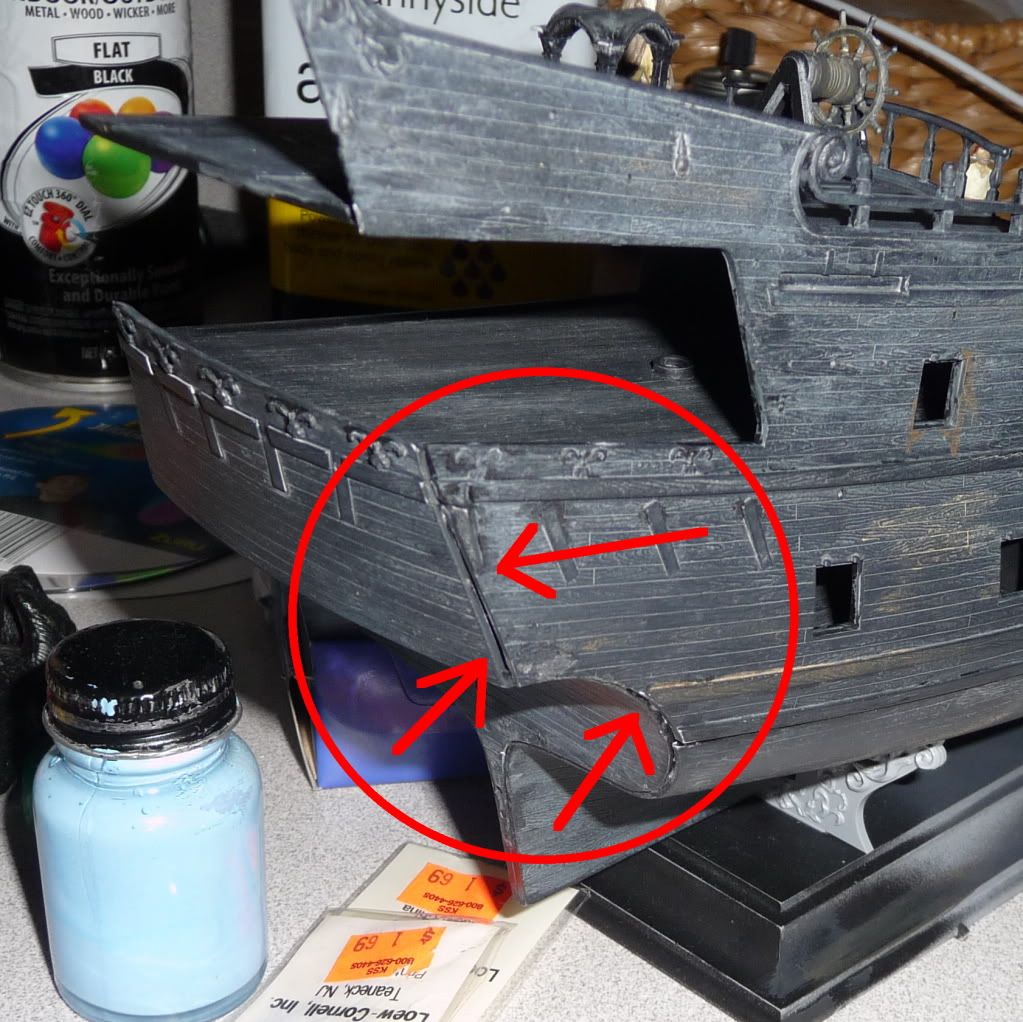
one thing you have to watch for is when it comes time to join the sides of the ship to the model -- mine did not line up perfectly...look at the picture with red circle and you can see the arrows pointing at the gap. this can easily be filled with putty...i will likely fill mine with black milliput and touch up with paint...but be sure to test fit ahead of time and be ready to hold the pieces in place while they adhere/set. i used combination of regular of testors model glue -- the kind in orange tube -- and a bit of super glue gel here and there. i have the plastruct liquid cement that you brush on, but i do not find it all that effective, especially when applying to larger areas -- it seems to dry out or evaporate before i get the entire piece coated with glue.

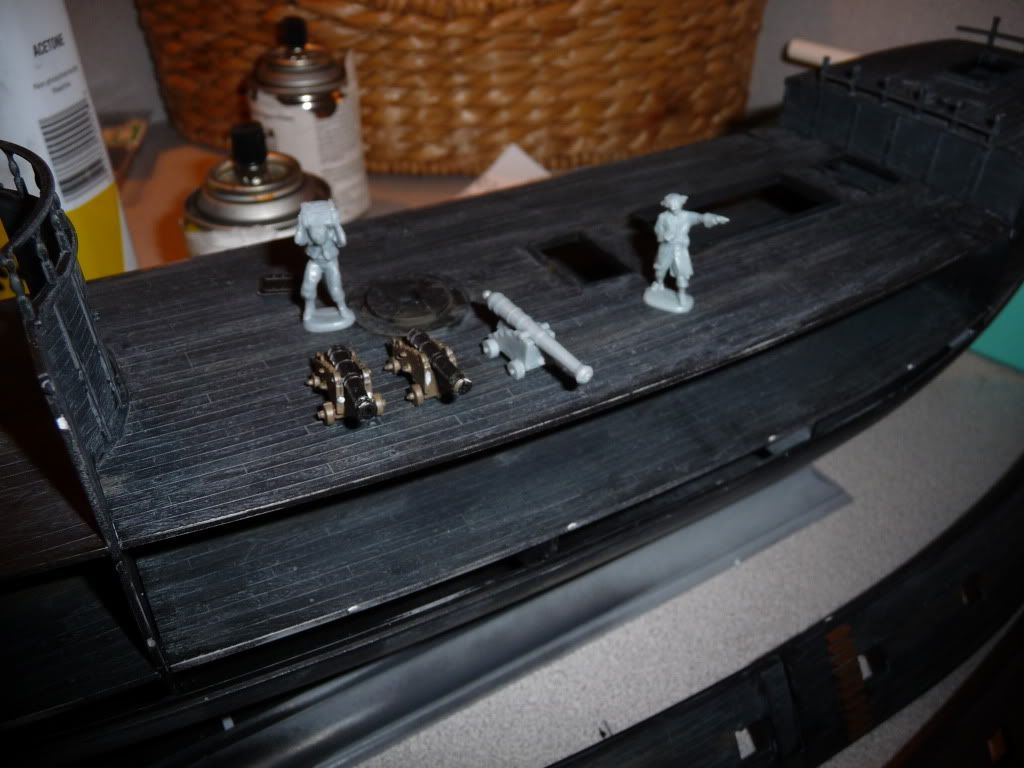
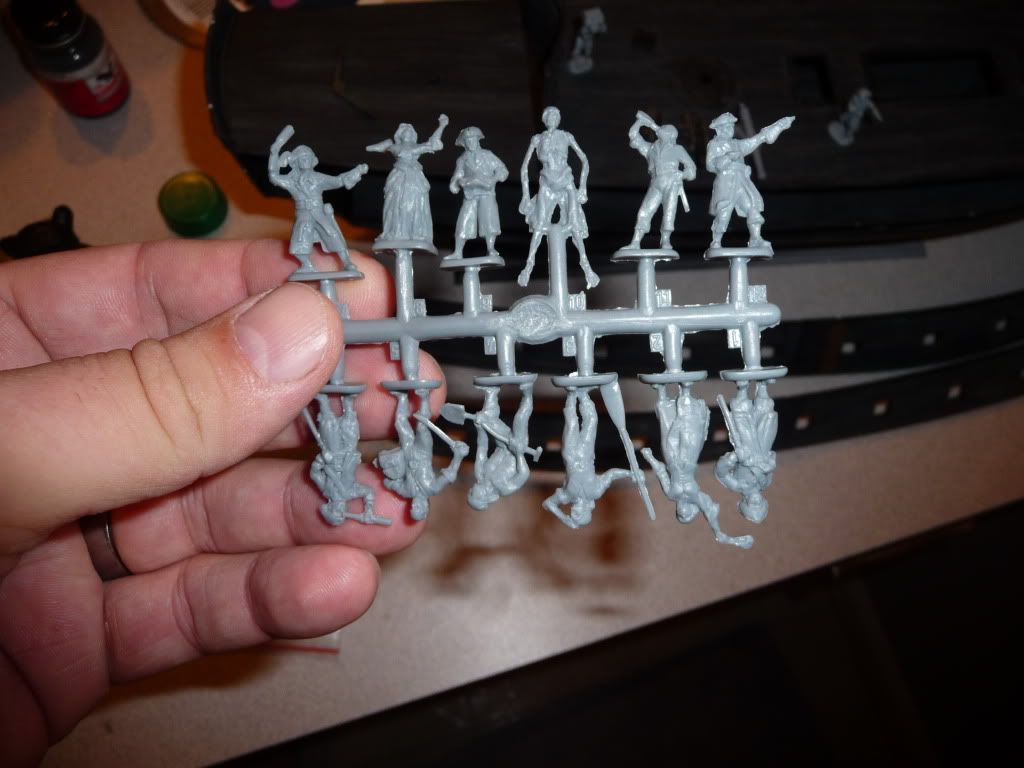
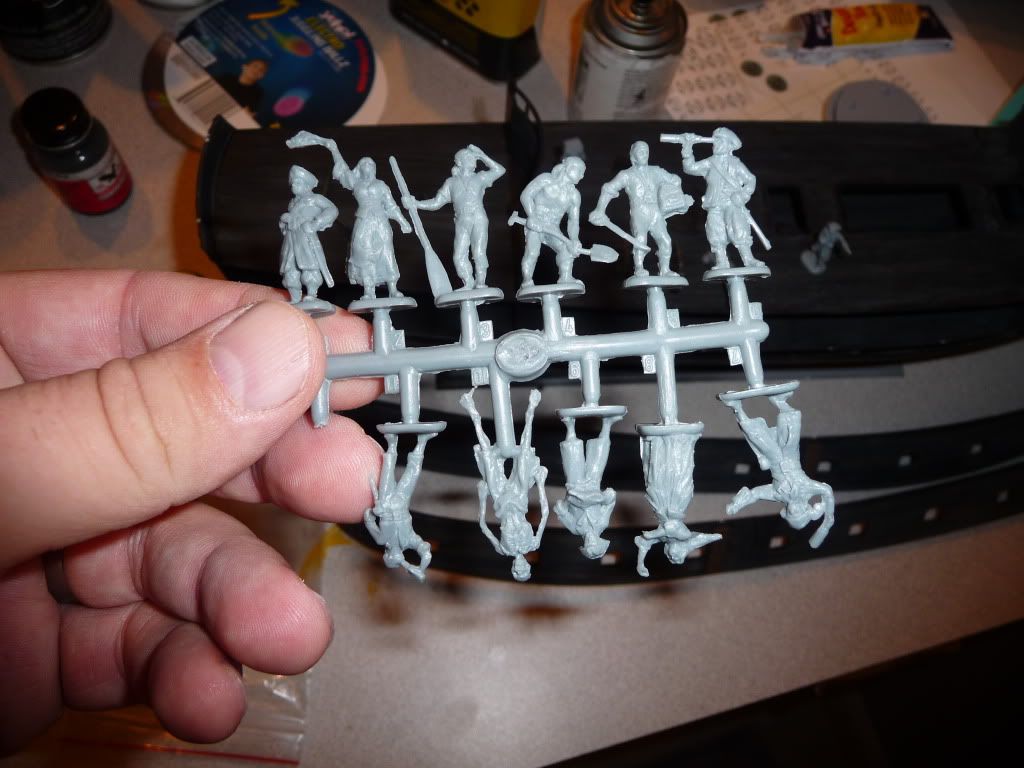
i also have pics of the 1:72 pirate figures...the cannon that comes with them has a base that is identical in size to the cannon bases that come with the kit, but the figures still seem a tad large to me...not much, and i plan to use them anyways, but i will of course cut the bases off and glue the bottoms of their boots directly to the deck.

that's all for now...i have a day off from work tomorrow so i may try to get other side on the ship and maybe get to the mast poles...we'll see. just when i think i am ready for the next step, i read instructions and see i forgot 27 other little pieces that need to go on before i do the next big thing.

if any of you are building this, love to see your builds.

P1110377.jpg


P1110353.jpg


P1110371.jpg


P1110360.jpg


P1110359.jpg


P1110358.jpg


P1110357.jpg


P1110353.jpg
 
I would - gonna drop everything for this kit - but I'm still waiting on the local release, in case by some miracle it's more affordable than online. :(
 
Haven't had time to work on mine.

Thanks for the heads up on the gap, I'll keep a sharp eye.
Those figures look promising and should look more to scale once you remove the bases.
 
Got mine from evil bay, all I can say WOW, this is very well done.

Also got these Pirates, thanks for the tip Ted.

Has anyone any idea if there are metal canons at this scale available?
 
This thread is more than 3 years old.

Your message may be considered spam for the following reasons:

  1. This thread hasn't been active in some time. A new post in this thread might not contribute constructively to this discussion after so long.
If you wish to reply despite these issues, check the box below before replying.
Be aware that malicious compliance may result in more severe penalties.
Back
Top