You are using an out of date browser. It may not display this or other websites correctly.
You should upgrade or use an alternative browser.
You should upgrade or use an alternative browser.
1/6 Kaiyodo/Screamin' Boba Fett
- Thread starter Callista
- Start date
Callista
Active Member
So would Hydrocal be good for using to fill the torso and then pin the arms?
I noticed there is Lightweight Hydrocal and was curious if that would be worth buying.
The arms need some work as they were trimmed before I got it and don't have the best fit which is why I want to pin them.
I noticed there is Lightweight Hydrocal and was curious if that would be worth buying.
The arms need some work as they were trimmed before I got it and don't have the best fit which is why I want to pin them.
Ozzman78
Active Member
Hydrocal for the legs only, would make the body to heavy. Fill the body with newspaper (arms, head, and pack as well).
Looking at your pick the arms look ready to attached, the flash appears to be correctly removed. So you don't need to pin the arms, just attach with good CA glue before you prime.
Looking at your pick the arms look ready to attached, the flash appears to be correctly removed. So you don't need to pin the arms, just attach with good CA glue before you prime.
division 6
Master Member
Some of the things I have read over on the Club House forum and on David Fishers Videos.
For trimming heat vinyl and use a new sharp exacto blade (being very careful while cutting)
Don't use regular plaster since it takes a really long time to dry out and may cause mold to grow inside.
Many people prefer Durhams water putty (found at most hardware stores)
Fill upper parts with wadded paper, plastic bags, foil or 2 part expanding foam like Mountains in Minutes (not the spray stuff from the hardware store since it doesn't always cure completely on the inside)
Use CA glue to attach parts.
Use a lacquer based primer.
While I personally hate the stuff some use Squadron green putty for filling in small seams, smoothed down with fingernail polish remover (acetone)
For larger gaps or doing custom work use epoxy 2 part clays like Aves or Magic Sculpt.
PHArchivist
Master Member
Here's that gun I mentioned from the Potato Head Fett.
The stock angles down to much but could be cut off and re-positioned. Other than that, its shaped better than the kit gun. Curious how the size compares.

The stock angles down to much but could be cut off and re-positioned. Other than that, its shaped better than the kit gun. Curious how the size compares.
PHArchivist
Master Member
Just ringing this image forward to compare...

Chicagovader
Sr Member
Warm the arms a bit at the joining line then glue to the body with CA glue pressing the parts firmly together then hit with a small spray of zipkicker to set the CA glue instantly. I have been building vinyl and resin figures for over 20 years.
Callista
Active Member
BTW, your body fit issue is due to the large chunk of flash still attached to the top of the legs. Warm it up with a hair dryer and cut that off.
Actually there isn't any flash attached, that has been removed. I have done this according to the directions and they clearly show leaving that top bit to the legs as is. Here is a portion of the directions clearly showing to leave this on:

I will be adjusting this myself to obtain a better fit.
Chicagovader
Sr Member
View Album
Link to Pics of the 1/6th Boba I did back in the 90's pardon the quality of them very old pics.
Link to Pics of the 1/6th Boba I did back in the 90's pardon the quality of them very old pics.
Clutch
Master Member
Painting....
I paint in enamel on all my kits. Yes, you can paint with Testors enamel on vinyl. All you have to do is wash all the parts in warm lightly soapy water to remove any mold release, when dry prime the parts with automotive primer, krylon primer, or rust-oleum primer. This will allow the enamel paint to adhere and dry properly (enamel will not dry on raw vinyl, stays sticky).
I've done kits the same way. Still tacky. It is really hit or miss with enamels. I would ONLY use them for any kind of metallic areas.
As far as torso fit, you could cut the plug down a little. Heck, you could even cut it off. If you are worried about fit, heat the parts up with a hair dryer and 'stitch' them together. That means gluing a small section at a time working your way around the torso. Zip kicker is nice when doing this because it sets the CA glue instantly.
Here's a 3po I did using testors enamel brass. It has slowly darkened over time.
 At least it isn't sticky. :lol
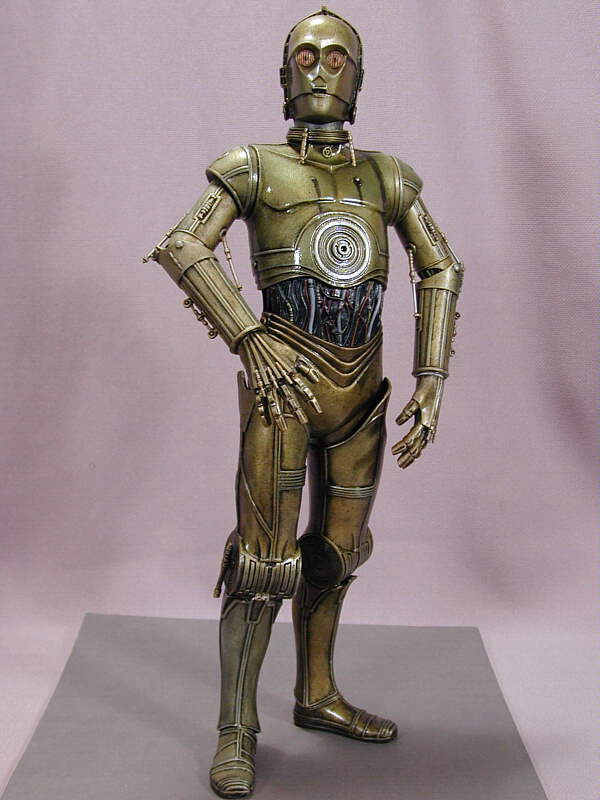
Ozzman78
Active Member
Yeah, you will need to remove more of it to get a good fit. They leave those plugs on to help but they really don't.
Actually there isn't any flash attached, that has been removed. I have done this according to the directions and they clearly show leaving that top bit to the legs as is. Here is a portion of the directions clearly showing to leave this on:
I will be adjusting this myself to obtain a better fit.
Ozzman78
Active Member
What type of primer did you use? Never had a sticky kit after a solid prime, auto primer is best IMO.
Great C3PO btw, has good ANH dirty look.
Great C3PO btw, has good ANH dirty look.
I've done kits the same way. Still tacky. It is really hit or miss with enamels. I would ONLY use them for any kind of metallic areas.
As far as torso fit, you could cut the plug down a little. Heck, you could even cut it off. If you are worried about fit, heat the parts up with a hair dryer and 'stitch' them together. That means gluing a small section at a time working your way around the torso. Zip kicker is nice when doing this because it sets the CA glue instantly.
Here's a 3po I did using testors enamel brass. It has slowly darkened over time.
Too Much Garlic
Master Member
Not at all. No reason to cut it off. The issue I've heard is that people tend to heat up both parts. Not necessary. Just only heat the flashing and not the upper body and then join the pieces together. The cool, hard shape of the upper body will push the flashing into a nice, tight fit. That's how I have mine and you are insured of a less likelihood of the pieces breaking apart while leaving the flashing intact. Of course, you could trim it down a little to just have a lip going inside the upper body, but it really isn't necessary.BTW, your body fit issue is due to the large chunk of flash still attached to the top of the legs. Warm it up with a hair dryer and cut that off.
KNIGHT
New Member
I've done kits the same way. Still tacky. It is really hit or miss with enamels. I would ONLY use them for any kind of metallic areas.
As far as torso fit, you could cut the plug down a little. Heck, you could even cut it off. If you are worried about fit, heat the parts up with a hair dryer and 'stitch' them together. That means gluing a small section at a time working your way around the torso. Zip kicker is nice when doing this because it sets the CA glue instantly.
Here's a 3po I did using testors enamel brass. It has slowly darkened over time.
NICE!!! :love
Here's one I did.


Scott Kaufmann
Member
Nice trim job, nice and clean. I never realized how improportionate the blaster is until you posted the picture. Boba should be commended for maintaining trigger safety.
Similar threads
- Replies
- 10
- Views
- 973
- Replies
- 0
- Views
- 165