You are using an out of date browser. It may not display this or other websites correctly.
You should upgrade or use an alternative browser.
You should upgrade or use an alternative browser.
1/2 scale Atlas from Portal 2 *FINISHED PICS PAGE 4*
- Thread starter TMFX
- Start date
Re: 1/2 scale Atlas from Portal 2
Then we got busy priming with RustOleum filler primer and sanding with 3M sanding sponges.
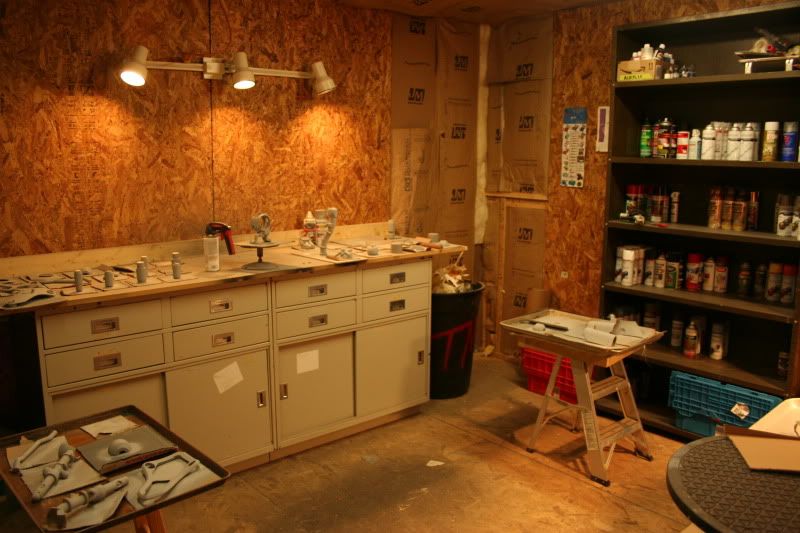
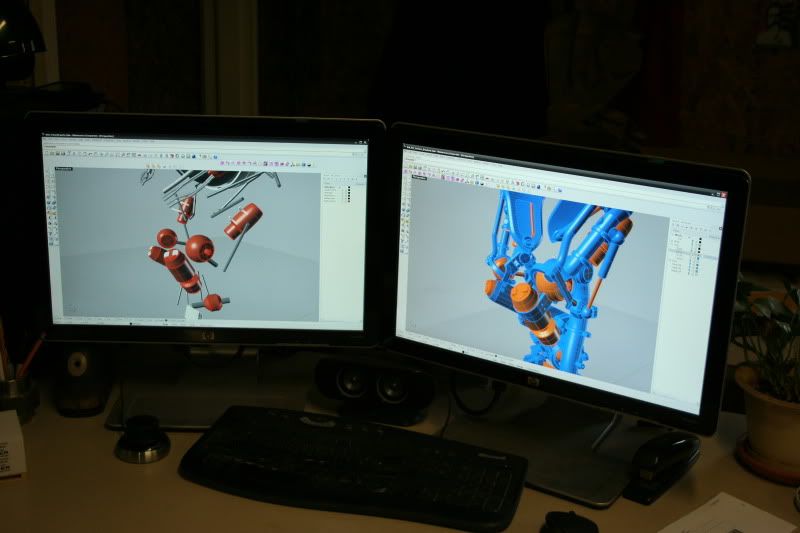
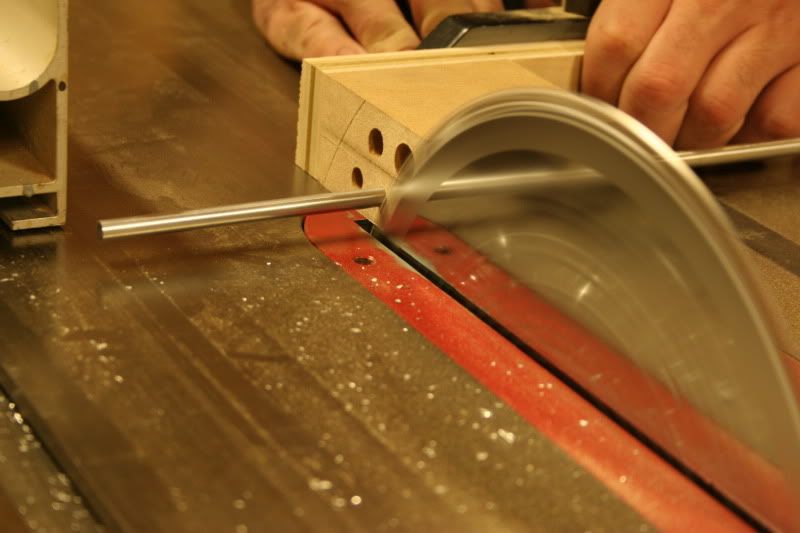
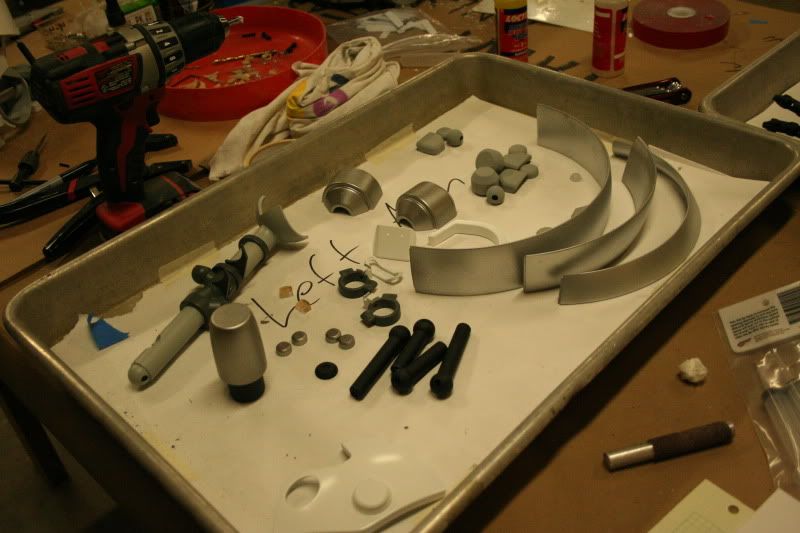
and cut all our lengths of aluminum rod based on the 3D model
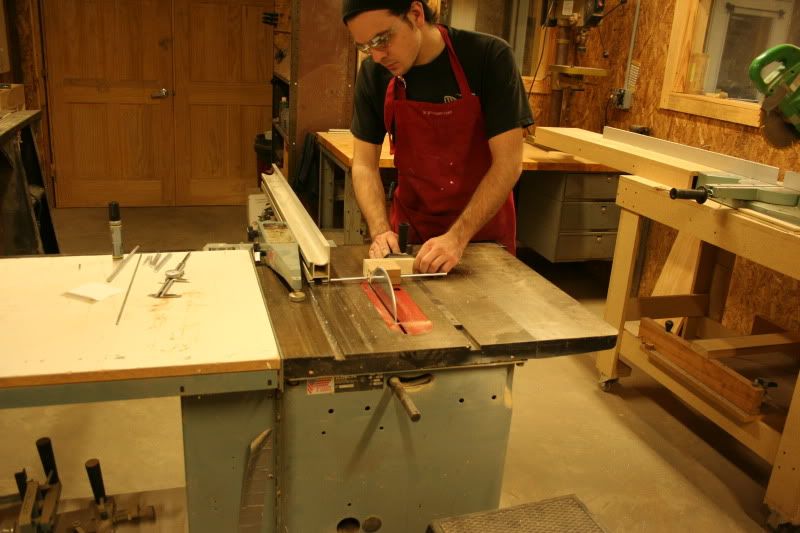
then we got everything mocked up with fasteners, before disassembling for final paint
Then we got busy priming with RustOleum filler primer and sanding with 3M sanding sponges.
and cut all our lengths of aluminum rod based on the 3D model
then we got everything mocked up with fasteners, before disassembling for final paint
Re: 1/2 scale Atlas from Portal 2
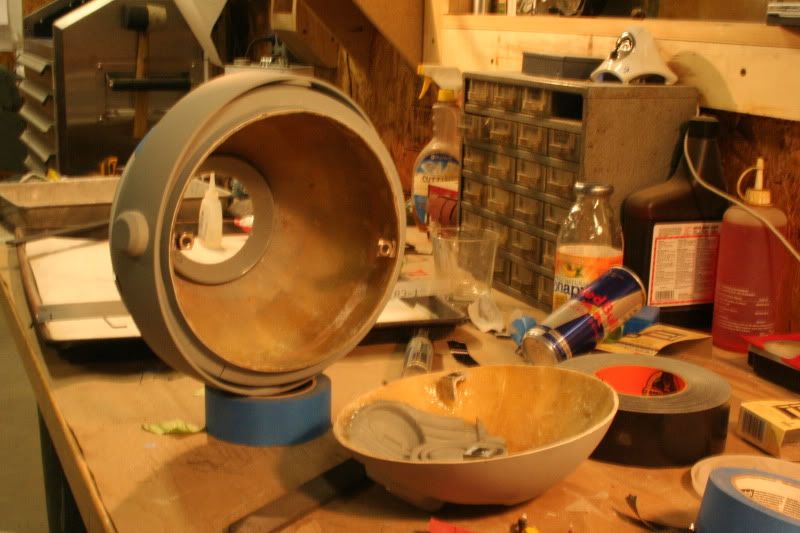
Then I pulled a silicone mould off of the larger of the hemisphere forms. This became our first issue. The smaller hemisphere needed to be moulded and cast in fiberglass, and those pieces needed to be assembled into a perfect sphere to form the main body. The larger hemisphere, was to be cast in fiberglass and then cut up to form the body plates that stand off the main body. We decided however, that the edges would be too wonky no matter how expertly we laid up the fiberglass. So the issue was that I had moulded the large hemisphere first, and used about $100 in silicone to do so, instead of taking the time to brush up or make a matrix mould. This turned out to be be a mistake because we would be using the small hemisphere, and not the large one. So not only did we waste the time and money on cutting the larger one, we wasted the silicone in moulding it. Well genious that he is, Jaye suggested putting the mould over the smaller sphere, and filling the difference with a bit more silicone that would bond to the original mould, and make a mould of the smaller sphere without costing us another gallon of silicone. So I sharpened the end of a length of steel tube, and punched a 1.5" hole out of the top of our original silicone mould, put it over the smaller hemisphere form, and poured in another 16 oz. of silicone, forming a perfect new mould!
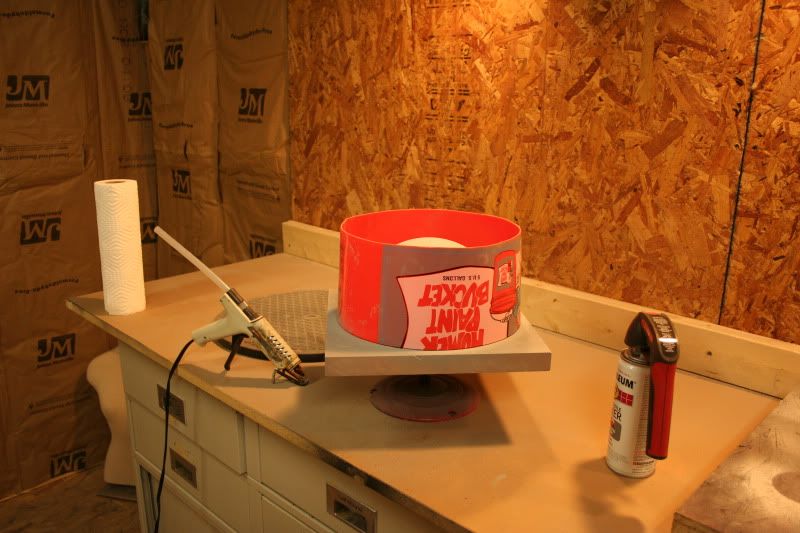
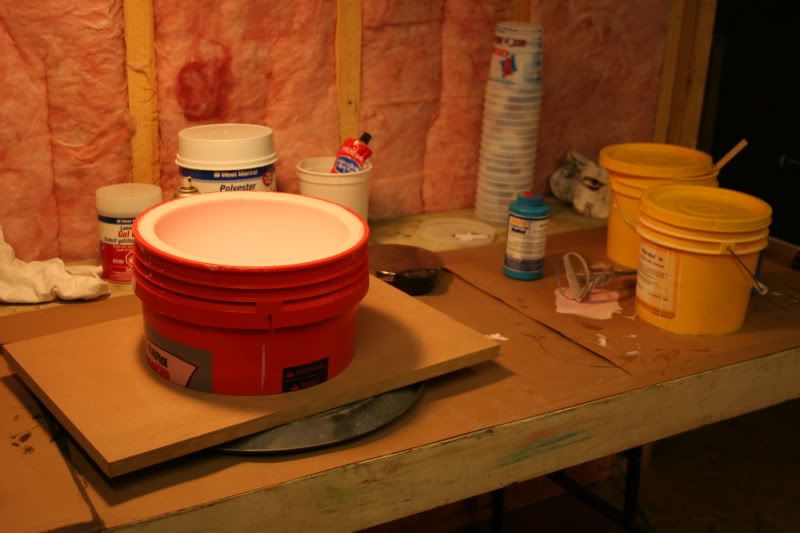
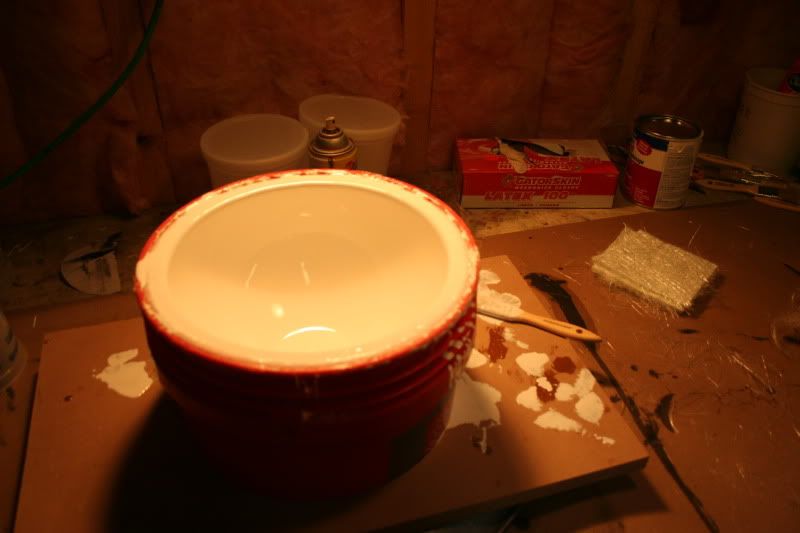
Here's the mould, poured up using a section of a pail from the Home Despot.
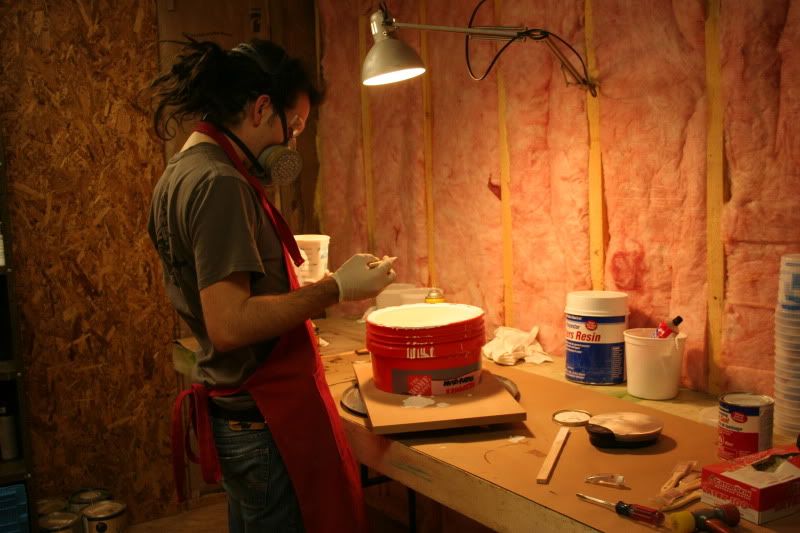
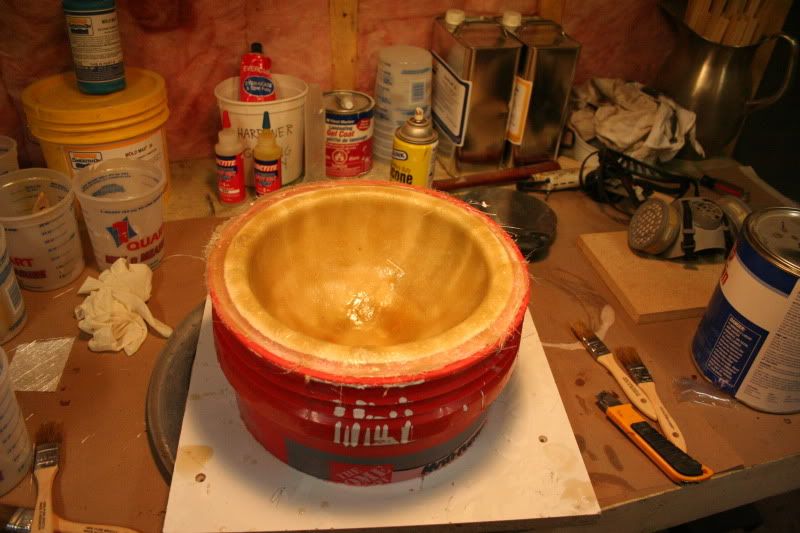
Then I got to laying up glass...
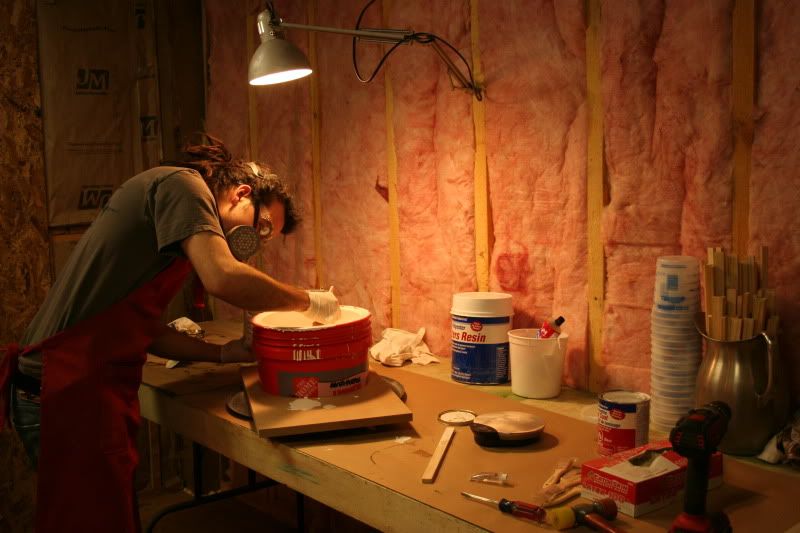
I tried to use one whole piece of matte for each layer, but it was about 100 degrees in our second story finishing room, with the lights blaring, so that was epic failure
Then I got it right the next time with strips
Then I pulled a silicone mould off of the larger of the hemisphere forms. This became our first issue. The smaller hemisphere needed to be moulded and cast in fiberglass, and those pieces needed to be assembled into a perfect sphere to form the main body. The larger hemisphere, was to be cast in fiberglass and then cut up to form the body plates that stand off the main body. We decided however, that the edges would be too wonky no matter how expertly we laid up the fiberglass. So the issue was that I had moulded the large hemisphere first, and used about $100 in silicone to do so, instead of taking the time to brush up or make a matrix mould. This turned out to be be a mistake because we would be using the small hemisphere, and not the large one. So not only did we waste the time and money on cutting the larger one, we wasted the silicone in moulding it. Well genious that he is, Jaye suggested putting the mould over the smaller sphere, and filling the difference with a bit more silicone that would bond to the original mould, and make a mould of the smaller sphere without costing us another gallon of silicone. So I sharpened the end of a length of steel tube, and punched a 1.5" hole out of the top of our original silicone mould, put it over the smaller hemisphere form, and poured in another 16 oz. of silicone, forming a perfect new mould!
Here's the mould, poured up using a section of a pail from the Home Despot.
Then I got to laying up glass...
I tried to use one whole piece of matte for each layer, but it was about 100 degrees in our second story finishing room, with the lights blaring, so that was epic failure
Then I got it right the next time with strips
Last edited:
Re: 1/2 scale Atlas from Portal 2
Looks Great!
They should do a Model kit!
Looks Great!
They should do a Model kit!
Re: 1/2 scale Atlas from Portal 2
Honestly, I don't know much about developing kits, but it cost about $8k to have all the necessary parts printed for one bot. I don't know if there would be a way to use the pieces for master moulds before they were painted and assembled, but time would be now before we put the second bot together. The second one is going directly to Valve but again, I don't know anything about creating kits. I know what would be technically involved, but nothing about the logistics of copyright, etc.
At the very least, we have a box of parts that were slightly defected, or for another reason unused on this project, many complex parts at this scale. It's only 25-30% of one bot or so, but I wonder if it would interest someone building their own bot. they'd have to do it at this scale though.
Looks Great!
They should do a Model kit!
Honestly, I don't know much about developing kits, but it cost about $8k to have all the necessary parts printed for one bot. I don't know if there would be a way to use the pieces for master moulds before they were painted and assembled, but time would be now before we put the second bot together. The second one is going directly to Valve but again, I don't know anything about creating kits. I know what would be technically involved, but nothing about the logistics of copyright, etc.
At the very least, we have a box of parts that were slightly defected, or for another reason unused on this project, many complex parts at this scale. It's only 25-30% of one bot or so, but I wonder if it would interest someone building their own bot. they'd have to do it at this scale though.
Re: 1/2 scale Atlas from Portal 2
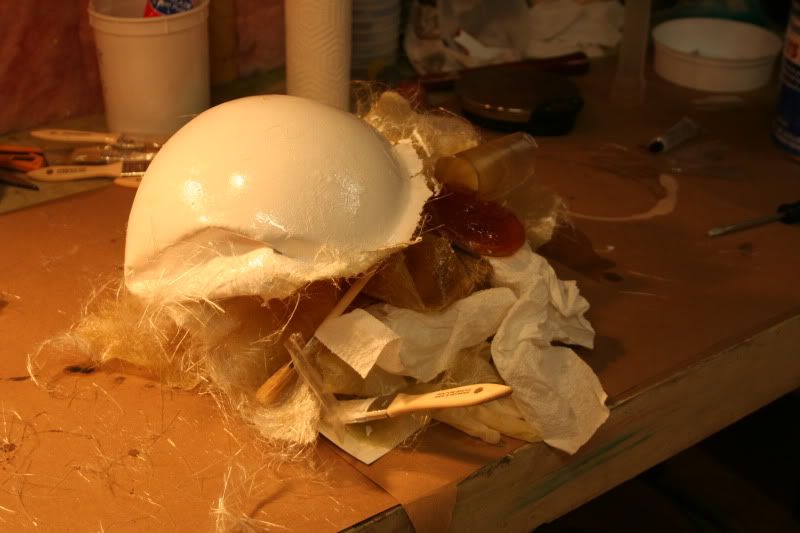
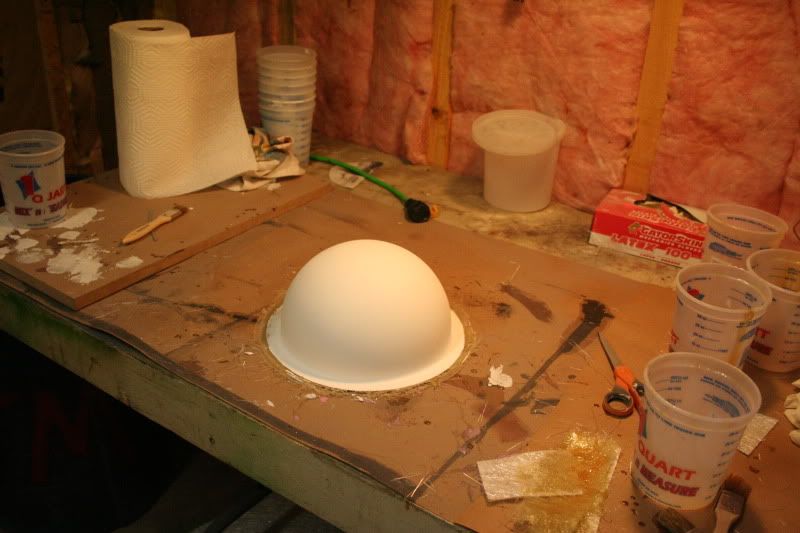
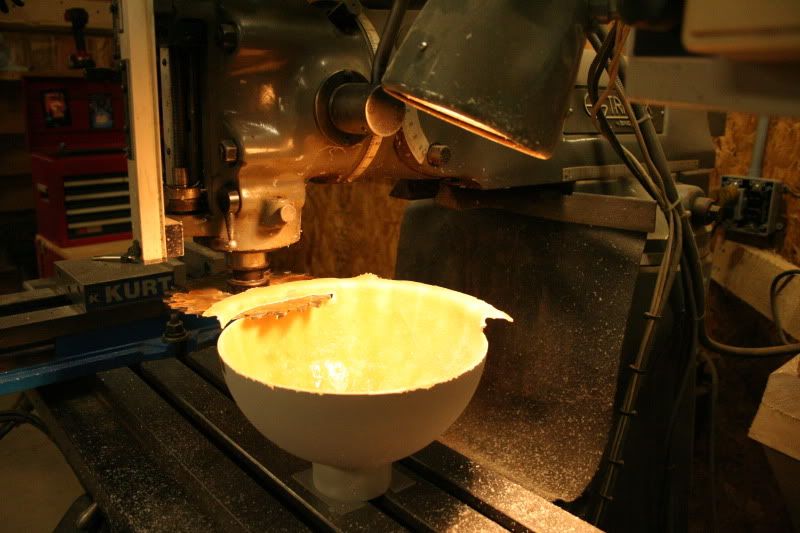
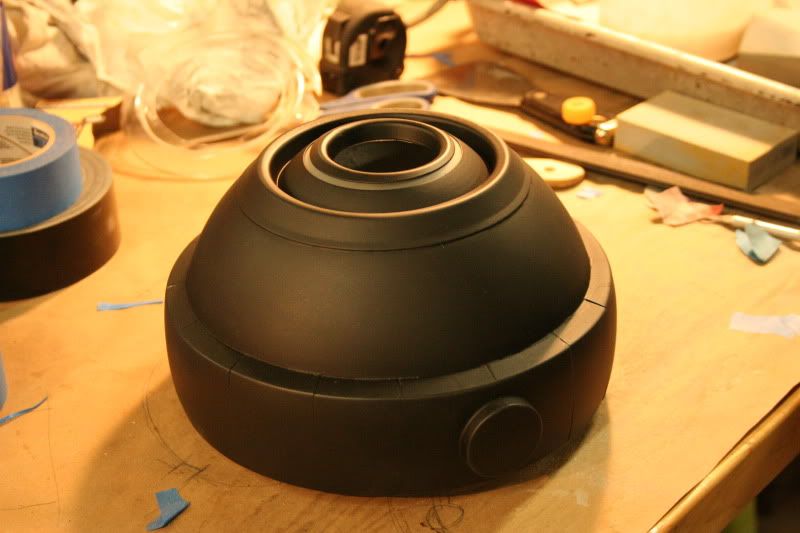
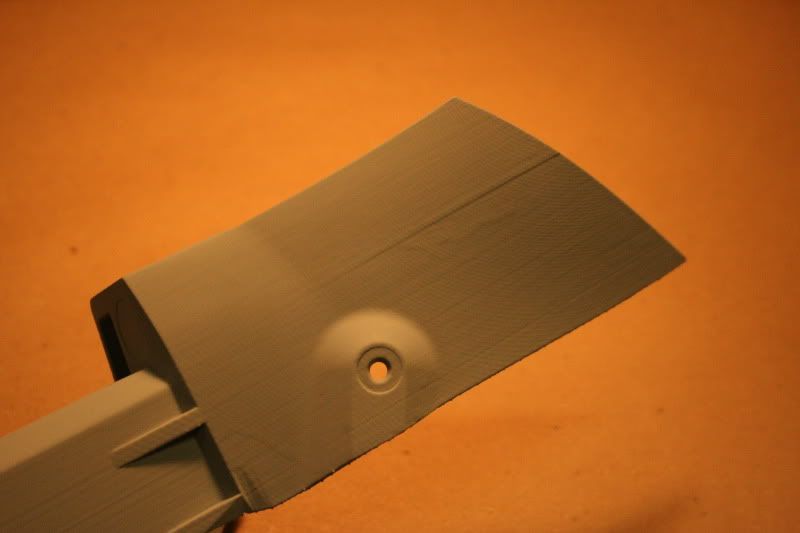
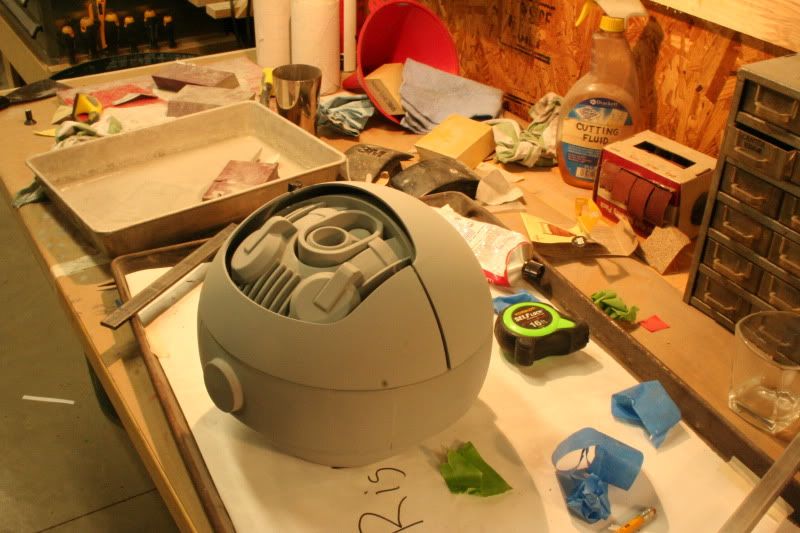
So I got a couple good castings from the hemisphere mould, and used a slitting saw on the mill to cut them just under the half way mark. This was a sketchy operation, after I took these pics, I switched to a smaller, thinner slitting saw with a much higher tooth count, which made things much smoother.
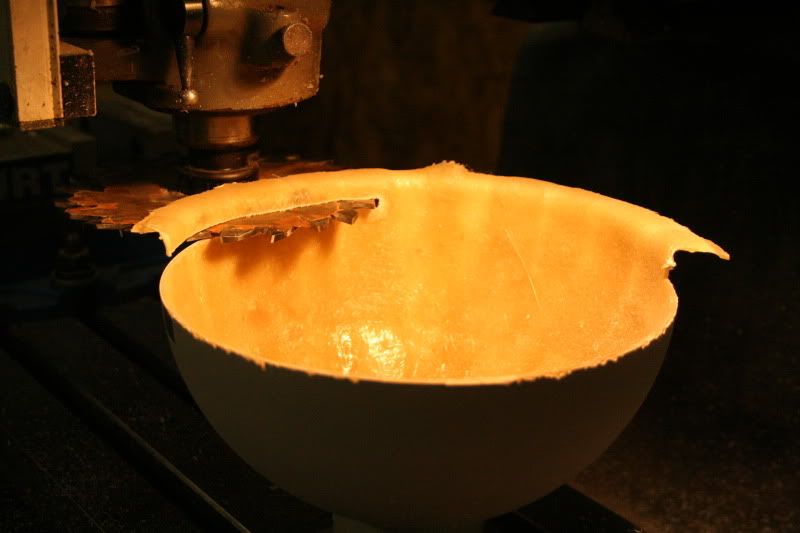
Then I cut the eye hole
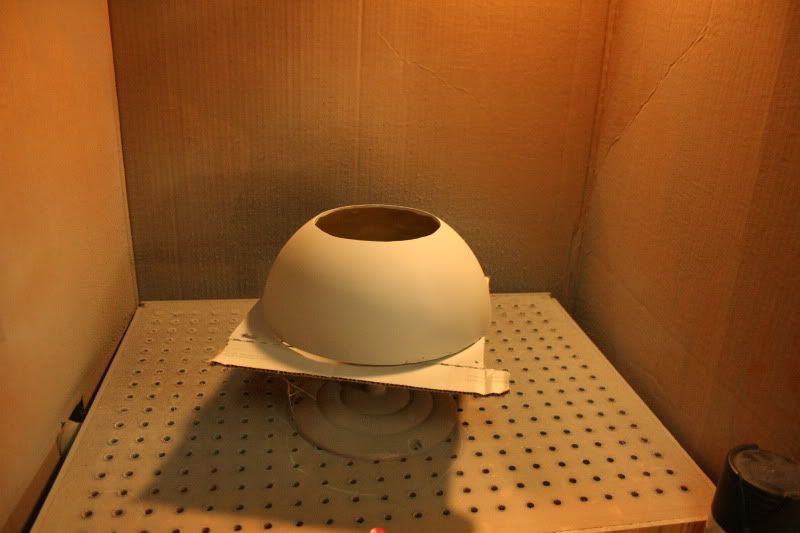
I put the halves back in the mould vertically and bandaged them together with fiberglass from inside, working through the eye hole and making a complete sphere. Then I got the 16 parts that went around the prime meridian located and tacked in place with super glue, sealed all the seams with frog tape, and then filled with Smooth Cast 325.
After all that, used a slitting saw again to cut just above the halfway point to make an access panel in the back of the body.

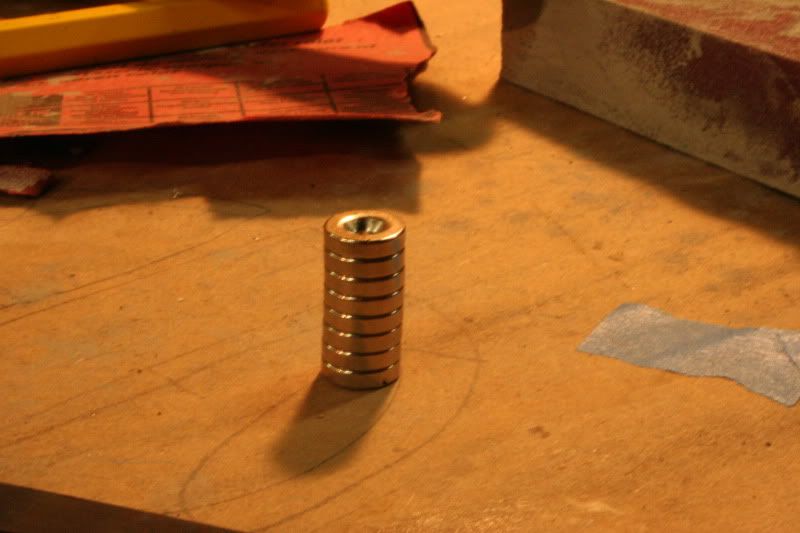
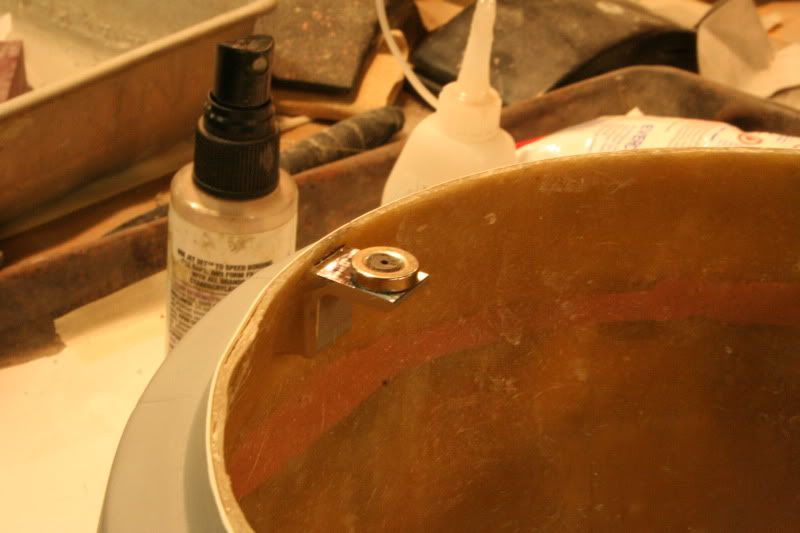
I used some rare earth magnets to attach this panel for fast access.
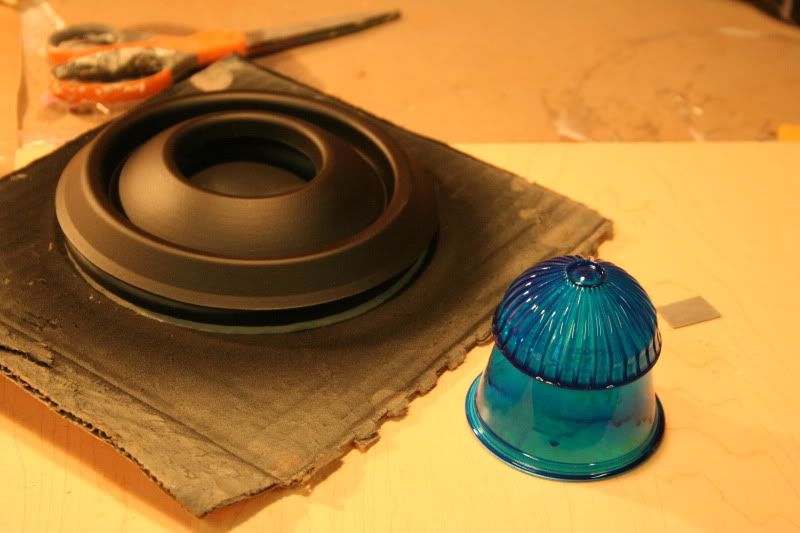
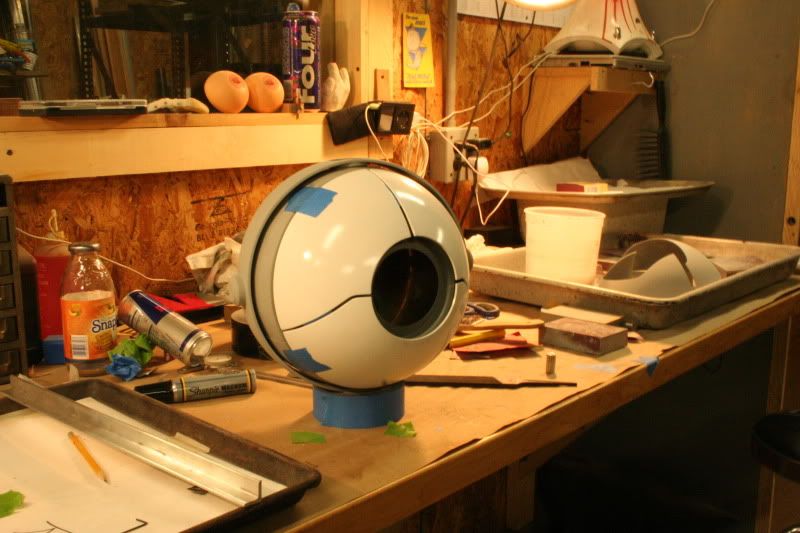
The eye bezel was actually another major mistake, the renderings we had didn't include the white halo around the blue iris of the eye. So we had all our vacuum forms made for the bezel, and then realized we would need new ones to allow for this halo. So we re-vacuum formed the original form, dusted it with talc as a release, and vacuum formed over that again, so we had two layers.
Then the top layer went into the laser cutter, and once we calibrated it correctly we were able to cut the halo out of it. So the lower layer was vacuum formed clear PETG, which we sprayed with a glass frosting spray, and the top layer was painted black and applied, leaving the frosted layer showing through from below in the area of the halo. When backlit, the halo glows white.
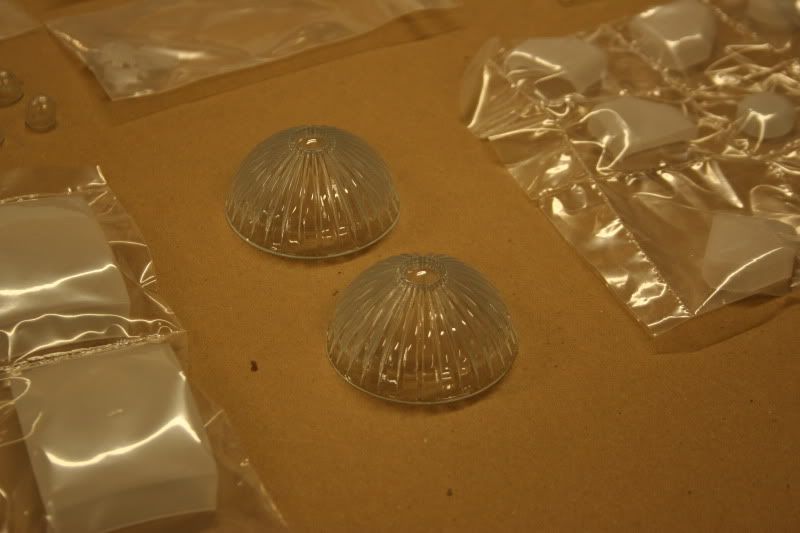
The iris was modelled and assigned a translucent blue right in the modelling software, so we could render it with a backlight and tweak the geometry until it looked just like the desired result. So then we had it printed in "supreme clear" which looked like this

and we gave it a few coats of Tamiya clear blue, as well as a few coats of the glass frosting spray
So I got a couple good castings from the hemisphere mould, and used a slitting saw on the mill to cut them just under the half way mark. This was a sketchy operation, after I took these pics, I switched to a smaller, thinner slitting saw with a much higher tooth count, which made things much smoother.
Then I cut the eye hole
I put the halves back in the mould vertically and bandaged them together with fiberglass from inside, working through the eye hole and making a complete sphere. Then I got the 16 parts that went around the prime meridian located and tacked in place with super glue, sealed all the seams with frog tape, and then filled with Smooth Cast 325.
After all that, used a slitting saw again to cut just above the halfway point to make an access panel in the back of the body.
I used some rare earth magnets to attach this panel for fast access.
The eye bezel was actually another major mistake, the renderings we had didn't include the white halo around the blue iris of the eye. So we had all our vacuum forms made for the bezel, and then realized we would need new ones to allow for this halo. So we re-vacuum formed the original form, dusted it with talc as a release, and vacuum formed over that again, so we had two layers.
Then the top layer went into the laser cutter, and once we calibrated it correctly we were able to cut the halo out of it. So the lower layer was vacuum formed clear PETG, which we sprayed with a glass frosting spray, and the top layer was painted black and applied, leaving the frosted layer showing through from below in the area of the halo. When backlit, the halo glows white.
The iris was modelled and assigned a translucent blue right in the modelling software, so we could render it with a backlight and tweak the geometry until it looked just like the desired result. So then we had it printed in "supreme clear" which looked like this
and we gave it a few coats of Tamiya clear blue, as well as a few coats of the glass frosting spray
Last edited:
Re: 1/2 scale Atlas from Portal 2
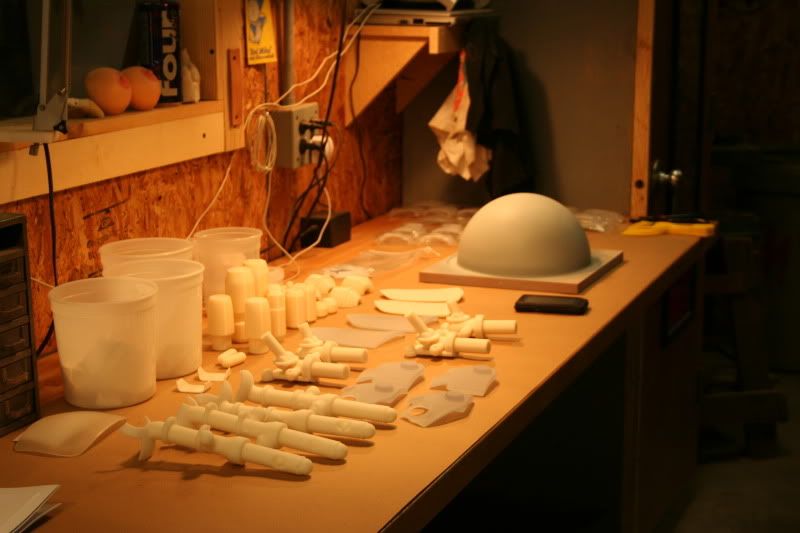
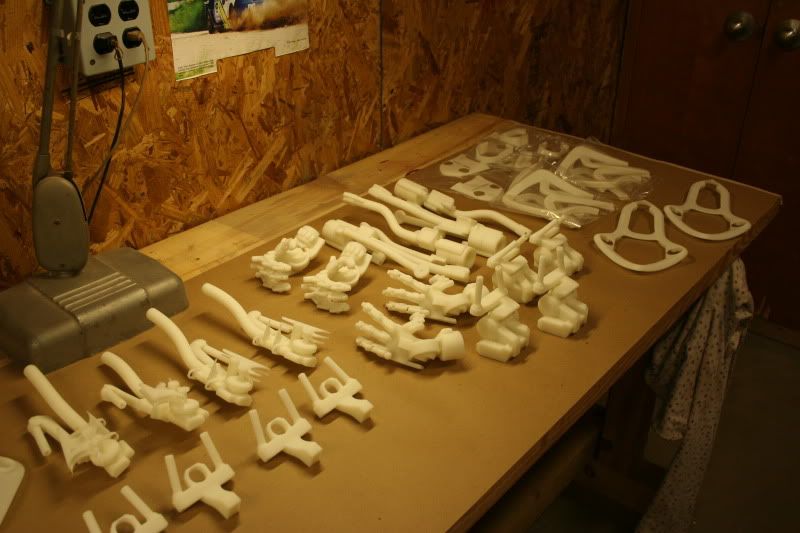
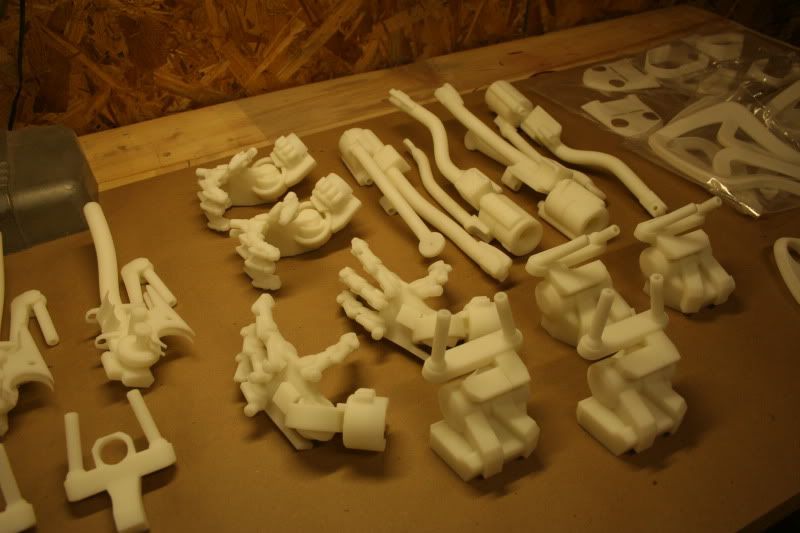
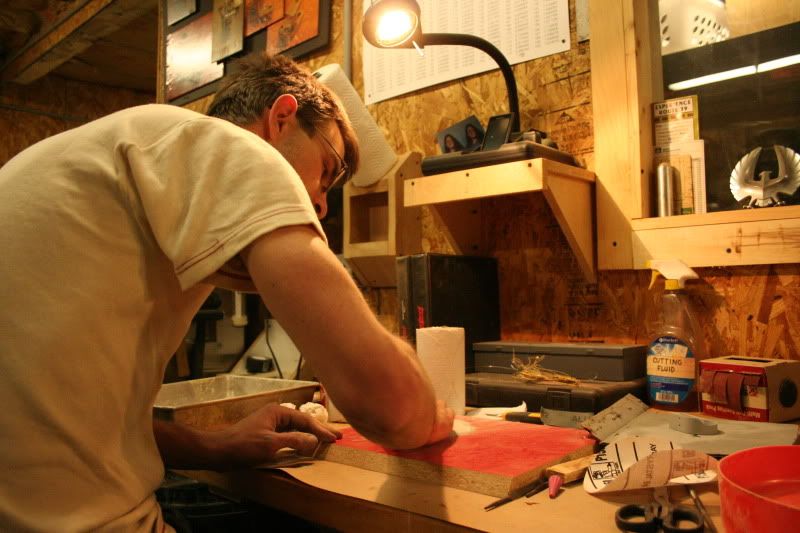
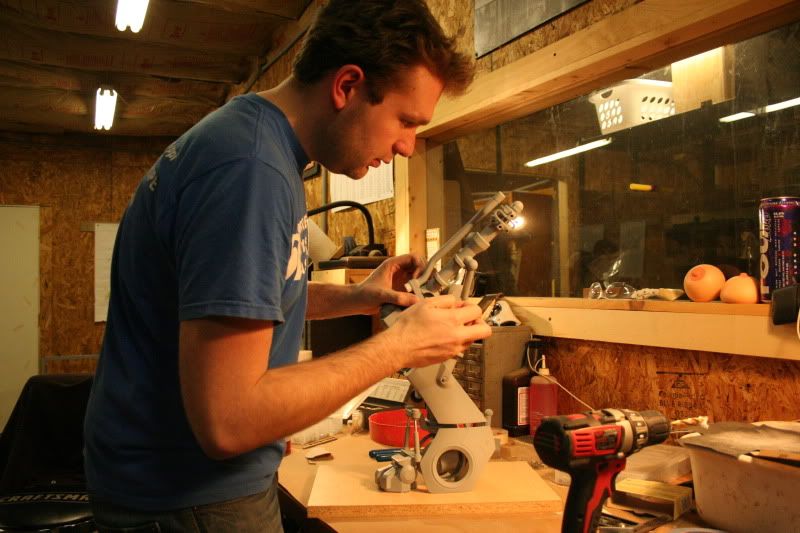
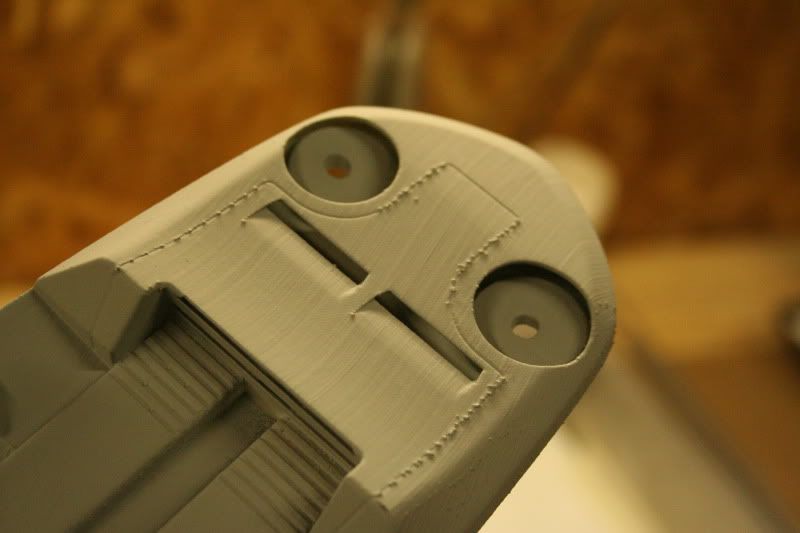
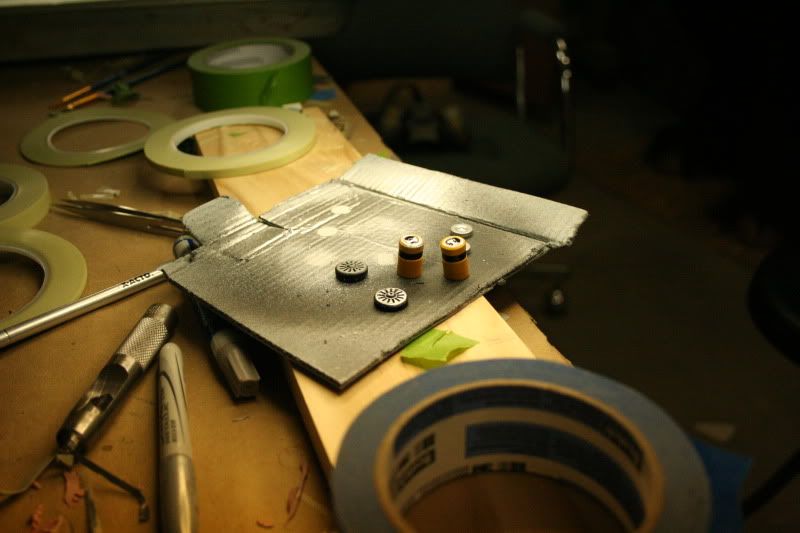
I know a lot of people think it's better to "scratch build" and frown on things like 3D printing and rapid prototyping in general, but let me tell you, there was plenty to do on this project.
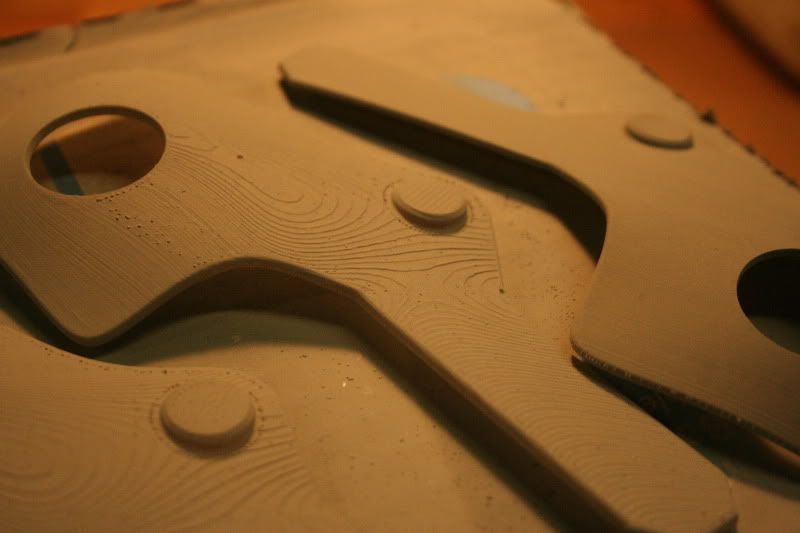
Here are some examples of some tougher parts with one layer of primer
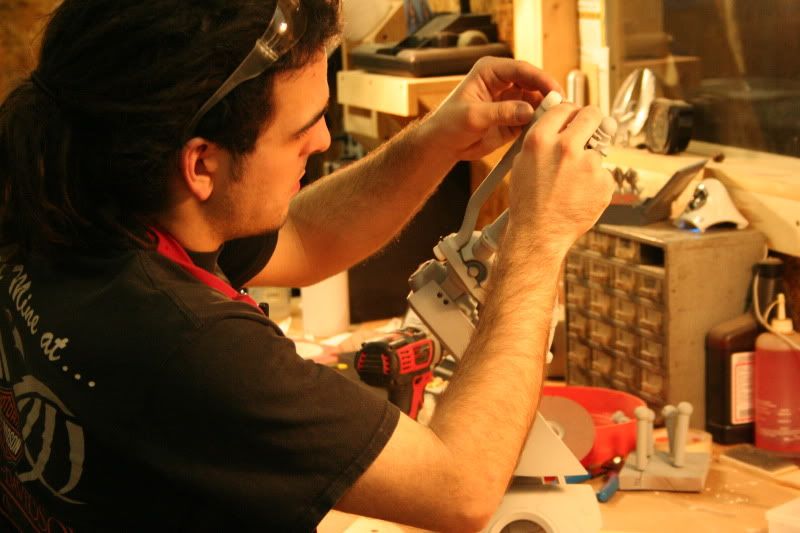
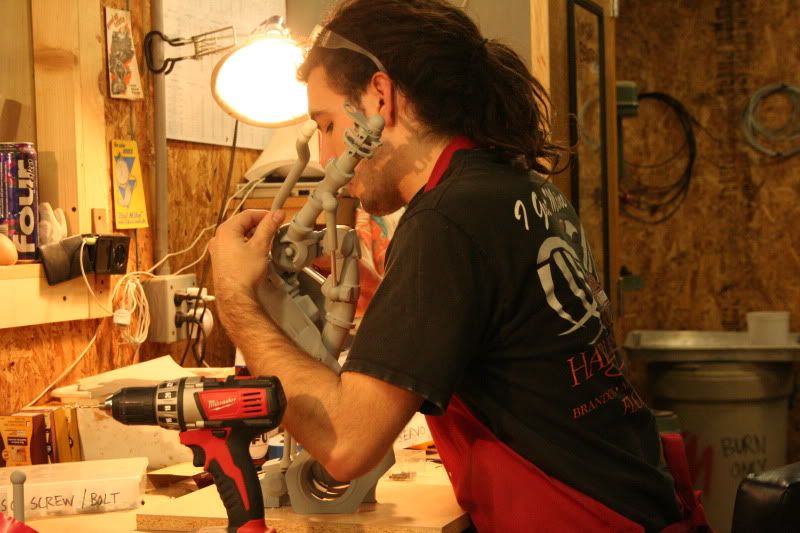
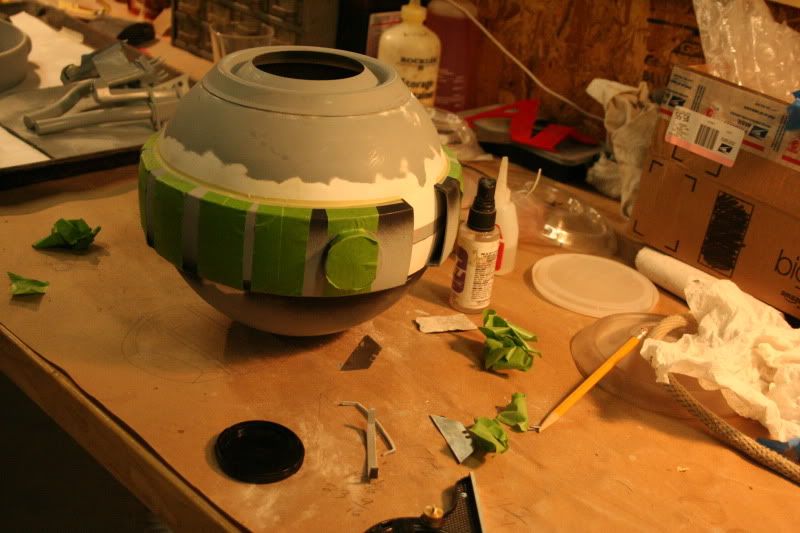
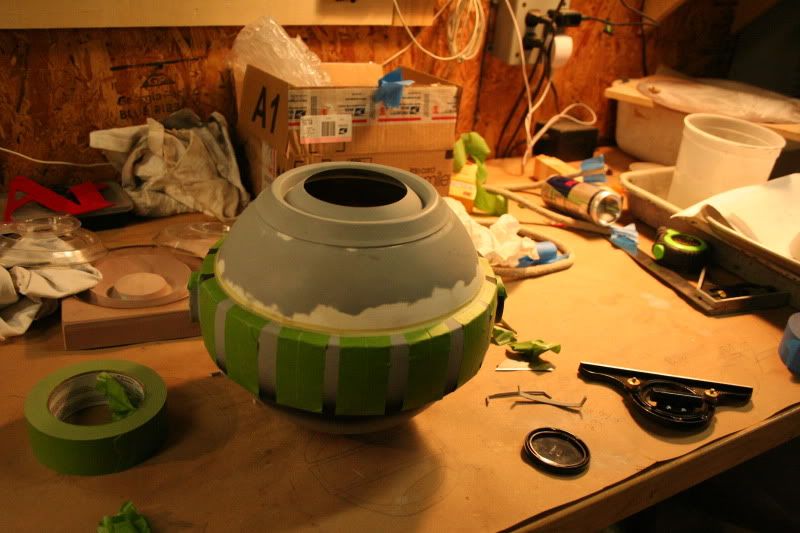
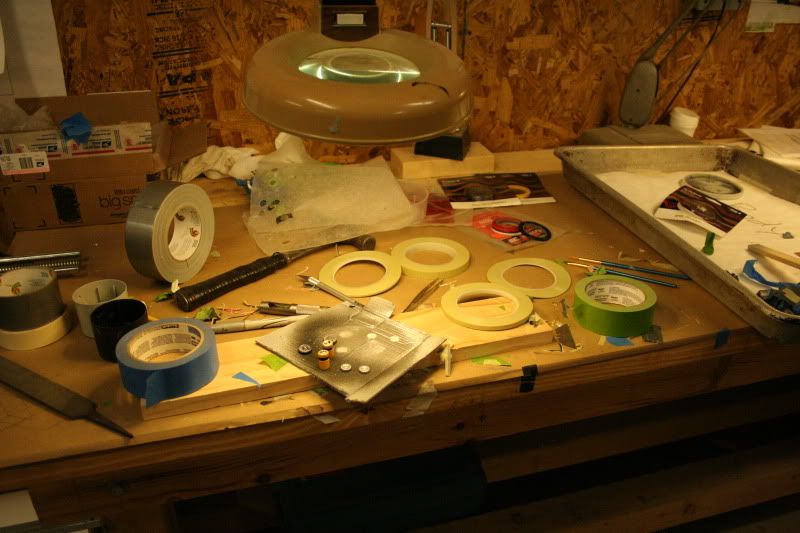
Anyway at this point it was time to start painting, taping, and painting. Some parts had as many as 5-6 sessions of paint/tape/paint to get all the different colors on them. We tried to organize the model into separate parts to help with painting but it wasn't possible in most cases.
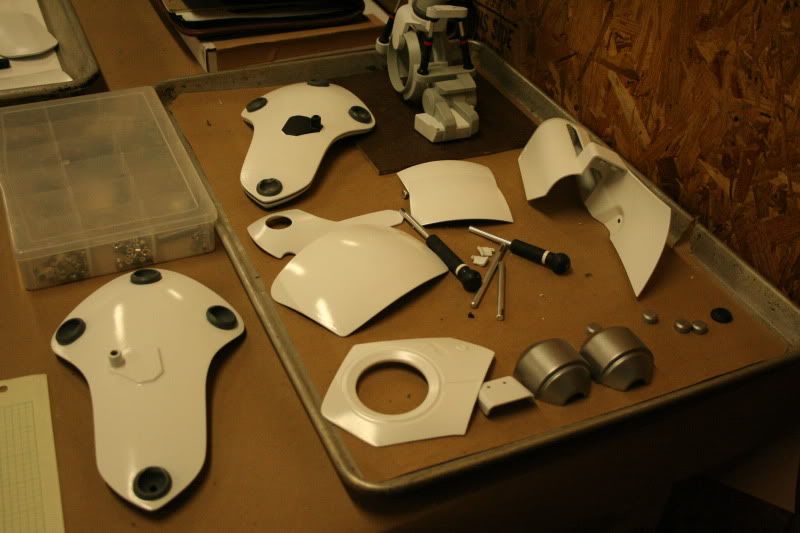
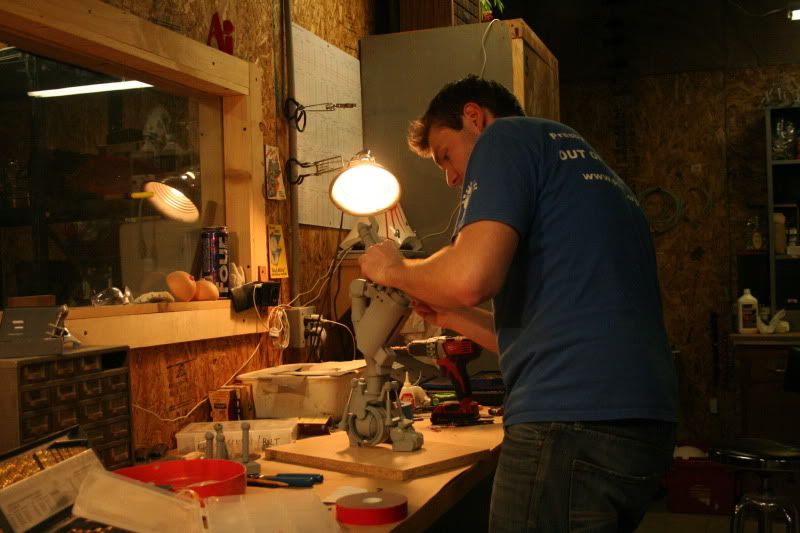
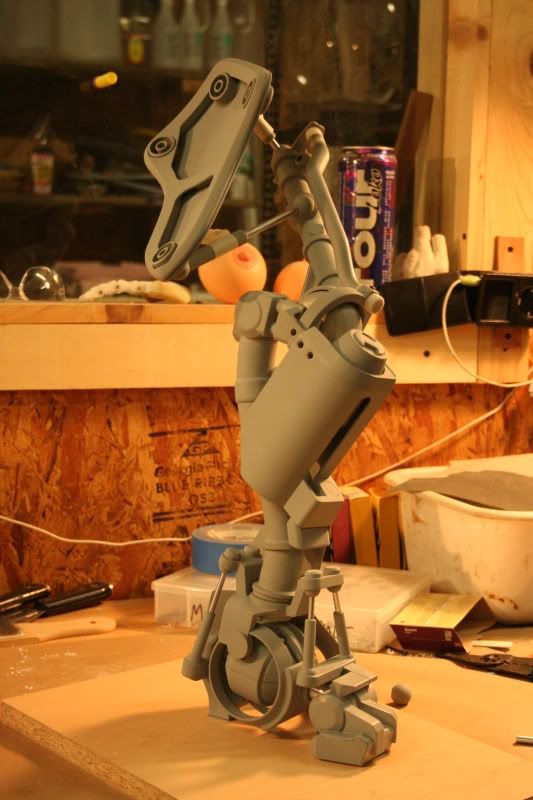
I got the body plates finished mocked it up
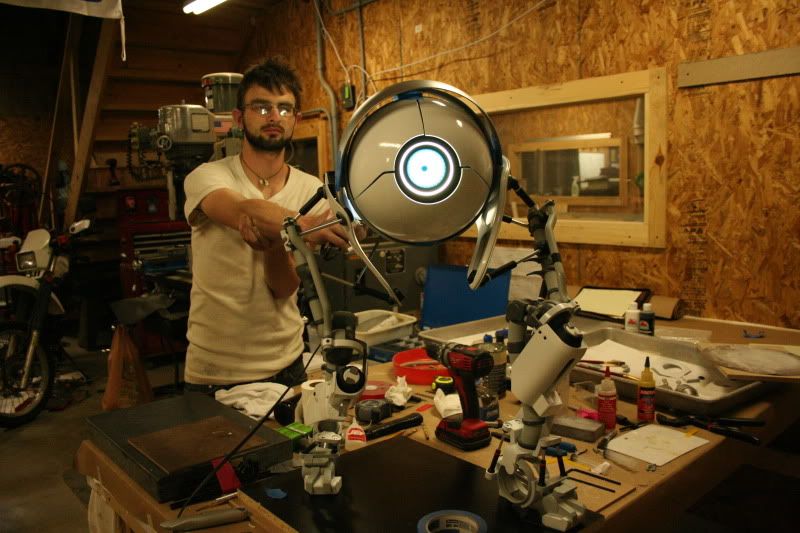
Then we got the legs mounted to a temporary base, assembled and put the body on top

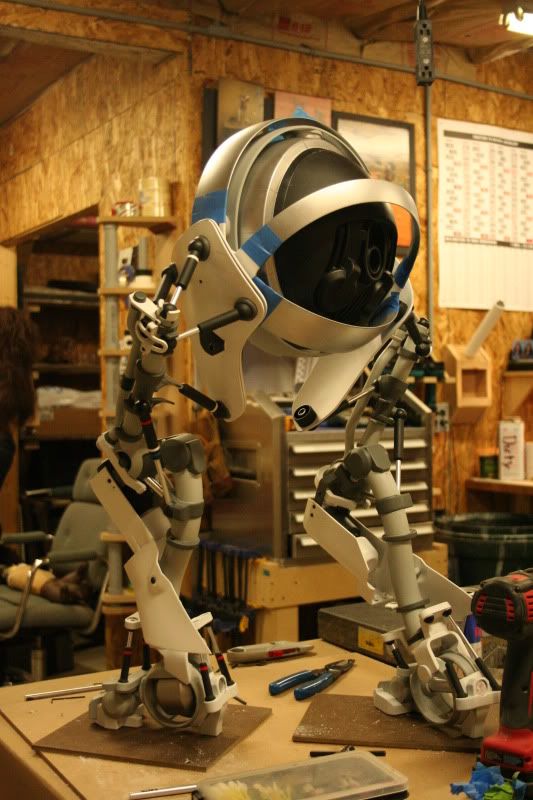
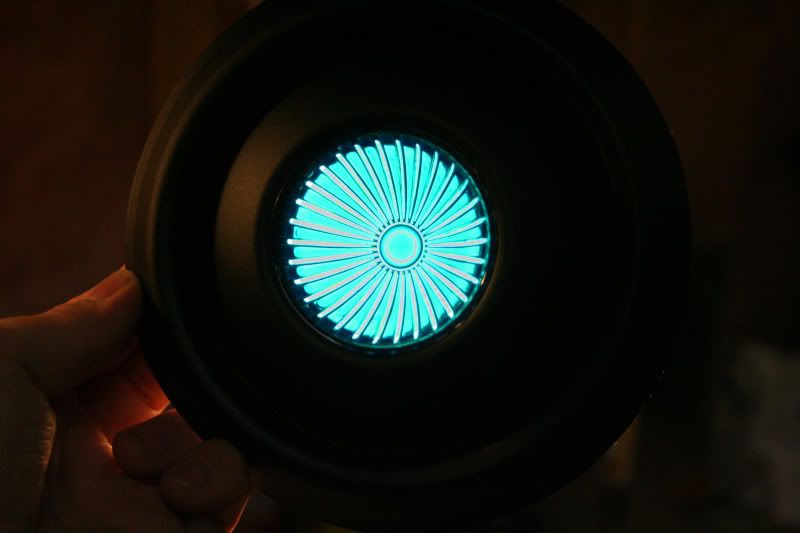
we quickly tested out the light for the eye, looks a lot better in person as I am not an expert photographer, alas.
I know a lot of people think it's better to "scratch build" and frown on things like 3D printing and rapid prototyping in general, but let me tell you, there was plenty to do on this project.
Here are some examples of some tougher parts with one layer of primer
Anyway at this point it was time to start painting, taping, and painting. Some parts had as many as 5-6 sessions of paint/tape/paint to get all the different colors on them. We tried to organize the model into separate parts to help with painting but it wasn't possible in most cases.
I got the body plates finished mocked it up
Then we got the legs mounted to a temporary base, assembled and put the body on top
we quickly tested out the light for the eye, looks a lot better in person as I am not an expert photographer, alas.
Re: 1/2 scale Atlas from Portal 2
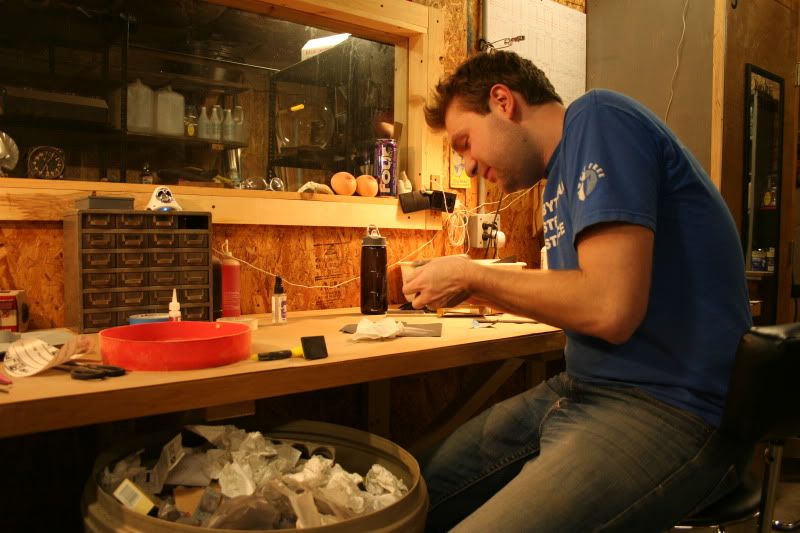
we had an intern for a few weeks who made short work of all the decals. We had him use the texture files and a micrometer to draw lines in Rhino, import them into Illustrator, and then create perfectly scaled .pdf files. Kinkos laser printed them onto Magic Touch water transfer paper for us, and we're almost ready to apply them.
This guy will also get a faux distressed paint job, as well as a custom base with design cues seen in the game. For right now, it's hell week wrapping him up to ship out Monday 6-13. Still have a ton to do!
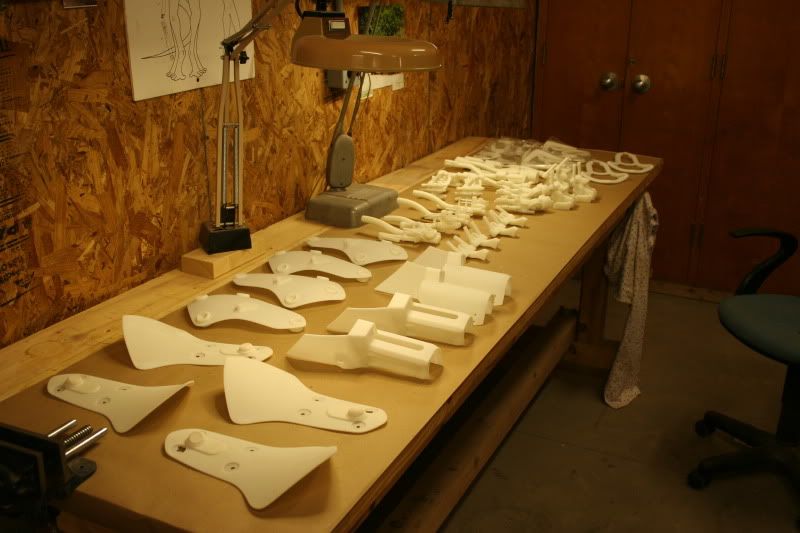
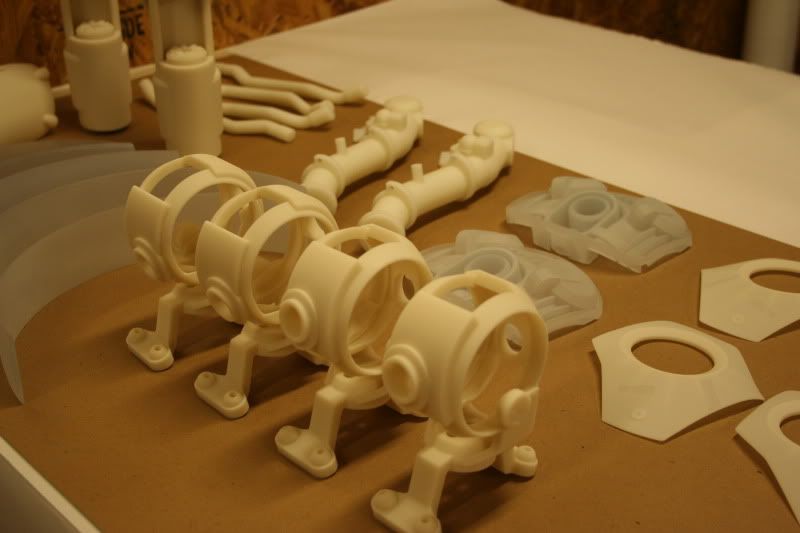
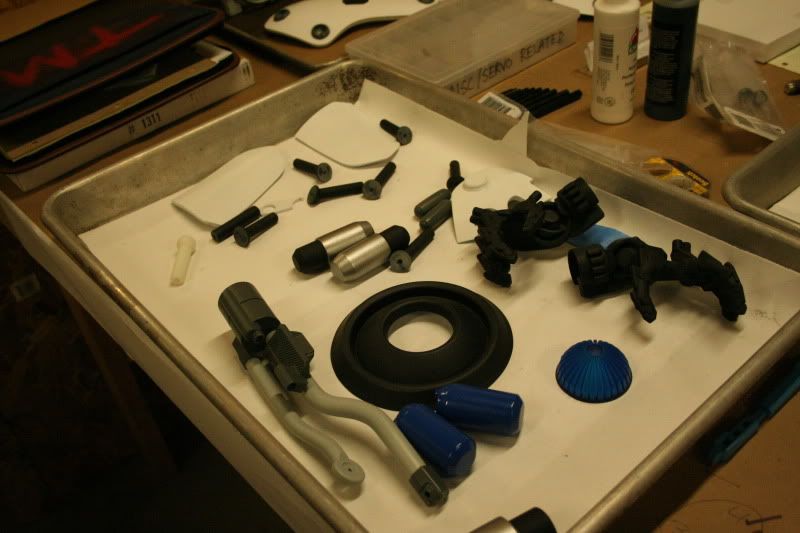
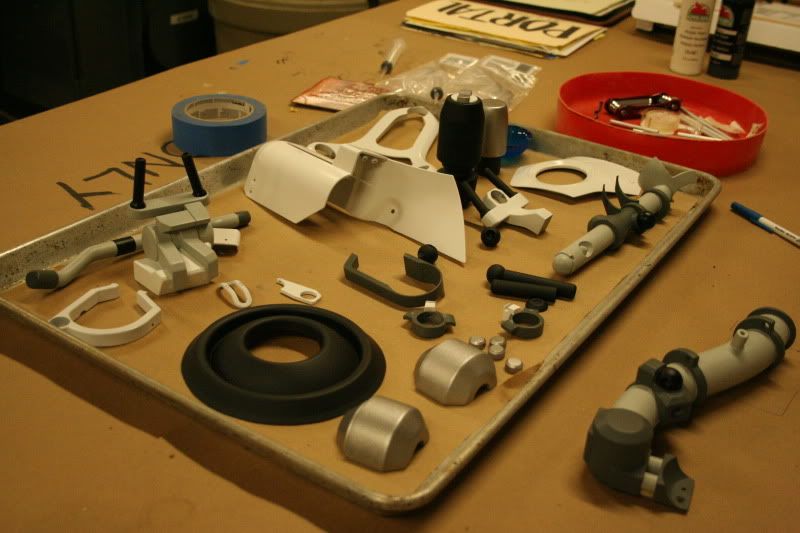
This is my favorite pic so far, there are 17 different pieces in this picture, not including any hardware (2-56 and 4-40)

we had an intern for a few weeks who made short work of all the decals. We had him use the texture files and a micrometer to draw lines in Rhino, import them into Illustrator, and then create perfectly scaled .pdf files. Kinkos laser printed them onto Magic Touch water transfer paper for us, and we're almost ready to apply them.
This guy will also get a faux distressed paint job, as well as a custom base with design cues seen in the game. For right now, it's hell week wrapping him up to ship out Monday 6-13. Still have a ton to do!
This is my favorite pic so far, there are 17 different pieces in this picture, not including any hardware (2-56 and 4-40)
Last edited:
Re: 1/2 scale Atlas from Portal 2
Thanks for the comliments! We haven't installed the lighting permanantly yet but it's just the printed iris, painted with frosting spray, with literally the dome from a touch light behind it, and a commercial outdoor LED array type bulb from LOWES. When we wrap this up ill have more detailed pics!
Thanks for the comliments! We haven't installed the lighting permanantly yet but it's just the printed iris, painted with frosting spray, with literally the dome from a touch light behind it, and a commercial outdoor LED array type bulb from LOWES. When we wrap this up ill have more detailed pics!
Phelyx
Active Member
Re: 1/2 scale Atlas from Portal 2
Really great looking work... And I think the only people who think everything should be scratch built and "frown upon" rapid prototyping and 3D printing are folks who don't work in it professionally. Any time-saving step that allows you to bypass what we call "monkey work" and proceed directly to the creative stuff is a fair move. That's what I love about CNC and 3D prototyping - it allows you to be creative for a larger percentage of the work time, and the result is this beautiful thing you've created. I love it.
Really great looking work... And I think the only people who think everything should be scratch built and "frown upon" rapid prototyping and 3D printing are folks who don't work in it professionally. Any time-saving step that allows you to bypass what we call "monkey work" and proceed directly to the creative stuff is a fair move. That's what I love about CNC and 3D prototyping - it allows you to be creative for a larger percentage of the work time, and the result is this beautiful thing you've created. I love it.
Re: 1/2 scale Atlas from Portal 2
Yea we are putting a lot of time and effort into matching the eye, it's something that's very difficult because it's like designing the lens for a headlight or other marker light on a car, it's not the bulb or source that you see, it's the lens with the light behind it, very tricky to match. The iris part has a little wall around the pupil area on the back, we modelled that in so that when we're ready we can fill it with black resin to create the pupil with smooth edges.
You really need to paint in some black on the eye lens so that it matches the in-game one. But still, I'm definitely enjoying this thread.
Yea we are putting a lot of time and effort into matching the eye, it's something that's very difficult because it's like designing the lens for a headlight or other marker light on a car, it's not the bulb or source that you see, it's the lens with the light behind it, very tricky to match. The iris part has a little wall around the pupil area on the back, we modelled that in so that when we're ready we can fill it with black resin to create the pupil with smooth edges.
CB2001
Master Member
Re: 1/2 scale Atlas from Portal 2
You're definitely in the right direction, for sure.
Yea we are putting a lot of time and effort into matching the eye, it's something that's very difficult because it's like designing the lens for a headlight or other marker light on a car, it's not the bulb or source that you see, it's the lens with the light behind it, very tricky to match. The iris part has a little wall around the pupil area on the back, we modelled that in so that when we're ready we can fill it with black resin to create the pupil with smooth edges.
You're definitely in the right direction, for sure.
Re: 1/2 scale Atlas from Portal 2
Thanks! You can see the little pupil reservoir walls in this pic
You're definitely in the right direction, for sure.
Thanks! You can see the little pupil reservoir walls in this pic
digger2307
Active Member
Re: 1/2 scale Atlas from Portal 2
this looks so amazing.
this looks so amazing.
Similar threads
- Replies
- 3
- Views
- 304
- Replies
- 319
- Views
- 16,689
- Replies
- 2
- Views
- 326