1:1 Millennium Falcon Cockpit Replica - Group Build

i've only just discovered this thread, and it's possible the greatest project i've ever seen!! looking forward to keeping up with it. Masterful work!

Hi Joe,

Welcome to the RPF! Thank you so much for the kind words. A lot of folks have spent a lot time and energy toward making this become a reality. I couldn't have done it without them! I hope you stay tuned - lots of good stuff on the way!

Thanks again! :)
 
Hi Gang,

Another quick morning update...

Finally finished painting all of these magnets for the panel lights. Sanded
20151021_170709_zpszr9ojh2l.jpg


1 coat
20151021_170827_zpshqneroob.jpg


20151021_171028_zpscmqtrwwq.jpg


I'm still debating whether to add a second coat. In my experience, the more coats of this paint that is applied you have a 50/50 shot at ruining the finish
20151021_212025_zpszlwem4hn.jpg


20151021_212038_zpst0htzjro.jpg


This guy will be back lit as well
20151021_212044_zpsnvpa1qxn.jpg


More to follow so stay tuned!
 
Hi Gang,

Early morning update! I was all over the map last night working a little here, a little there...

Started off with one of the two door frames - adding lots of filler
20151022_164600_zpsaptz9yge.jpg


20151022_164604_zps2kxspxtt.jpg


20151022_164608_zpswsdttsaz.jpg


20151022_164611_zpsub3rgdld.jpg


While the filler dried I prepped the door for it's 3.5" addition - I laser cut 4 new door pieces. I'll remove some of the original trim and cover piece and overlay on top of the existing frame. This should minimize any unevenness - I hope!
20151022_165000_zpswwvloof6.jpg


20151022_165004_zpswgke9thd.jpg


Cut and removed the trim
20151022_170725_zps8cgiapwi.jpg


Sanded
20151022_185248_zpsm2xnkbds.jpg


Here you can see how much door I need to add - I now need to remove some of the main panel itself
20151022_180246_zpsy1wlthdr.jpg


I then weathered this nose panel greeblie
20151022_182029_zpssrnf7rkc.jpg


20151022_182040_zpskgwficph.jpg


20151022_182100_zpslrg9cz7g.jpg


I then turned my attention to the new "auto pilot clutch"
20151022_182156_zps6szom9ey.jpg


I adhered the arm to the base
20151022_182203_zpsq3zqxfdm.jpg


Added a final layer of primer
20151022_182339_zps8kj0dcgk.jpg


20151022_182350_zpsw4cz3ump.jpg


20151022_182401_zpsjql5ueiw.jpg


After that dried I added flat black
20151022_185030_zpskr2z6s1f.jpg


20151022_185040_zpsjhmkbrpz.jpg


20151022_185052_zpsptigzaib.jpg


Making sure everything still fits
20151022_214657_zpslmdzkmjk.jpg


Hi, Winky!
20151022_214740_zpsjnve7kjo.jpg


When I pulled the old greeblie off I removed some paint - touch up work here
20151022_220054_zpsiqo5ikfx.jpg


Against EVERY fiber of me being... I added another layer of the translucent paint to the panel lenses... UGH I KNEW IT! It appears to be another fail. I'll and see how they are this afternoon
20151022_182755_zpsw1ornbfg.jpg


The blue one turned out really nice
20151022_214328_zpsk6cjcn6t.jpg


Previous ones I had painted are now adhered and in place on this piece of wall art
20151022_214149_zpsfxhty68f.jpg


I finally weathered the armrest levers. I'm really liking / enjoying how these turned out. Despite being a bit small there are SO MANY things to do - before weathering
20151022_221325_zpsh82welwj.jpg


After - first pass
20151022_221330_zpsnuqkik7k.jpg


Before
20151022_222129_zpsuvs6qd8o.jpg


After
20151022_222134_zpss7ozlngs.jpg


Side by side comparo
20151022_222141_zpsv8dldeps.jpg


And done
20151022_223316_zps5vz0oyqm.jpg


20151022_223341_zpsamlv8l3t.jpg


20151022_223349_zpsuytq2nd9.jpg


Big push this weekend! Lots of greeblies, door frame, console, etc

Stay Tuned!

EDIT: OK so curiosity got the better of me!

They didn't turn out as bad as I thought but they're DEF not as smooth as they should be. Next - ONE coat of paint only!

Tiny little bumps
20151023_053851_zpsan51frbc.jpg


UGH... Need to order more magnets
20151023_053858_zpszkpwwxha.jpg
 
Last edited:
Hi Gang,

UPDATE! This is not your usual update. As many of may know fellow RPFer IzzyMel has been putting together his 1/6th version of the Falcon cockpit. We'll he and I have been working behind the scenes and we've finally got something to show!

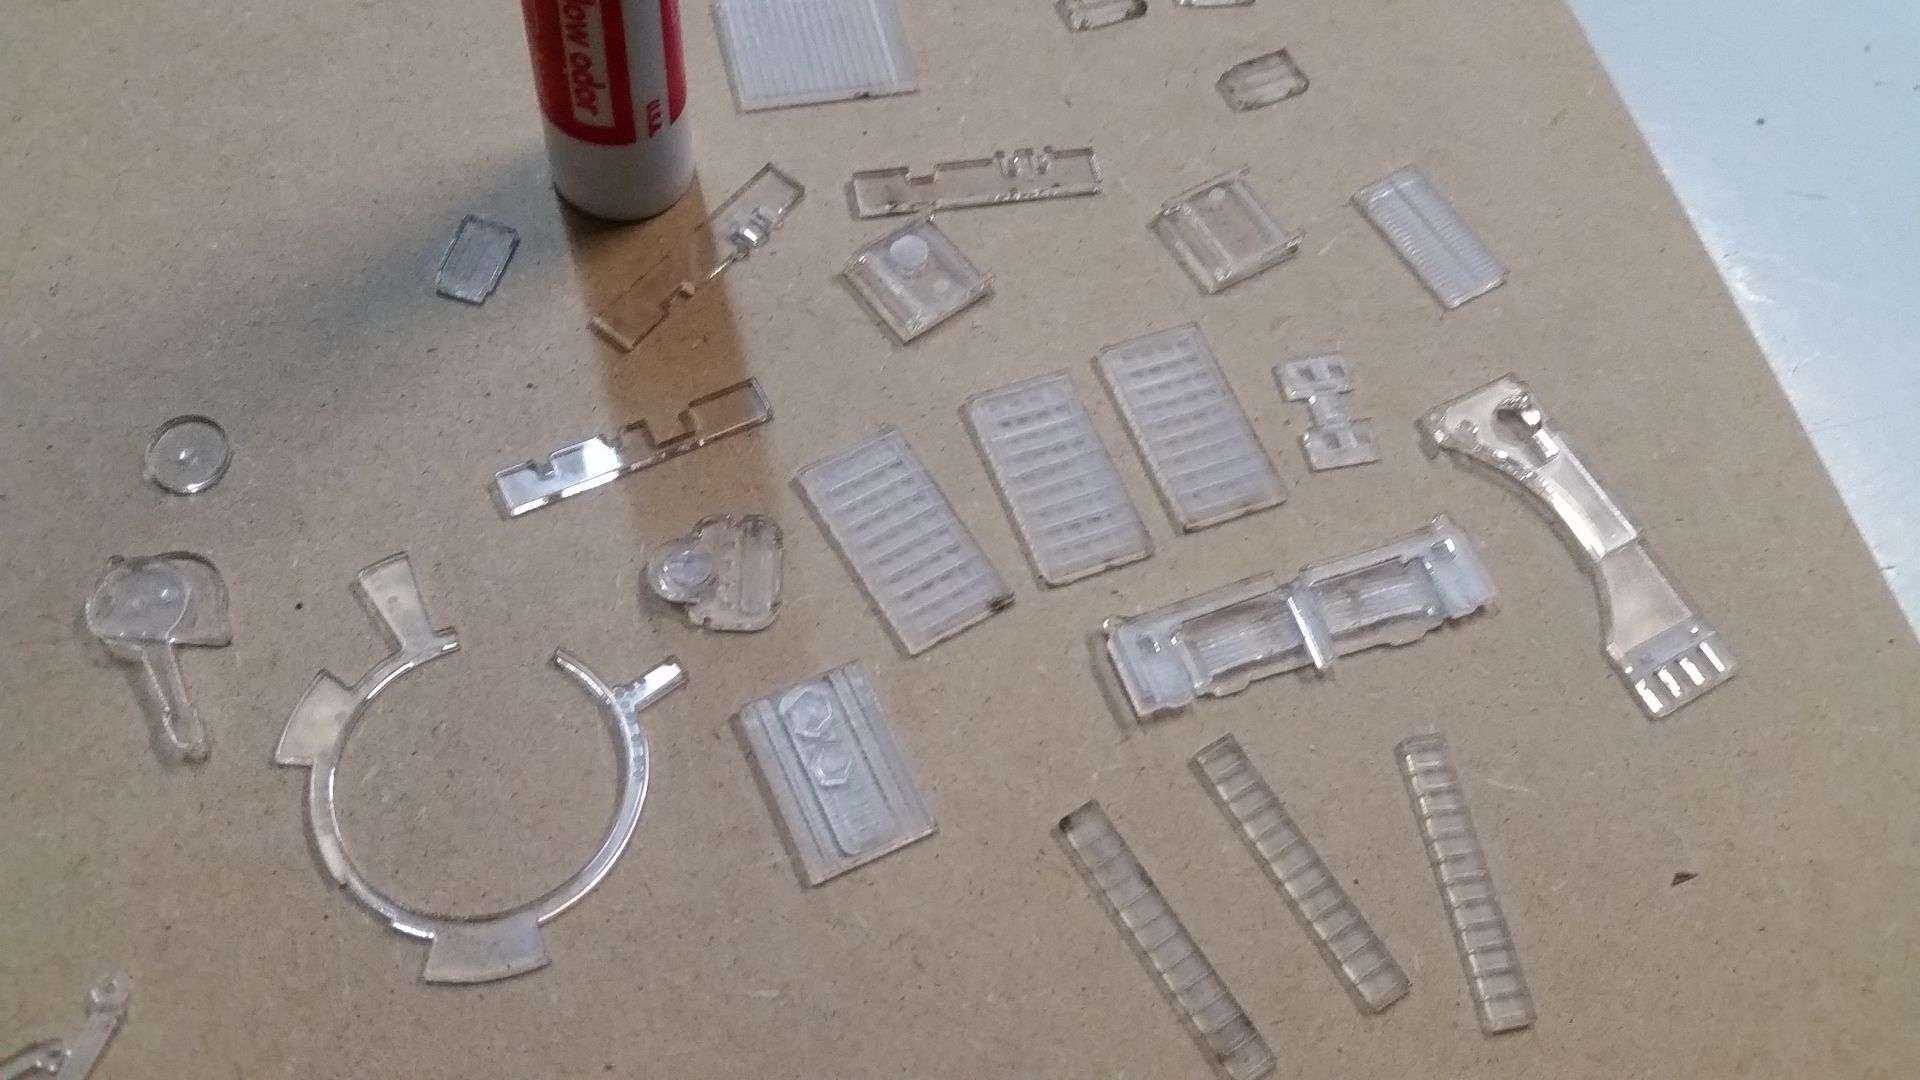
I've been taking my greeblie files and mod'ing them to successfully cut on the laser cutter at 1/6th scale. After a few failed attempts I was FINALLY able to knock a bunch of greeblies. Just to give you an idea of how small these greeblies are - the entire footprint on the cut was 5" x 12"! Enjoy!

Standard Dry Erase Marker for scale
20151025_114042_zpsovsopneo.jpg


20151025_113138_zpsavl003bu.jpg


I brought them home, cleaned them up and got them ready for some primer!
20151025_142819_zpsdpv5fftg.jpg


20151025_142825_zpsjs04iceb.jpg


I adhered the multi-layered greeblies together
20151025_142834_zps1niwnwma.jpg


20151025_142838_zpstltkwkrv.jpg


20151025_143829-1_zpsuegjgjqh.jpg


Some required a little more work. I broke out the lighter and carefully bent the parts to shape
20151025_142850_zps5wliyn5w.jpg


20151025_142920-1_zpst0cregbz.jpg


20151025_143300-1_zpslleiekjl.jpg


20151025_143452_zpsrepaaba4.jpg


20151025_143457_zpsqqktih8i.jpg


20151025_143834_zps7y1yuxcs.jpg


Primer! Several of them need some light surface sanding to knock down the small lip created by the laser cutter. On some it looks the part
20151025_144855_zpsbe7x41ey.jpg


20151025_144908_zpsvmsiaszq.jpg


20151025_144912_zpsle6vjizc.jpg


20151025_144916_zpsyjybyzyv.jpg


We're also working on decals of the cockpit - so the vertical gauges might be back lit. I'll leave that to Iz!
20151025_144921_zps0uttivde.jpg


The dreaded mystery greeblie and the 4 little greeblies that go around radar scope
20151025_144928_zpsvsvl0zwd.jpg


A teeny tiny Garrard trim piece
20151025_144940_zpsrszwdvlg.jpg


How teeny tiny?
20151025_154058_zpstgfkebix.jpg


20151025_154210_zpsgiifac6c.jpg


20151025_154222_zpshf8bunro.jpg


20151025_154230_zps8pc7sgoo.jpg


Yup... even the I Bolts!
20151025_154705_zpspqtwqa6q.jpg


Dont Sneeze!
20151025_154720_zpso9od32bg.jpg


A little sanding
20151025_154744_zpsv1uf5ho6.jpg


Hey Iz! Enjoy - they are on their way! OK... I gotta get back to work!

To see his build - click the link below! :)
http://www.therpf.com/showthread.php?t=241516&highlight=1/6th+Scale+Cockpit

More to Follow!

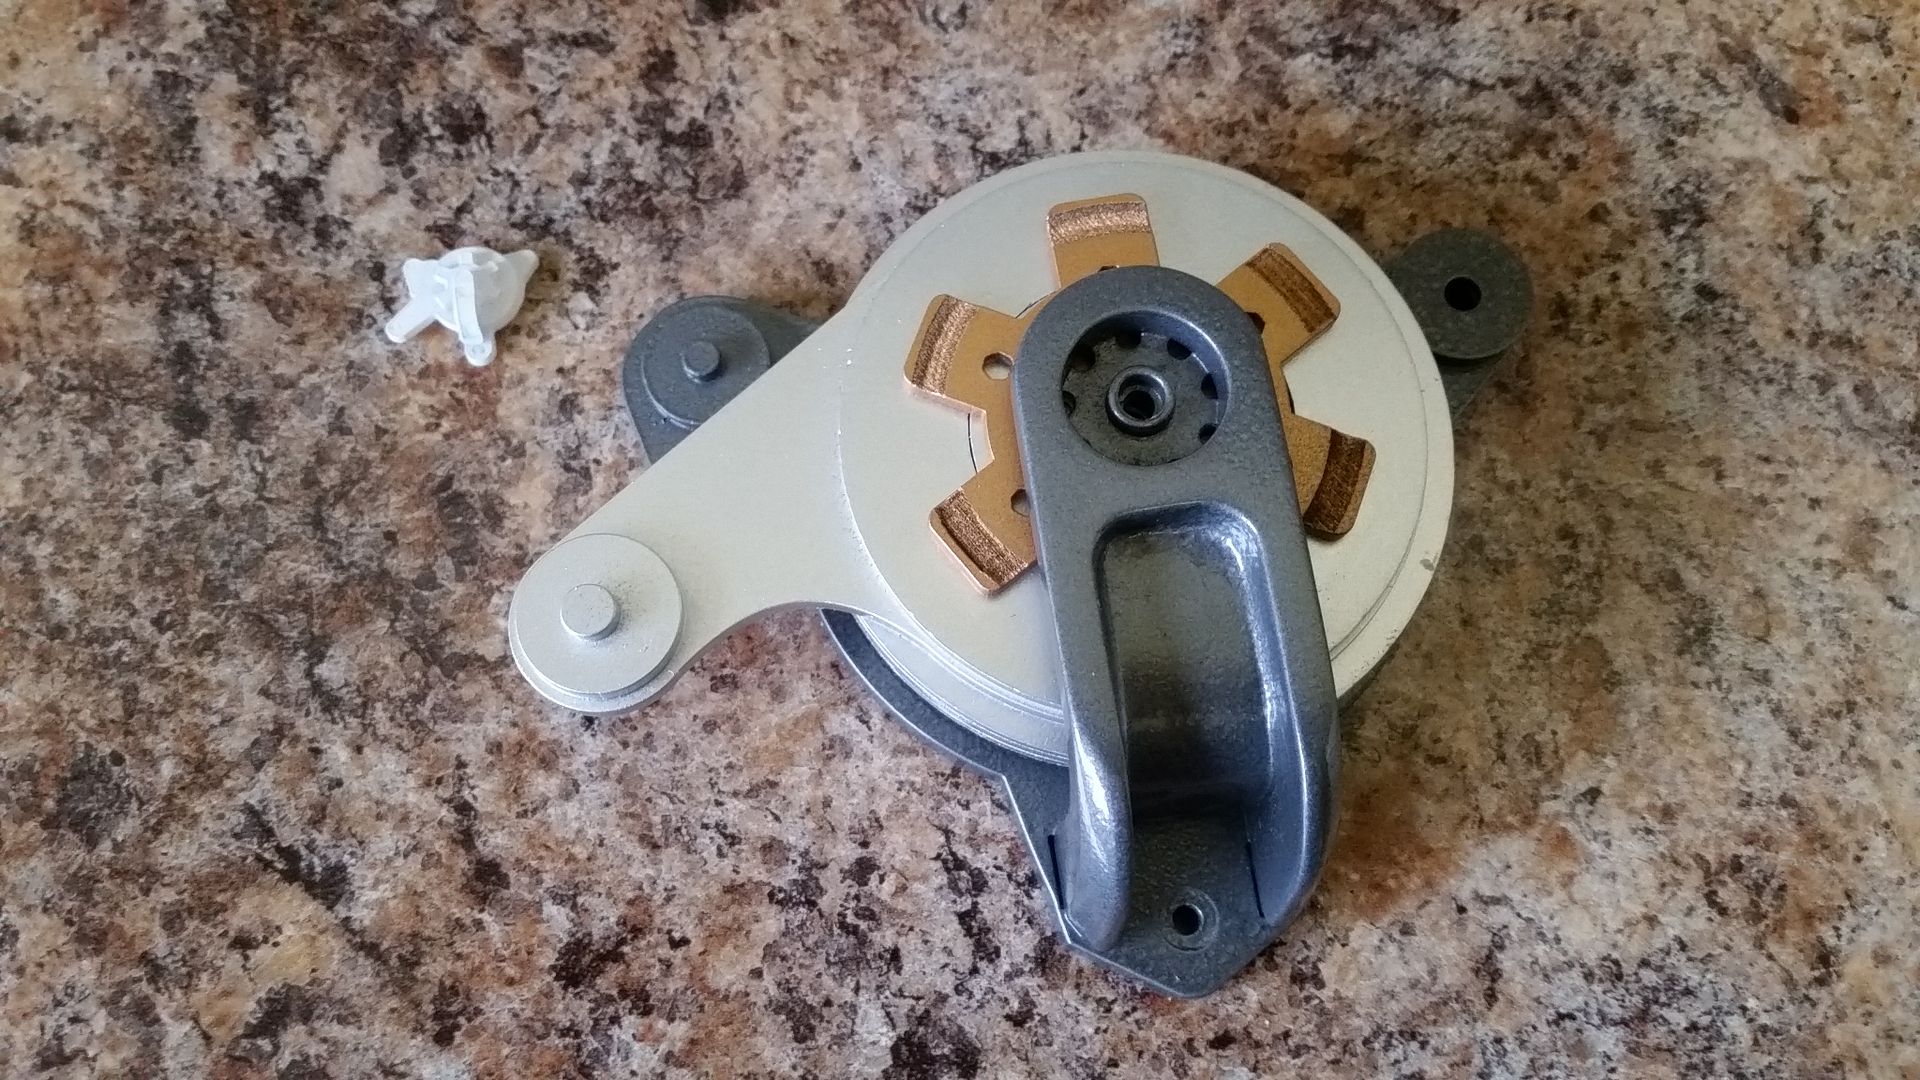
EDIT: I forgot to add this pic of the 1/6th clutch next to the 1:1 scale version :)
20151025_154338_zpsshvvhewv.jpg
 
Last edited:
Great update as usual Sofa...I showed the your pics to the GF and ask the following question: who's crazier; me building the 2001 Space Station, or this guy here, building the MF cockpit 1:1 scale? You get the mention "Crazy" Sofa:D...but, as far as I'm concerned, you're the coolest one!
 
Hi Gang,

Quick Morning Update! As you already know I did a lot of work on the 1/6th Scale cockpit over the weekend but I was able to knock out a few things for the 1:1 scale as well. :)

The weekend started out with the laser cutter. While that was going on Jessie and I got the second door frame finished up
20151024_092418_zpskycn2laq.jpg


20151024_092422_zpsfd0ckih8.jpg


Still lots of sanding and priming to do - plus I have to figure out how it will all go together
20151024_143256_zpsdabcycia.jpg


I then worked on the auto pilot clutch. I'm really happy with how this is turning out. It's about 95% finished
20151024_145849_zps3vyari6v.jpg


20151024_145903_zps9spatlhn.jpg


20151024_162432_zpsicxut3gh.jpg


20151024_162442_zpslurftmyd.jpg


I cut a new top piece. I want to add real screws to the top so I drilled holes - painted black
20151024_171221_zpsnhqffo5d.jpg


Gold
20151024_183551_zpswkamltxh.jpg


Slowly coming together. I def need to spray some satin clear and bring down that high gloss
20151024_185637_zpsjyt8i0dg.jpg


20151024_185647_zpsio3uelpq.jpg


20151024_185656_zps9ltuu6oa.jpg


I decided to cut a new center piece - painted black
20151025_152718_zpsfzfphrcm.jpg


And the two silver pieces that sandwich together
20151025_152724_zpsfyb7ydqw.jpg


Black
20151025_155123_zpsdxwsmp3e.jpg


Silver
20151025_164127_zpslmabsoxk.jpg


This is how it looks right now... Unfortunately, the bolts are a bit to high and wont fit around the arm
20151025_180741_zpsydvfwfvw.jpg


20151025_180753_zpsxerbwtah.jpg


Top with bolts
20151025_194955_zps1ieixdny.jpg


20151025_200528_zpsx2tmjwcl.jpg


I'll figure it out
20151025_200719_zps1oykag2p.jpg


Jumping back to all the laser cutting... we had a few errors. Note the LONG horizontal line that shoots off to the left - not good!
20151025_100452_zpsygpmw2fy.jpg


ugh...
20151025_100458_zpswa7v6gee.jpg


I cut a new "cup" greeblie for the canopy boxes
20151025_104445_zpsdrumlxpb.jpg


I cut and applied these two new greeblies
20151024_160847_zpsy4ryaovs.jpg


This guy is almost finished
20151024_171215_zpsqjyhj4te.jpg


I am so excited to announce... I designed another of these panels! #5!
20151024_151805_zpsrcz2q4t6.jpg


20151025_155145_zpsaqpsldz1.jpg


I hate this thing
20151025_165801_zpszna6d86l.jpg


FINALLY!
20151025_195006_zpsyjjw6sdx.jpg


There are 6 rockers on this panel - 3 inside the panel greeblie and 3 in various places.
20151025_195017_zpshi9gpmw9.jpg


I cut this mounting template for the armrest levers
20151025_115335_zpsshheksvc.jpg


20151025_155705_zpsgpxyjz7k.jpg


20151025_160410_zps0anxvoxc.jpg


20151025_175316_zpsym0loy8i.jpg


I cut these with the idea that they would be the LED housing for the instrument panel LEDs
20151025_104408_zpsh7dcz831.jpg


I laser cut another template that allowed me to cut all the mounting and LED holes in the instrument panel
20151025_162616_zpsqcbllens.jpg


I removed the cradle and realized we had a slight problem... The instrument panel was not CNCd to accept most of the LEDs. This was an oversight but nothing that can't be fixed. This entire area sits within the center console and we have lots of room to play
20151025_163732_zps8uabiygt.jpg


20151025_164140_zps2huf2esi.jpg


Good area
20151025_164745_zpspzirhsic.jpg


The LED wires will have to be fed up through the entire instrument panel - what you're looking is the actual bottom of the exterior
20151025_164747_zpsv0ggmunv.jpg


No to be discouraged I moved forward. The LED panel in its final spot
20151025_175312_zpshb4cllzi.jpg


This is how it will look when lit and with the smoked acrylic cover
20151025_175338_zpsfoo1rgma.jpg


Its interesting how the smoked acrylic makes the white acrylic buttons appear blue - going to look so cool when it's all wired
20151025_175344_zpsmddbozir.jpg


Finally, I cut these mystery pieces
20151025_104457_zps7nwbtxzl.jpg


20151025_134812_zps08qnb67j.jpg


I'm not saying what this is just yet. Some of you may see it. ;)
20151025_134825_zpsoenwbh75.jpg


20151025_134838_zpstvhj0qzv.jpg


Routed the base
20151025_151938_zpsxep2hjd6.jpg


And added lots of filler
20151025_152732_zpsrzxatxph.jpg


I didn't get around to finishing the door... that will be this week.

There's more to come, so stay tuned!
 
Last edited:
Great update as usual Sofa...I showed the your pics to the GF and ask the following question: who's crazier; me building the 2001 Space Station, or this guy here, building the MF cockpit 1:1 scale? You get the mention "Crazy" Sofa:D...but, as far as I'm concerned, you're the coolest one!

LOL! I'll take that mention! :) And thanks for the kind words - as always. Speaking of 01 SS - how's she coming along?
 
Whenever i need greeblie inspiration my friend, all i have to do is drop by here for a look. Just unreal!

Thank you, my friend! As much as I love this project I wish I had the freedom you have with your build! I would love to be able to do what you're doing and just have fun with it. Dont get me wrong, I'm having a blast, but I'm so restricted to making everything screen accurate.

The things we do for our craft, right? ;)
 
Thank you, my friend! As much as I love this project I wish I had the freedom you have with your build! I would love to be able to do what you're doing and just have fun with it. Dont get me wrong, I'm having a blast, but I'm so restricted to making everything screen accurate.

The things we do for our craft, right? ;)

Oh gimme a break... I've seen you divert from the accuracy many many times... you just don't think we notice but I got my eyes on you bub!! LOL:)
 
Hi Gang,

UPDATE! This is not your usual update. As many of may know fellow RPFer IzzyMel has been putting together his 1/6th version of the Falcon cockpit. We'll he and I have been working behind the scenes and we've finally got something to show!

I've been taking my greeblie files and mod'ing them to successfully cut on the laser cutter at 1/6th scale. After a few failed attempts I was FINALLY able to knock a bunch of greeblies. Just to give you an idea of how small these greeblies are - the entire footprint on the cut was 5" x 12"! Enjoy!

Standard Dry Erase Marker for scale
http://i778.photobucket.com/albums/...kpit/2015/Oct/20151025_114042_zpsovsopneo.jpg

http://i778.photobucket.com/albums/...kpit/2015/Oct/20151025_113138_zpsavl003bu.jpg

I brought them home, cleaned them up and got them ready for some primer!
http://i778.photobucket.com/albums/...kpit/2015/Oct/20151025_142819_zpsdpv5fftg.jpg

http://i778.photobucket.com/albums/...kpit/2015/Oct/20151025_142825_zpsjs04iceb.jpg

I adhered the multi-layered greeblies together
http://i778.photobucket.com/albums/...kpit/2015/Oct/20151025_142834_zps1niwnwma.jpg

http://i778.photobucket.com/albums/...kpit/2015/Oct/20151025_142838_zpstltkwkrv.jpg

http://i778.photobucket.com/albums/...it/2015/Oct/20151025_143829-1_zpsuegjgjqh.jpg

Some required a little more work. I broke out the lighter and carefully bent the parts to shape
http://i778.photobucket.com/albums/...kpit/2015/Oct/20151025_142850_zps5wliyn5w.jpg

http://i778.photobucket.com/albums/...it/2015/Oct/20151025_142920-1_zpst0cregbz.jpg

http://i778.photobucket.com/albums/...it/2015/Oct/20151025_143300-1_zpslleiekjl.jpg

http://i778.photobucket.com/albums/...kpit/2015/Oct/20151025_143452_zpsrepaaba4.jpg

http://i778.photobucket.com/albums/...kpit/2015/Oct/20151025_143457_zpsqqktih8i.jpg

http://i778.photobucket.com/albums/...kpit/2015/Oct/20151025_143834_zps7y1yuxcs.jpg

Primer! Several of them need some light surface sanding to knock down the small lip created by the laser cutter. On some it looks the part
http://i778.photobucket.com/albums/...kpit/2015/Oct/20151025_144855_zpsbe7x41ey.jpg

http://i778.photobucket.com/albums/...kpit/2015/Oct/20151025_144908_zpsvmsiaszq.jpg

http://i778.photobucket.com/albums/...kpit/2015/Oct/20151025_144912_zpsle6vjizc.jpg

http://i778.photobucket.com/albums/...kpit/2015/Oct/20151025_144916_zpsyjybyzyv.jpg

We're also working on decals of the cockpit - so the vertical gauges might be back lit. I'll leave that to Iz!
http://i778.photobucket.com/albums/...kpit/2015/Oct/20151025_144921_zps0uttivde.jpg

The dreaded mystery greeblie and the 4 little greeblies that go around radar scope
http://i778.photobucket.com/albums/...kpit/2015/Oct/20151025_144928_zpsvsvl0zwd.jpg

A teeny tiny Garrard trim piece
http://i778.photobucket.com/albums/...kpit/2015/Oct/20151025_144940_zpsrszwdvlg.jpg

How teeny tiny?
http://i778.photobucket.com/albums/...kpit/2015/Oct/20151025_154058_zpstgfkebix.jpg

http://i778.photobucket.com/albums/...kpit/2015/Oct/20151025_154210_zpsgiifac6c.jpg

http://i778.photobucket.com/albums/...kpit/2015/Oct/20151025_154222_zpshf8bunro.jpg

http://i778.photobucket.com/albums/...kpit/2015/Oct/20151025_154230_zps8pc7sgoo.jpg

Yup... even the I Bolts!
http://i778.photobucket.com/albums/...kpit/2015/Oct/20151025_154705_zpspqtwqa6q.jpg

Dont Sneeze!
http://i778.photobucket.com/albums/...kpit/2015/Oct/20151025_154720_zpso9od32bg.jpg

A little sanding
http://i778.photobucket.com/albums/...kpit/2015/Oct/20151025_154744_zpsv1uf5ho6.jpg

Hey Iz! Enjoy - they are on their way! OK... I gotta get back to work!

To see his build - click the link below! :)
http://www.therpf.com/showthread.php?t=241516&highlight=1/6th+Scale+Cockpit

More to Follow!

EDIT: I forgot to add this pic of the 1/6th clutch next to the 1:1 scale version :)
http://i778.photobucket.com/albums/...kpit/2015/Oct/20151025_154338_zpsshvvhewv.jpg

Thanks SofaKing0. Can't wait. Looking forward to getting the parts.:D:D:D
 
Back
Top