1:1 Millennium Falcon Cockpit Replica - Group Build

Loving this as always.
I don't want to be a downer but the signatures would really bother me if I were to ever see this in person.
I would want to fully imagine myself in the Falcon cockpit and those signatures will surely be joined by more in the future until it's like the bathroom wall at a bar.
I guess it's just a matter of taste between different types of fans. For me nothing is worse than seeing a beautiful replica of a Vader or Boba Fett helmet with a huge signature of a celebrity across it.
Is there any chance you could have them somewhere else? Like on the outside maybe?

Hi DJ,

Good News: Chris Lee and I had a quick chat regarding the current center console. The reason for all the changes and my saving the signatures is because this particular console has become a "standalone console" - it will not be part of the cockpit. It will be a separate piece with seats and working lights and sound. This is where we will get people to sign.

ConsoleRender01_zpsb61a6d23.jpg


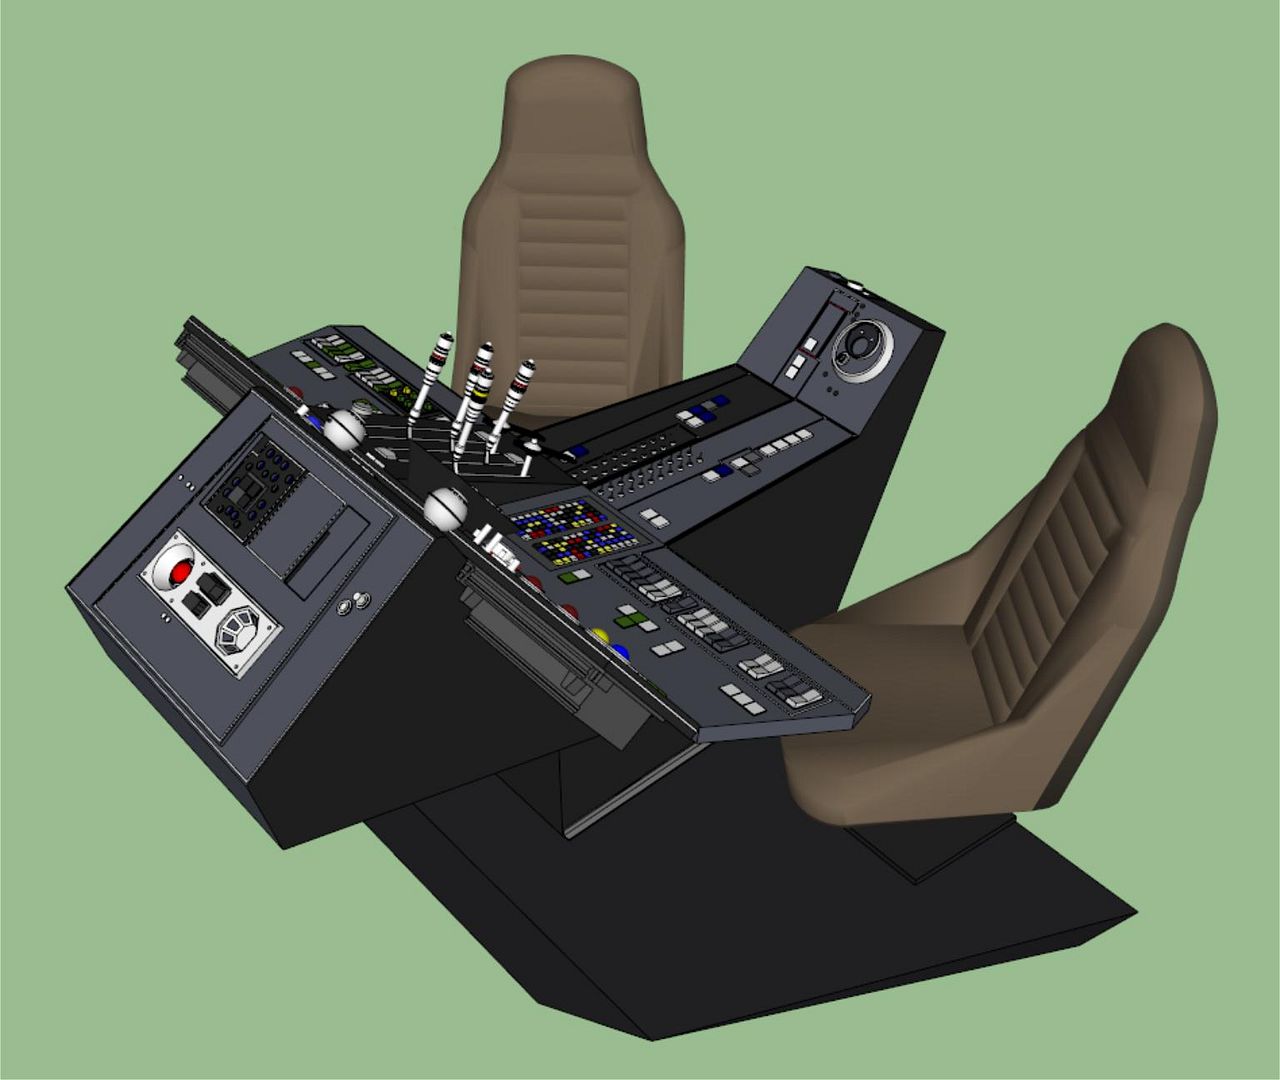
We're working on the newer console that will be more ESB and signature free. We're working the final dimensions to have the CNC cut all the panels for easy assembly. More on that later!

Stay Tuned!
 
Hi Gang,

Quick question... Does anybody know what these rotary swicthes are called? There are VERY compact with a 1/4" post. I would like to find something similar to this size.

20140204_054027_zpsb95b8365.jpg


Thanks!
 
HMMMM... I hope I can put these to good use. I would hate they not do anything or worse have to scrap them or...

- - - Updated - - -

The biggest questions is: "Where are the cupholders?"

Not to worry! Those are coming! :)

- - - Updated - - -


Thanks for the link. As of right now... I've got TONS of knobs! :D
 
Most pots are usually bigger, thats why the audio equipment sprang to mind, they usually have small foot print as they fit lots together on those mixer boards.
 
Hi Gang,

Work continues on the upper panel...

I cut the holes for the rotary switches. I had to cut a pilot hole and remove 1/4" of material from the back side of the panel so the switch could fit
20140204_183644_zps972a8b14.jpg


There's still plenty of room for wiring. The backside will be covered with the back boxes
20140204_183706_zps5b3bfae0.jpg


Still deciding on the final switch
20140204_185734_zps332759d0.jpg


20140204_185745_zps261b02df.jpg


20140204_185802_zpsc4575e15.jpg


20140204_185823_zps3c67a509.jpg


More to Come!
 
Last edited:
I wouldn't have believed it possible but the new console looks like it's gonna be even sexier that the first one
The big dial is shiny in the best way
 
I wouldn't have believed it possible but the new console looks like it's gonna be even sexier that the first one
The big dial is shiny in the best way

Hi C,

Believe it or not... this is the same console. We're reworking it to have full lights and sound. We haven't even started the new console yet. And I agree. I LOVE the chrome knob. Need to find another one... Come on, Ebay! Don't let me down!

- - - Updated - - -

You asked sometime back in the thread about showing a simulated falcon, and I just remembered seeing this so did a search:

Millennium Falcon at training center - YouTube

Based on flight sim or fsx, so in theory you could make it happen!

Excellent! You are now officially in charge of the Flight & Sim division of the build. Long hours, no vacations and little to no pay. But OH the experience... ;)
 
Hi Gang,

I've designed a slider to be cut on the laser cutter. I'm hoping to match the Vector edge connectors I recently picked up so we have a full set

Sliders_zps6114f5fb.jpg
 
Very good stuff of course and looking forward to seeing all of those improvements with the console:cool
 
Hi Gang,

Another night at MGL...

Put the panels back in place to make sure everything was in order
20140205_162226_zps5204b994.jpg


20140205_162302_zps51186a0e.jpg


Laser cut another Radar Surround
20140205_161511_zpsae9c4055.jpg


20140205_161840_zpse1f98950.jpg


20140205_161848_zpsaeef7548.jpg


20140205_161853_zps1ec06c3a.jpg


We then cut new sliders out of acrylic... didn't turn out exactly right
20140205_161535_zps0702689a.jpg


20140205_161544_zpsd81f845e.jpg


We then tried several different types of acrylic and MDF
20140205_170853_zps41f71562.jpg


20140205_174923_zps8ef6ab23.jpg


Note how fine the laser cutter is! Unfortunately, the acrylic is too thin and had a lot of flex. It would have been very difficult to adhere the two pieces together evenly
20140205_174933_zpsbd12826f.jpg


20140205_174939_zpsa7da29ad.jpg


So... decided on the MDF but removed the little details
20140205_174953_zps45c81859.jpg


Removing the details allowed us to do this
20140205_175013_zps6f243163.jpg


20140205_180249_zpsb7570130.jpg


This is only a test piece
20140205_180622_zps516ae64d.jpg


20140205_180629_zpsa81e83eb.jpg


20140205_180644_zps19b54b18.jpg


Satisfied with the sliders we decided to laser cut all 24
20140205_195037_zpscc6402f3.jpg


20140205_195046_zps1a3ac4f1.jpg


20140205_202954_zpsfc15add8.jpg


20140205_202959_zpsd10c1e0d.jpg


We attempted to cut another matte box with a smaller drill bit. Something happened and we had to scrap this cut...
20140205_195103_zpsc3054c76.jpg


Mike and I then took some time and popped all the greeblies and tiles off the main console...
20140205_194100_zps2637fe06.jpg


EWE... Need to get some Bondo into those holes and fast!
20140205_194107_zps35774c78.jpg


I used a different glue here and the tiles popped off without damaging/pulling up the paint. I might not use Super Glue this time around
20140205_194113_zps4f3f4eb7.jpg


Here we are...
20140205_195146_zpscb9be81f.jpg


20140205_195200_zps945582e4.jpg


Stay Tuned!
 
Last edited:
Man, those laser cut pieces are AWESOME!!

I need to get my hands on one of those. I can only imagine the time that is saving you!

Great greeblie weeblies! The new (old) console is looking cool!
 
Back
Top