Hi,
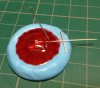
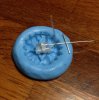
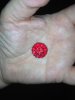
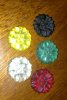
Thank you - I'm very glad to be able to contribute to this fascinating thread and, to answer your question, yes I cast a single, flashing LED into one of the red crystals which I then attached to a small battery pack.
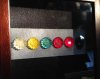
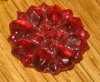
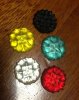
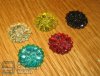
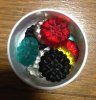
I'm very sorry for the late reply but I was trying to find a way of uploading a video of the flashing lifeclock display. I wasn't successful in this and so instead, I have posted several more photographs of the crystals in various stages of completion and the framed display along with the small battery box containing two AA batteries.
Finally - and I'm not sure if this is of any help - I wanted to give you the acrylic resin ratio I used for the green crystal (which was by far the hardest colour to replicate):
Based on a total of 45 drops per lifeclock, it was 24 drops clear resin + 3 drops green + 3 drops blue + 15 drops hardener. Basically, you need to keep a ratio of 2/3 resin to 1/3 hardener but the colour mix was trial and error and experimentation.
All the best,
Simon
View attachment 585751View attachment 585750View attachment 585749View attachment 585748View attachment 585747View attachment 585746View attachment 585745View attachment 585744


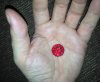


") Because it's translucent instead of solid, it is hard to make out detail.
Because it's translucent instead of solid, it is hard to make out detail.