COMPLETED PHOTOS: post #64
Had posted this on TDH, but thought I'd do the same here. If the admins think I should not, let me know and I will stop, thanks.
While waiting for my gadzillion ESB Boba's parts to arrive (likely over the next 3 to 4 months), I decided to start on another helmet project: Boushh. I've always found her (his, since Boushh was supposed to be male, and Leia was only cross dressing) helmet to be cool looking.
Bought the bucket off Sandman (Todd), and he is a friendly and accommodating guy to work with. Awesome dude!
The kit came in a nicely sealed box with lots of cushioning, and the packets of resin greeblies neatly packed in ziploc.
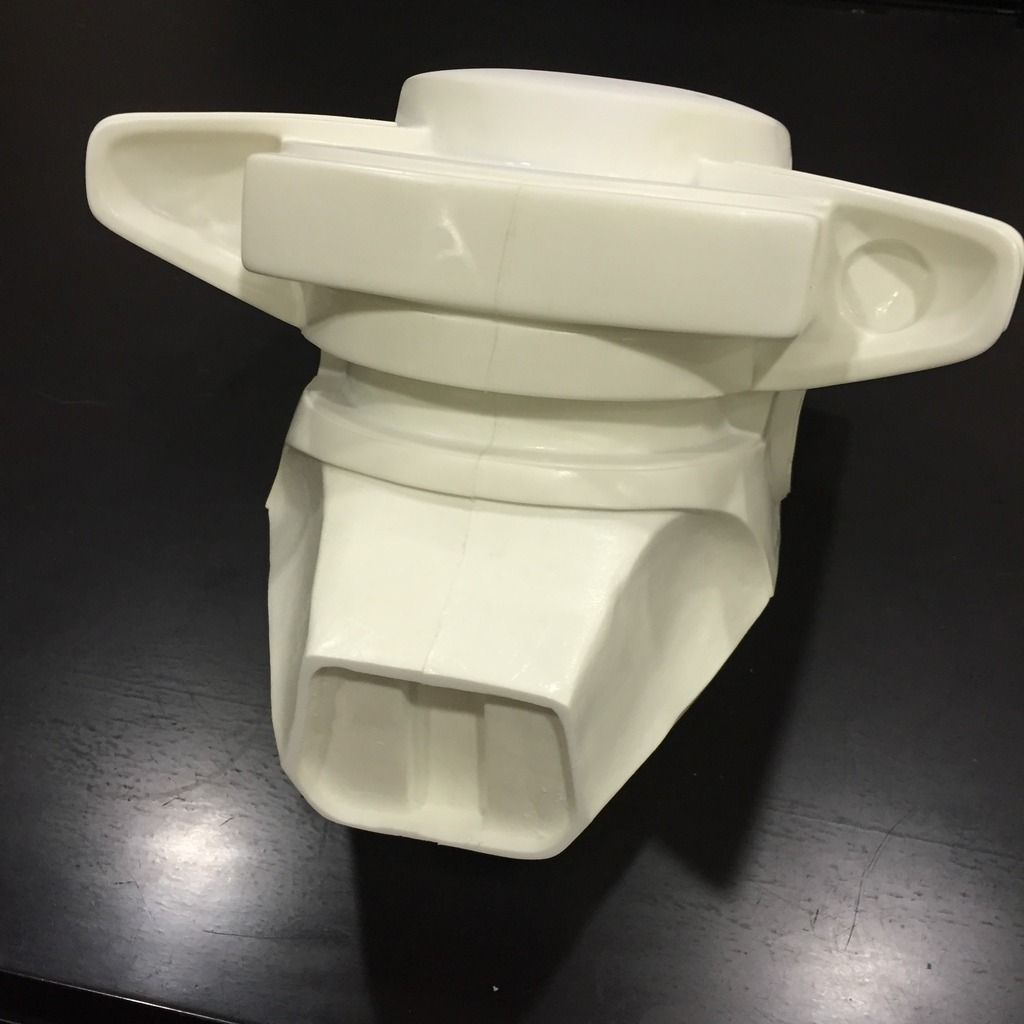
The main attraction, the helmet, was a crisp, smooth and well cast block of resin. Except for the seam that ran through the cross section of the helmet, It was a very nice cast! Truly excited!
And so the project begins.
I intend to do this slowly, and try to reference this as closely as I can to the screen-used prop, as there are many nice clear photos of it.
- - - Updated - - -
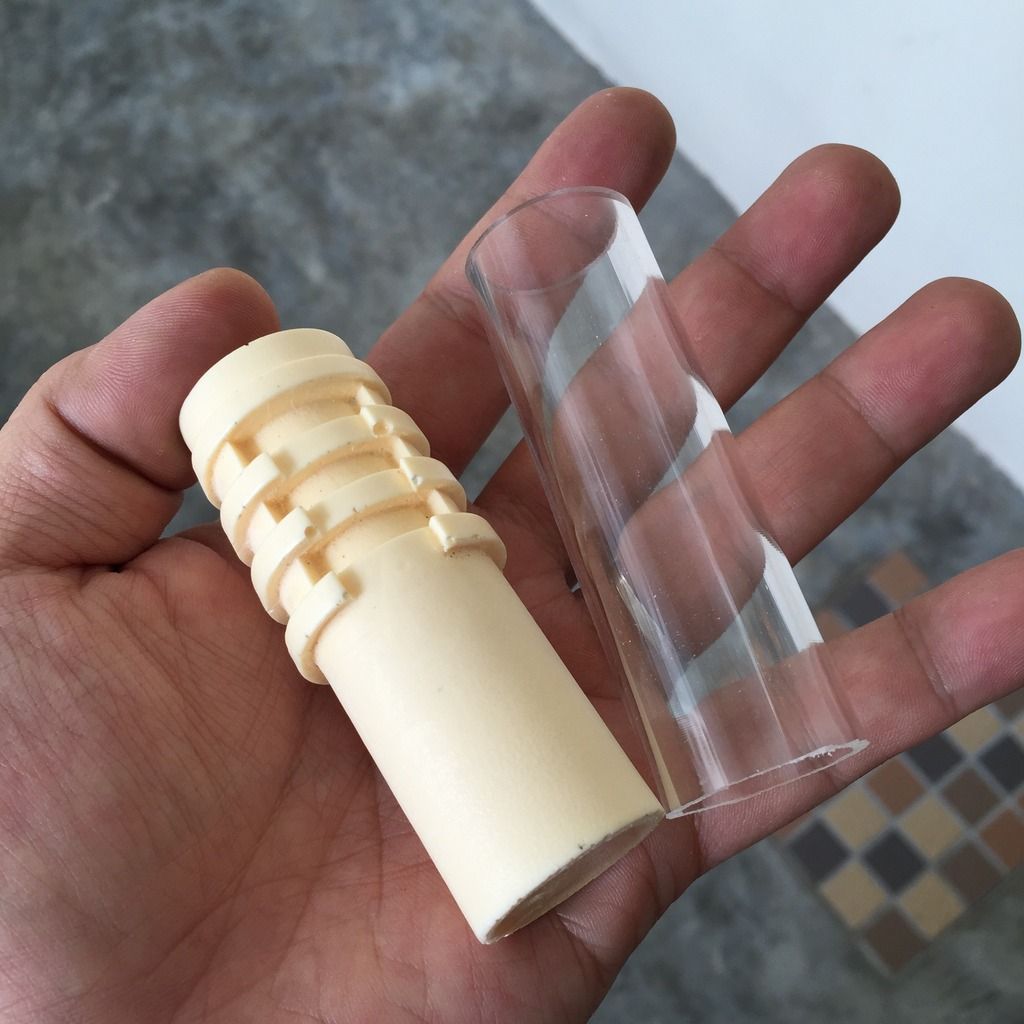
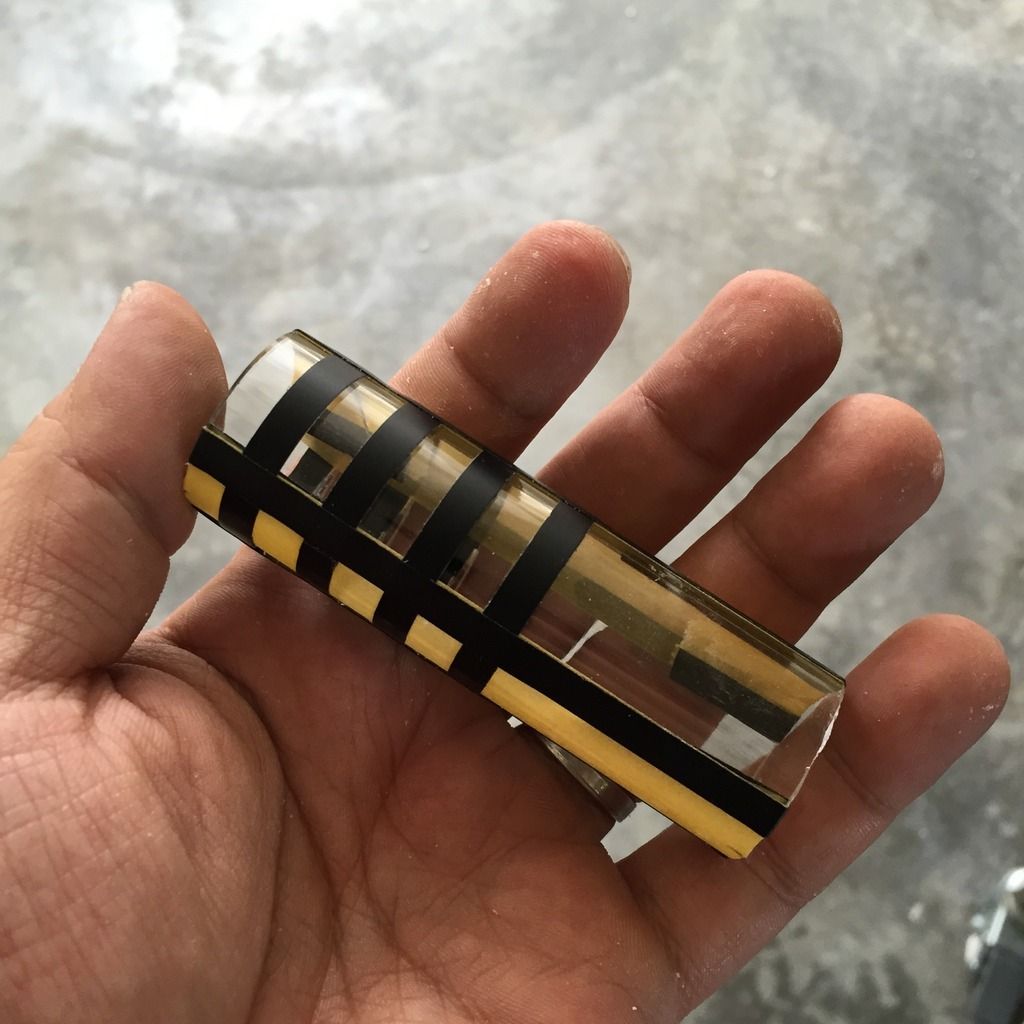
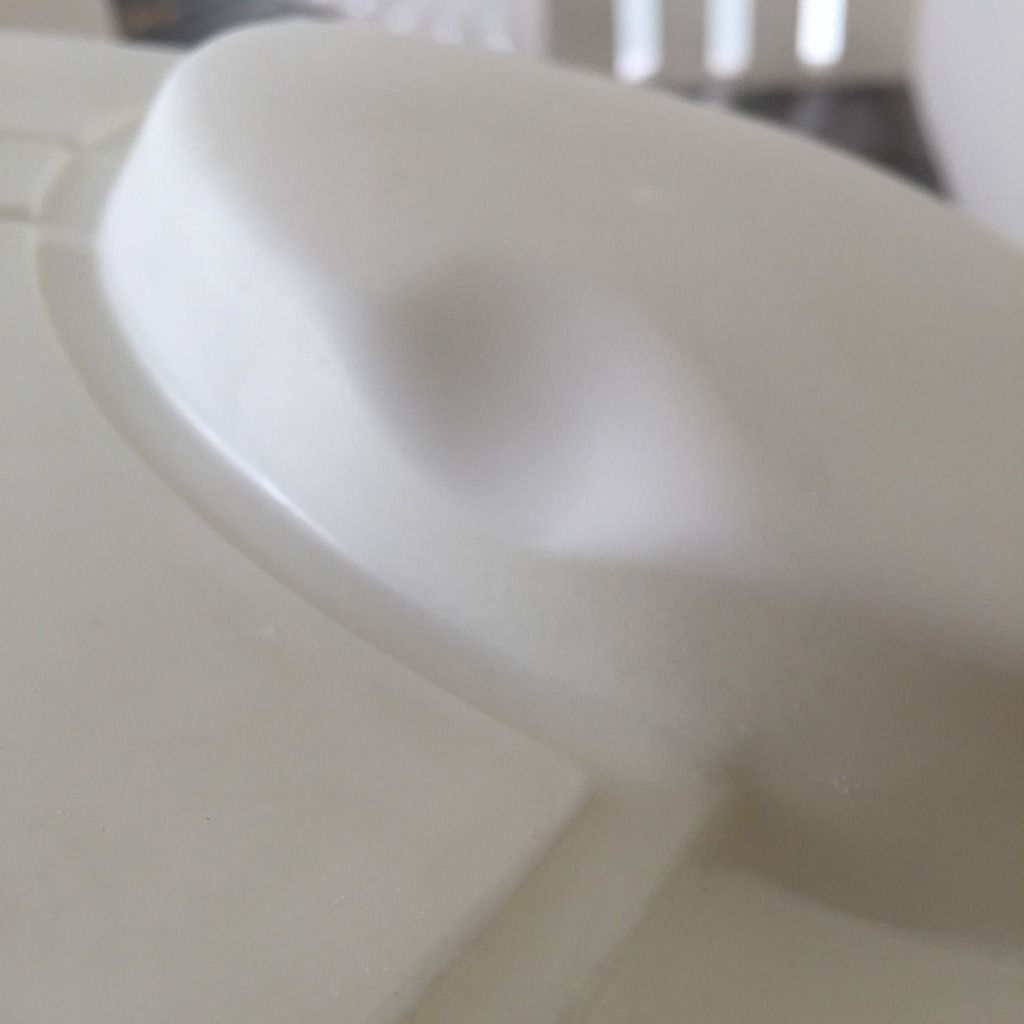
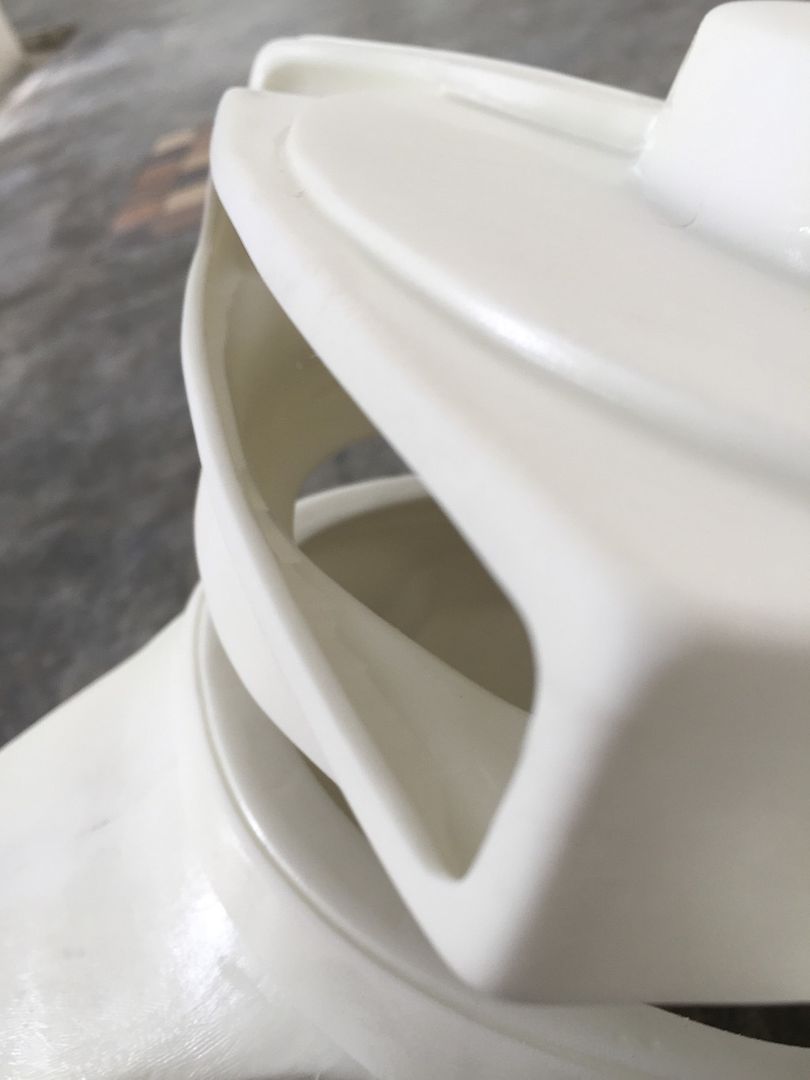
The first thing to do was to cut our the visor and the head display slots.
The visor was pretty straightforward/ You just had to cut straight into the helmet, and take care at the rounded sides. The thing that needed some work was the inside top of the rim was longer than the inside bottom of the rim (not sure if you get what I'm saying), which would result in the visor being tilted backwards when viewed from the side. I wanted the visor to be perpendicular to the slot, so I had to trim the inside of the top rim to get it in line with the bottom rim. Test fitting the visor regularly helped to ensure I did not take away too much, or it would tilt forward!
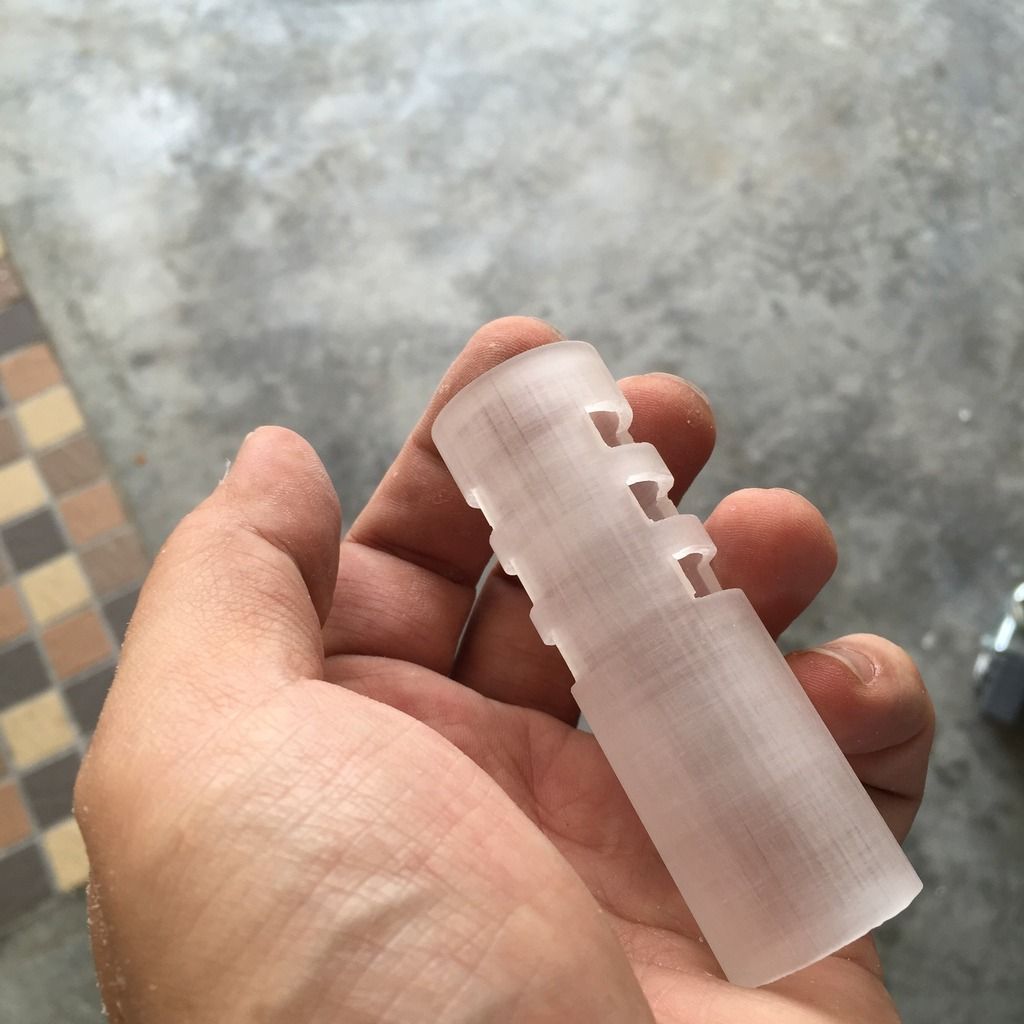
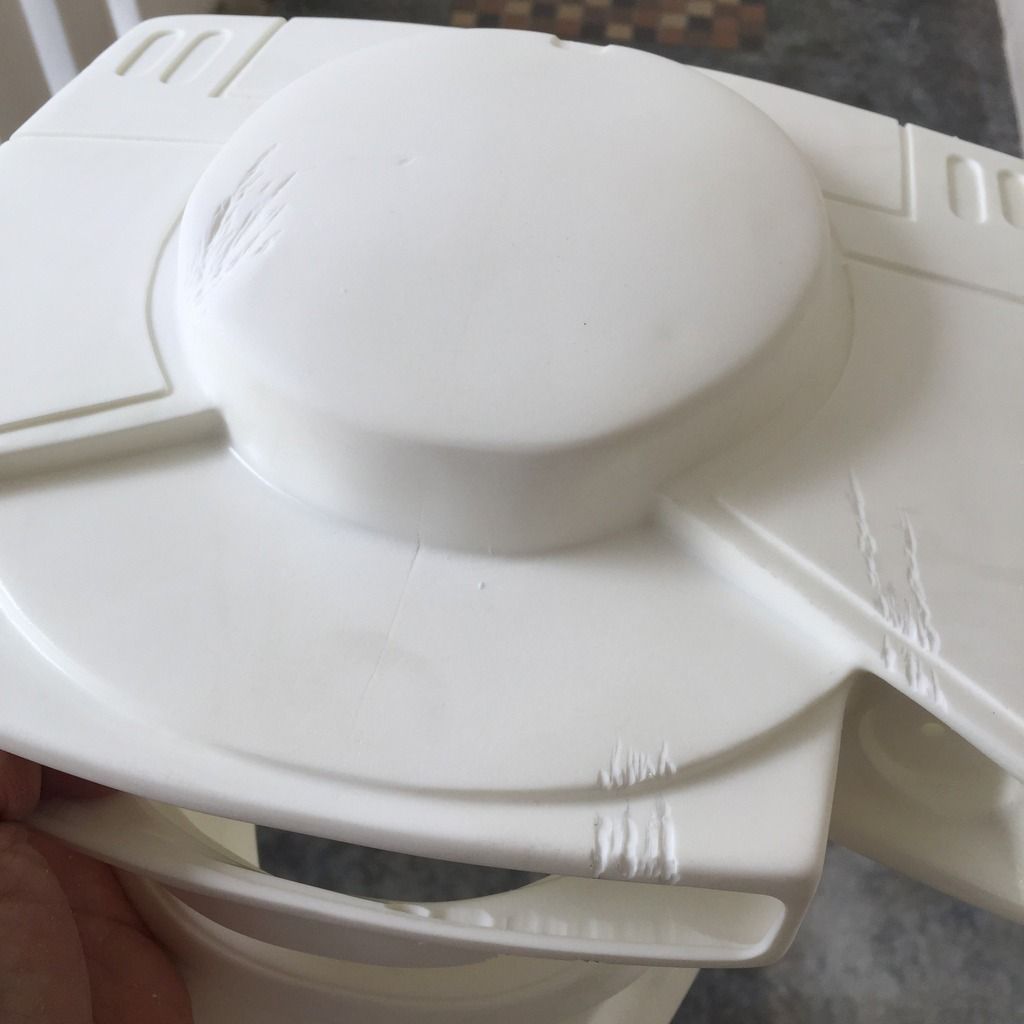
For the head display slot, what I did was mask out the area that needed to be cut using graphic tape, and put my dremel to work.
Turned out pretty nice, If I may say so myself!

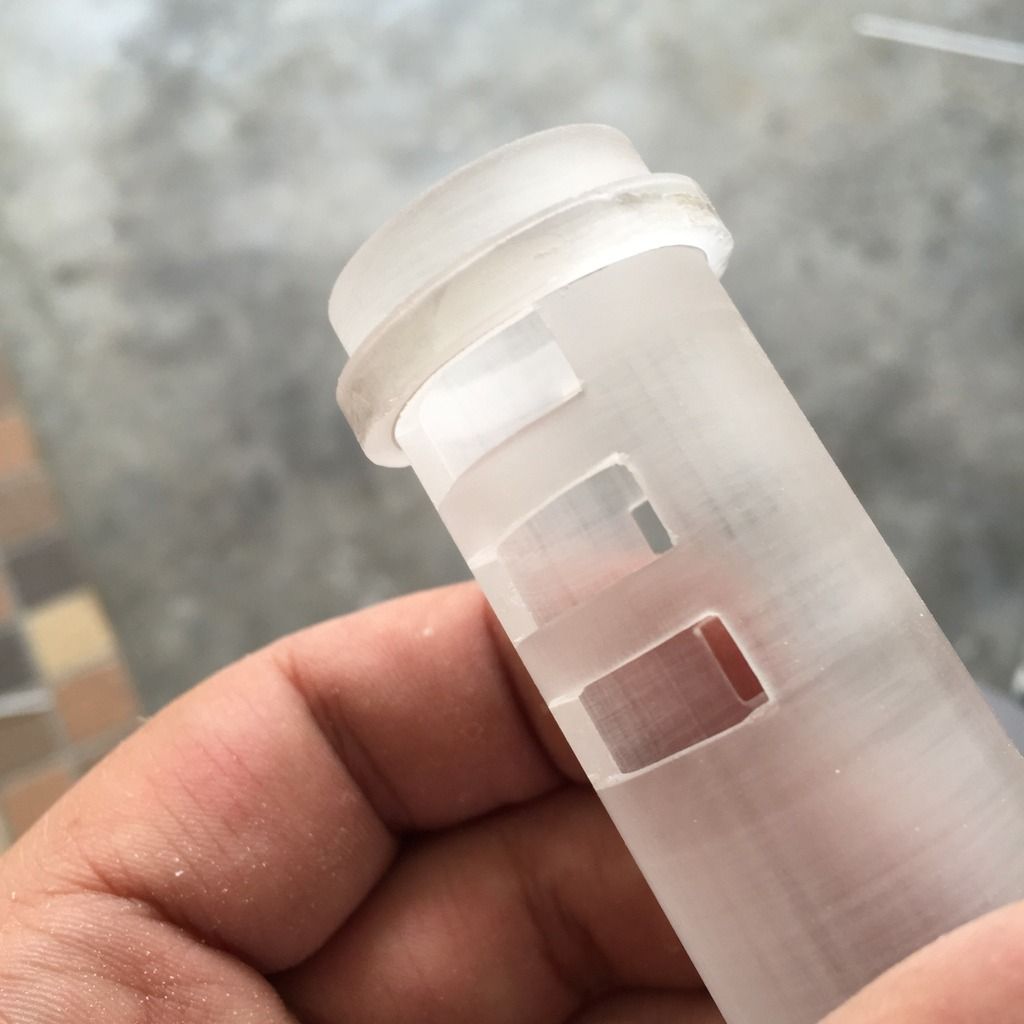
Now the problem I faced while doing the top display was that after cutting the slot, the visor could not sit neatly against the edge, as the resin inside of the helmet was thick and uneven. I had to use a cutting bit to flatten the inside of the slot in order for the visor to sit.
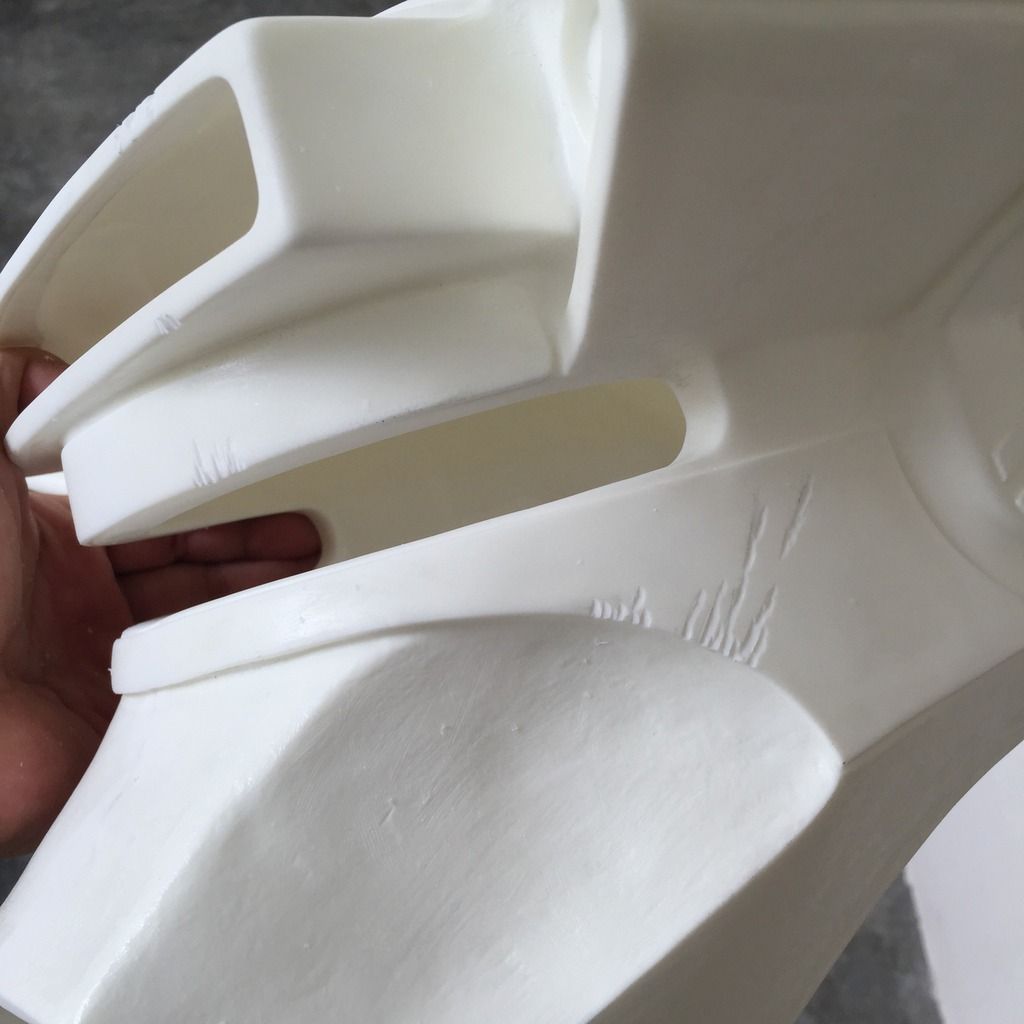
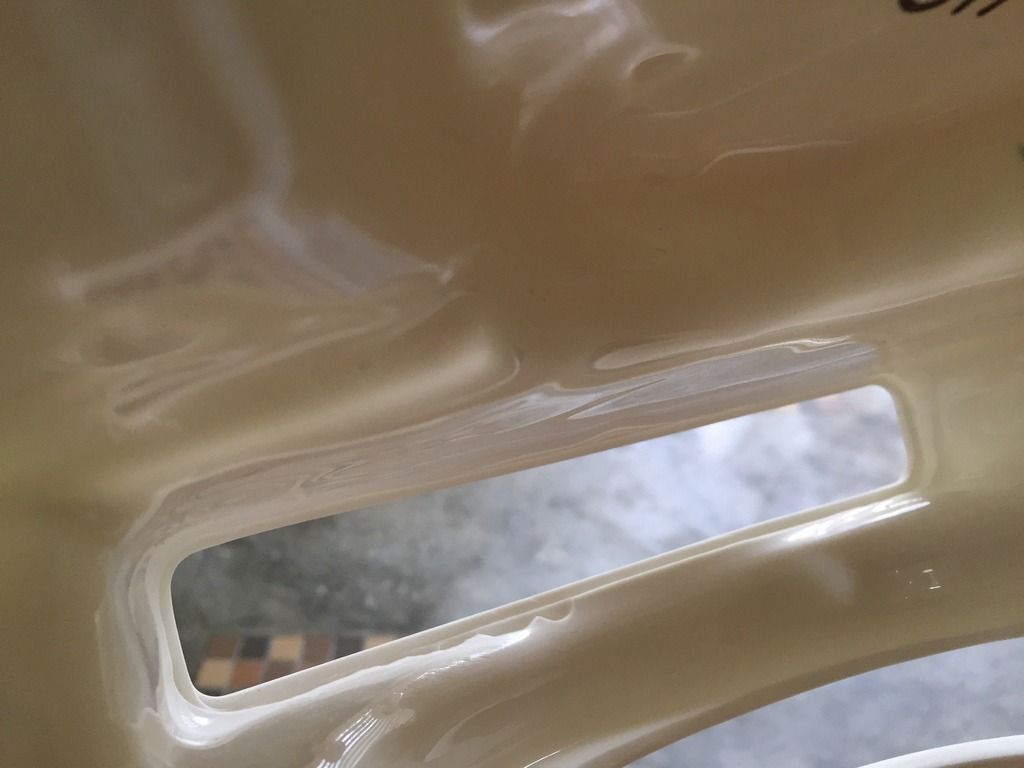
As you can see, a photo from the inside showing the flat groove that I created to allow the visor to sit neatly against the slot opening.
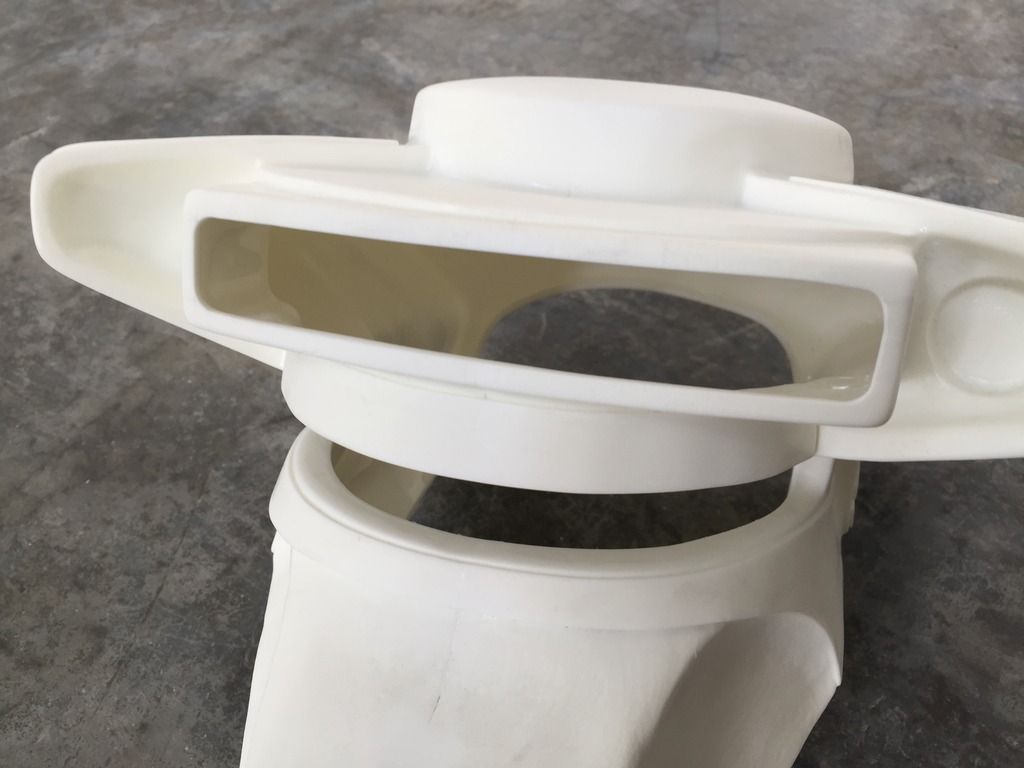
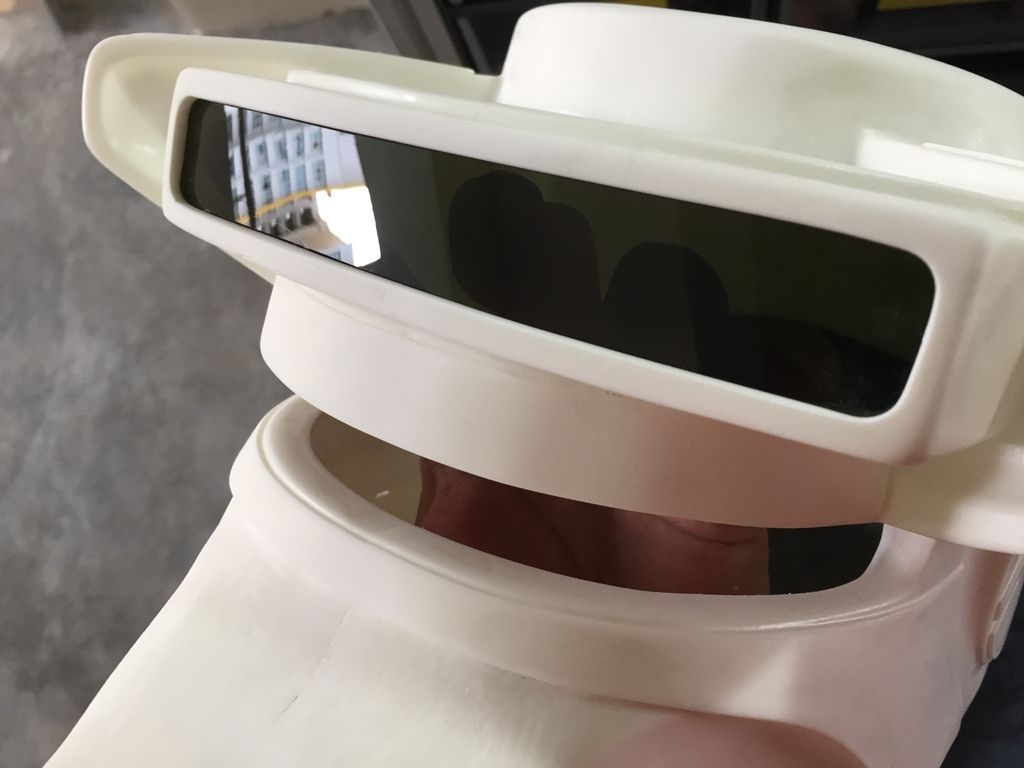
The view from the outside showing the neat groove.
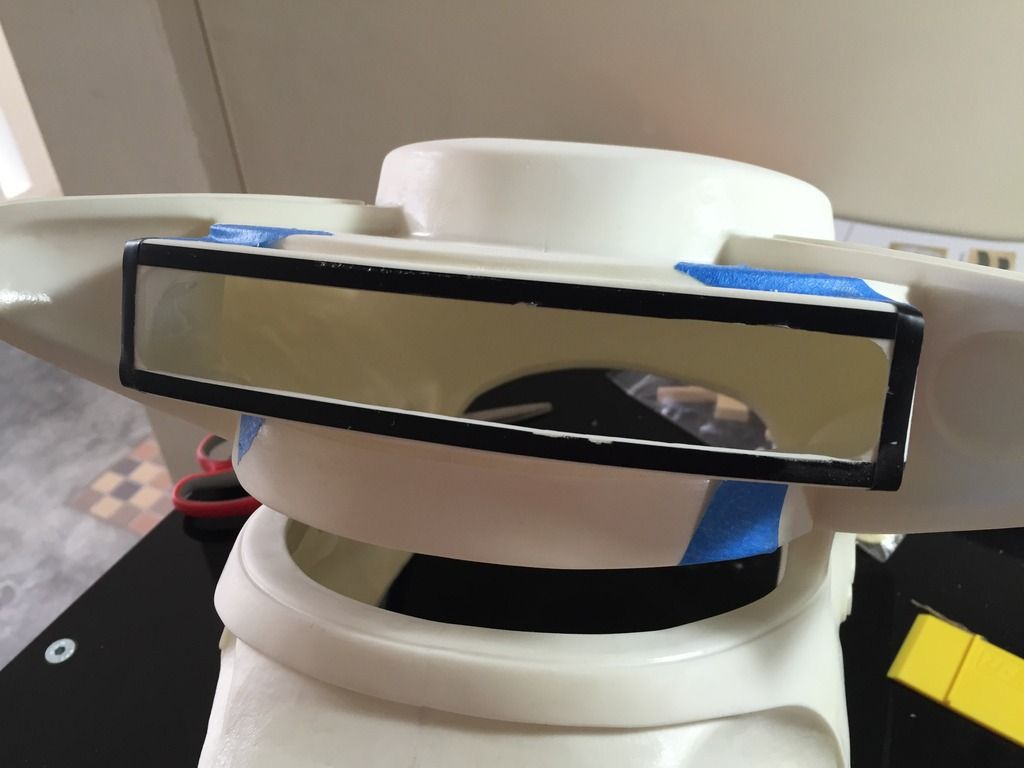
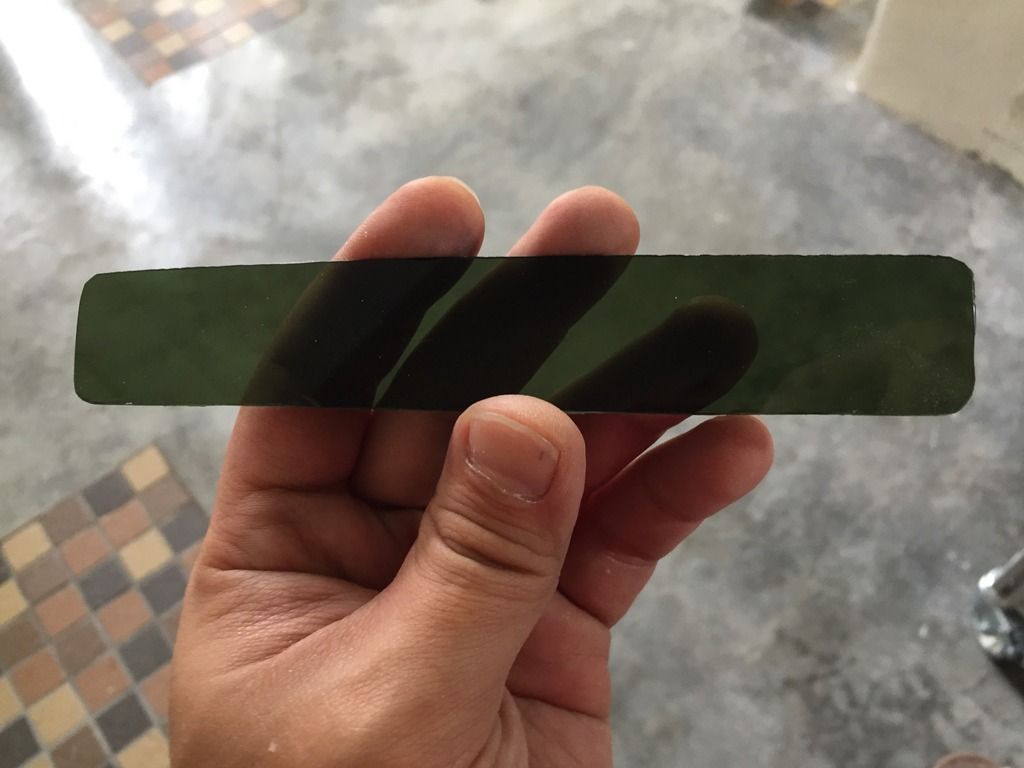
The visor had to be trimmed too. It was too high and too long, so both the length and width had to be trimmed to fit into the small space at the display slot.
Finally, a dry fit with the visor in place. Pretty satisfied with how it looks.
- - - Updated - - -
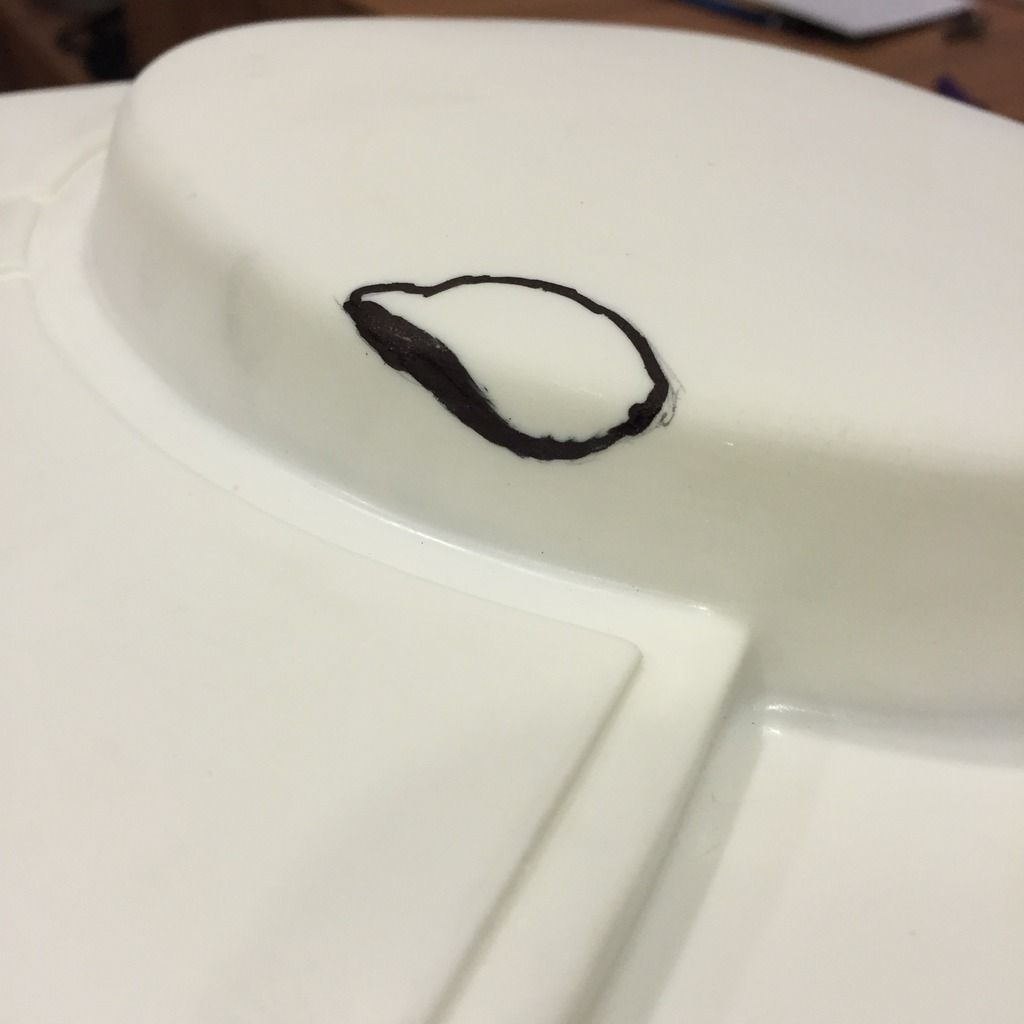
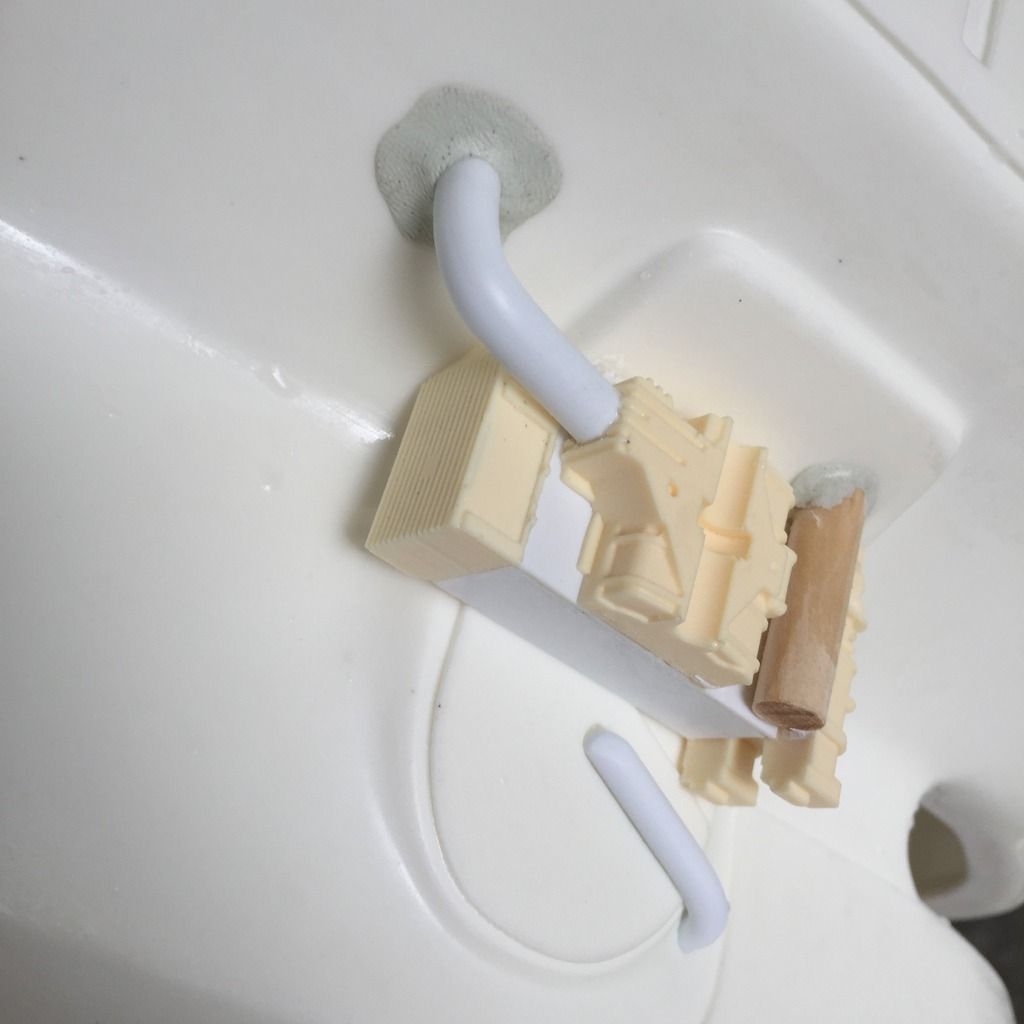
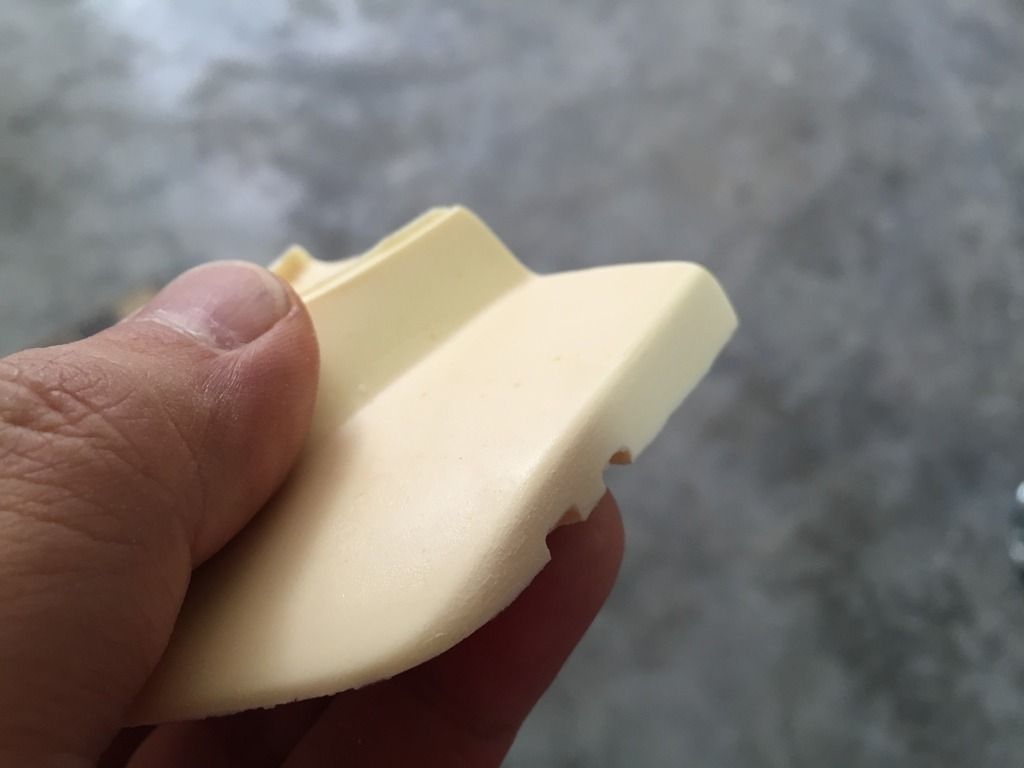
Next up, I tackled the piece at the front centre of the helmet. The resin part came with a straight edge, so a lot of grinding would be needed to get it to sit nicely with the curve of the top of the helmet. Take note that there is a nub on either side of the resin part. Not sure why Todd casted them. The photos of the SU piece did not have them. So I removed them. The tiny holes running down the centre of the piece were also not found in the original. I will fill them later.
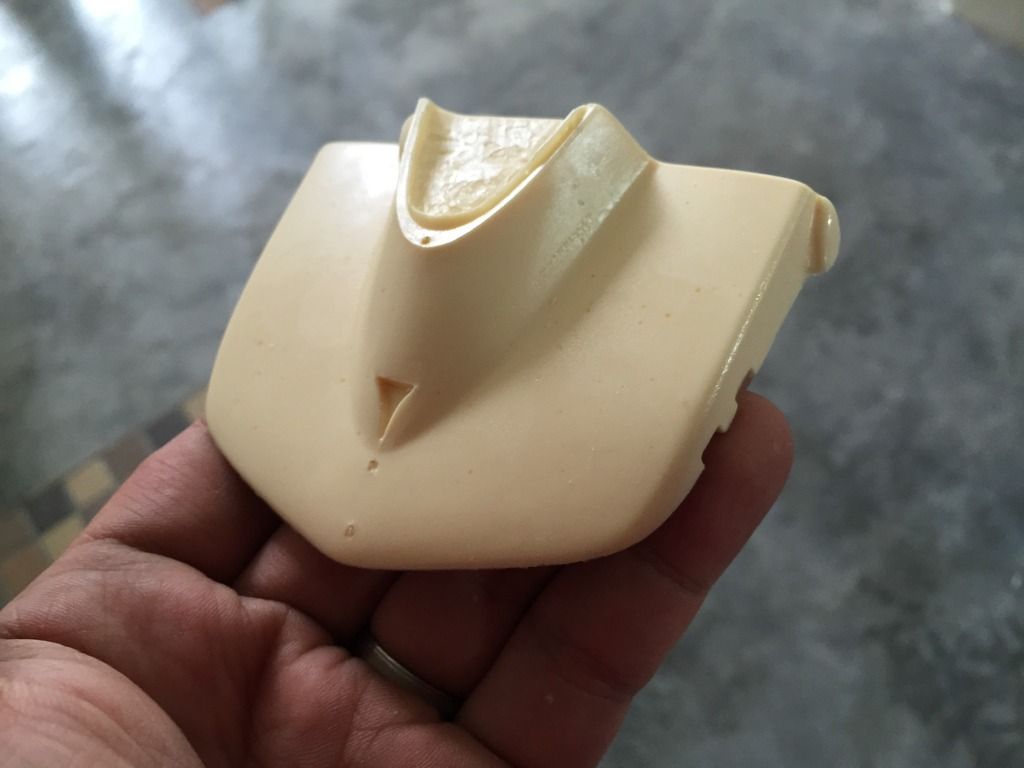
The nubs removed:
- - - Updated - - -
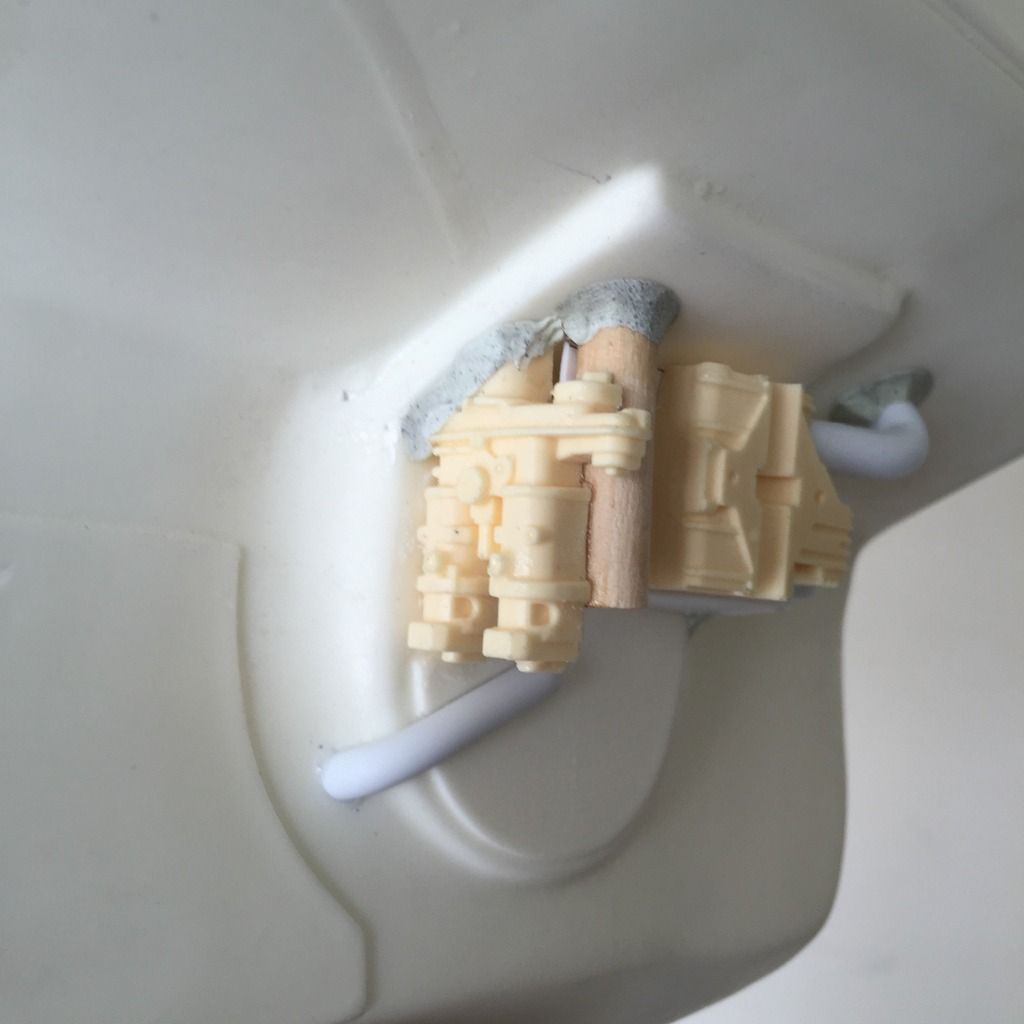
To know how the curve will be in order to grind the resin piece properly, I masked the contour of the curve, and transferred the masking to the back of the resin piece. The curve is symmetrical and so would be ok even if it was reversed when transferring to the resin piece. This would give me a good guide as to how far the curve went, and take care not to remove too much of it.
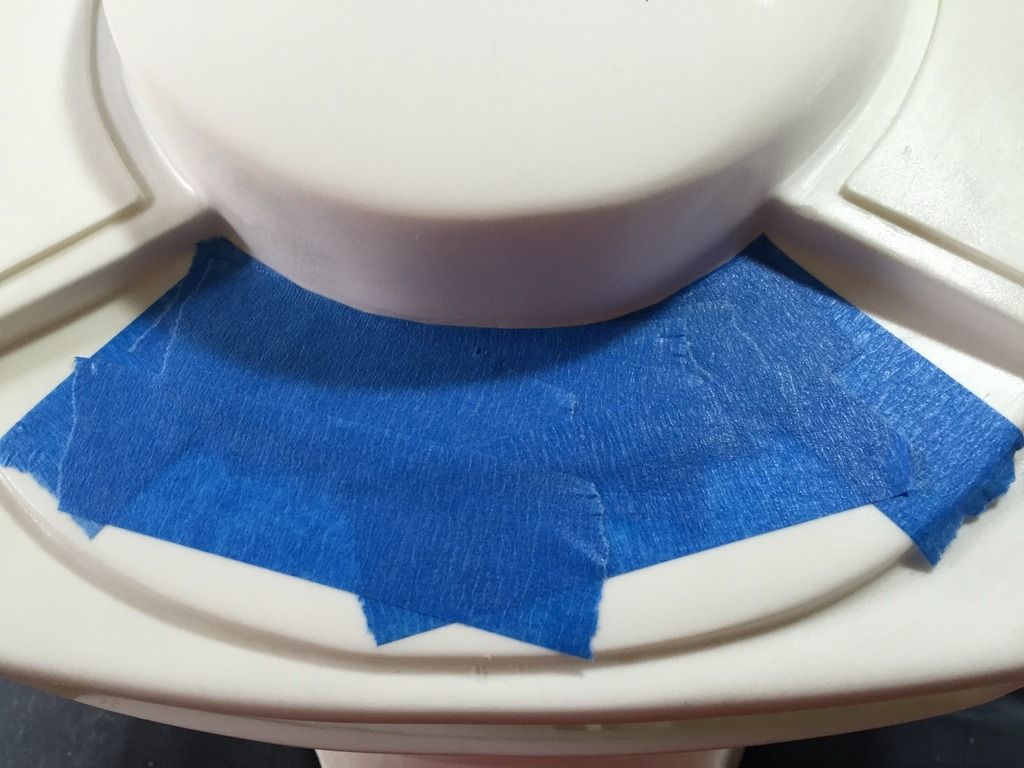
The masking transferred to the back of the resin part:
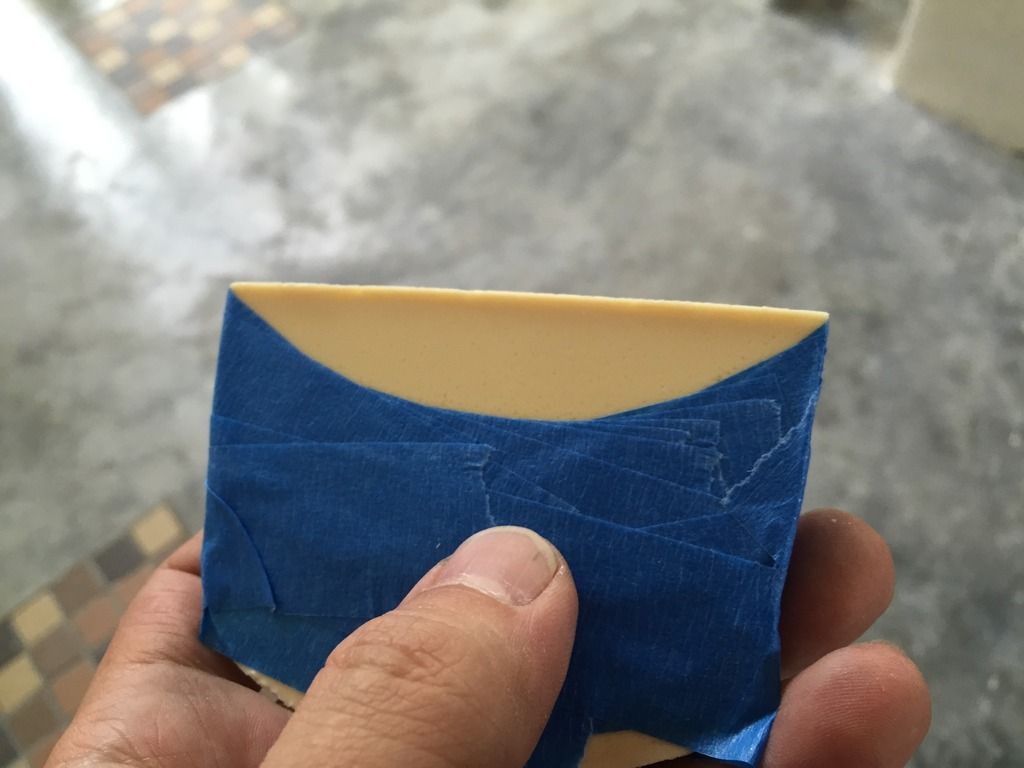
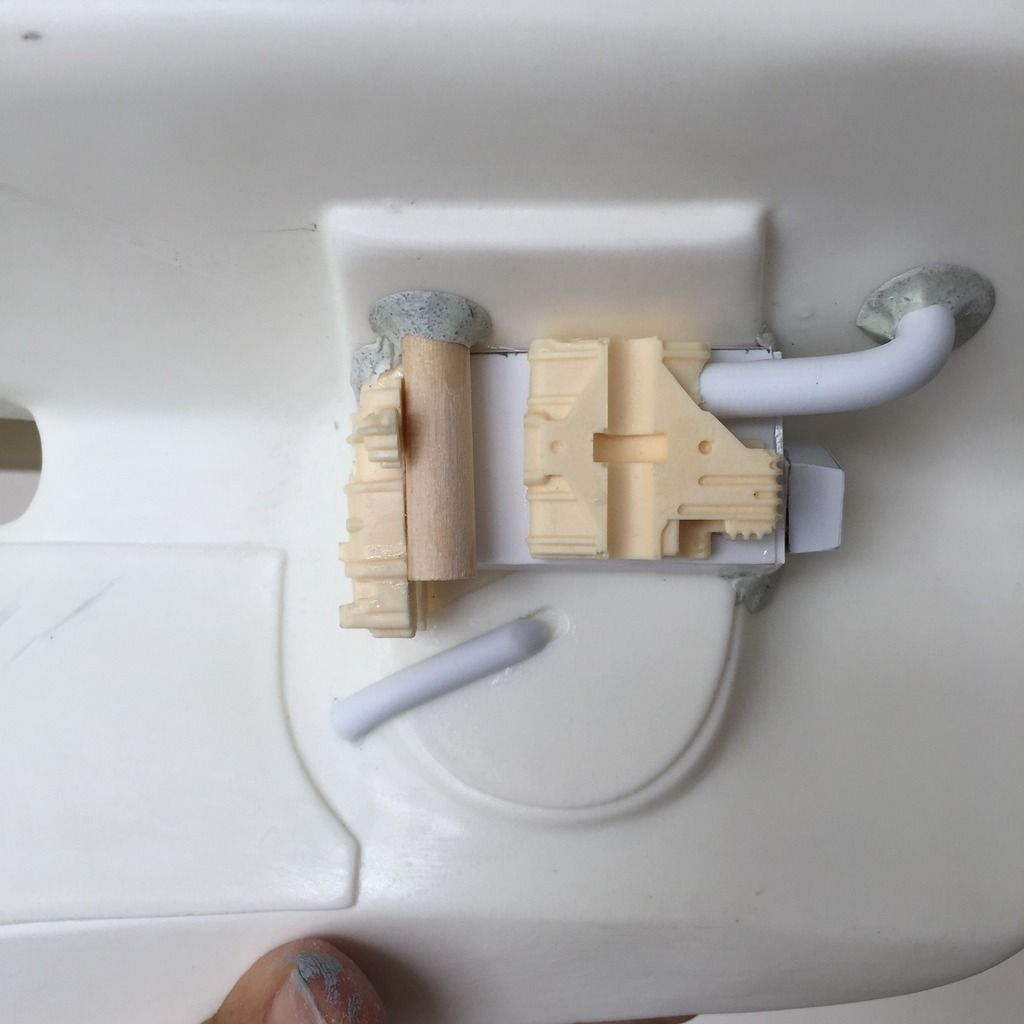
Also, the curved part was lesser at the top than the bottom. So you can't just grind it away vertically following the masking line. You had to angle it a little, which was done with very very very regular test fits. Remember, "measure twice, cut once"!
This was how it looked after grinding:
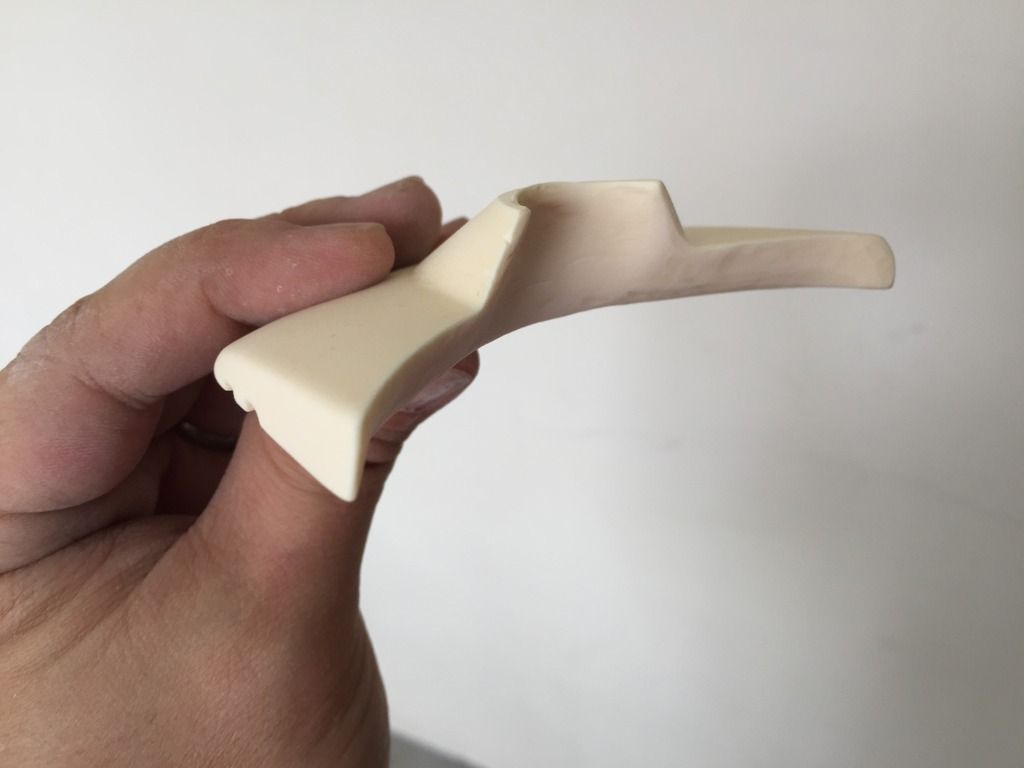
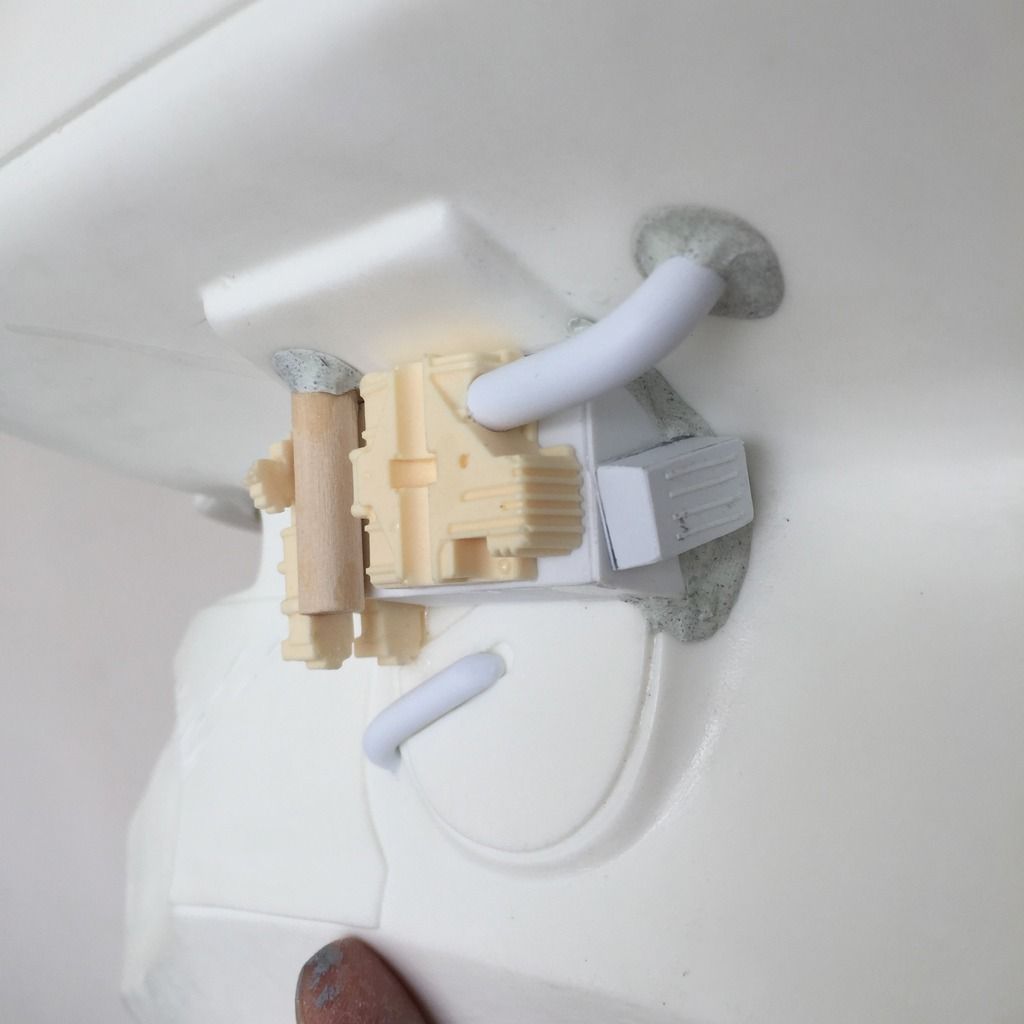
The final fit. There is some slight unevenness at the top of the helmet preventing the resin piece from sitting flush with the top. That will be resolved when gluing the piece down.
Had posted this on TDH, but thought I'd do the same here. If the admins think I should not, let me know and I will stop, thanks.
While waiting for my gadzillion ESB Boba's parts to arrive (likely over the next 3 to 4 months), I decided to start on another helmet project: Boushh. I've always found her (his, since Boushh was supposed to be male, and Leia was only cross dressing) helmet to be cool looking.
Bought the bucket off Sandman (Todd), and he is a friendly and accommodating guy to work with. Awesome dude!
The kit came in a nicely sealed box with lots of cushioning, and the packets of resin greeblies neatly packed in ziploc.
The main attraction, the helmet, was a crisp, smooth and well cast block of resin. Except for the seam that ran through the cross section of the helmet, It was a very nice cast! Truly excited!
And so the project begins.
I intend to do this slowly, and try to reference this as closely as I can to the screen-used prop, as there are many nice clear photos of it.
- - - Updated - - -
The first thing to do was to cut our the visor and the head display slots.
The visor was pretty straightforward/ You just had to cut straight into the helmet, and take care at the rounded sides. The thing that needed some work was the inside top of the rim was longer than the inside bottom of the rim (not sure if you get what I'm saying), which would result in the visor being tilted backwards when viewed from the side. I wanted the visor to be perpendicular to the slot, so I had to trim the inside of the top rim to get it in line with the bottom rim. Test fitting the visor regularly helped to ensure I did not take away too much, or it would tilt forward!
For the head display slot, what I did was mask out the area that needed to be cut using graphic tape, and put my dremel to work.
Turned out pretty nice, If I may say so myself!
Now the problem I faced while doing the top display was that after cutting the slot, the visor could not sit neatly against the edge, as the resin inside of the helmet was thick and uneven. I had to use a cutting bit to flatten the inside of the slot in order for the visor to sit.
As you can see, a photo from the inside showing the flat groove that I created to allow the visor to sit neatly against the slot opening.
The view from the outside showing the neat groove.
The visor had to be trimmed too. It was too high and too long, so both the length and width had to be trimmed to fit into the small space at the display slot.
Finally, a dry fit with the visor in place. Pretty satisfied with how it looks.
- - - Updated - - -
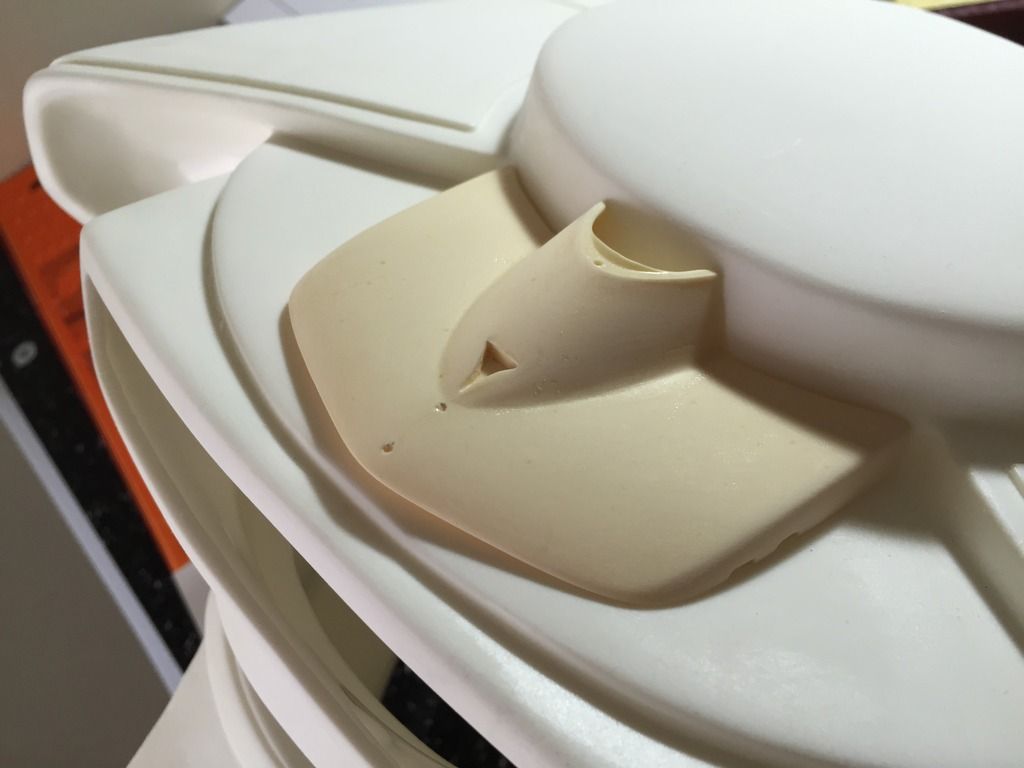
Next up, I tackled the piece at the front centre of the helmet. The resin part came with a straight edge, so a lot of grinding would be needed to get it to sit nicely with the curve of the top of the helmet. Take note that there is a nub on either side of the resin part. Not sure why Todd casted them. The photos of the SU piece did not have them. So I removed them. The tiny holes running down the centre of the piece were also not found in the original. I will fill them later.
The nubs removed:
- - - Updated - - -
To know how the curve will be in order to grind the resin piece properly, I masked the contour of the curve, and transferred the masking to the back of the resin piece. The curve is symmetrical and so would be ok even if it was reversed when transferring to the resin piece. This would give me a good guide as to how far the curve went, and take care not to remove too much of it.
The masking transferred to the back of the resin part:
Also, the curved part was lesser at the top than the bottom. So you can't just grind it away vertically following the masking line. You had to angle it a little, which was done with very very very regular test fits. Remember, "measure twice, cut once"!
This was how it looked after grinding:
The final fit. There is some slight unevenness at the top of the helmet preventing the resin piece from sitting flush with the top. That will be resolved when gluing the piece down.
Last edited:
 opcorn