greedo
Well-Known Member
I’d like to first start off by giving thanks to the following for making this happen:
Savage- for the awesome Fusion Reactor thread ( On Astromech dot net ) with tons of helpful info and reference pics.
Kevin Holme- For having a 60th birthday party in Chicago and inviting me to join.
American Airlines ( And Mike Kelley too for that matter… ) – for the 5 hour layover in Chicago that gave me time to read the 30 something pages of the Fusion thread.
Now … On with the build. I wasn’t going to really document this at first because most everyone is printing these. But, I figured there may be another builder or two that will be scratch building and maybe this might help.
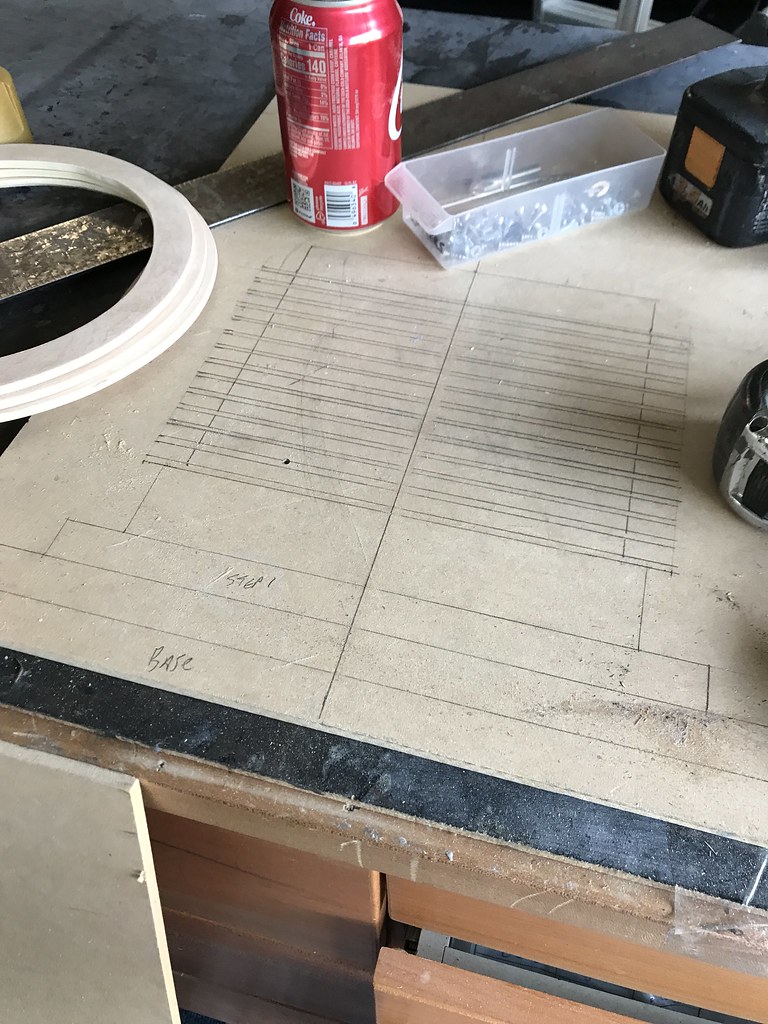
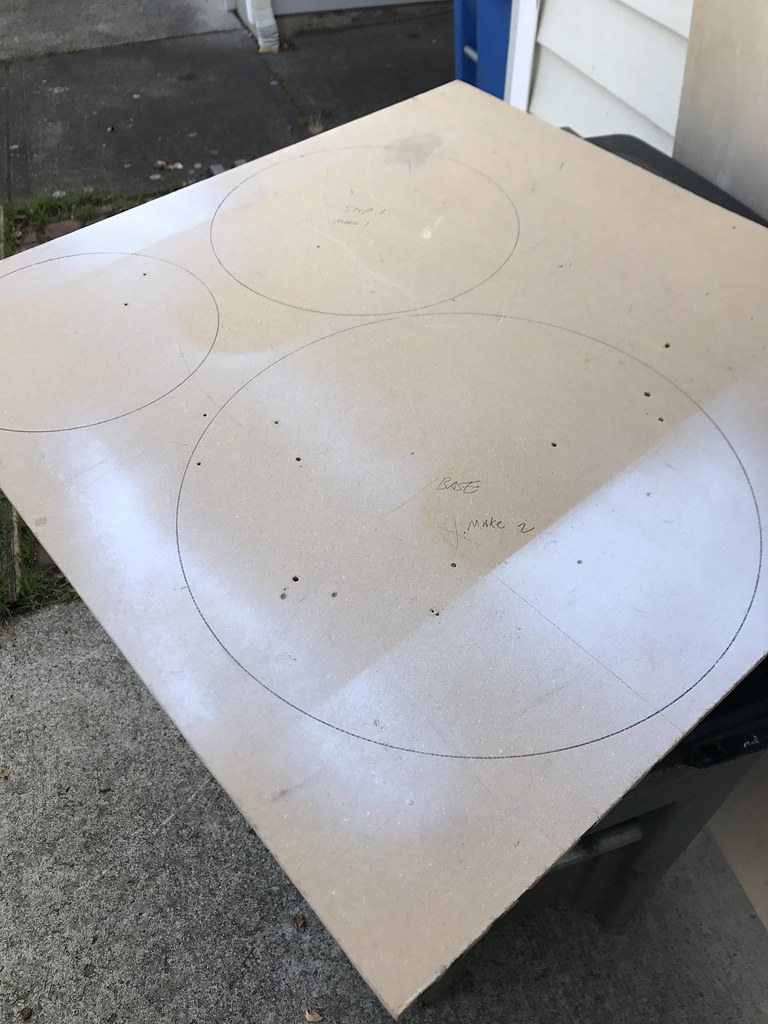
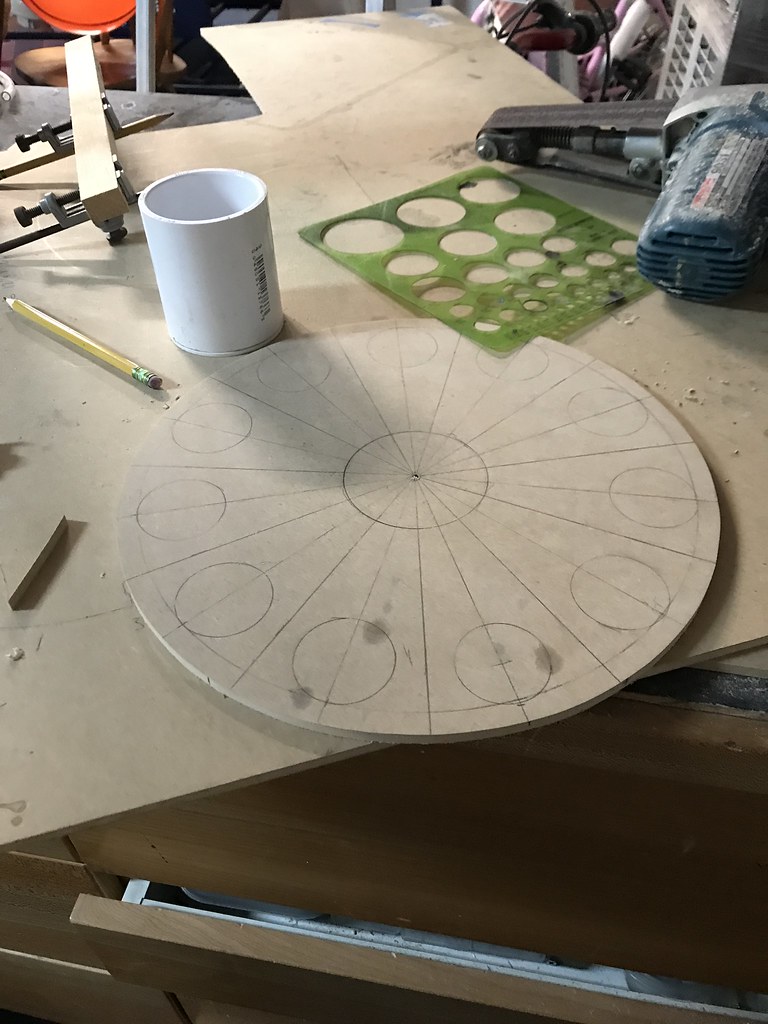
Started by drawing a full size plan and making some ¼’’ MDF templates. I have some ¾’’ Baltic birch that I’ll be using for the base.
 Untitled by chris stephens, on Flickr
 Untitled by chris stephens, on Flickr
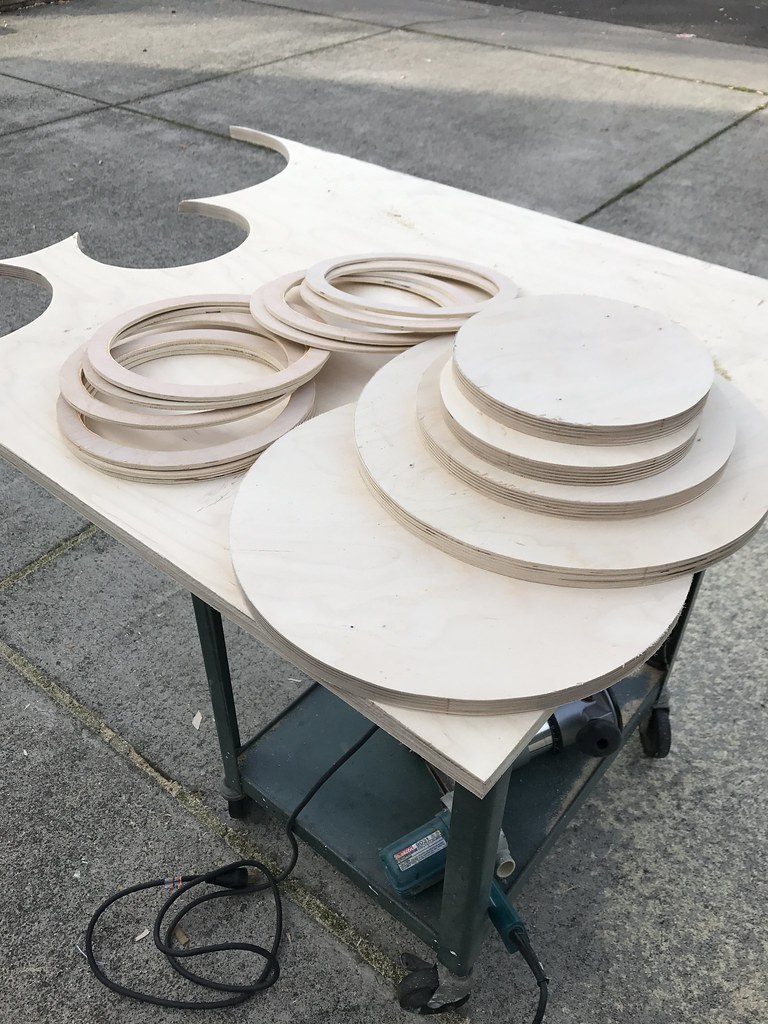
Then routed out all my round parts…
 Untitled by chris stephens, on Flickr
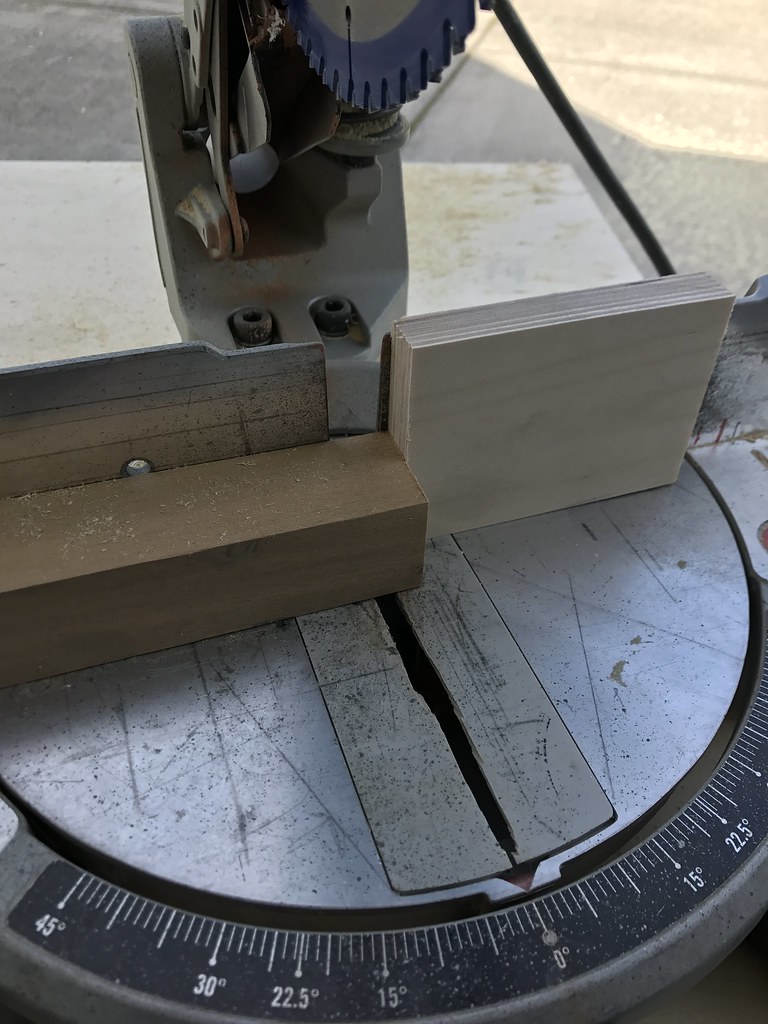
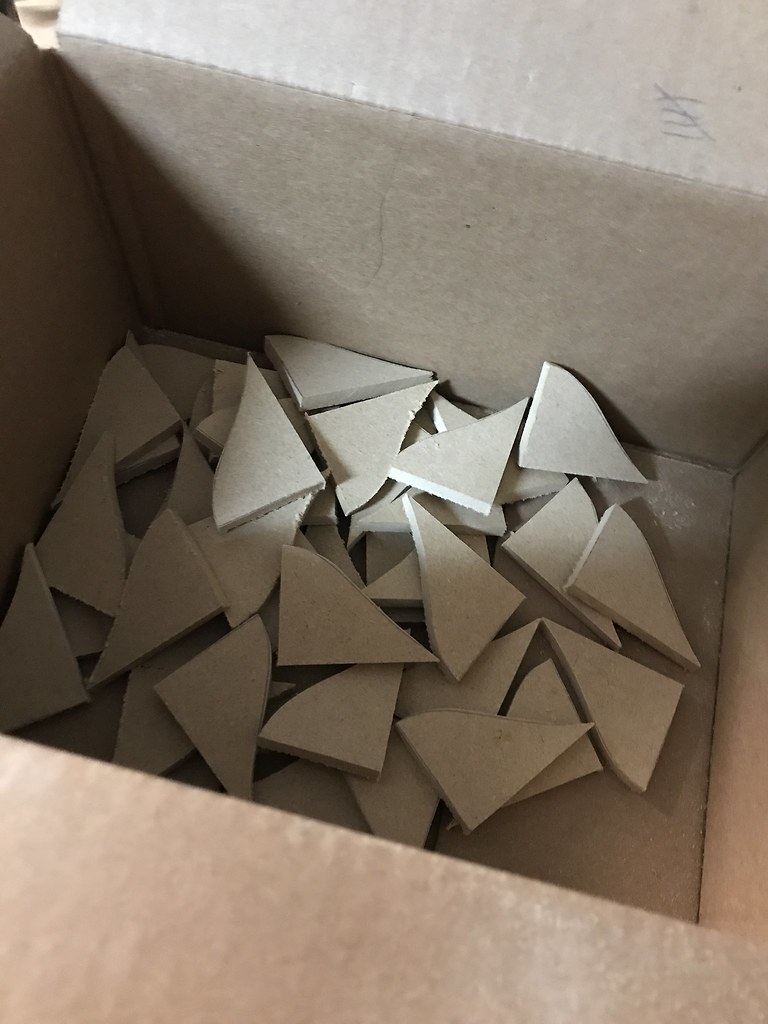
Next up, I spent what seemed like forever cutting out hardwood for spacers. These spacers will go in between each vent to create the illusion of one solid vertical piece when it’s done.
 Untitled by chris stephens, on Flickr
 Untitled by chris stephens, on Flickr
 Untitled by chris stephens, on Flickr
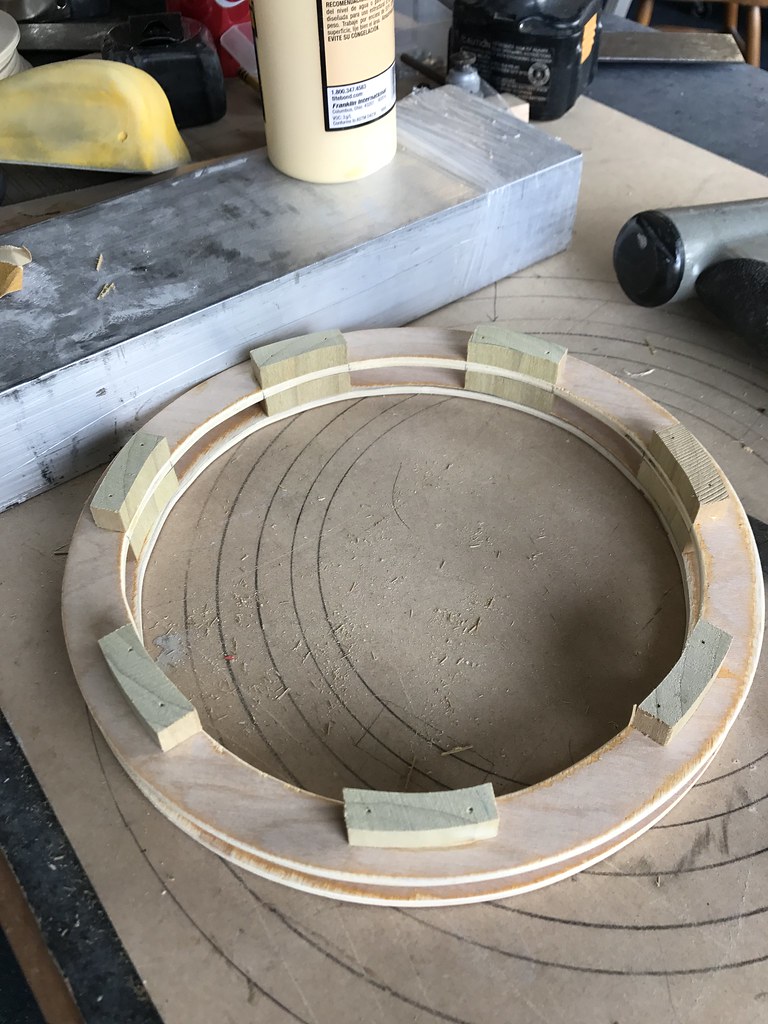
Then start stacking….
 Untitled by chris stephens, on Flickr
 Untitled by chris stephens, on Flickr
- - - Updated - - -
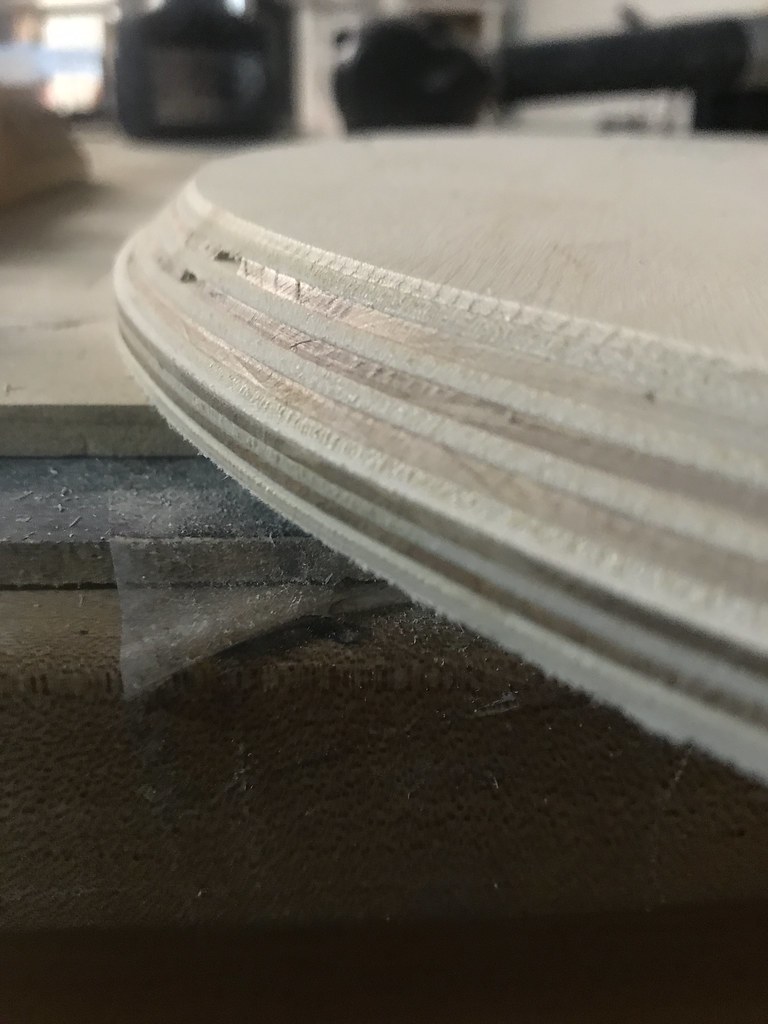
Next, I beveled the base. I took most of the material off with a 45 degree router bit. Then I just belt sanded the rest
 Untitled by chris stephens, on Flickr
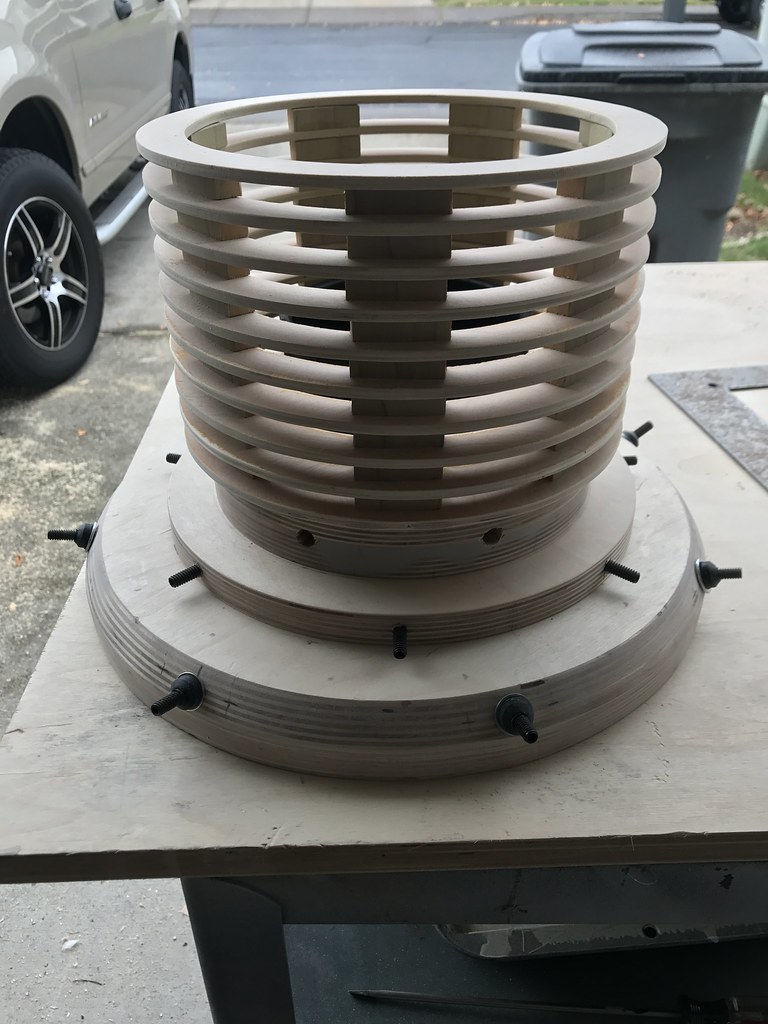
Then stacked em up. Glue and nail gun to get these together.
 Untitled by chris stephens, on Flickr
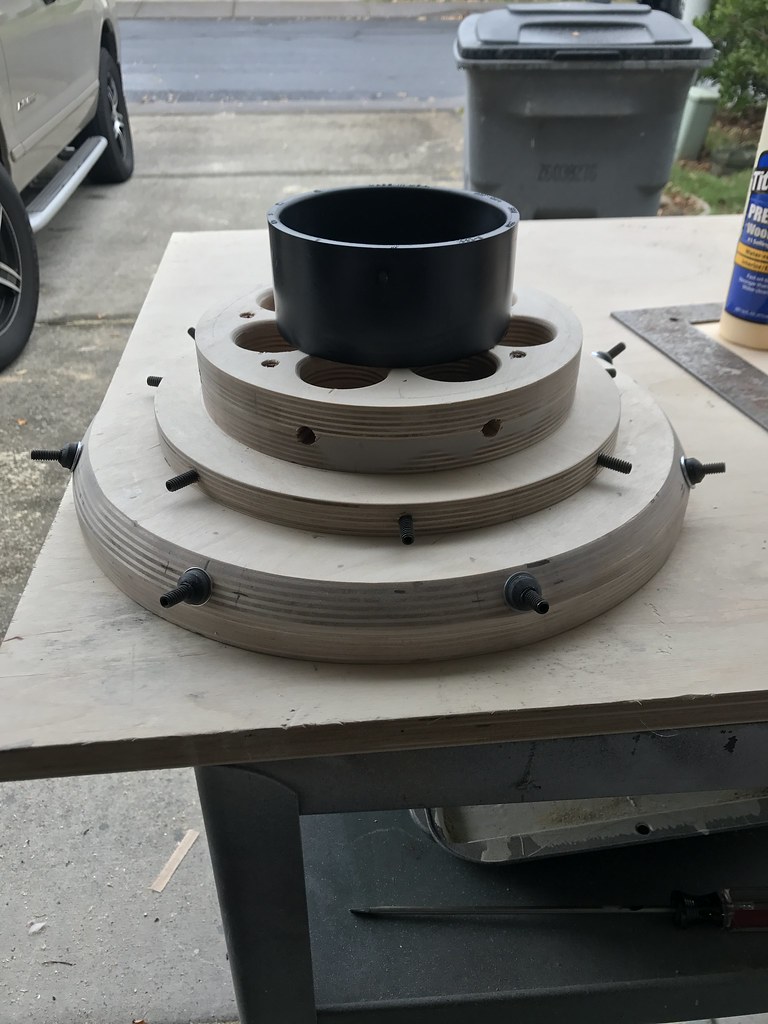
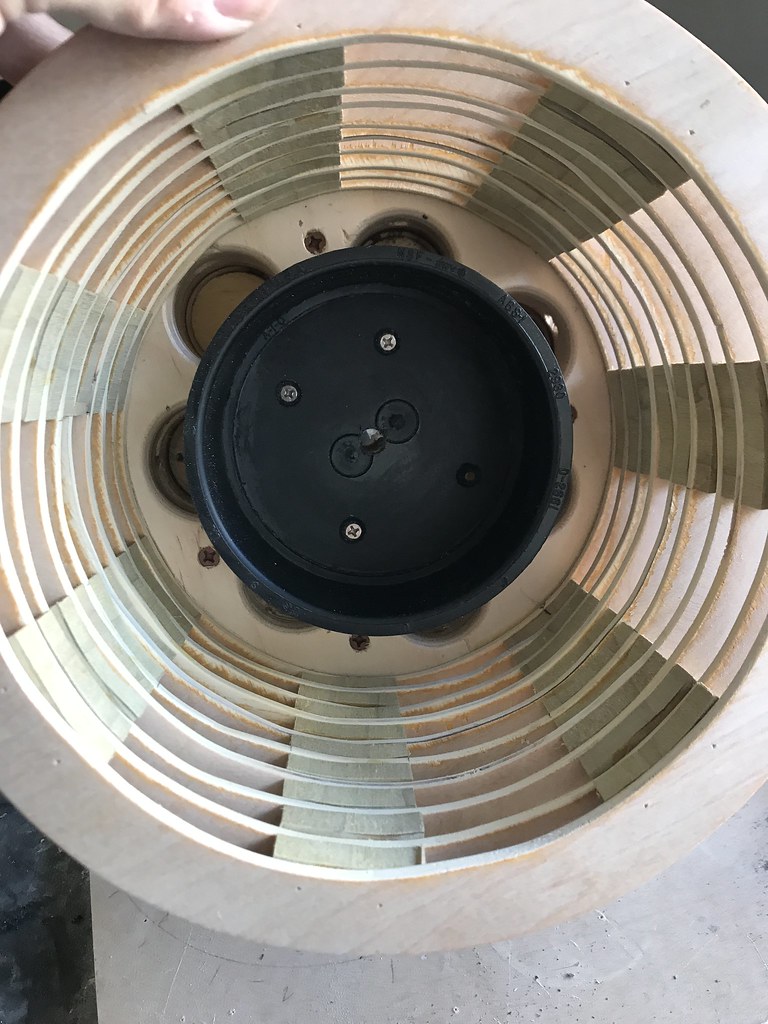
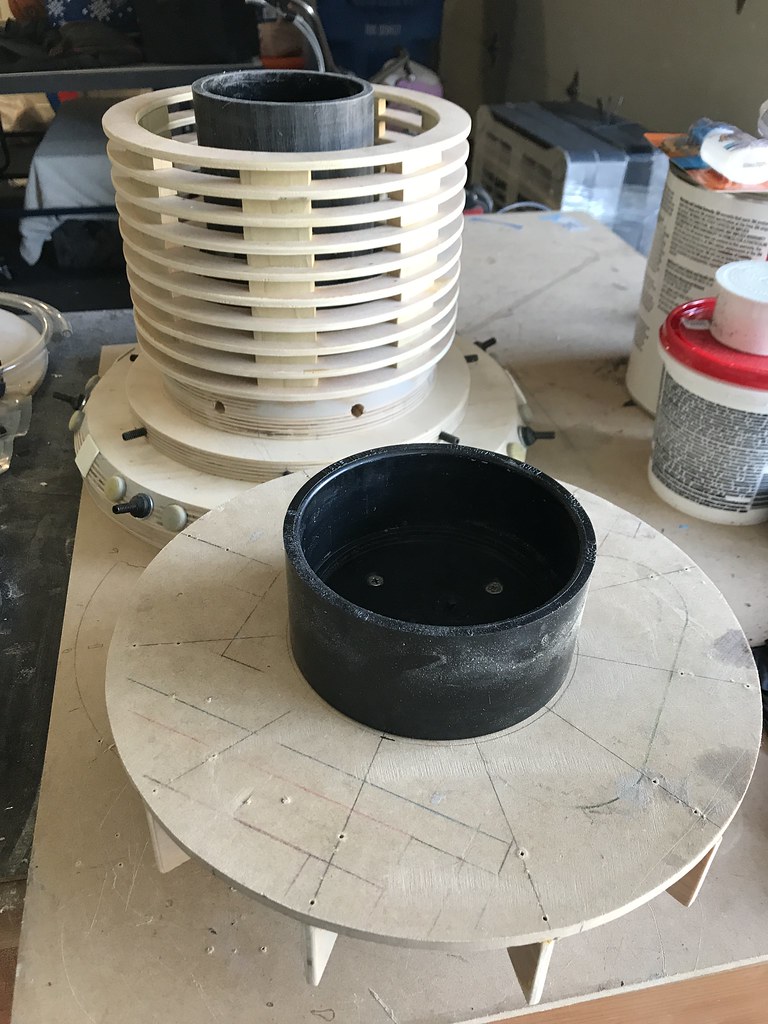
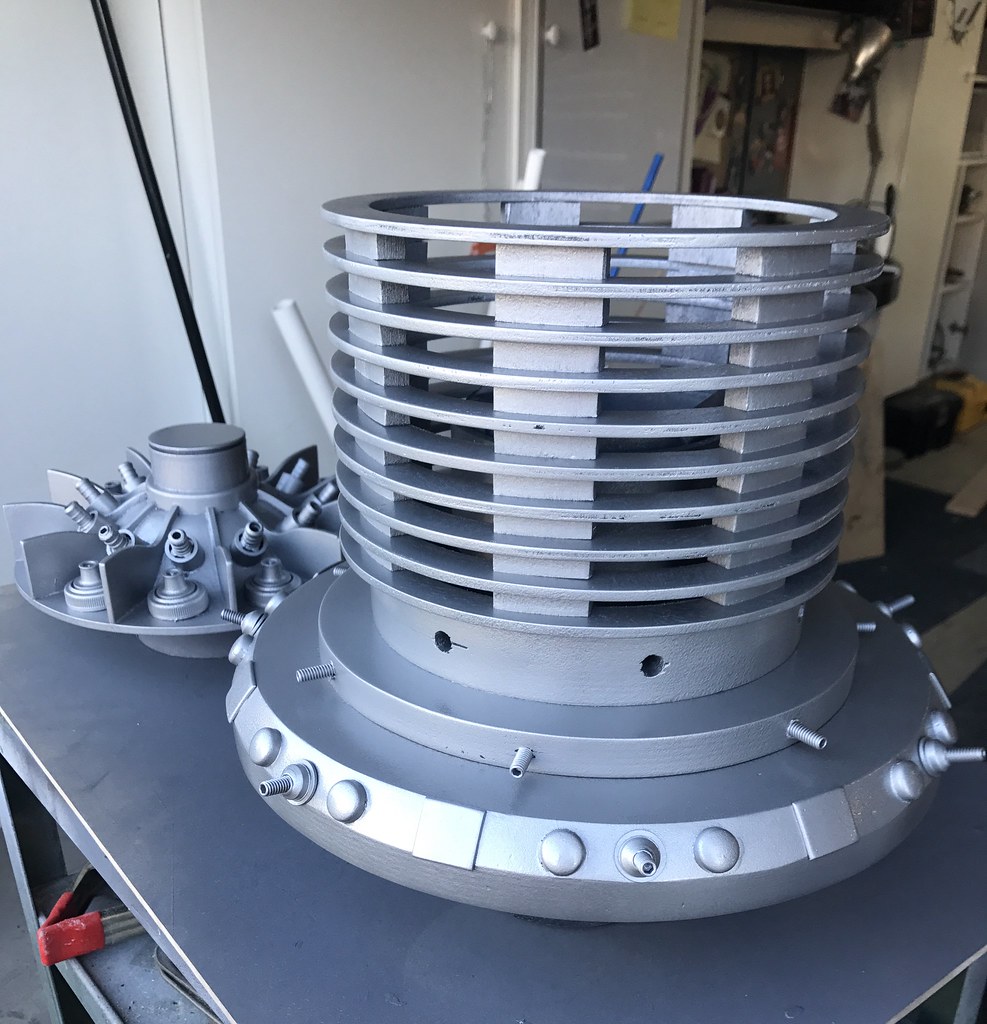
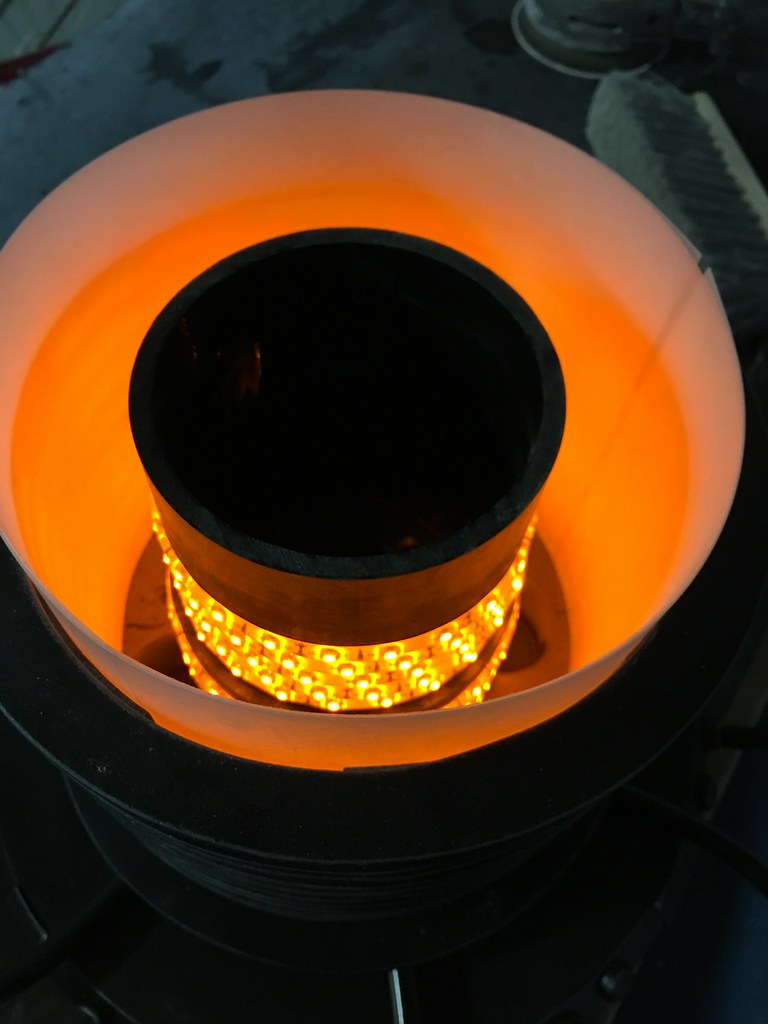
I bought some 4’’ pvc and two caps for attaching the lid to the base. This will later allow me to have something to wrap the LED strips around as well. I forgot to take pics, but you can see that I added large holes in the bottom to later allow the LED orange to escape into the clear tubes coming out the side.
 Untitled by chris stephens, on Flickr
 Untitled by chris stephens, on Flickr
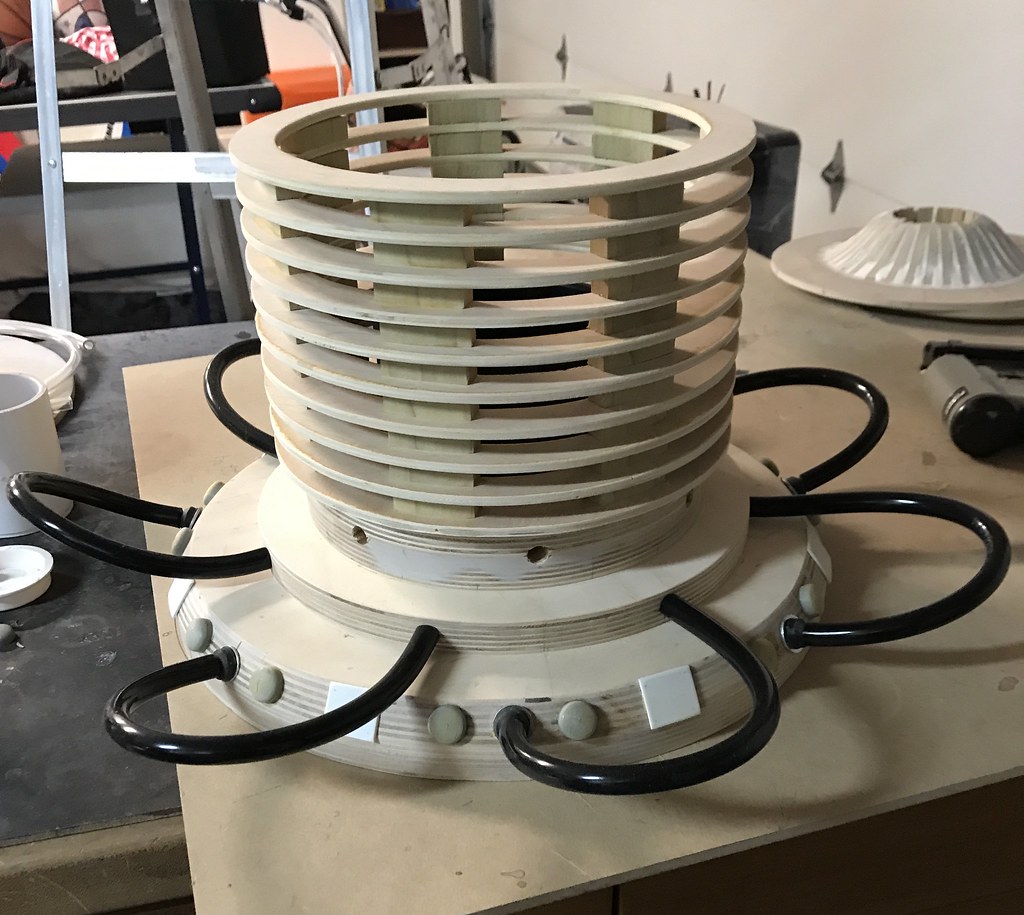
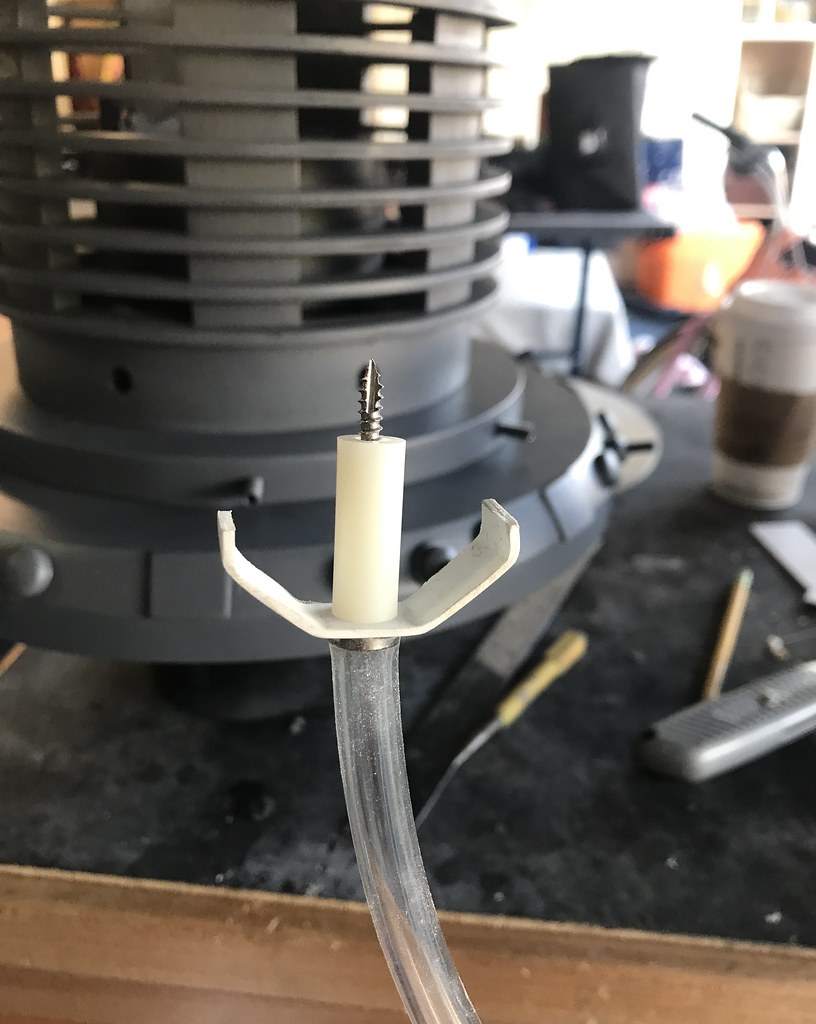
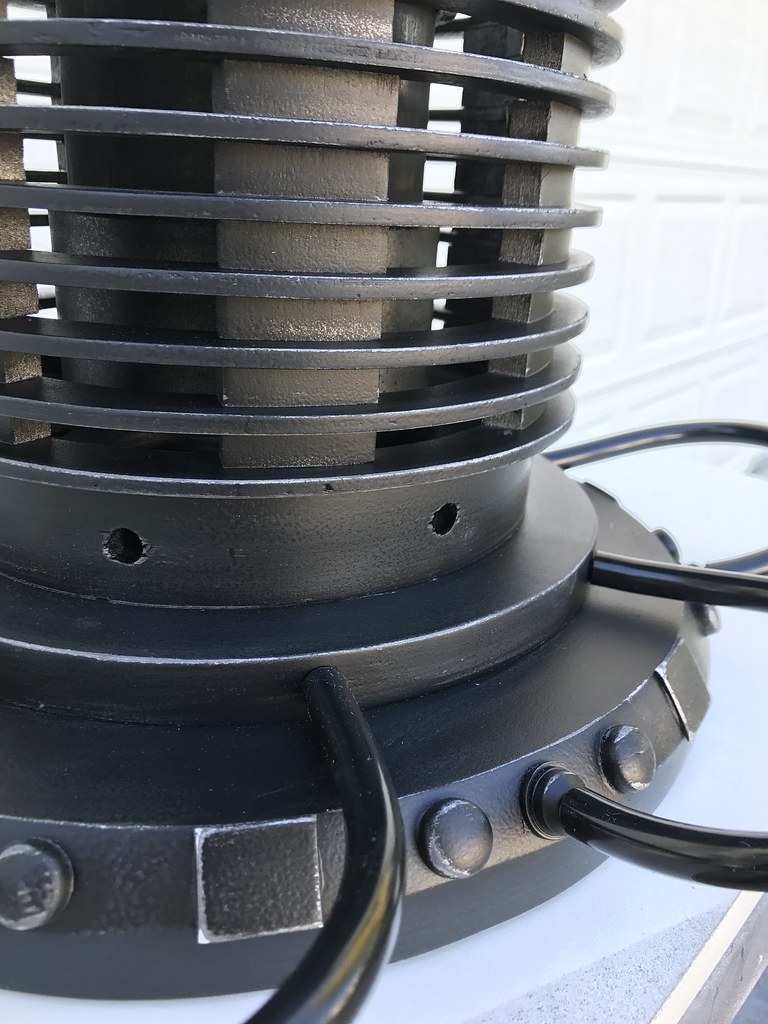
Also added threaded rod for the hose attachments
 Untitled by chris stephens, on Flickr
 Untitled by chris stephens, on Flickr
- - - Updated - - -
Next up is the lid.
Drew it out on ¼’’ MDF
 Untitled by chris stephens, on Flickr
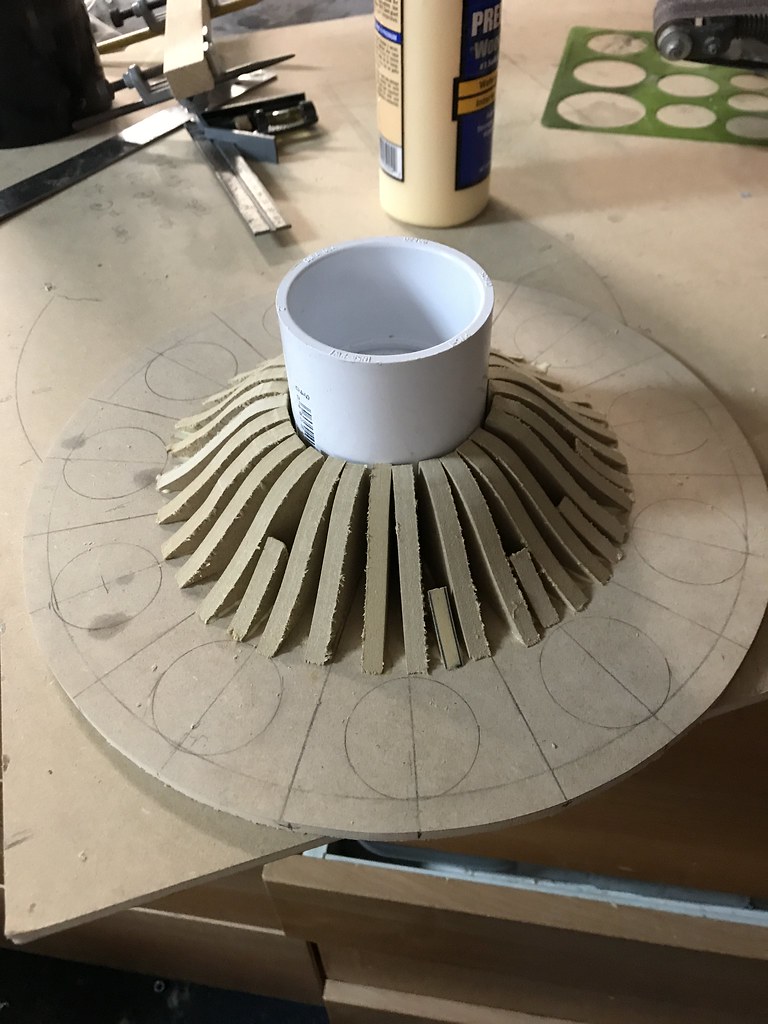
Cut out a bunch of ribs for the shape of the dish
 Untitled by chris stephens, on Flickr
Wrapped them around the PVC core
 Untitled by chris stephens, on Flickr
After gluing the ribs down and shooting them with a micro pin nailer, I filled the gaps with liquid nails
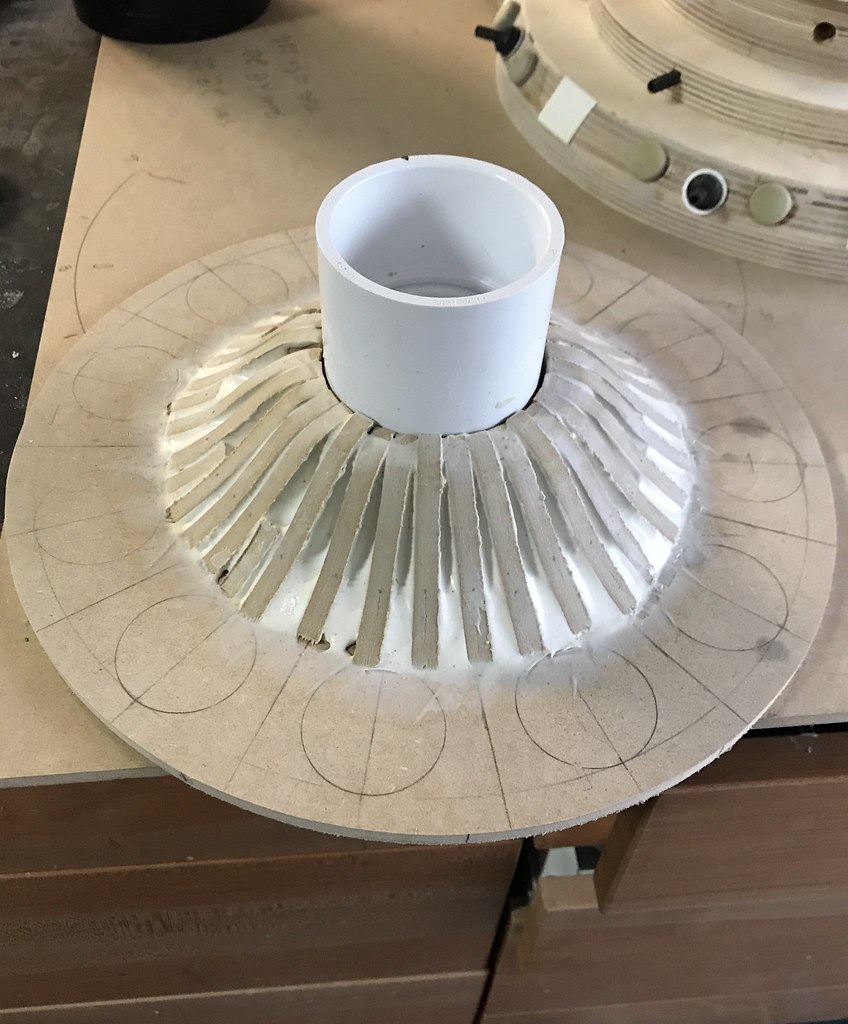 Untitled by chris stephens, on Flickr
Then after a day or so of drying, I skimmed it with bondo and sanded it
 Untitled by chris stephens, on Flickr
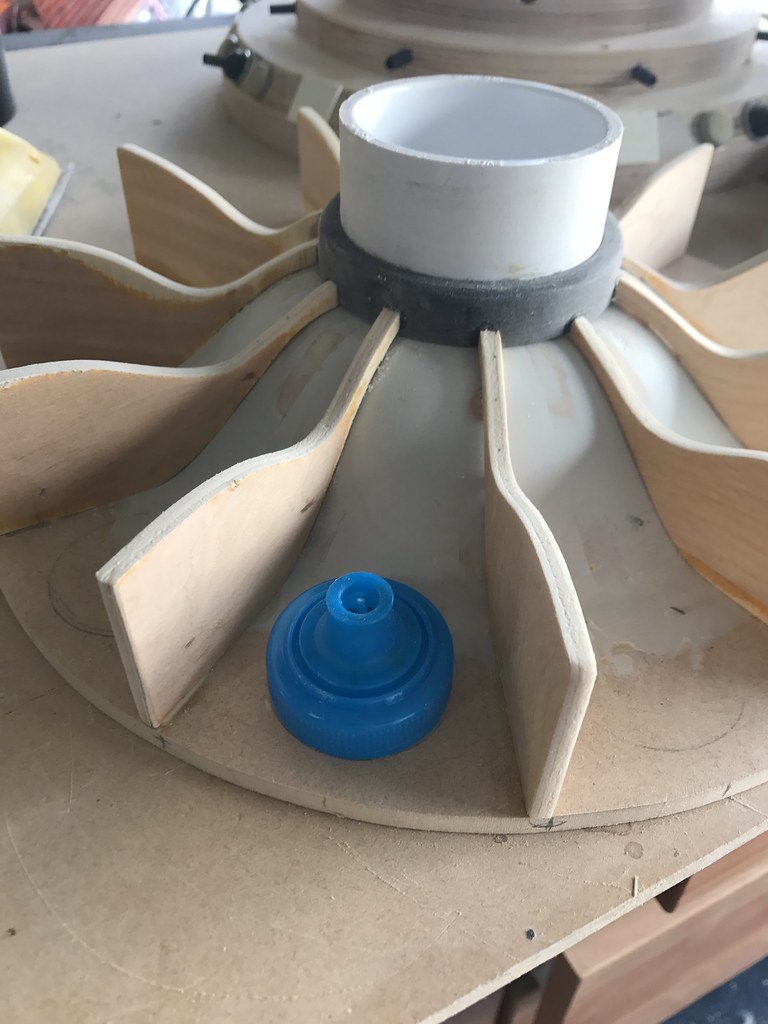
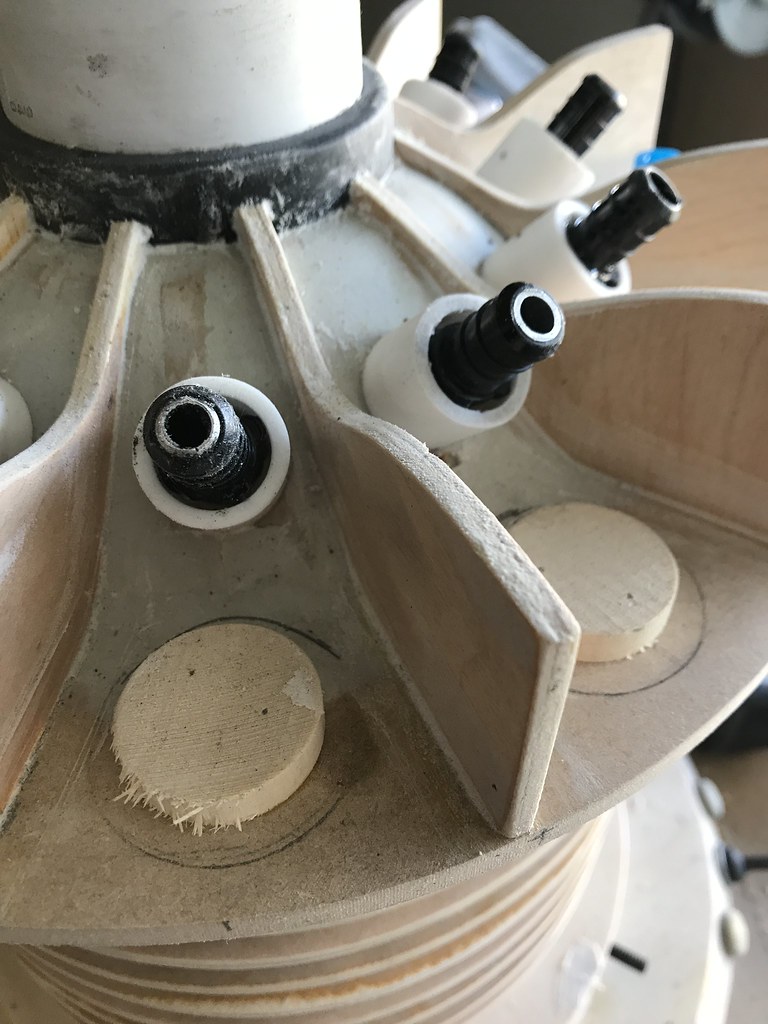
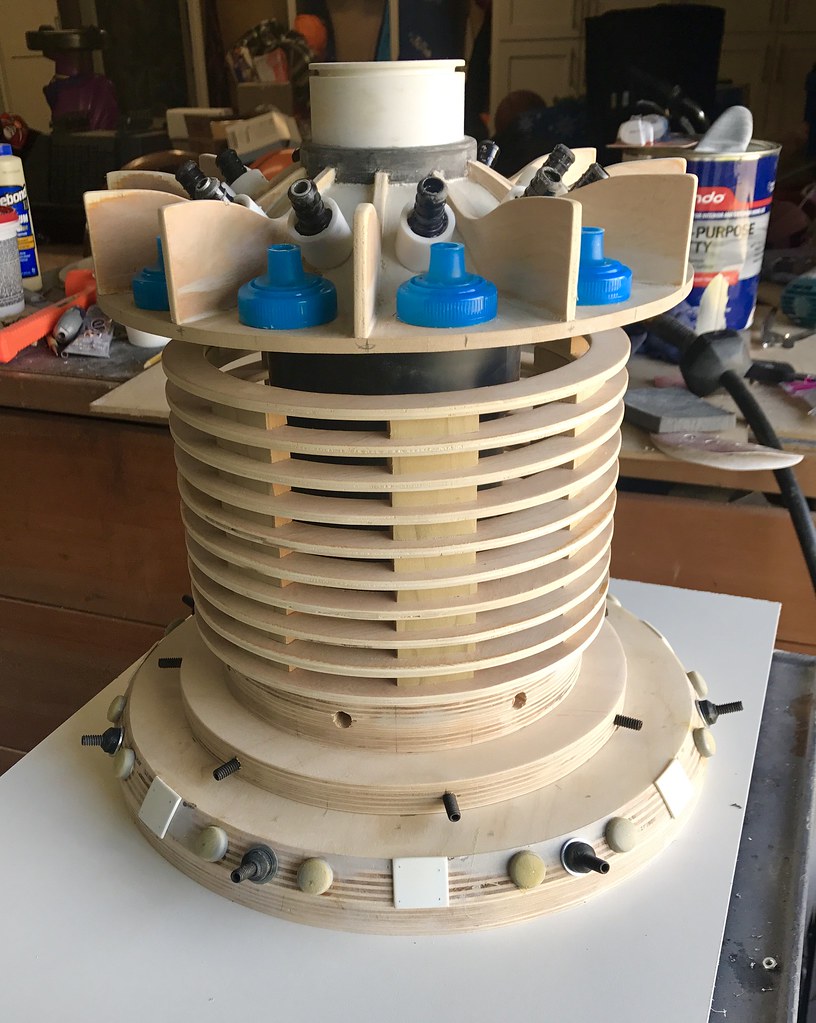
Then added the fins and dowels for the greeblies. This will allow the juice caps something to be glued and nailed to.
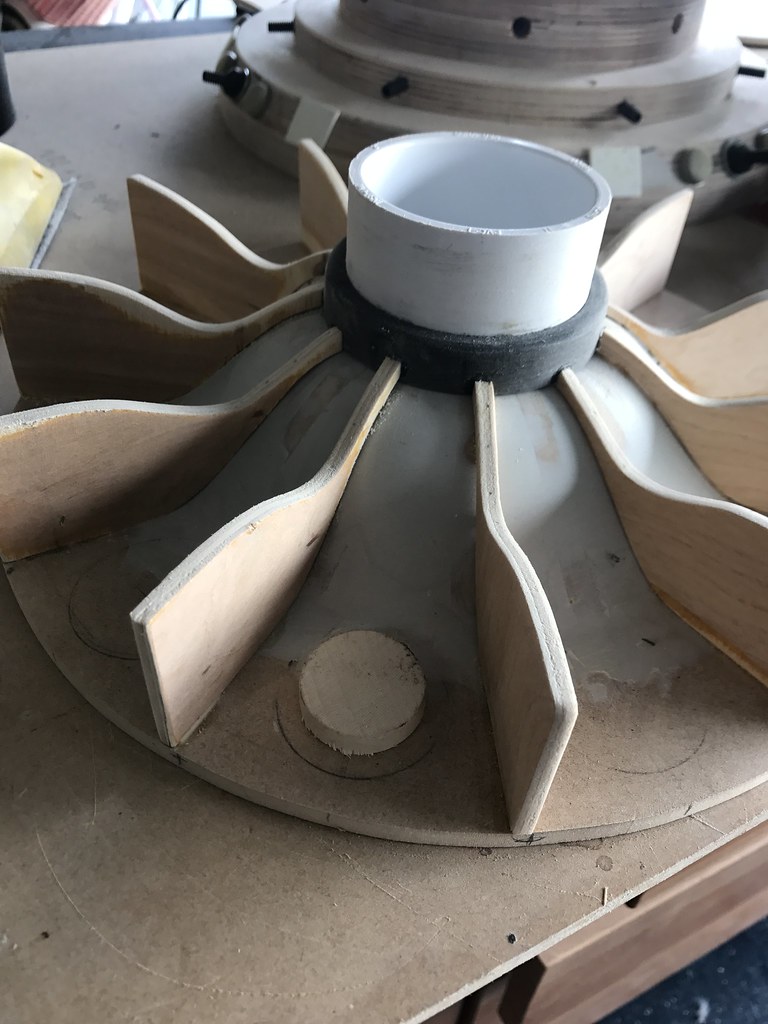 Untitled by chris stephens, on Flickr
 Untitled by chris stephens, on Flickr
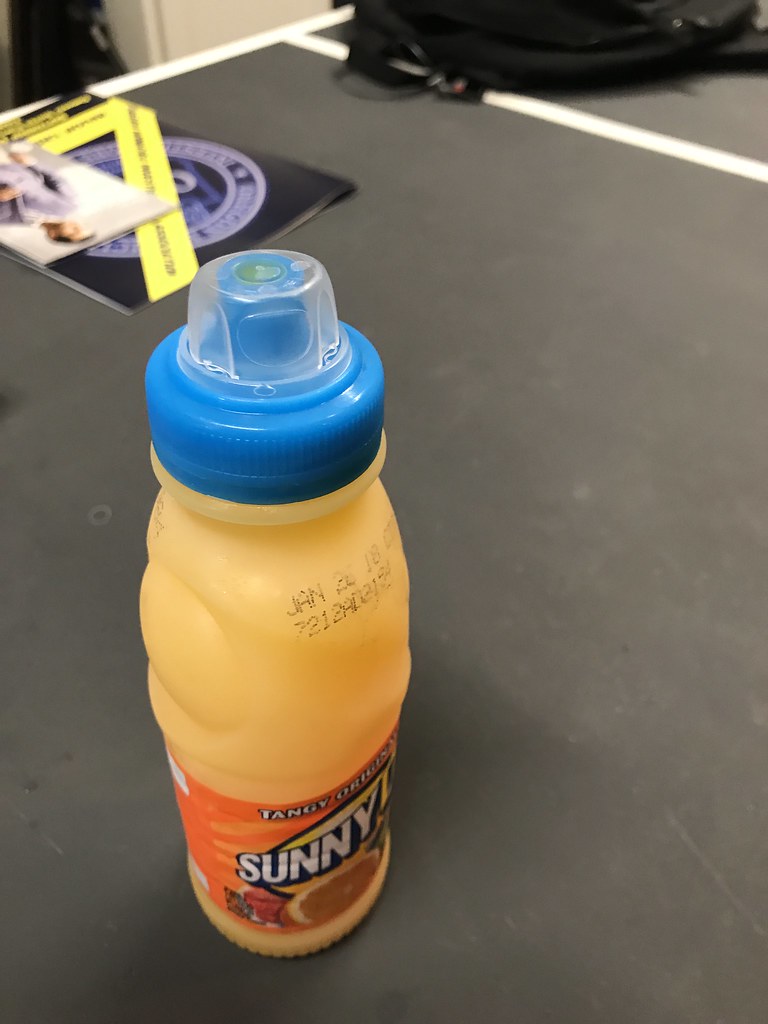
And yeah… those greeblies really did come from my kids’ lunches
 Untitled by chris stephens, on Flickr
- - - Updated - - -
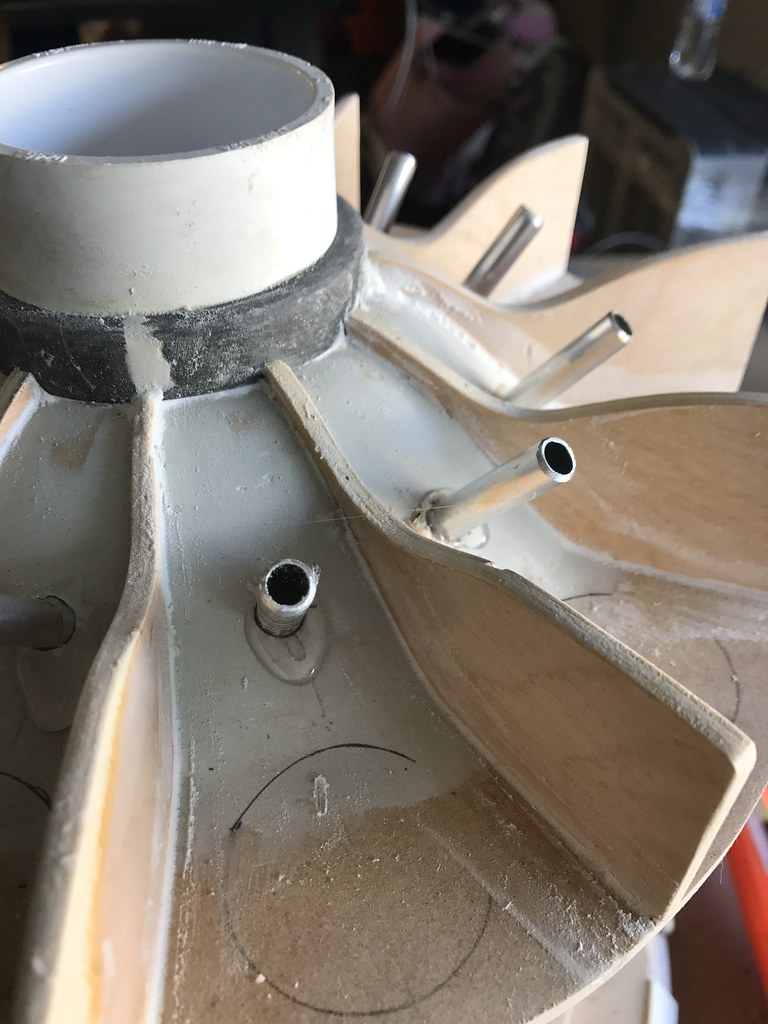
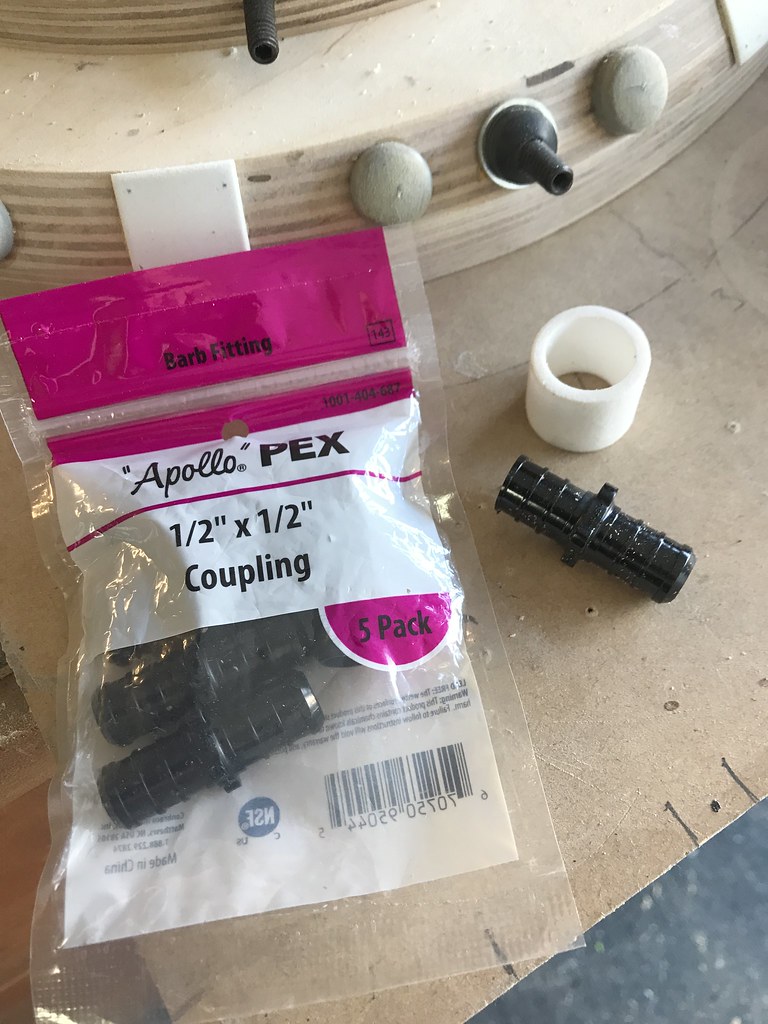
Next up, I added the second row of greeblies to the lid. I used metal tubing, plastic couplers and PVC for the outer layer.
 Untitled by chris stephens, on Flickr
 Untitled by chris stephens, on Flickr
 Untitled by chris stephens, on Flickr
Mounted another PVC cap under the lid. This will allow the lid to attach to the main housing easily.
 Untitled by chris stephens, on Flickr
 Untitled by chris stephens, on Flickr
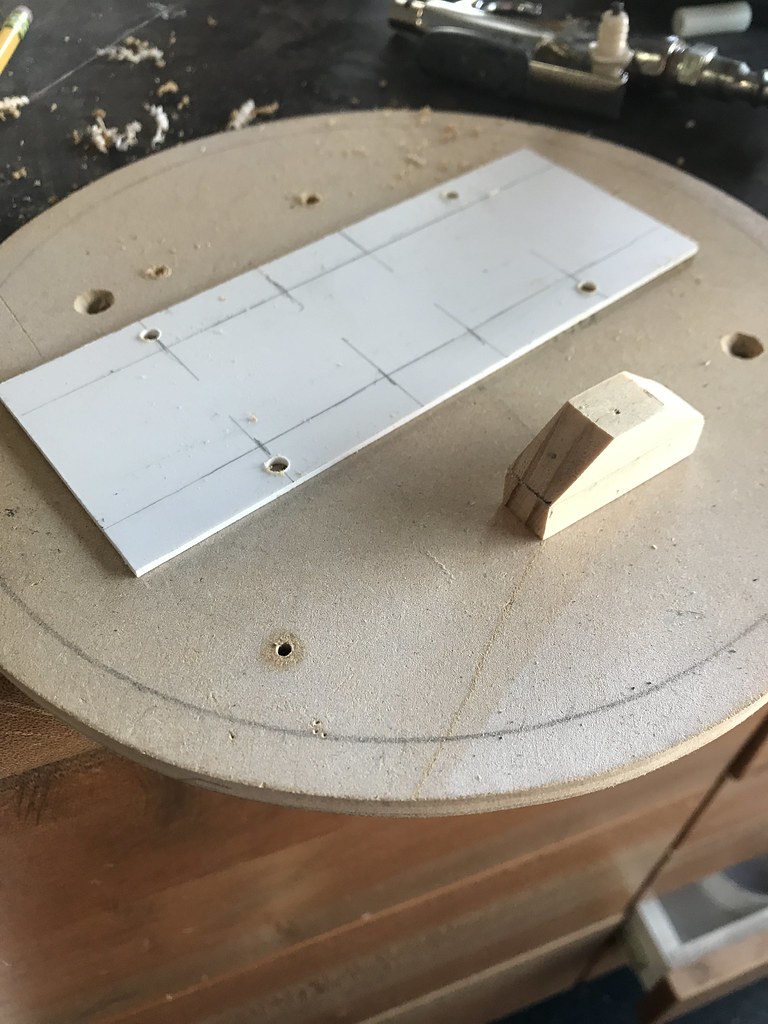
Next up, I made a form to bend some styrene to. This was the only way I could think to make those T nut looking things hanging down from the lid
 Untitled by chris stephens, on Flickr
Score and snap the styrene into strips with a hole in the middle for attaching later
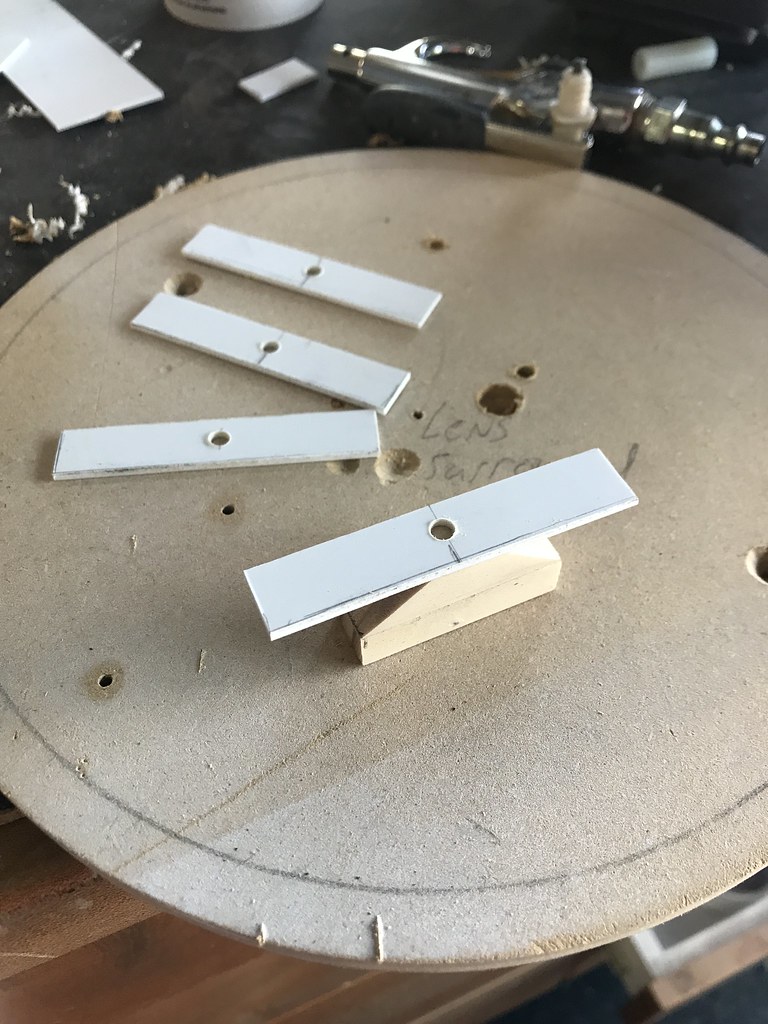 Untitled by chris stephens, on Flickr
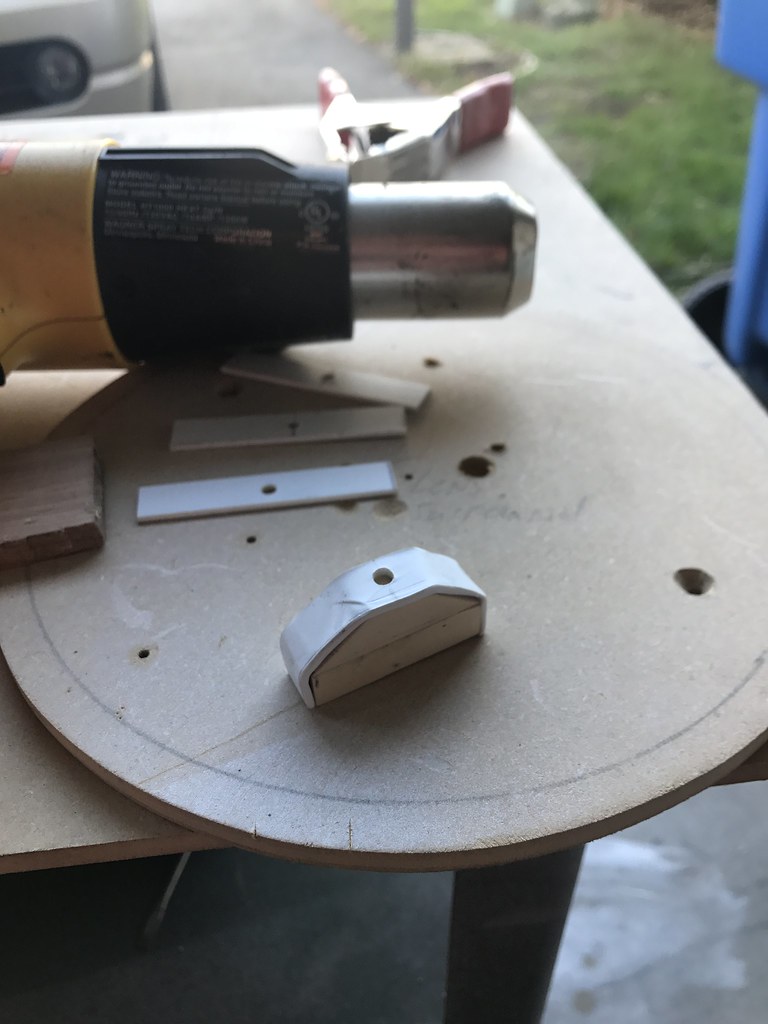
Center it over the form and then heat gun it until it’s formable. Press it down against the form and within a few seconds, it dries in place
 Untitled by chris stephens, on Flickr
Too easy….
 Untitled by chris stephens, on Flickr
- - - Updated - - -
Primer and then a couple layers of aluminum
 Untitled by chris stephens, on Flickr
Then a heavy layer of black. About 10 minutes later, scuff with a pad in areas to get a slightly weathered look.
 Untitled by chris stephens, on Flickr
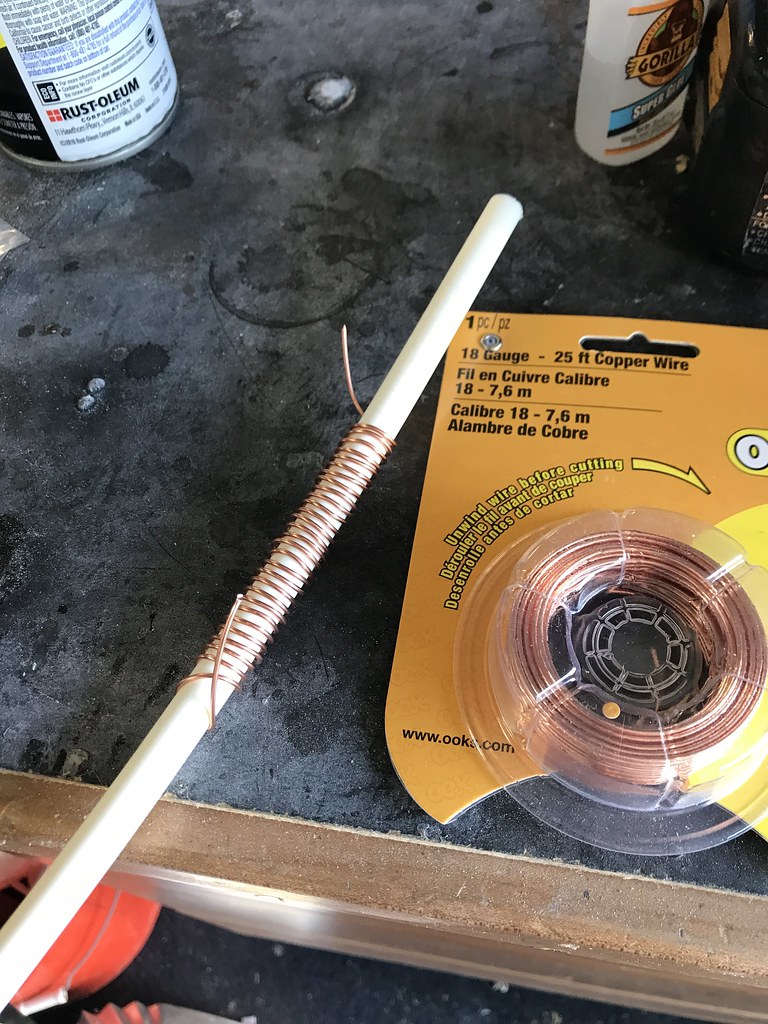
Then I went to Home Depot and looked in the picture hanging area. They sell this copper wire that’s perfect for making your own coils. You need to buy two roles because each coil is about 3 feet of wire.
Just wrap it around a ½” dowel and you can make your own coils easily
 Untitled by chris stephens, on Flickr
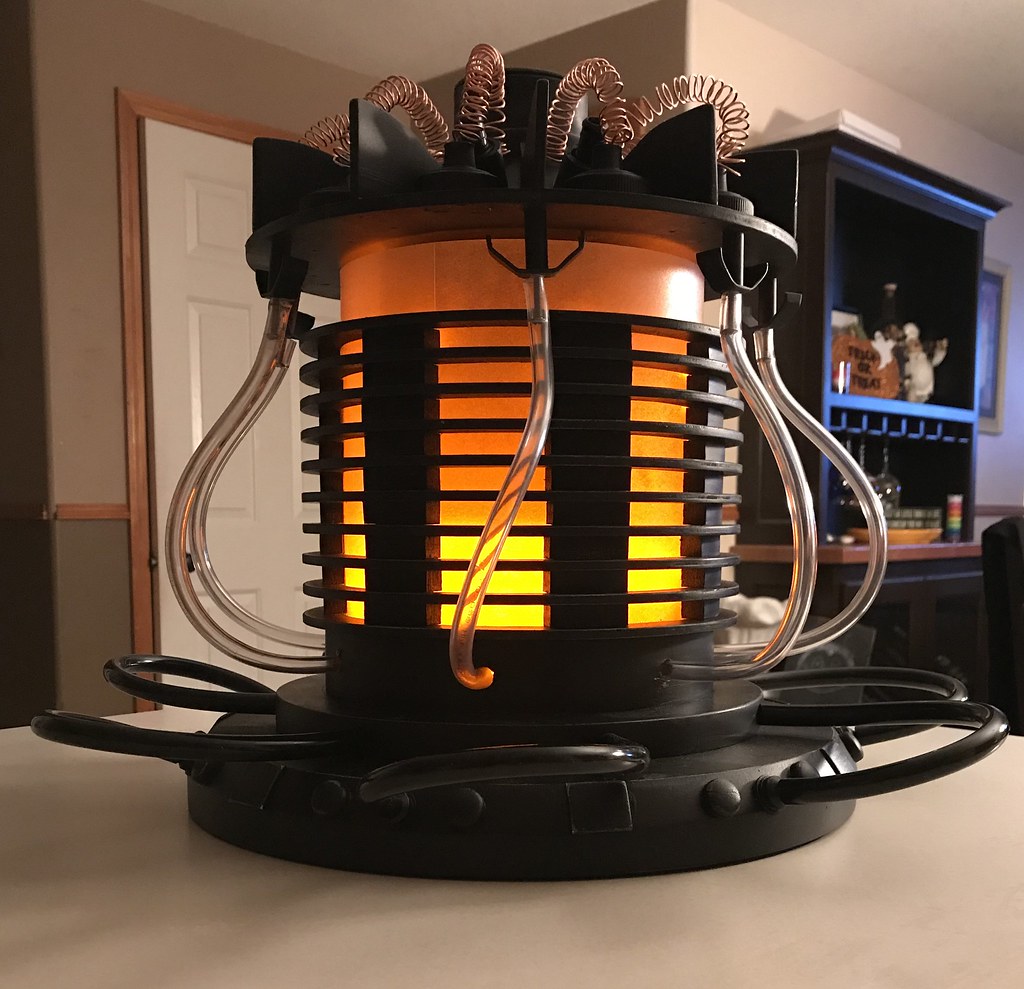
And here it is…
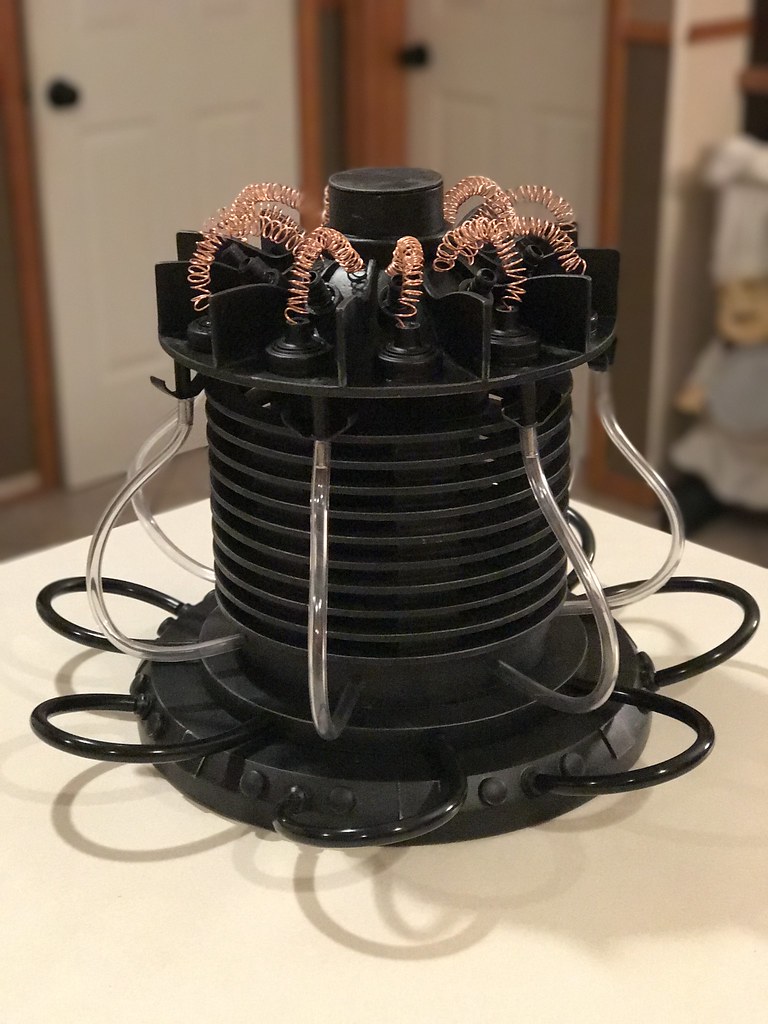 by chris stephens, on Flickr
I bought LED strips on amazon and wrapped them around the PVC. The lens material is just a thin plastic I bought at TAP Plastics. You can get a 2'X4' sheet for around $4. One side was already scuffed up, so I took an orbital sander to the smooth side to make it look better. Also used 2 layers to defuse the LED's
 Untitled by chris stephens, on Flickr
 Untitled by chris stephens, on Flickr
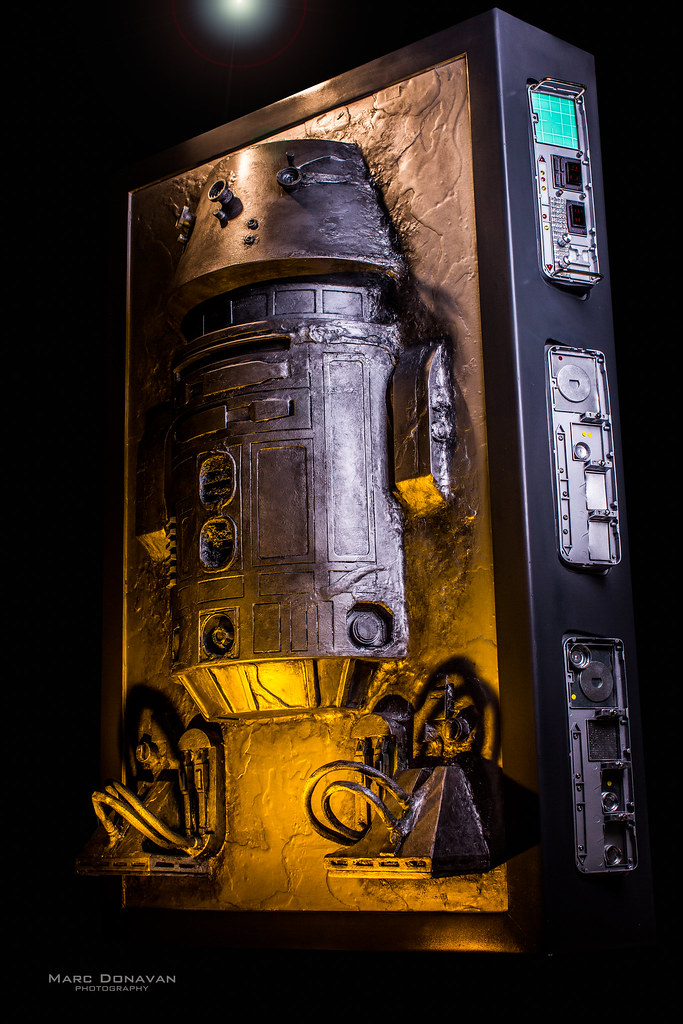
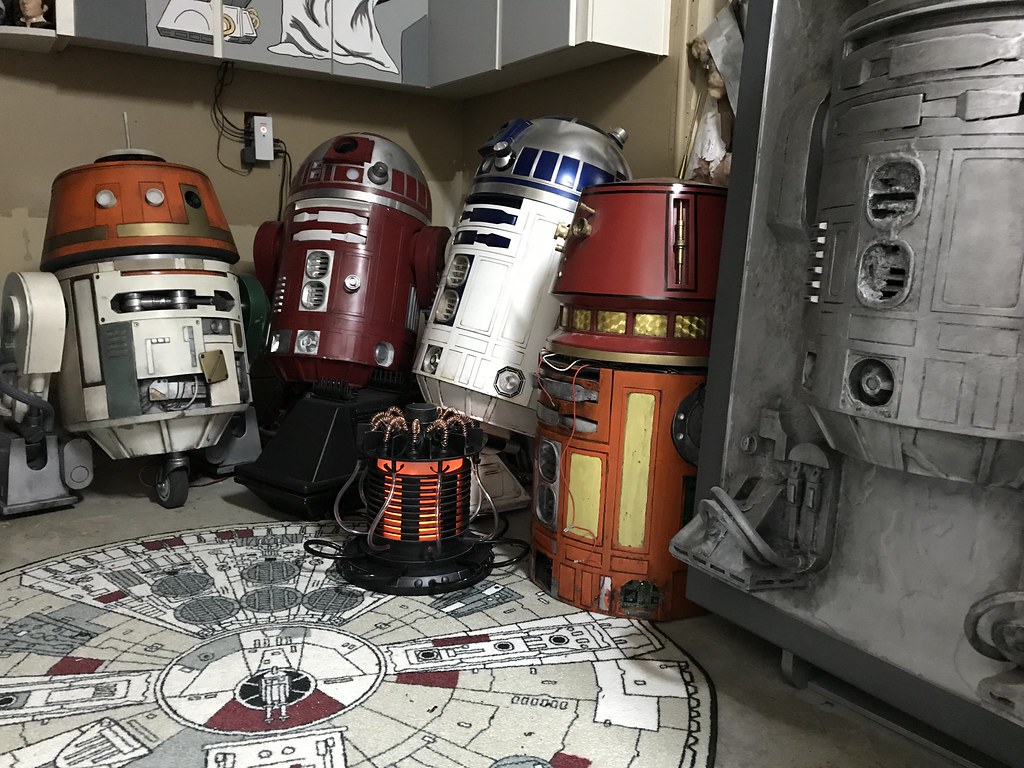
And now that it's done, it just sits in the corner with the rest of my stuff not allowed in the house.....
 Untitled by chris stephens, on Flickr
Savage- for the awesome Fusion Reactor thread ( On Astromech dot net ) with tons of helpful info and reference pics.
Kevin Holme- For having a 60th birthday party in Chicago and inviting me to join.
American Airlines ( And Mike Kelley too for that matter… ) – for the 5 hour layover in Chicago that gave me time to read the 30 something pages of the Fusion thread.
Now … On with the build. I wasn’t going to really document this at first because most everyone is printing these. But, I figured there may be another builder or two that will be scratch building and maybe this might help.
Started by drawing a full size plan and making some ¼’’ MDF templates. I have some ¾’’ Baltic birch that I’ll be using for the base.
Untitled by chris stephens, on FlickrUntitled by chris stephens, on FlickrThen routed out all my round parts…
Untitled by chris stephens, on FlickrNext up, I spent what seemed like forever cutting out hardwood for spacers. These spacers will go in between each vent to create the illusion of one solid vertical piece when it’s done.
Untitled by chris stephens, on FlickrUntitled by chris stephens, on FlickrUntitled by chris stephens, on FlickrThen start stacking….
Untitled by chris stephens, on FlickrUntitled by chris stephens, on Flickr- - - Updated - - -
Next, I beveled the base. I took most of the material off with a 45 degree router bit. Then I just belt sanded the rest
Untitled by chris stephens, on FlickrThen stacked em up. Glue and nail gun to get these together.
Untitled by chris stephens, on FlickrI bought some 4’’ pvc and two caps for attaching the lid to the base. This will later allow me to have something to wrap the LED strips around as well. I forgot to take pics, but you can see that I added large holes in the bottom to later allow the LED orange to escape into the clear tubes coming out the side.
Untitled by chris stephens, on FlickrUntitled by chris stephens, on FlickrAlso added threaded rod for the hose attachments
Untitled by chris stephens, on FlickrUntitled by chris stephens, on Flickr- - - Updated - - -
Next up is the lid.
Drew it out on ¼’’ MDF
Untitled by chris stephens, on FlickrCut out a bunch of ribs for the shape of the dish
Untitled by chris stephens, on FlickrWrapped them around the PVC core
Untitled by chris stephens, on FlickrAfter gluing the ribs down and shooting them with a micro pin nailer, I filled the gaps with liquid nails
Untitled by chris stephens, on FlickrThen after a day or so of drying, I skimmed it with bondo and sanded it
Untitled by chris stephens, on FlickrThen added the fins and dowels for the greeblies. This will allow the juice caps something to be glued and nailed to.
Untitled by chris stephens, on FlickrUntitled by chris stephens, on FlickrAnd yeah… those greeblies really did come from my kids’ lunches
Untitled by chris stephens, on Flickr- - - Updated - - -
Next up, I added the second row of greeblies to the lid. I used metal tubing, plastic couplers and PVC for the outer layer.
Untitled by chris stephens, on FlickrUntitled by chris stephens, on FlickrUntitled by chris stephens, on FlickrMounted another PVC cap under the lid. This will allow the lid to attach to the main housing easily.
Untitled by chris stephens, on FlickrUntitled by chris stephens, on FlickrNext up, I made a form to bend some styrene to. This was the only way I could think to make those T nut looking things hanging down from the lid
Untitled by chris stephens, on FlickrScore and snap the styrene into strips with a hole in the middle for attaching later
Untitled by chris stephens, on FlickrCenter it over the form and then heat gun it until it’s formable. Press it down against the form and within a few seconds, it dries in place
Untitled by chris stephens, on FlickrToo easy….
Untitled by chris stephens, on Flickr- - - Updated - - -
Primer and then a couple layers of aluminum
Untitled by chris stephens, on FlickrThen a heavy layer of black. About 10 minutes later, scuff with a pad in areas to get a slightly weathered look.
Untitled by chris stephens, on FlickrThen I went to Home Depot and looked in the picture hanging area. They sell this copper wire that’s perfect for making your own coils. You need to buy two roles because each coil is about 3 feet of wire.
Just wrap it around a ½” dowel and you can make your own coils easily
Untitled by chris stephens, on FlickrAnd here it is…
by chris stephens, on FlickrI bought LED strips on amazon and wrapped them around the PVC. The lens material is just a thin plastic I bought at TAP Plastics. You can get a 2'X4' sheet for around $4. One side was already scuffed up, so I took an orbital sander to the smooth side to make it look better. Also used 2 layers to defuse the LED's
Untitled by chris stephens, on FlickrUntitled by chris stephens, on FlickrAnd now that it's done, it just sits in the corner with the rest of my stuff not allowed in the house.....
Untitled by chris stephens, on Flickr")