xl97's Iron Man motorized face plate tutorial

You have an UNO as well...correct?

Then you can re-flash bootloader..etc

hard to tell.. with it not in front of me.

Arduino.cc forum will yield TONS of help/things to try/do

I do have a uno. Thanks for the note I will dig deeper to see if I can figure it out or not.

Here is the datasheet for the servo I'm using.

https://www.pololu.com/file/download...?file_id=0J729

It says the range is between 4.8V - 6V. It also showing three different range for current. Not sure why (really wish I have taken some physics course when I was in school :()


I choose this servo was due to it was referred by a lot of people on the web. And showing what will happen if use the small and plastic servo. However the small plastic servo will work if the helmet/faceplate is pure plastic or 3d printed due to the lightness. I'm using the traditional version which is 110lb paper template->hot glue->resin->fiberglass->resin->body filter(multiple times) so it is pretty heavy.

I also notice that when I power it on for a while say 5-10mins with the 12V power source (2 4xAA battery pack), my 5v module become a bit hot. I know its input range is between 6-12V. Is that normal to be a bit hot? Will that be a issue since I'm at the max input range?

Here is what the 5v module looks like:


I do have a backup 5v module. The input range is 7.5v-20v.


The problem is for this one, I'm not sure how to connect it. It looks like I can wire input on one side ( the one side with screw) and output on the other side (the other side with screw. However, I notice that the is a yellow select which have 5+ and 5-. Now I'm confused. Also since originally I only have 1 4xAA battery pack for the power source. So I used the first one. The second one need min 7.5V input. And the first one is only the half the size of the second one.

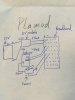
Is there anything I can try to fix this arm not moving to the assigned degree and auto come back issue?

Thanks

Dio
 
try doing the Arduino servo 'SWEEP' example.

(google for how to set things up)..


see if you still get jitter and odd movement back with the servo still..


*it will show you how to wire it.. and the sample/example code is already built into the Arduino IDE
 
try doing the Arduino servo 'SWEEP' example.

(google for how to set things up)..


see if you still get jitter and odd movement back with the servo still..


*it will show you how to wire it.. and the sample/example code is already built into the Arduino IDE

Will do that Sir:D
 
try doing the Arduino servo 'SWEEP' example.

(google for how to set things up)..


see if you still get jitter and odd movement back with the servo still..


*it will show you how to wire it.. and the sample/example code is already built into the Arduino IDE

HI xl97,

I just did the sweep example and my servo working perfect. May I ask what's next?

Thanks

Dio
 
I dont know... hard to say I guess. :(

maybe try getting a 7805 voltage regulator and some caps like the diagram?

Maybe that module thingy is the source/issue? (although it 'looks' like it -is- just a voltage regulator board....and if the specs are correct should have been a problem)
 
I dont know... hard to say I guess. :(

maybe try getting a 7805 voltage regulator and some caps like the diagram?

Maybe that module thingy is the source/issue? (although it 'looks' like it -is- just a voltage regulator board....and if the specs are correct should have been a problem)


I notice one thing for the sweep example.

I see this tutorial on youtube:


As you can see the guy in the video use usb as direct power source and has no problem at all. When I try the same thing on my uno r3 board and servo.The power start drop and back on really frequently just like in this video. The computer start have the device connect and unconnected notice sound forever.


So when I didi the sweep example, I used battery back for my power source.

Is this normal?
 
Last edited by a moderator:
As explained before..


1.) You 'can' use the USB (Arduino) to power the servo.. but it is NOT recommended..

The servo pulls WAY more current than the Arduino/USB can supply.

sometimes the smaller servos will work.. but its not recommended.


you do not have those servos...(and you have TWO)..... and your probably ruining your Arduino if connecting it directly

Got it. Sorry about let you explained twice:p

I'm leaving tonight, so I cannot hands them to play around it. However, I will search online see what's the other possibility could cause this issue. Also I find two stores in DC may have Arduino Uno R3, Nano and other parts. I'm thinking should I buy another set then try use the new set see if there is anything wrong with the existing set? The current set is cheap and from China.

BTW, have you heard these stores in States? Micro Center & Hobby Works. Do you know is there any other good store could sell these parts in DC?

Thanks

Dio
 
no worries...

sometimes foreign terms and new stuff takes a bit to 'sink in'...

I know nothing about DC area.. (sorry)..

I usually order all my stuff off ebay (from China) to save on costs..

seems like things work when the regulator module thingy isnt being used? Is this correct?

Or does the sweep example not work at all? (correctly?)

Actually when I did the sweep test. I did used the regulator module and it works fine. What I did is I hook up 12v power source to the regulator module first. Then wire the output to the breadboard. Then wire two set of wire out from the breadboard, one set is for the R3 board and the other set is for the servo. Then load the sweep example code to R3 disconnect the usb, power it on. Works fine.

So it seems the regulator module works fine with the sweep example.
 
and you had 1 or two servos for the 'sweep' example?

I'm thinking you may need more current? Maybe your getting a brown at because it needs more current (draw).. and hence the voltage goes down to compensate for this?


try NO leds.. and 1 servo.. with your module thingy..

maybe try hooking up the Arduino to the battery pack? (through the regulator)... so not BOTH things are connected to the module.. (make sure to connect a GND wire to the breadboard GND still.. all GND's connected together)
 
I attached only one servo for the sweep example. Since I'm away now, I will draw how i connect them then you will have a clear pic how i did it.
 
this is what i did. how you can understand my draw
 

Attachments

  • image.jpeg
    image.jpeg
    834.7 KB · Views: 173
image.jpegimage.jpeg

these are the datasheet for my servos. Is that means they need more current? Sorry i have no knowledge about current at all.
 
when you get back..

try the set-up again. but use only 1 servo this time.. (not the sweep demo, the real project... use only 1 servo this time)

those datasheets say that the servo will take roughly 450mA (half an amp)... running normally.. not lifting anything (ie: no load)

if they are lifting something.. they will take MUCH more...

if they lift something that is too heavy for it to move.. it will be taking up to 2400mA (2.4 amps) in current!!

your module isnt going to work for that...

I suggest maybe using a +7.4v Li-Ion pack.. start there (they should be cheap enough)

and maybe having two separate +5v regulators... (or modules).. 1 for each servo.. the +7.4v li-ion pack and connect directly to the Arduino through its regulator.. VIN I think it is? (or RAW?).. I get them mixed up sometimes..lol
 
Last edited:
when you get back..

try the set-up again. but use only 1 servo this time.. (not the sweep demo, the real project... use only 1 servo this time)

those datasheets say that the servo will take roughly 450mA (half an amp)... running normally.. not lifting anything (ie: no load)

if they are lifting something.. they will take MUCH more...

if they lift something that is too heavy for it to move.. it will be taking up to 2400mA (2.4 amps) in current!!

your module isnt going to work for that...

I suggest maybe using a +7.4v Li-Ion pack.. start there (they should be cheap enough)

and maybe having two separate +5v regulators... (or modules).. 1 for each servo.. the +7.4v li-ion pack and connect directly to the Arduino through its regulator.. VIN I think it is? (or RAW?).. I get them mixed up sometimes..lol

Do you mean something like this?

test.jpg

Also may I ask the difference between using +7.4 v Li-on pack and +12 V battery pack? I thought the higher the better is it? (within the voltage limit for sure)

How do you charge the 7.4v Li-on pack?

Thanks

Dio
 
I cant make any sense of that diagram...

more or less.. you want to follow the INITIAL diagram.. and swap out the voltage regulator/caps with your +5v module thingy..

you might need more than 1 module.. (1 for each servo)..

and maybe even a 3rd one.. so you can give a regulator +5v to the transistor/leds..

for NOW though...

I say only test with 1 servo..

maybe not even having ANY leds either..

diagram_1.jpg
 
Back
Top