WIP: Isaac Clarke's Engineering Rig from Dead Space 2

Dang I come back to this thread and had no idea you were doing the rest of the costume. This was actually going to be my project for the year and on one hand I still would like to do the build myself, but on the other hand I find it silly to go through all the hassle when someone else has already done the work. Especially when the back sculpt looked a lot more annoying than I initially expected.

Looking forward to seeing the end result.
 
I'm making all the hard parts for a friend who needs them by the beginning of October.

I'll also offer up a few kits and you should have plenty of time to tack it together, paint it, and stitch up the soft parts in time for Halloween. Hopefully that helps you make up your mind.
 
I guess I'll have to.

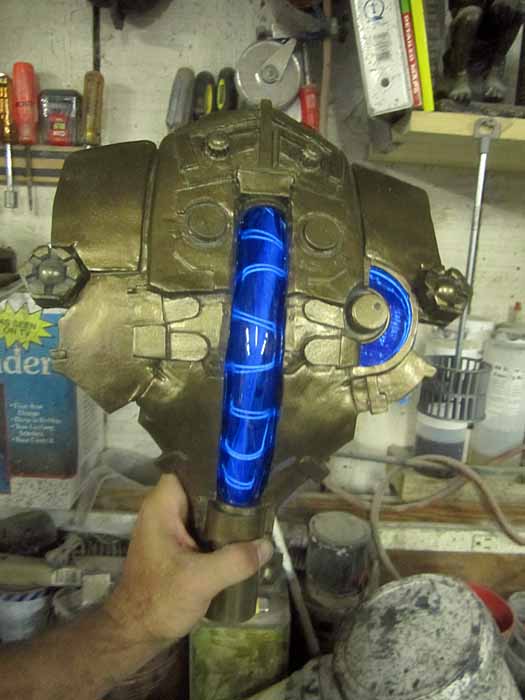
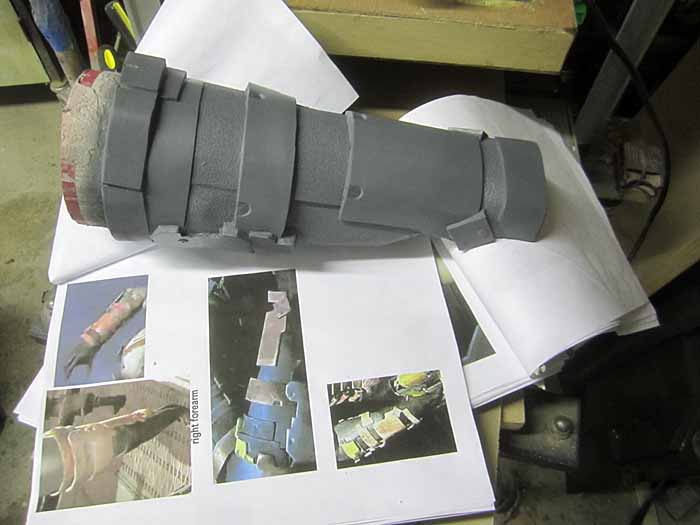
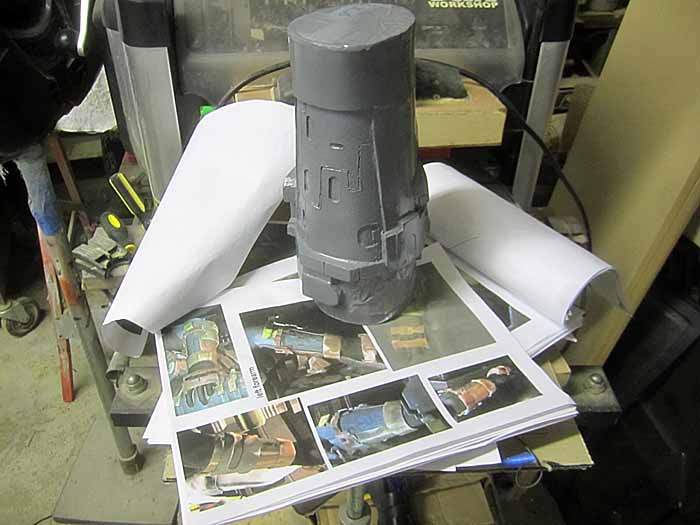
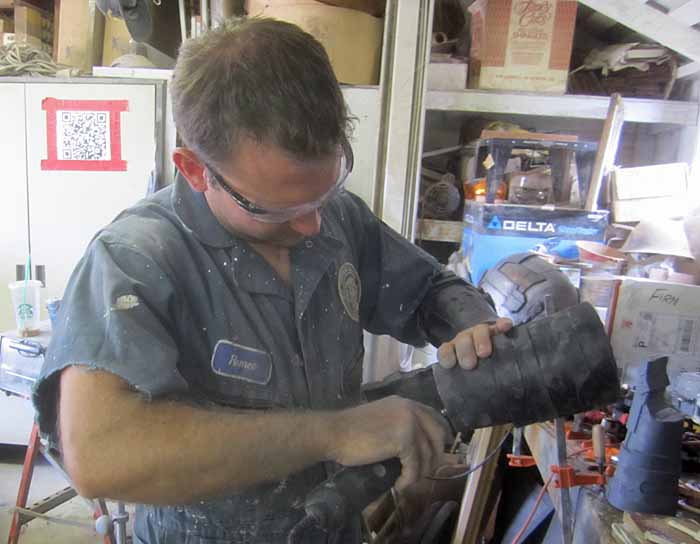
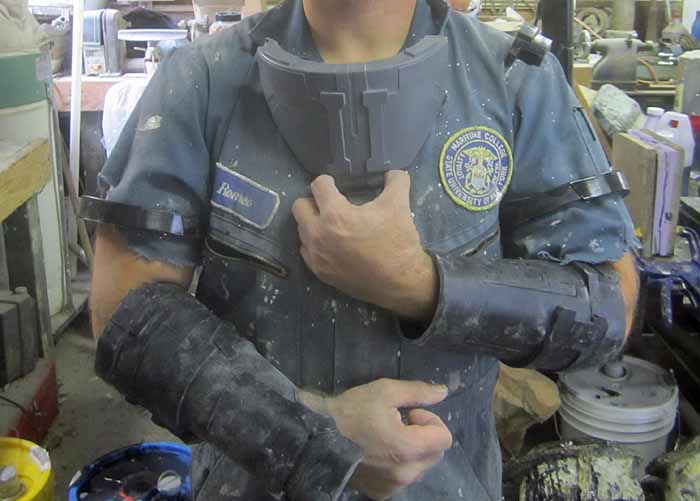
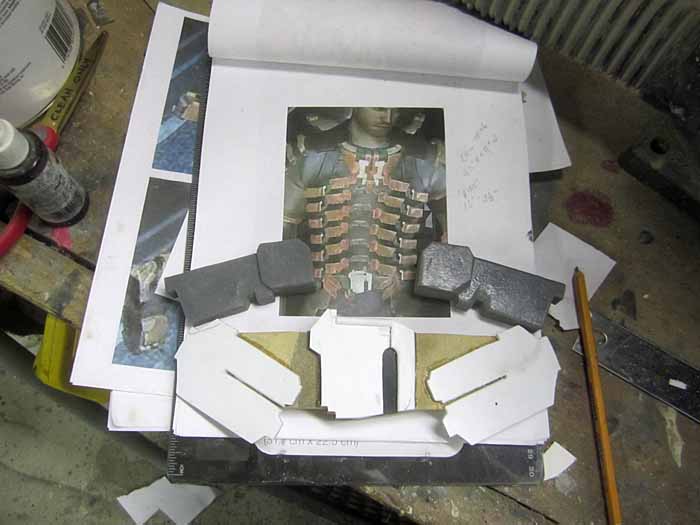
I'm still not sure what I'll be wearing for Halloween. I'm simultaneously working on this guy, my Warhammer 40k Space Marine, and retouching my blue HALO Spartan armor. I may even finish my Republic Commando armor before Halloween if I really get ambitious. I'm toying with just parking a van downtown and doing three or four wardrobe changes as I make the rounds...
 
omg, drooool... all this...its all amazing. If u do offer the rest of these parts, i might have to pick them up to go along with my helmet
 
Thanks for the compliments, guys.

I finished the jacket mold for the back:

The rubber was still a bit tacky though, so I didn't get around to building the mothermold or pulling a cast.

I also got the tiniest start on the right forearm:


It doesn't look like much just yet, but once I've layered on the rest of the skins it'll start to shape up.

Stay tuned...
 
The back mold is made:


It works too:


Here's the first cast with all of the greeblies in place:


And here's the start of the strips for the right upper arm:


More to come. Stay tuned...
 
I put the health tube together today. It was a simple matter of heating up a piece of blue acrylic (the same stuff I used for the slots in the faceshield) and then bending it into the shape I needed. Then I took some EL wire and coiled it down along the inside of the tube. Here's an early test shot of the lighting:


Here's the inside showing the mess of masking tape holding everything in place:


Needless to say, I've got some refinements in mind already.

I also made a couple of the easy parts such as the left shoulder bits:


Here they are again (with the thigh ring) with a coat of textured paint:


More to come. I'm also making progress on my Space Marine build.

Stay tuned...
 
Right gauntlet prototype is done:


The left one too:


Today I'll be making the belt buckle arrangement and starting on the boots. I'll also be making a whole bunch of molds.

Stay tuned...
 
Apologies for the lack of updates, but the heat has stalled progress for me. There's no climate control in the barn, so if it's 90 degrees outside, it's 110 in the workshop.

Yesterday I made the molds for the chest widget, the arm and thigh rings, and the left shoulder ridge. I also finished the gauntlet molds. Here's the left one:


And here's the right one:


Hopefully today I'll have good pulls of all of them.

Stay tuned...
 
Here's an action photo:


That was grinding out the hand hole on the end of one of the gauntlets. They look pretty good now:


Also, I've made the belt buckle section for the front:


More to come. Stay tuned...
 
Wow. No comments? Am I doing something wrong?

Here's the beginning of the boots:


The parts of the left and right boot will be interchangeable, so I can get away with just making one mold for everything. The shin part shown above was cobbled together from pieces of plastic sheet I had laying around in the workshop. Now I just need a toe, a heel cup, and a kneepad.

Stay tuned...
 
Back
Top