WIP: Isaac Clarke's Engineering Rig from Dead Space 2

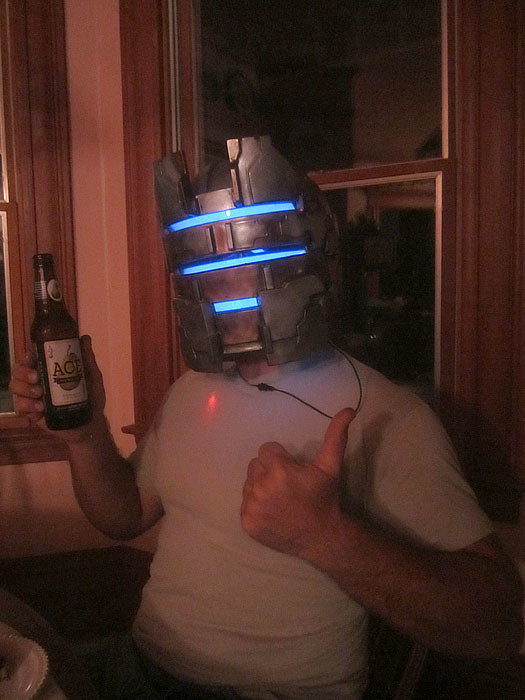
That is really really cool.

It's been a while since I played Dead Space 1&2, but I wonder what one of these helmets would look like if it had 'hammered metal' look to it? Just a different take on it, I guess.
 
Okay, so here's the first fully-finished helmet:


Here it is in the dark:


Finally, here's a shot showing the inside of the faceplate so you can see the layout of the electroluminescent tape:


Making a 5-foot long strip of tape into three segments less than a foot long increased the brightness by quite a bit. The only difficult part was making the connections at the ends. That stuff is pretty sensitive, you can't solder onto the power contacts, and it starts to deteriorate on contact with air.

When I wire up the next one, I'll get some step-by-step photos so you can see how I overcame all of these issues.
 
I made the rib portions today. After a lot of looking at the references, I decided I could get away with just repeating six unique pieces six times each to get all of the parts I needed. Here's the six different parts lined up:


They're cut from MDF and the raised portions are sheet styrene scraps I had laying around. Here's a shot of the parts all coated with textured paint:


Once the paint is dry tomorrow I'll make a mold and start cranking out copies of the parts to go on the suit. I'll also be making a vacformed section for the black parts that connect these pieces together. That'll make more sense as I get it done and post pictures.

I also completed the prototype for the widget that sits below the neck:


Here it is in primer:


Tomorrow I'll be starting on the sculpt for the upper back and lower spine. Stay tuned...
 
Looking good! Sooo, how much is a full suit gonna be :D

I'm not 100% sure just yet, but I'm thinking I'll be able to do a set of the raw cast parts for somewhere between $750 and $950. It's a lot of little parts and a handful of large ones, so it'll be very time consuming to make a kit.
 
I'm not 100% sure just yet, but I'm thinking I'll be able to do a set of the raw cast parts for somewhere between $750 and $950. It's a lot of little parts and a handful of large ones, so it'll be very time consuming to make a kit.
But very cool and you'll be the first :lol

Peer pressure.
 
I started blocking out the main shapes of the upper back piece:


After a few hours' work, it looked like so:


Turns out I got carried away and did more than just blocking in the rough shapes. Here's a closer shot:


I also poured the rubber to mold the repeating parts of the chest:


More to come. Stay tuned...
 
Almost done with the details on the back:


Here's another angle showing some more of the found items I'm using:


I'll be starting the arm parts today. Stay tuned...
 
Very very nice.

Hey I was wondering, how do you get that off the dummy? Do you spray something on it's body before you start?
 
It's not coming off. I'll take a mold of it right where it is, then peel off the mold and scrap the original sculpt. So far I've kept it pretty clean, so I should be able to reuse the clay for some other part of the build.

The next thing I need to knock out is the tailbone section which will mostly be cobbled together from found items and sheet styrene. The gauntlets will be a mixed media sculpt. Then it's the upper arms (very easy) and the boots (slightly difficult).

Stay tuned...
 
Cool, I didn't know you could make the molds and reuse the material, also didn't know you could make a mold while it was sitting that way.

You know I'm sticking around to see this through, I wanna be one of the first people to get a copy from you when you get to them.

Can't wait to see you tackle the undersuit, when I considered making this myself I always couldn't decide which material to use exactly.
 
Looks really good. It's probably one of the hardest parts of the costume as there isn't much you can make it out of other than a sculpt.
 
Last night I prepped the back piece for moldmaking:


Here I am pouring the first layer of silicone:


Then brushing it back up onto the high parts:


Before I called it a night, I layered on a batch of thicker rubber to build up the thin spots:


I also cast a set of the chest parts:


Stay tuned. The next step will be the beginning of the arm parts...
 
Back
Top