OK, the long avoided ALTERATIONS section. The easiest way to think about these explanations is to understand I followed the original 4923 pattern and instructions first, then altered. I apologize but this is the process I followed.
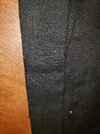
First the sleeve. The opening was far too large to match Will's, so I trimmed it. See pic here:
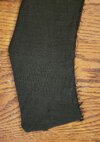
I then altered the cuff to match not only the new sleeve opening width but to make them rectangles. See pics for comparison to originals and for sizing to a size Large coat.
The pocket flap alteration eliminates the scallops on the flap bottom and replaces it with the following:
I just drew a straight line above the scallops to form this envelope flap look.
The coat bottom: I removed all of the three expansion flap areas. I can't remember what they are called. I then sewed the front to the back all the way down the side where these expansions had been. This left only the back central slit. Make sure to create a small overlap but leave the back slit. It looks like there is no open flap when the overlap is in place but it can still open. At this point I realized there was way to much girth on the bottom so I trimmed the front and back panels at the same time (they were currently sewn together, see pics).
After pinning along the pink ruler line, I cut the material which cut the front and back panels at the same time. Measurements are in the pics above.
Cutting only on that edge where front meets back not the back to back center seam. This will be done twice for the two seams that are front back connection seams.
The lapel: This first pic is the lapel as per the original pattern.
It reaches well past center chest. I folded it back 2.5 inches on both lapels, evenly down the vertical lapel leading edge.
This is how it fits after:
(The final lapel sewing was done while adding the cordage, see previous cordage entry and pic here)

The collar: After the lapel was sewn back, mostly tacking and ironing, I measured the distance around the neck opening and created 2 two-layer rectangles sewn along the long edges and turned inside out and ironed flat (you may need to look up a how-to on doing this, similar to making cloth belts). The height is 2 and 1/4 inch when finished so make sure to add in your favorite seam allowance. I used 5/8 so mine was originally 3.5. I left the ends unsewn. I sewed one of these onto the neck overlapping the outside of the neck opening by about 1/8 inch using hand stitching. I put on the jacket and drew the line for the collar angle to match the lapel. I then cut about 1/4 inch past that (making it 1/4 longer than neck opening). I then tucked the 1/4 extra inside the collar end and hand stitched it closed to match the angle coming up from the lapel. I then used the first one as my pattern for the second one. I finished the ends of the second one before sewing the second one against the first, inside the neck, with the bottom of the collar now inside the neck opening overlapping the same 1/8th inch. I used hand stitching for most of this. Outside pic first, then inside:


")