What's on your workbench? (no Star Wars, Marvel or DC stuff)

Update on my Thanos build
I’ve now printed all the parts and glued them together,
Just fill rub and primer for the next couple of months !!!
going to install LEDs and wires in the base for illuminated crystals before I glue that together,
the crystals will be resin printed in the correct colour.
View attachment 1471665View attachment 1471666View attachment 1471669
What the hell have you printed that on? I've zoomed in on all these pics and can't see a whole lot of print lines. Very impressive.
 
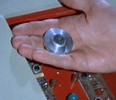
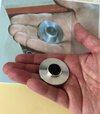
Grail tablet. 3D printes in 4 parts.
I'm considering molding this when its done and casting in concrete to put one out in the garden.
View attachment 1409150
Finished the grail tablet. Not going to bother doing a concrete cast, it's done. Onto the next object.

20210705_185509.jpg
 
Update on my Thanos build
I’ve now printed all the parts and glued them together,
Just fill rub and primer for the next couple of months !!!
going to install LEDs and wires in the base for illuminated crystals before I glue that together,
the crystals will be resin printed in the correct colour.
View attachment 1471665View attachment 1471666View attachment 1471669

I'm not a big fan of Thanos, but the size of that bust, put together with all those pieces is quite incredible.

TazMan2000
 
Finished the grail tablet. Not going to bother doing a concrete cast, it's done. Onto the next object.

View attachment 1473598

Quite a nice job painted up. I hope it holds up to the weather.

Recently, we've had some incredibly hot weather, 38 degrees Celcius. I had a cell phone cup holder I printed out in my vehicle and the darn thing melted a bit and now it doesn't hold my phone.

TazMan2000
 
What the hell have you printed that on? I've zoomed in on all these pics and can't see a whole lot of print lines. Very impressive.
Printed on 2 of my printers, Creality cr10s
Nicely tuned, 0.4 layer height
The hardest part of finishing this print will be the filling and smoothing the joints
The main print will be smooth with a couple of blasts of filler primer
 
Printed on 2 of my printers, Creality cr10s
Nicely tuned, 0.4 layer height
The hardest part of finishing this print will be the filling and smoothing the joints
The main print will be smooth with a couple of blasts of filler primer
0.4!! They look excellent.
Get yoursel up the north east and tune mine up!!!!
 
No, I'll run it off a 9v battery. The top light will be on constantly. When you push the button the top light goes out and the 2 bottom lights turn on.
Well, it looks great!


But not having it open a garage door or something does feel like a wasted opportunity.
 
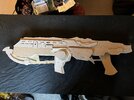
Working on a wooden replica of the Lancer assault rifle from the Gears of war games.
 

Attachments

  • 21A1E06F-5FB8-4054-83A8-55E89CCA3735.jpeg
    21A1E06F-5FB8-4054-83A8-55E89CCA3735.jpeg
    3.3 MB · Views: 73
Th
That looks like a lot of work. Lots of detail. Looking forward to seeing it finished. Working on a dlt-19 myself.

Yeah it’s taking some time! Wow man that looks amazing!
Dude that is amazing!
 
True. It is a Denix. A new release from denix. Couldn't beat $300 for a metal and wood replica. A real one is $8,000. I just weathered it with a sanding block, did some painting and I'm making the greeblies out of metal. Except the t-tracks. It comes with an orange barrel plug. I took it out though.
 

Your message may be considered spam for the following reasons:

If you wish to reply despite these issues, check the box below before replying.
Be aware that malicious compliance may result in more severe penalties.
Back
Top