You are using an out of date browser. It may not display this or other websites correctly.
You should upgrade or use an alternative browser.
You should upgrade or use an alternative browser.
What's on your workbench? (no Star Wars, Marvel or DC stuff)
- Thread starter moffeaton
- Start date
ID10T
Sr Member
Finally finished the last details of my headphone amp. This has been functional for a while but I’ve not wanted to be without it to finish it up…
Anyway, added the face plate logo as well as the bi-color (actually it’s a tri-color but I only use two) LED so green indicates power on and red indicates a fault on the amplifier devices.


Anyway, added the face plate logo as well as the bi-color (actually it’s a tri-color but I only use two) LED so green indicates power on and red indicates a fault on the amplifier devices.
Just started work today on a Cylon sword.
")
Here's a progress pic:

Last edited:
ID10T
Sr Member
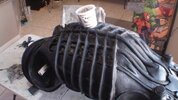
Doing a main bearing overhaul for a Micro BL-91 yesterday:

Disassembled.

Ultrasonic parts cleaning.

Thrust plate wear.

Base plate cleaned.

Base plate and thrust plate lapped.

Spindle before superfinish.

And after.

Polymer thrust ball to replace the steel one.

Back together with new synthetic oil to replace the original leaded oil.

Signed and sealed. Delivery on Monday.
Disassembled.
Ultrasonic parts cleaning.
Thrust plate wear.
Base plate cleaned.
Base plate and thrust plate lapped.
Spindle before superfinish.
And after.
Polymer thrust ball to replace the steel one.
Back together with new synthetic oil to replace the original leaded oil.
Signed and sealed. Delivery on Monday.
Last edited:
Metalalien
Sr Member
Its time for K.I.T.T.s resurrection. I have begun with the dash and electeonics. Then engine and transmission (they are both fine but I want MORE POWER!) Painting will be as soon as the weather improves.


I was able to carve out some time, over the course of a busy weekend, to start a Delta Communicator / Paul Allen Communicator build. I’m about 90% completed with the build, which is intended to capture the current weathered and set-worn look of the original—warts and all. Only a few more parts and weathering techniques to apply and this one will be completed (more photos to come)…
Here is the original.


And pics of the progress on my build, so far…


Here is the original.
And pics of the progress on my build, so far…
Last edited:
Palantirion
Sr Member
I'm working on this, a bit bigger than the table under it. It's a full size Aliens (AvP)) queen crown casting and paint test panel originally made by Studio ADI. I am repairing and finishing it to be a very large wall art piece for my collection.
Posting link so as to not flood this thread with pics.

 www.therpf.com
Posting link so as to not flood this thread with pics.
ADI AvP Queen test casting, repair and modification
A couple years ago I purchased this paint test piece from PropStore. It is the queen's "crown", and was made by Studio ADI for AvP and has different finishes (and different sculpts) on each side. The middle was left unfinished. There was the obvious paint damage on its right side, as well as...
www.therpf.com
Dobblegog
New Member
Thorvald, Did you build that MM sword? Out of what if so and can you build me one?And Madmartigan's sword is on the wall.View attachment 994831
Dobblegog
New Member
What is your hilt made out of? and what metel are you using?View attachment 1635828
Just started work today on a Cylon sword.
Here's a progress pic:
View attachment 1640186
Eventually, the hilt will be made of Oak. The sword itself is made of aluminum.What is your hilt made out of? and what metel are you using?
Dobblegog
New Member
What you have now looks like resin. Did you print those. I never thought about wood. I I guess it could be carved.What is your hilt made out of? and what metel are you using?
Dobblegog
New Member
Oh did you ever see the Cylon swords was a borrowed prop left over from Lost in Space from the 60s? I have picture on set with here somewhere.What you have now looks like resin. Did you print those. I never thought about wood. I I guess it could be carved.
Dobblegog
New Member
Oh did you ever see the Cylon swords was a borrowed prop left over from Lost in Space from the 60s? I have picture on set with here somewhere.
Yes, I've seen it. Thanks for posting the pics!
You can check out my research thread here:
BSG Cylon Sword - Research Thread
I'm working on a Cylon sword and I have the wrist guard and pommel (cast in resin). Does anyone know what kind of wood might have been used for the handle? Reference photo: Reference of the sword from Lost in Space: Condemned of Space
www.therpf.com
Because most of the props used in Lost In space were left over from the movie, Cleopatra, more than likely, that's where the sword came from.
I have yet to re-watch Cleopatra to find the prop, however.
Just finished my Buck Rogers "Mini" Laser Pistol:


Next up is a "Hero" Laser Pistol from the 2nd season shows. This one will include light and sound. The sound is turning out to be a challenge:


Next up is a "Hero" Laser Pistol from the 2nd season shows. This one will include light and sound. The sound is turning out to be a challenge:
a Marco Enterprise ST VI Klingon Disruptor kit I purchased when he was clearing out stock a couple of years back. It was missing the front Emitter Hood and Emitter, so I had to have them 3D printed, Almost finished and ready to add to my Klingon Armory. Not toally accurate to the screen version but close enough for me.


Similar threads
- Replies
- 4
- Views
- 662
- Replies
- 35
- Views
- 3,216
- Replies
- 18
- Views
- 1,839