Tomorrowland

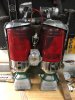
Either people didn't like this movie or This is way to hard of a prop to make, well we all know it is hard, but come on there are no fans, we went a second time to see it in the theaters, it is awesome, any way I love this prop it is on our Dinning room table, KILLER!!!!! I have 4 sets of Exhaust nozzles ready to go I'll do $40 for a set shipped in the us if anybody wants them.
AL


- - - Updated - - -

And I'll add 7,097 people have read this thread so we must be doing something right!!!!!!


Yeah like the movie but it tanked in the theater .
 
Last edited by a moderator:
Some progress finally!
Mounted the tanks to a plywood board and slid the vintage army Jeep seat cushion over it. The harness/seat belts are bolted to the board and fed through slits in the seat canvas. The seat cushion is a little thicker than the movie version but it makes it really comfortable to wear. It's not as heavy as I anticipated with all the found parts used on it.
I still have to trim and tuck the canvas around the board a little more and do some finally weathering touch ups.
Waiting for the headlamp holders that I picked up off ebay to use as the attachment for the handlebars to the pack and get those installed.

IMG_1637.JPG

IMG_1638.JPG
 

Attachments

  • IMG_1637.JPG
    IMG_1637.JPG
    516.6 KB · Views: 92
Figured out some more parts. The "handle bars", swivel joint and attachment are boat canopy parts.
Here's a still from the movie:
tomorrowland_TOuckp.jpg

And here's similar parts I found looking up boat or bimi canopy top parts.
image_57236.jpg
06063_F.jpg
1053045-1.jpg

I'm sticking with some electrical conduit, ratchet swivel socket and conduit bend clamp and schwinn handle bars for now.
 
Installed the "Handle bars" last night. For now we just went with the conduit tubing, "L" conduit for the elbow, upper halves of a Schwinn handle bar and socket swivel joints that I welded to the tubing.
We also just used and L bracket that was attached to the backboard seat belt bolts for now. Since I found the correct tubing for the setup we'll hopefully upgrade that at some point. Right now we're just trying to get finished for Halloween.
Just have to add the brake cables, pressure gauge and button to the handle bars and I think we'll be good for now.
Here's my son modeling it for his costume.

IMG_1150.JPG

IMG_1151.JPG
 
Time to bring this thread back to life how far did everybody get with their Jet Pacs, Still one of my favorite props and a tough build, here is where mine is today!!!!!
JP 1 copy.jpgJP 2 copy.jpgJet Pac 4 copy 2.jpg#7 copy.jpg
#6 copy.jpgJP 4 copy.jpg

JP 1 copy.jpg


JP 2 copy.jpg


Jet Pac 4 copy 2.jpg


#7 copy.jpg


#6 copy.jpg


JP 4 copy.jpg
 
Last edited by a moderator:
Time to bring this thread back to life how far did everybody get with their Jet Pacs, Still one of my favorite props and a tough build, here is where mine is today!!!!!

I'm just about ready to take a second pass at my pack. (Still a few details and proportions I'm not happy with.) Here's my current setup:

CgX09wpUMAELCbg.jpg


As for non-pack Tomorrowland props, here's a peek at something I've got printing for SDCC as we speak:

qT5olQk.png
 

Attachments

  • qT5olQk.png
    qT5olQk.png
    227.1 KB · Views: 211
Haven't had much time for updates but need to make some as it's my favorite piece so far.
Does anyone have any updates on the "carb" plate the horn button attaches to. I know Nickytea found the what the one top piece was. Any luck on the other?
I'd love to be able to 3D print out some of the pieces if anyone can scan or has templates. I'd be happy to print extras.
 
I'm not sure, but there might be some more reference for the jet pack, or anything else, available in the Dreamer's Cut of the film.

It was a better version of the film, anyway, and is worth watching if you haven't seen it already.

dreamers.tomorrownauts.com
 
I'm not sure, but there might be some more reference for the jet pack, or anything else, available in the Dreamer's Cut of the film.

That's just a fan-edit of the film that incorporates previously available deleted scenes into the film itself. No new reference there.
 
Hey Jet Pack builders, I have couple of each of these parts if someone is interested in them, The first is the backing plate for the Planet horn button, and the other is the ribbed piece under the plate, see the picture of my Pac.
They are 3D printed,they're $60 for each peice including shipping in the US.
IMG_3659.jpegIMG_9367.jpegIMG_1667.JPGIMG_1666.JPGIMG_1665.JPG

IMG_3659.jpeg


IMG_9367.jpeg


IMG_1667.JPG


IMG_1666.JPG


IMG_1665.JPG
 
Last edited by a moderator:
I filled the prints and did some weathering and painting so if anyone wants a set just PM me I have 2 of each piece.
AL
FullSizeRender.jpgFullSizeRender-1.jpgIMG_1699.JPGIMG_1702.JPG

FullSizeRender.jpg


FullSizeRender-1.jpg


IMG_1699.JPG


IMG_1702.JPG
 
Last edited by a moderator:
Any info on how you made this one. I just saw you posted a little clip on Instagram of it.
Would love to find out more info.

I had the blaster 3D-printed in two halves, assembled, cleaned them up, then NicksDad helped me install the electronics before final painting/finsihing.
Video of the finished blaster here.

Planning to make the 3D model available, but it still needs some fine tuning for accuracy and printing efficiency.

EDIT: if anyone wants to play around with the unmodified 3D file, I've made it available to download here.
 
Last edited:
I had a scaling mishap on the first print, resulting in a piece WAY too big for the pistol. So, I decided to make lemonade out of lemons and converted it into the rifle version of the blaster from the film. Turned out to be just about the perfect size for that:

rifle.jpg

(Still a work-in-progress.)

Here's a shot of the original rifle -- along with a few of the Nix guard rifles from later in the film -- for reference:

tomorrowland-exhibit-25.jpg
 
I had the blaster 3D-printed in two halves, assembled, cleaned them up, then NicksDad helped me install the electronics before final painting/finsihing.
Video of the finished blaster here.

EDIT: if anyone wants to play around with the unmodified 3D file, I've made it available to download here.

Hot of the printer bed, here's my slice of the right half. The left half is printing now. Would love to see what electronics you crammed inside. Any in progress pics?

IMG_9885.JPG
 

Your message may be considered spam for the following reasons:

If you wish to reply despite these issues, check the box below before replying.
Be aware that malicious compliance may result in more severe penalties.
Back
Top