Well, its been a while since I've posted or finished a build. Unfortunately a lingering sinus infection left me hyper senstive to dust and paint since the spring which royally screwed with my modelling schedule. I've got a B-wing, Corvette, Discovery, Swift and a concept X wing to finish painting and a Salzo X wing (V2) to build I bought off Guy Cowen almost a year ago!!! I didn't even properly finish that E wing.
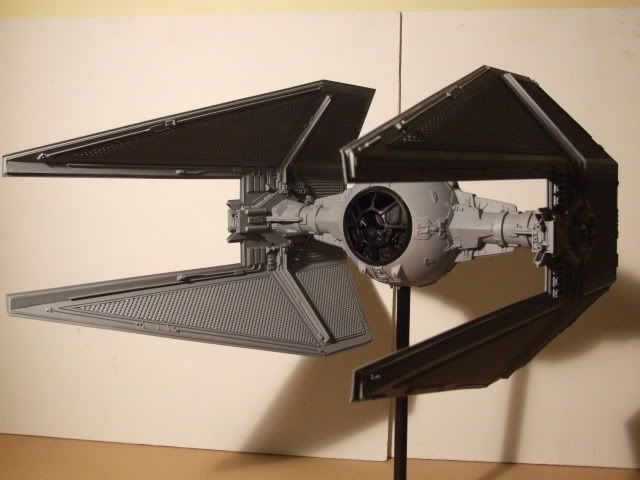
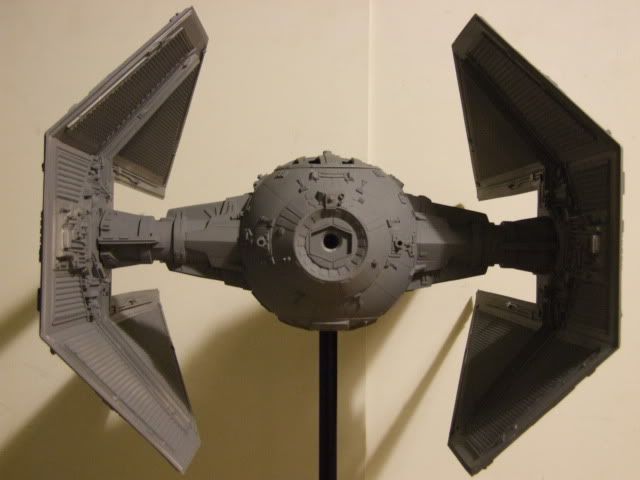
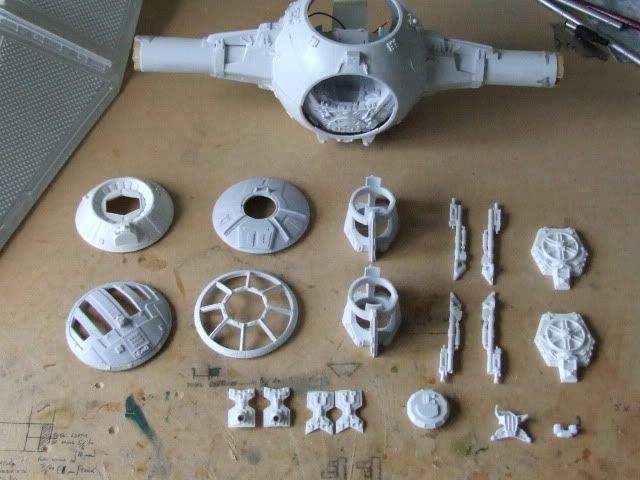
However, I intend to catch up with these in the spring. To keep me going I got hold of a Tie Interceptor a month or so back. This is one of the new casting from Mike and Steve and its an impressive beast.
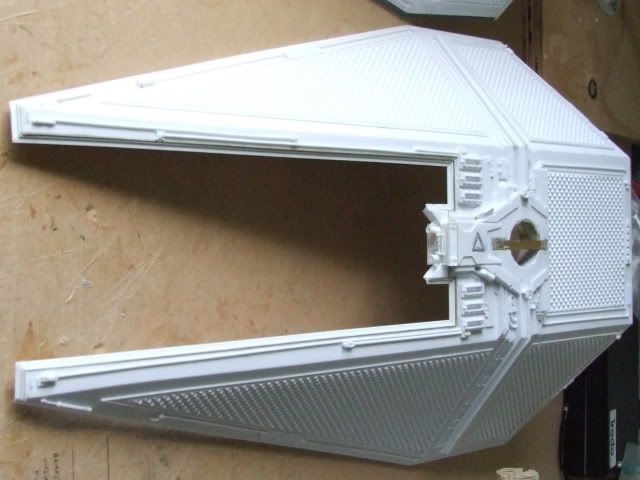
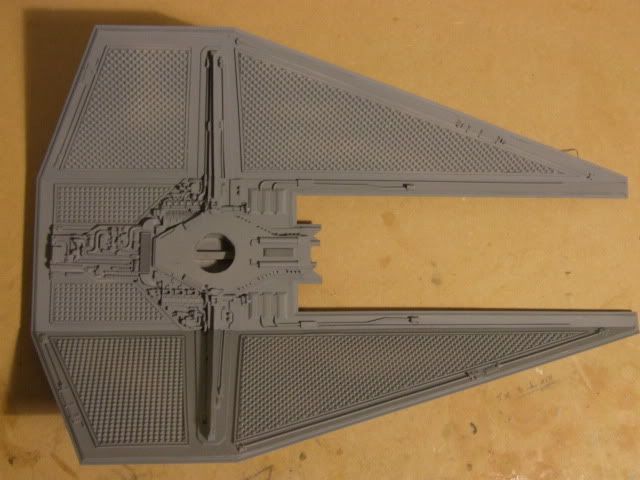
First off the casting on the wings is fantastic for such huge pieces. God knows how he managed it. They are perfectly straight and level and are really solid heavy pieces ,so given that the originals have sagged somewhat over time ,I've got a few suggests for keeping them as level as possible. The detail on the rest of the kit is extremely crisp and accurate and didn't require much clean up at all.
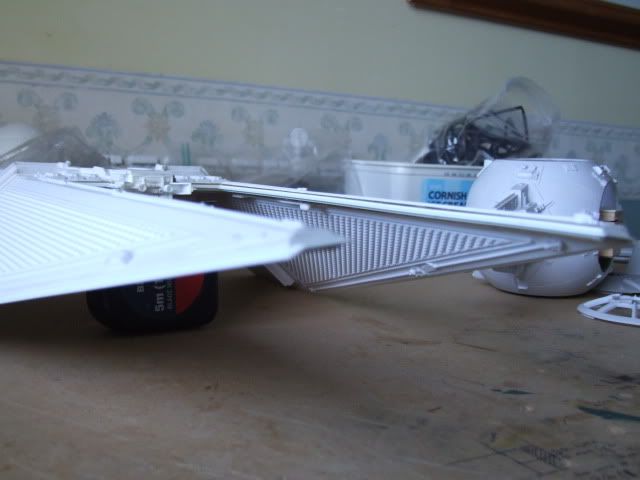
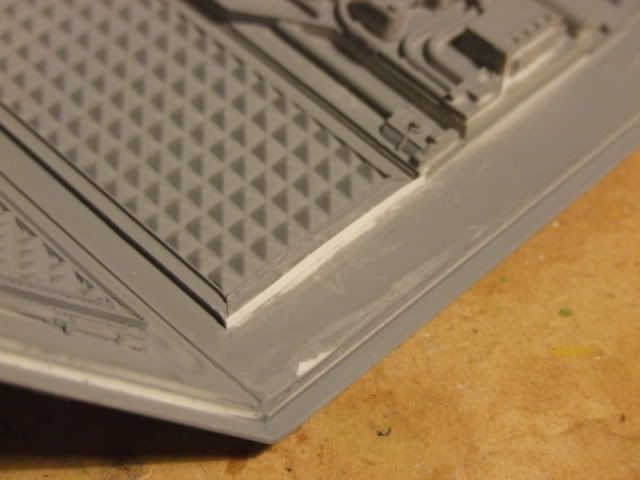
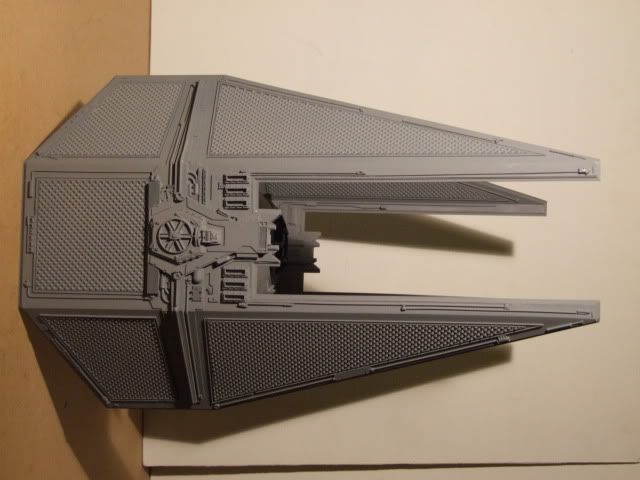
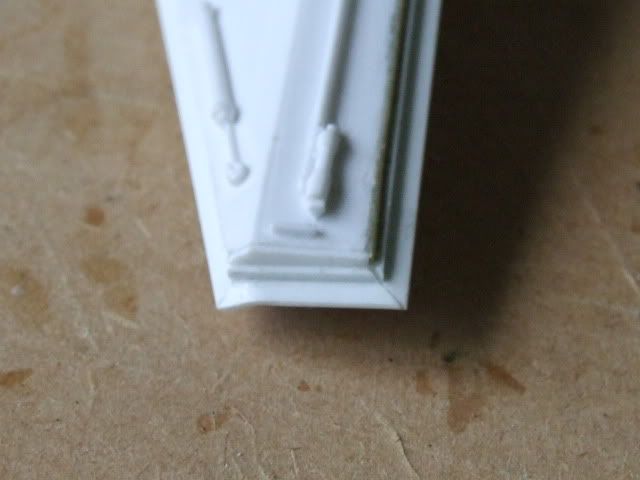
The wings are amazing straight as you can see but will,if they are like the screen models, sag after a time or in high temperatures. So I've added some strengthing to the wings to go with all the plastruct T strips you will have to buy to finish off the edges. I had to get about a dozen from my modelling shop.
The front tips of the wings were the hardest to finish properly. The easiest way was to bend the T and cut off the excess that remained. You can see just how straight those wings are in the photo. That casting is impressive!
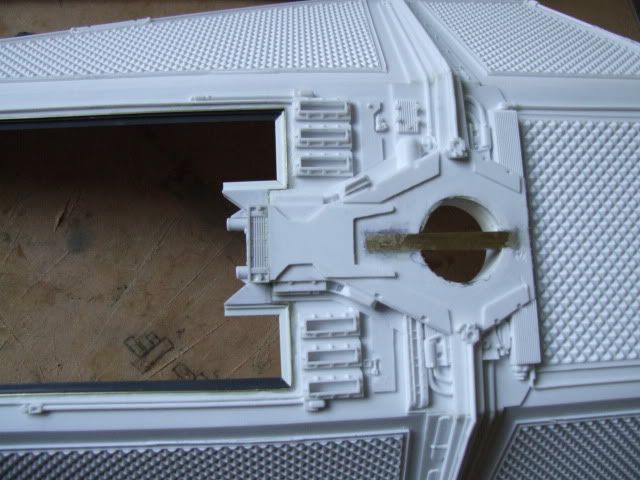
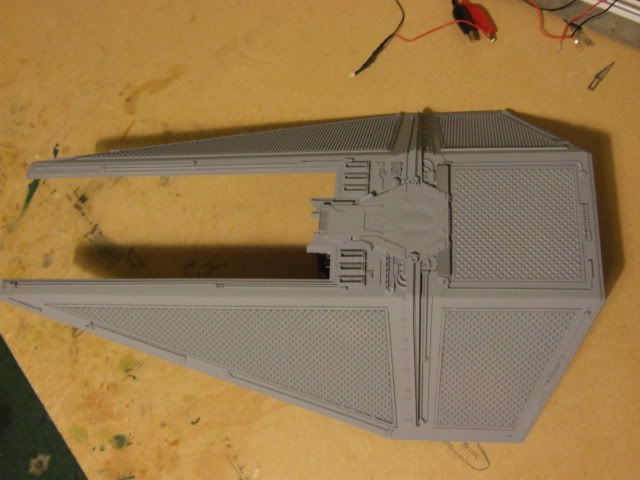
To keep the wings as strong as possible I've added a thin brass strip of 4mm x 30 cm around the inside of the wing. Its one complete piece thats been bent at right angles to the corners. Keeping it this way made it quite strong and when glued into the wing, I was surprised how rigid the whole structure went. The T strips also add to the framing.
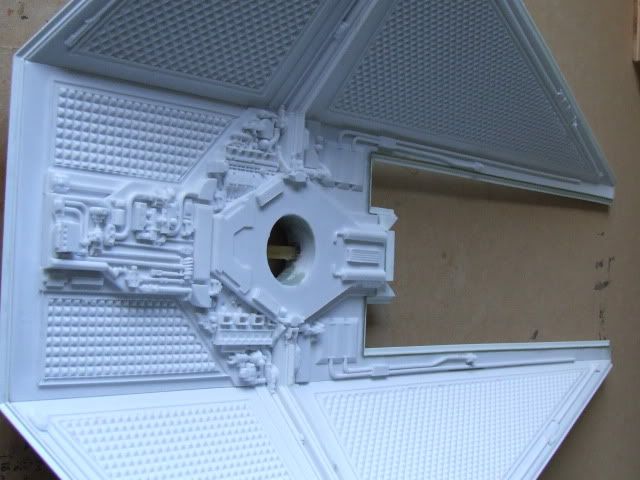
You can see the brass strip edge between the T strip and the wing. I also cut off the existing T strip cast on to the rectangle in the centre. In the end it made it easier and neater than fiddling with the little gap that existed otherwise.
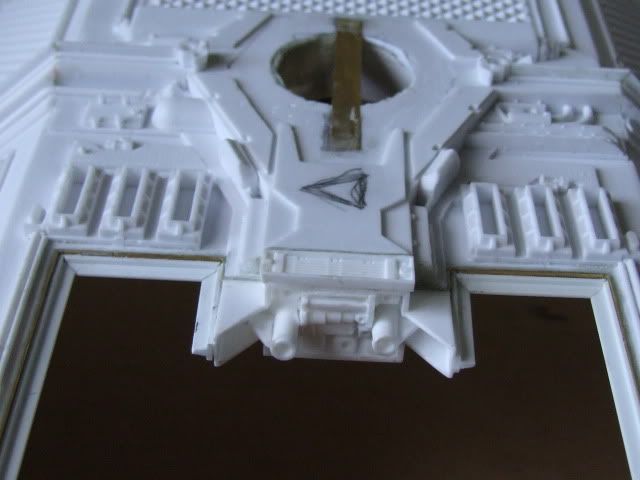
Also, to stop the wings slipping down on the armature I drilled ,chiselled and cut a square strip out of the inner wing circle and added a mirror image on the armature ends. This should help the wings stay in place as I'm going to try to make them detatchable, depending on how tight I can make the join.

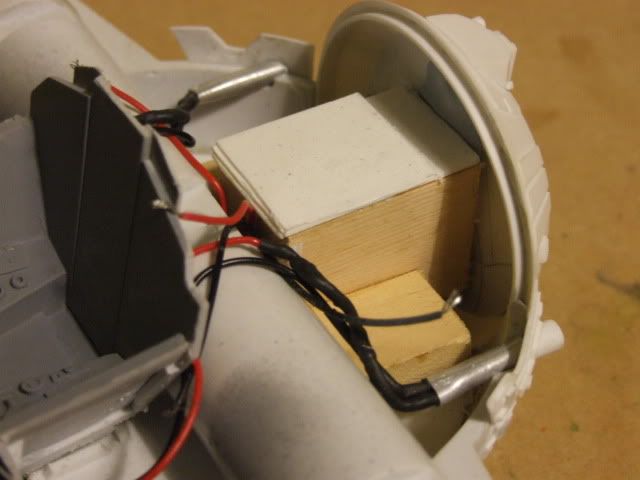
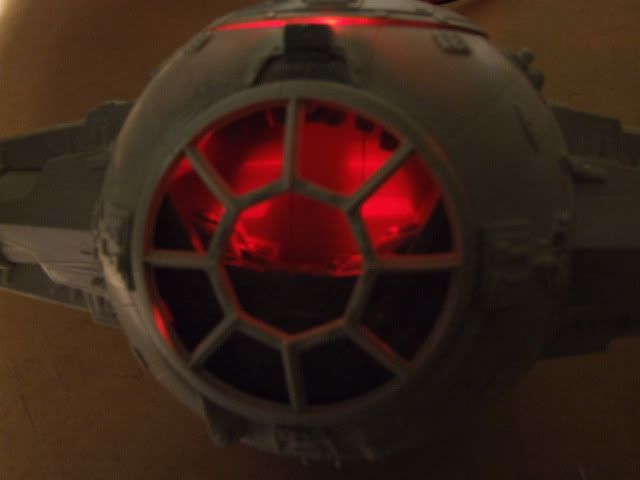
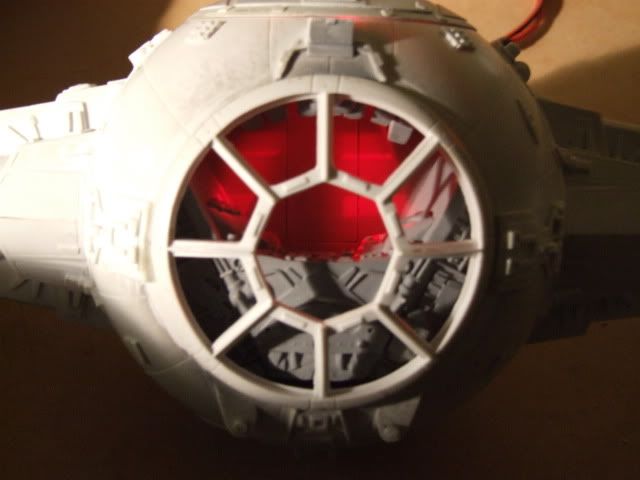
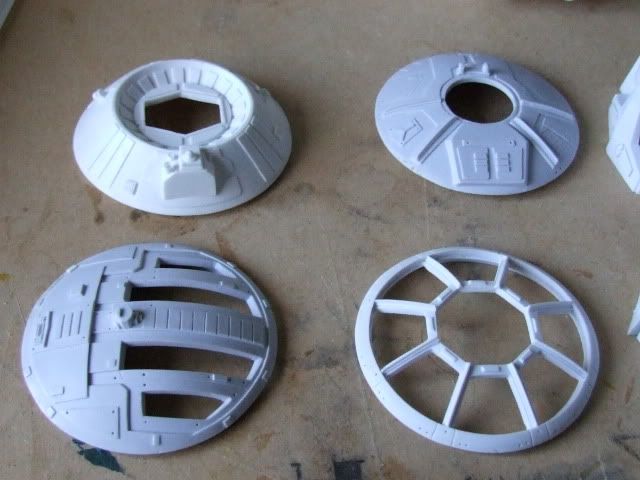
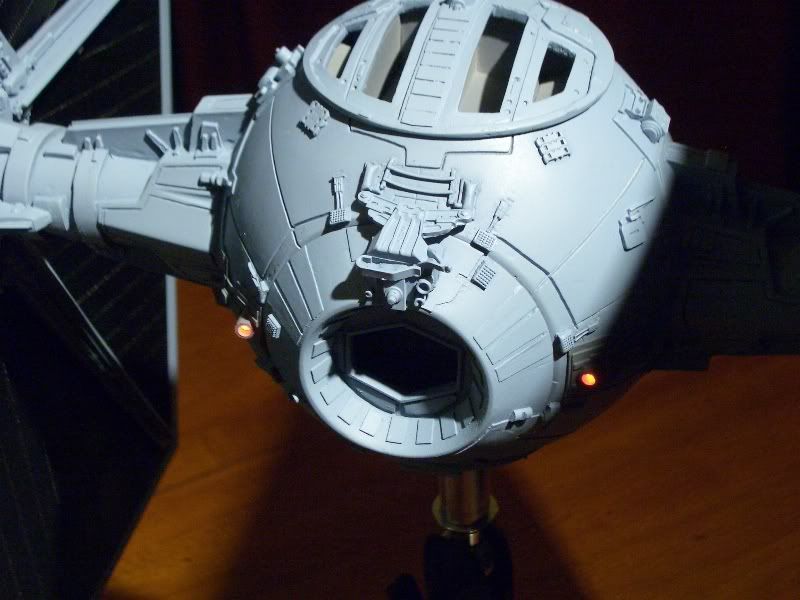
With the wings done its the "Eyeball"to tackle. I've drilled second mounting point on a small block of wood as the originals displayed had two ports . This will also act as a platform for a battery pack support as well as help strengthening the whole socket over time.
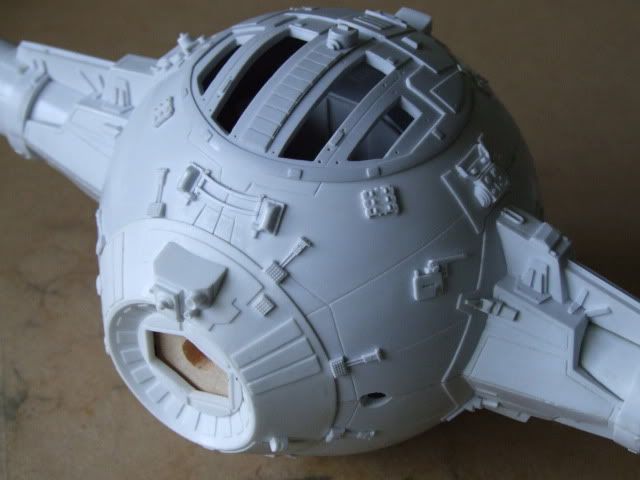
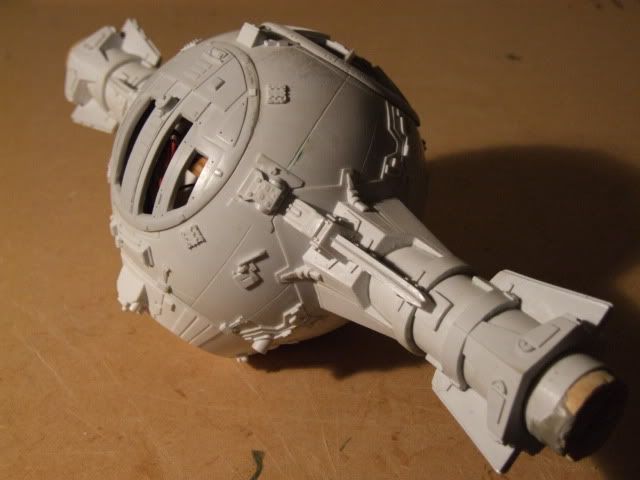
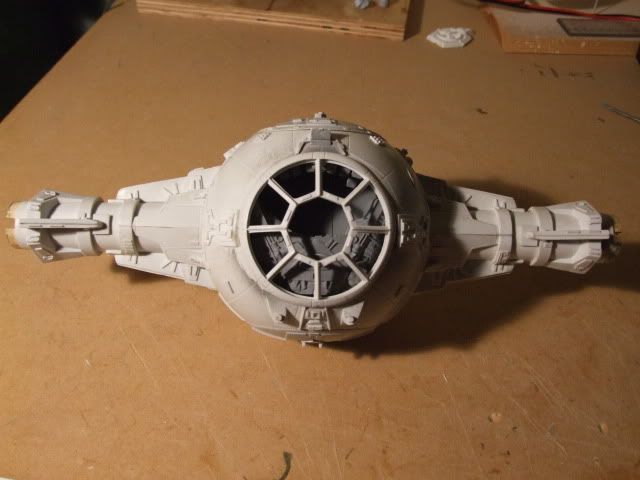
Eyeball test assembled onto armature. The first fit was good, but with a pan of hot water and some tape and a bit of molding later the gaps will be very slight indeed once its glued together.
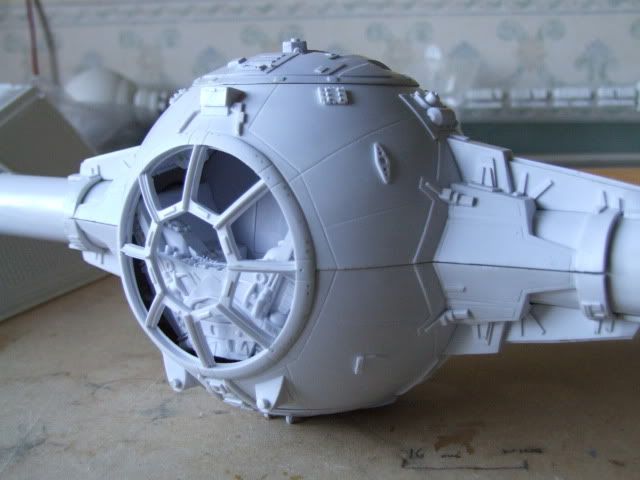
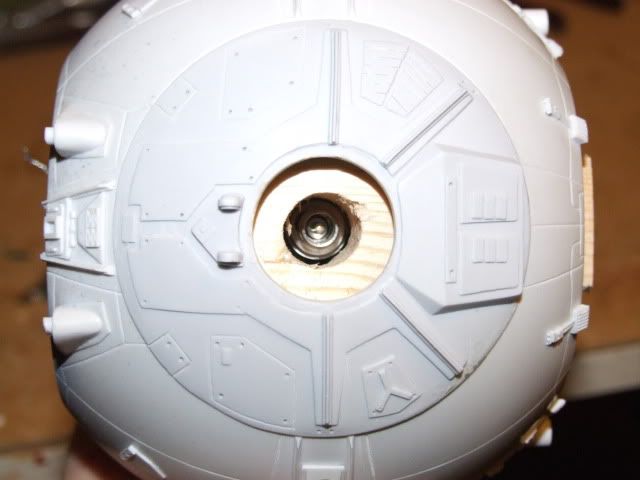
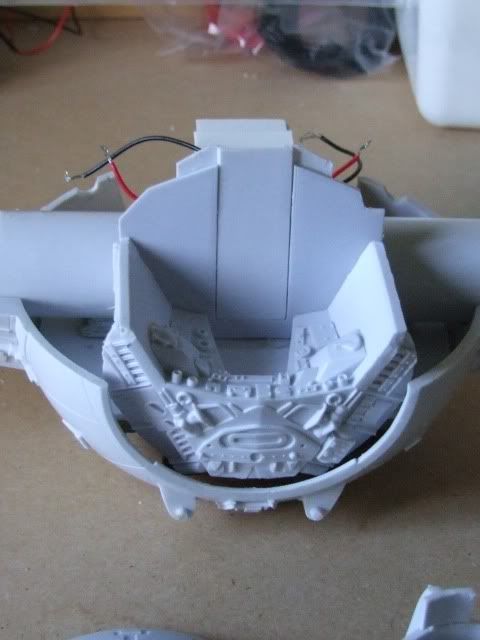
Top of cabin with roof in place.
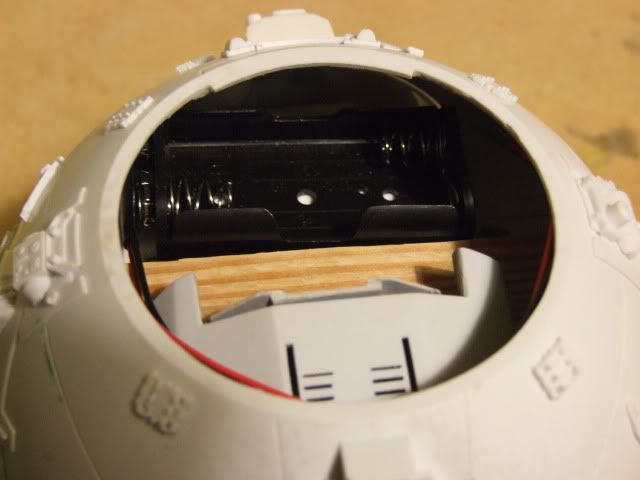
The eyeball with cabin built in place. I've built a wooden platform benieth it. This is drilled out so that it will keep the eyeball rigid over time and it allows me to put two possible power sources in place. One from an external source through a stand coming in from benieth, and one from a battery pack that will be accessible through the top.
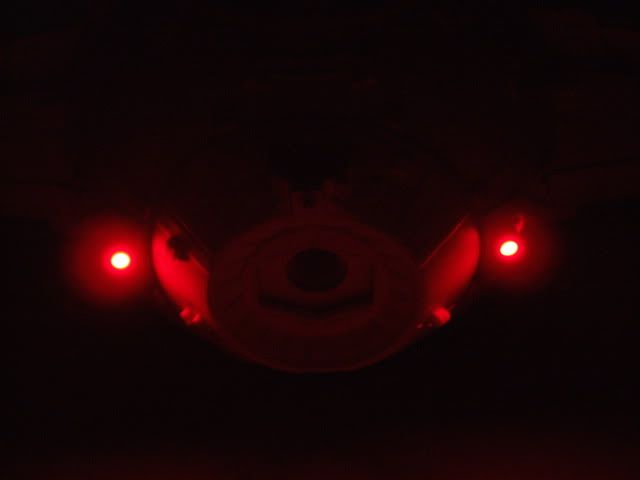
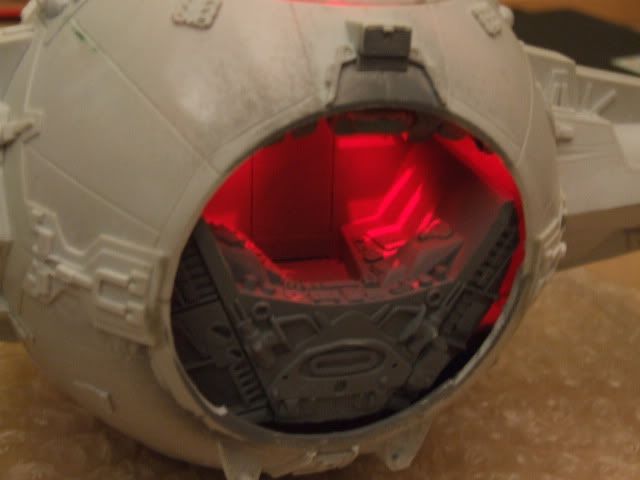
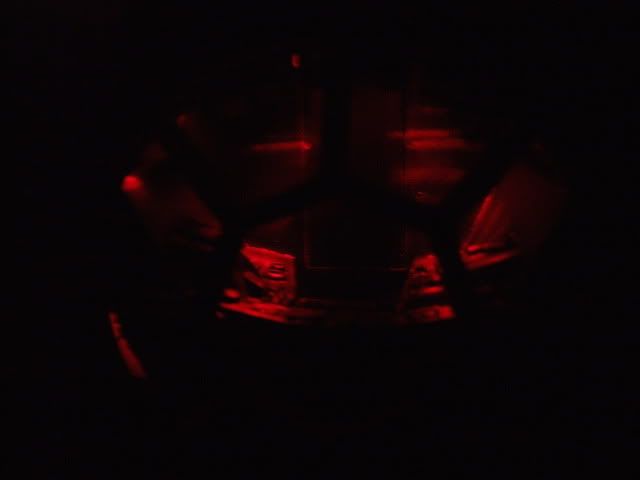
Used two 3mm LEDs for engines.This shot was with curtians partially drawn so the light leakage is pretty bad as its all test fitted at the moment.
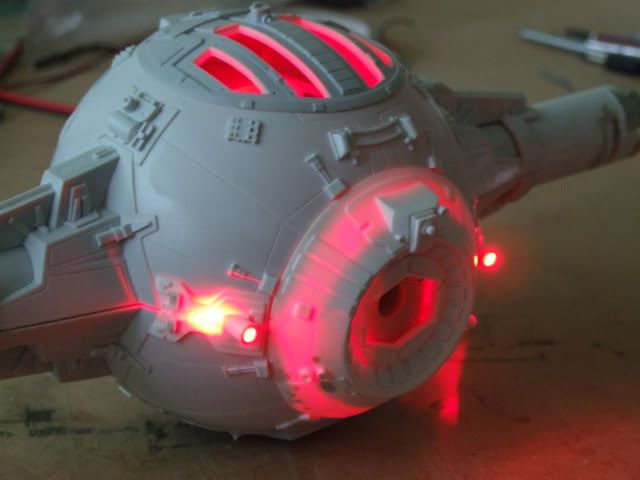
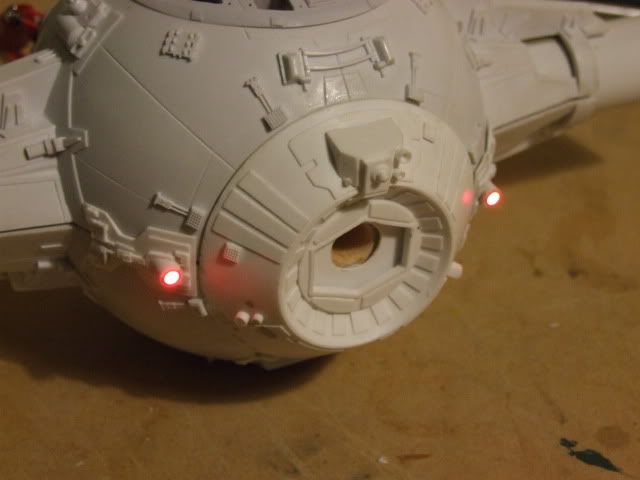
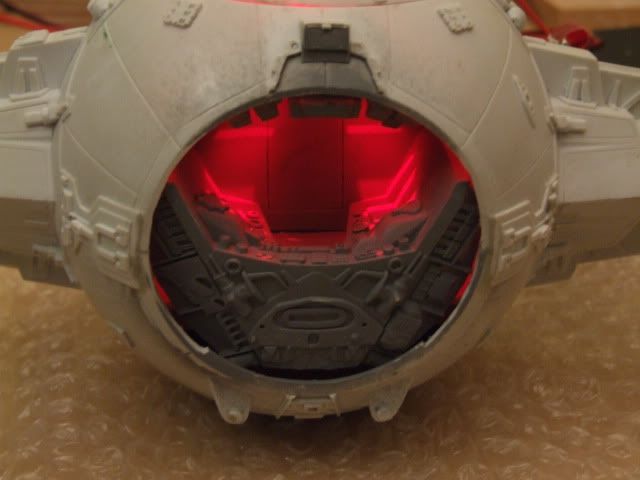
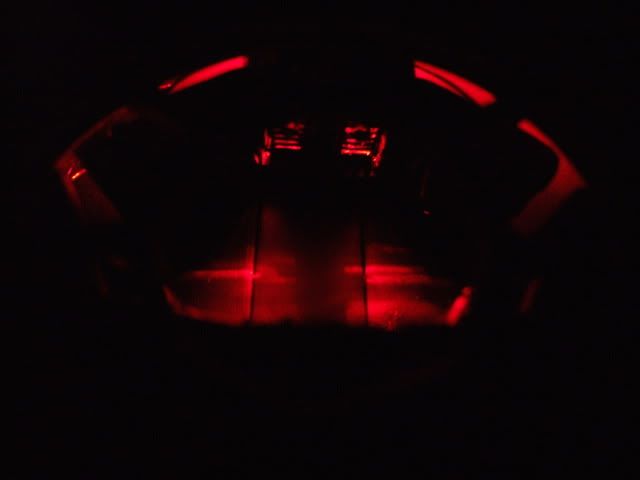
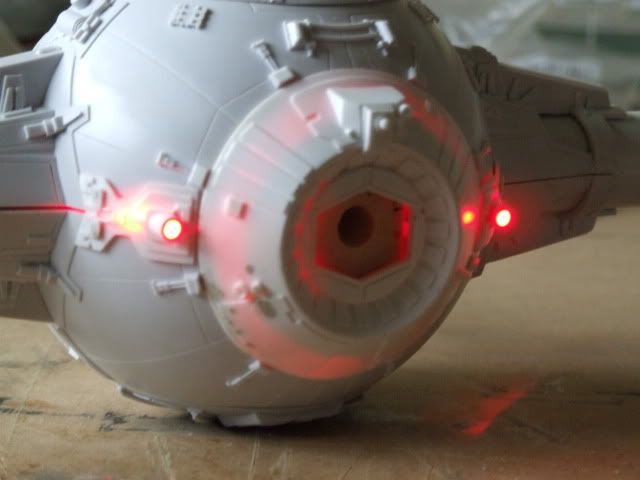
Bright lights! Normal lighting. I strengthened the engines with thin copper tubing. Seem OK to the screen pics of Tie Interceptors over the 2nd Deathstar.
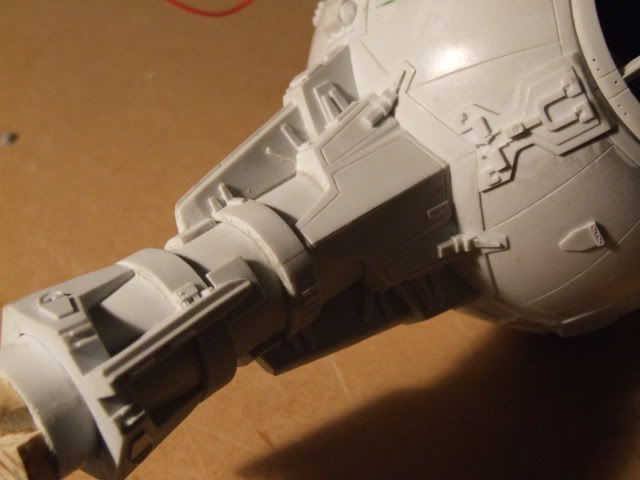
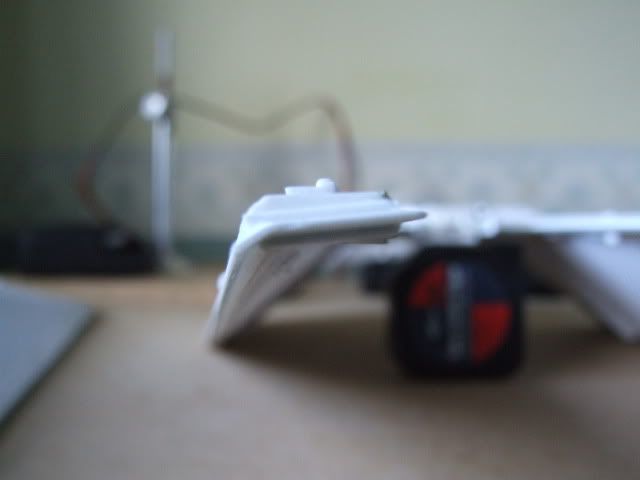
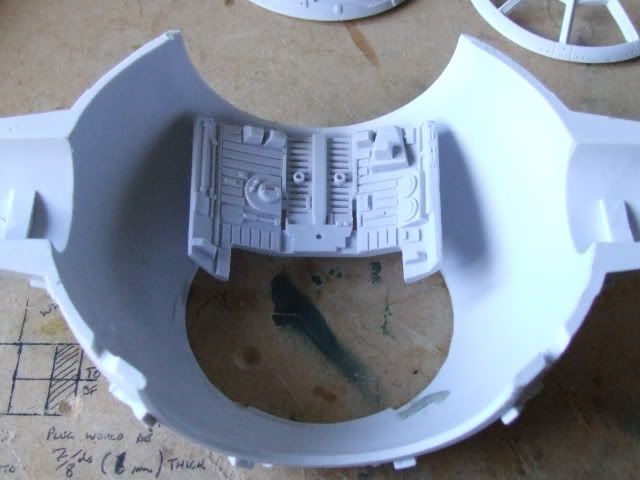
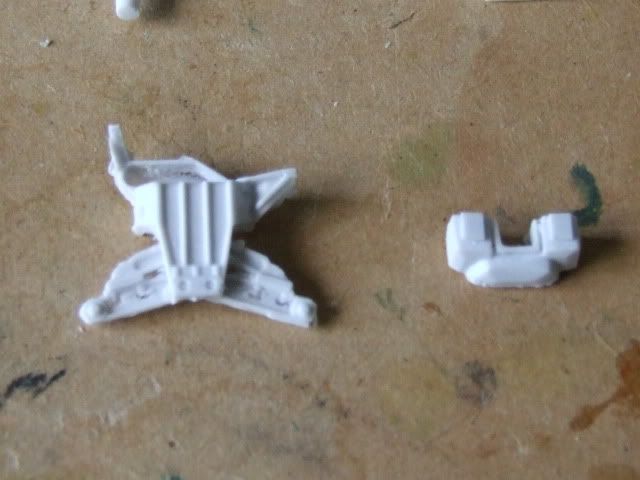
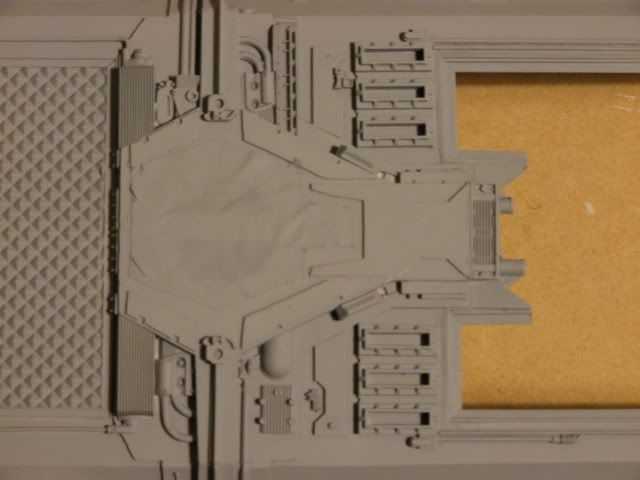
Can anyone tell me where these two mystery parts go? I can't find it on any reference photos, but I'm guessing they might have fallen off over the years.
However, I intend to catch up with these in the spring. To keep me going I got hold of a Tie Interceptor a month or so back. This is one of the new casting from Mike and Steve and its an impressive beast.
First off the casting on the wings is fantastic for such huge pieces. God knows how he managed it. They are perfectly straight and level and are really solid heavy pieces ,so given that the originals have sagged somewhat over time ,I've got a few suggests for keeping them as level as possible. The detail on the rest of the kit is extremely crisp and accurate and didn't require much clean up at all.
The wings are amazing straight as you can see but will,if they are like the screen models, sag after a time or in high temperatures. So I've added some strengthing to the wings to go with all the plastruct T strips you will have to buy to finish off the edges. I had to get about a dozen from my modelling shop.
The front tips of the wings were the hardest to finish properly. The easiest way was to bend the T and cut off the excess that remained. You can see just how straight those wings are in the photo. That casting is impressive!
To keep the wings as strong as possible I've added a thin brass strip of 4mm x 30 cm around the inside of the wing. Its one complete piece thats been bent at right angles to the corners. Keeping it this way made it quite strong and when glued into the wing, I was surprised how rigid the whole structure went. The T strips also add to the framing.
You can see the brass strip edge between the T strip and the wing. I also cut off the existing T strip cast on to the rectangle in the centre. In the end it made it easier and neater than fiddling with the little gap that existed otherwise.
Also, to stop the wings slipping down on the armature I drilled ,chiselled and cut a square strip out of the inner wing circle and added a mirror image on the armature ends. This should help the wings stay in place as I'm going to try to make them detatchable, depending on how tight I can make the join.
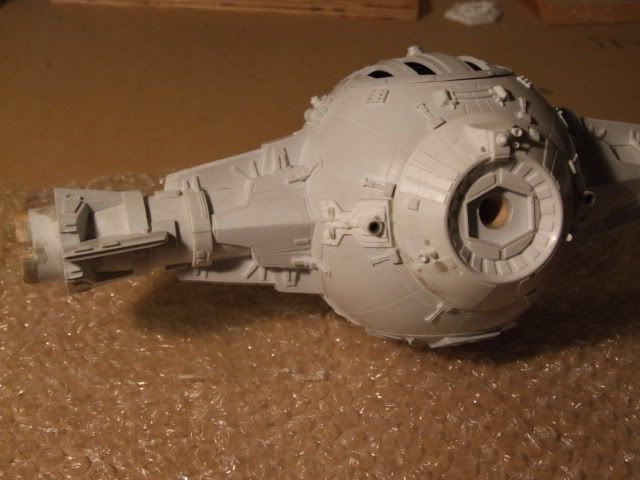
With the wings done its the "Eyeball"to tackle. I've drilled second mounting point on a small block of wood as the originals displayed had two ports . This will also act as a platform for a battery pack support as well as help strengthening the whole socket over time.
Eyeball test assembled onto armature. The first fit was good, but with a pan of hot water and some tape and a bit of molding later the gaps will be very slight indeed once its glued together.
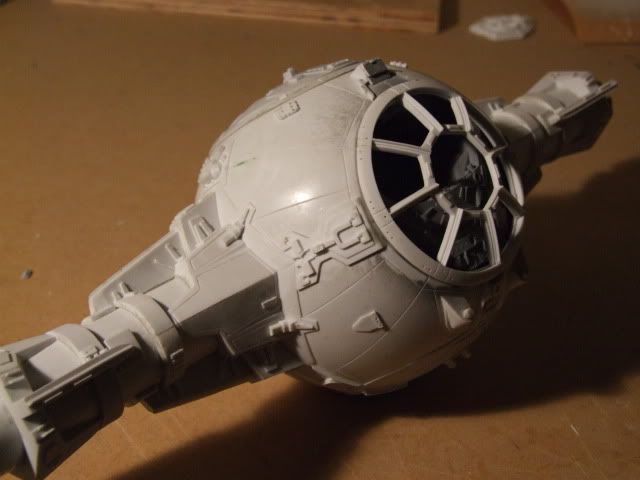
Top of cabin with roof in place.
The eyeball with cabin built in place. I've built a wooden platform benieth it. This is drilled out so that it will keep the eyeball rigid over time and it allows me to put two possible power sources in place. One from an external source through a stand coming in from benieth, and one from a battery pack that will be accessible through the top.
Used two 3mm LEDs for engines.This shot was with curtians partially drawn so the light leakage is pretty bad as its all test fitted at the moment.
Bright lights! Normal lighting. I strengthened the engines with thin copper tubing. Seem OK to the screen pics of Tie Interceptors over the 2nd Deathstar.
Can anyone tell me where these two mystery parts go? I can't find it on any reference photos, but I'm guessing they might have fallen off over the years.
Last edited:
")