Down to 4...!
You are using an out of date browser. It may not display this or other websites correctly.
You should upgrade or use an alternative browser.
You should upgrade or use an alternative browser.
The Rescuer--Luke's saber from Mandolorian Show off
- Thread starter Anakin Starkiller
- Start date


Only one remaining for purchase at atstarsend.com
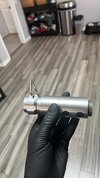
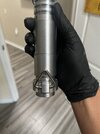
Any advice on how to mask off the underside of the emitter as seen in Halliwax video. I don’t own a cricket. Any suggestions?
CopperRevan
Master Member
I did mine while i did the neck and i allowed the paint to get over the edge on purpose then took acetone and a qtip and just wiped it off after it dries to get that nice straight and clean appearance. You could also use a tiny brush, some acetone and a tooth pick and use very, very light daps and patience until you get the paint off. If you have some acetone($1) in the nail polish aisle at walmart...you don't have to mask it off to perfection at all.Any advice on how to mask off the underside of the emitter as seen in Halliwax video. I don’t own a cricket. Any suggestions?
** if you try masking it off, chances are you will create a tiny gap between the neck and emitter which you don't want.
Last edited:
CopperRevan
Master Member
or brush some toothpaste on the ring prior to painting...lol. easierAny advice on how to mask off the underside of the emitter as seen in Halliwax video. I don’t own a cricket. Any suggestions?
CopperRevan
Master Member
Teaser..Teaser...Wicked progress, I have a “surprise” coming for all of us tomorrow
Keep an eye out at atstarsend.com for his next big release.
Sold out!
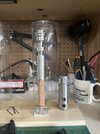
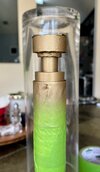
I’m rather late to this party but was able to get ahold of a Rescuer and started painting the neck. First time doing a paint job on a prop like this, but so far going smooth. Fortunately I was able to use my wife’s Cricut machine to cut the circular tape strips for covering the underside of the neck. Will post more pictures as I make progress.
Attachments
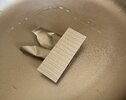
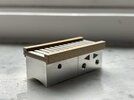
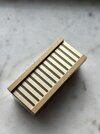
Mostly finished with the control box now. I decided to try something a bit different with the brass card. In the reference pictures that I’ve seen, the recessed portions look dark compared to the top, so I aged the entire brass card and then polished only the top, making the dark/light line effect a bit more pronounced.
Attachments
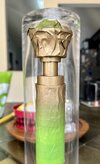
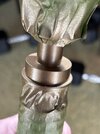
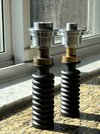
Did the black paint on the rings yesterday, about three coats each. I decided to go with the flat black, as I’ve never really liked the shiny black and the references to me appear fairly dull. Worst case I can always buff the black paint with a paper towel on my lathe to polish it up some if I want it a bit glossier.
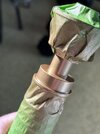
For the neck section, I experimented on the stunt top using some Tamiya weathering paints and I like how it turned out, so I may add it to the belt hanger version also eventually. Thanks DaveP for the tips on how to get those to adhere.
Now just need to wait about a week before I sand off the tops of the rings.
Attachments

Great job! That flat black is so much easier to work with in my opinion.Did the black paint on the rings yesterday, about three coats each. I decided to go with the flat black, as I’ve never really liked the shiny black and the references to me appear fairly dull. Worst case I can always buff the black paint with a paper towel on my lathe to polish it up some if I want it a bit glossier.
For the neck section, I experimented on the stunt top using some Tamiya weathering paints and I like how it turned out, so I may add it to the belt hanger version also eventually. Thanks DaveP for the tips on how to get those to adhere.
Now just need to wait about a week before I sand off the tops of the rings.
The two necks look incredible. Love the brush marks in the stunt neck.
Great job! That flat black is so much easier to work with in my opinion.
The two necks look incredible. Love the brush marks in the stunt neck.
Thank you! Yea so this is pretty much my first time really doing this painting and I’ve used the stunt top as a practice run for everything because I don’t really intend to use it much anyway.
The only “issue” I was having with the black paint was that with each coat, I couldn’t seem to put on a thick enough amount of paint to make the full hilt look liquid and shiny, and I was afraid I would get paint runs. So I think as a result it has a very, very slight texture visible in the paint, due to the paint droplets. I didn’t have that problem with the gold though.
Also, I can’t really decide on some of the color/weathering options because to be honest, every reference photo, or the clips from the behind the scenes Mando episode, the hilt looks different. The tri ring is even in different spots at different times. So they either had several hilts, or the pommel rotated.
At the end of the day, I’m trying to mix in a combination of what Halliwax showed as well as what the eFX hilt looks like, plus whatever I can decipher on my own.
Similar threads
- Replies
- 62
- Views
- 5,833
- Replies
- 2
- Views
- 552
- Replies
- 32
- Views
- 3,441
- Replies
- 11
- Views
- 737
- Replies
- 7
- Views
- 1,143