TheExit148
New Member
It’s definitely the weekender 40mm case but I also haven’t found the proper dial and hands aftermarket yet. Not a lot of sub seconds dials come up that are even close.
Can you tell me where you get that NATO strap?Wanted to share my find. User stopmo in a separate thread about the watch recommend the Timex Weekender. I rolled with that, dug for hours through NATO straps, I feel semi-confident in my result. Only problem is I can't find the right hands.
Green, 20mm. It looks like the 20mm is sold out at the moment, I'm looking for an alternate source.Can you tell me where you get that NATO strap?
What did you use to get such perfect weathering details. I used sandpaper, but it looks too clean.
Thanks!!! I took the sandpaper bit on my Dremel and made the markings match as close as I could, and then I took high grit sandpaper to the spots and the edges of said spots to smooth it out. There are still a few knicks here and there from the Dremel, but it worked really well for me.What did you use to get such perfect weathering details. I used sandpaper, but it looks too clean.
That's right! I had completely forgotten. The watch in the game even has the knurling around the face.It looks like Joel's watch dial design was heavily inspired by the Lum-Tec Combat B2.
View attachment 1680861
FYI - The River Island shirt runs big, so if you want something a little closer fitting, I'd recommend sizing down. The size chart on their site is way off.
Received mine today, and decided to return it for a Medium.
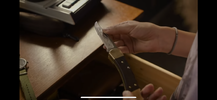
It's a buck 110, the 112 is a little shorter with a finger groove almost. ( with a custom engraving on the blade oc )Created an account after seeing this thread. Super interesting! Does anyone know if this is the Bucks 110 or 112?
Created an account after seeing this thread. Super interesting! Does anyone know if this is the Bucks 110 or 112?
I must have gotten a weird size then. It's marked as Large, but the measurements compared to their website has it in the XL specs. I'll wait for the Medium and should be good to go. It's a nice shirt though.Can confirm, it's what I meant by "longish", although I think it's probably gonna come down to taste with most folks. I bought mine Medium true to size, and while it's slightly roomier on me than the Fjallraven it doesn't feel oversized. I guess the rule of thumb would be: anyone who wants a tight(er) fit better order one size down. If you prefer looser fitting then true to size will probably work.
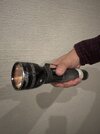
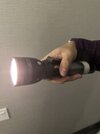
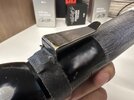
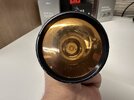
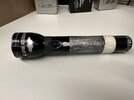
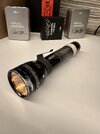
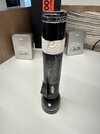
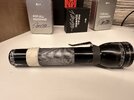
For the black tape, I used 1-inch Hockey Tape, and split it down the middle:So I confirmed with the prop master of the show that the flashlight has black cloth tape (gaff tape most likely) and white hockey tape.
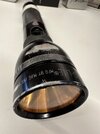
Also, the front lens has a layer of 1/2 CTB filter (not sure of whether that's on the outside, or inside on the lens).
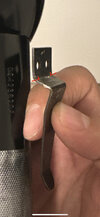
Was not able to confirm the clip however, but I'm sure we can figure that out - and already did find out.
I bought a LED replacement, with a reflector from a place in Australia off ebay. It'll be nice to have a flashlight that is 1080 lumens lol.
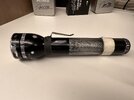
Additionally, I drilled holes for my clip into the flashlight, cut some flat nail heads, and hammered them into the flashlight for a secure fit, but also topped it off with JB Weld to get a tight grip.
Also got some D Cell Lithium Ion batteries from Pale Blue Earth.
Will post photos soon.
I knew there had to be someone out there who made custom dials.I have an Etsy maker who makes a great custom face, so I'm 99% there.
I found the watch hands! I won't share until they get here, just in case I'm wrong so I don't waste anyone's time. Still waiting on my Etsy source for the face.I knew there had to be someone out there who made custom dials.
Prepare for the onslaught messages and questions when you finish. Haha. Can’t wait to see what you get made up

Niiice.I found the watch hands! I won't share until they get here, just in case I'm wrong so I don't waste anyone's time. Still waiting on my Etsy source for the face.