You are using an out of date browser. It may not display this or other websites correctly.
You should upgrade or use an alternative browser.
You should upgrade or use an alternative browser.
The Definitive Peter Quill/Star-Lord Costume Thread
- Thread starter Kevin Gossett
- Start date
Following! I'm planning to finally tackle Star-Lord's helmet this year and am wondering the same thing.I understand this is a precariously noobish thing to post and ask, but I'm currently working on a printed Star Lord helmet build and wanted to know if anyone had a line on a lighting kit for the eyes.
From research, it appears CorSec Props and TheRocketeer on here used to offer kits, with both having faded into internet oblivion.
Any insight or direction is appreciated, or even a tutorial pointer, as I've not tried working with LEDs before.
Cheers!
Spenny.
NeroMakes
Member
I got mine from Risu back in 2018, I'd check to see if he still does them.Following! I'm planning to finally tackle Star-Lord's helmet this year and am wondering the same thing.
Spenny
New Member
I got mine from Risu back in 2018, I'd check to see if he still does them.
Unfortunately, he is not currently producing them due to lack of both laser cutter and interest.
blackyck
Member
I’m in the same boat and just looking for a rundown of how they work and I can make them myself.I understand this is a precariously noobish thing to post and ask, but I'm currently working on a printed Star Lord helmet build and wanted to know if anyone had a line on a lighting kit for the eyes.
From research, it appears CorSec Props and TheRocketeer on here used to offer kits, with both having faded into internet oblivion.
Any insight or direction is appreciated, or even a tutorial pointer, as I've not tried working with LEDs before.
Cheers!
Spenny.
Spenny
New Member
From watching a few YouTube videos of mask builds (3DPrintedProps and Punished Props Academy) with Risu and CorSec's kits, they appear to be:I’m in the same boat and just looking for a rundown of how they work and I can make them myself.
- Clear acrylic disks with etched grid patterns for the outer lens.
- Red LED strips placed within the circumference of the sockets, wired to a switch and battery.
- Blue acrylic disks on the inside to counterbalance the red LEDs and the vision impairment/agitation that comes with them.
One of the kits, I'm pretty sure Risu's, included an inner socket to hold the LEDs and be installed into the helmet's eyes.
I've ordered parts to give it all a whirl, so I'll report back next week with the poor man's (or rather the soldering noob's) version.
Spenny
New Member
Thanks for the vid recommendations!
That’s not that difficult and my buddy has a glo forge for the lenses. the sockets are the rough part I need to figure out.
The wiring is easy you got this! It’s only 2 wires so basic.
These might be a good jumping off point on the sockets.
We'll see how things go, haha. Hoping I've done the proper calculations on the batteries/LEDs for some decent run time.

Red tint
New Member
Had anyone attempted to trim down the back part of the Legends helmet to suck it in closer to the head?
I feel like I could pull this off…..I’ve done harder mods.
View attachment 1700395View attachment 1700396
I have the same helmet and I think you're just not pushing it in correctly. Those top seams should go all the way in and then the rest of the back will follow suit.
blackyck
Member
Yeah that isn't the issue and only pulls it in 1/2". Theres like 3-4" of space from the back of my head to the rear cap. I have been chopping it up and modifying and got it to fit closer. I need to clean it up and touch up the paint as its still a work in progress.I have the same helmet and I think you're just not pushing it in correctly. Those top seams should go all the way in and then the rest of the back will follow suit.
Attachments
Red tint
New Member
yo! I’ve been thinking of making a star lord with my own flair and i love the rocker look the game has, does anyone know if there are any patterns out there for a similar look? the top flap that looks like its attched to the top pockets look so weirdView attachment 1709318View attachment 1709319
They (whitesheepleather) have the best version of the game jacket. It's the best you're gonna get, I feel. I've never seen anything else beyond cheap Chinese knockoffs of their pattern (way too dark and not as good).
The game is pretty niche, so I don't think there's gonna be many choices here unless you could make your own.
Starboy2329
New Member
Hey everyone, just started up on my Star-Lord bucket build again and I do have some general questions. I’m hoping I’ll be pointed in the right direction.
1.) What method is everyone using to attach a two-piece kit, front to back?
And
2.) What LED strips are some of the best to use for the eyes? I currently have a set I ordered from Amazon, but they don’t seem to have as much LED module / centimeter as some I’ve seen throughout the thread, so if anyone is able to post a couple of links or suggestions, it’d be greatly appreciated.
Thanks in advance!
Spenny
New Member
Hey everyone, just started up on my Star-Lord bucket build again and I do have some general questions. I’m hoping I’ll be pointed in the right direction.
1.) What method is everyone using to attach a two-piece kit, front to back?
And
2.) What LED strips are some of the best to use for the eyes? I currently have a set I ordered from Amazon, but they don’t seem to have as much LED module / centimeter as some I’ve seen throughout the thread, so if anyone is able to post a couple of links or suggestions, it’d be greatly appreciated.
Thanks in advance!
I am not an expert, but I can give you some insight as to my process:
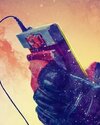
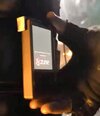
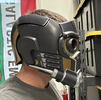
1. I used the Necrosster files via Cults and eventually welded everything into two pieces (front/back) of the helmet. Once together, I put three magnets into either side, both the front and back, by using a small hand drill then super gluing. I found that painters tape combined with a paint marker helped tremendously to get the magnets lined up. Finally, I hot glued two elastic bands from the back to the front to effectively combine the parts into a singular helmet. I now put it on by gripping the back of the helmet and pulling it backwards, to disconnect the magnets and enable there to be enough space to fit my head into the front of the helmet before easing the back into position and allowing the magnets to re-engage. Below are photos of the magnet locations (the third is peaking out from behind the ear), and the bands. Hopefully this will get you jumpstarted on your own solution.
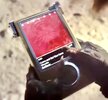
2. These are the LEDs I used for the eyes. They are cuttable every 3 LEDs, though I'll drop a photo below for you to determine if it's enough LED per length for your tastes.
They're 12V, but connected to a single 9V battery via a pressure switch for on/off/strobe functionality.
Cheers,
Spenny
Last edited:
Starboy2329
New Member
This actually helped a lot and I have a better idea of how I’m gonna go into it now. And by any chance do you have a link to these LED’s? Thank you for your feedback.I am not an expert, but I can give you some insight as to my process:
1. I used the Necrosster files via Cults and eventually welded everything into two pieces (front/back) of the helmet. Once together, I put three magnets into either side, both the front and back, by using a small hand drill then super gluing. I found that painters tape combined with a paint marker helped tremendously to get the magnets lined up. Finally, I hot glued two elastic bands from the back to the front to effectively combine the parts into a singular helmet. I now put it on by gripping the back of the helmet and pulling it backwards, to disconnect the magnets and enable there to be enough space to fit my head into the front of the helmet before easing the back into position and allowing the magnets to re-engage. Below are photos of the magnet locations (the third is peaking out from behind the ear), and the bands. Hopefully this will get you jumpstarted on your own solution.
View attachment 1716383
View attachment 1716384
2. These are the LEDs I used for the eyes. They are cuttable every 3 LEDs, though I'll drop a photo below for you to determine if it's enough LED per length for your tastes.
View attachment 1716385
They're 12V, but connected to a single 9V battery via a pressure switch for on/off/strobe functionality.
Cheers,
Spenny
Spenny
New Member
The word "These" in the post above is a link. Should take you right to them!This actually helped a lot and I have a better idea of how I’m gonna go into it now. And by any chance do you have a link to these LED’s? Thank you for your feedback.
Cheers,
Spenny
medievalmosey
New Member
Where did you get the new helmet?Hi guys, I received my new helmet today and I want to share this with you
The seller describe it as 1:1 real life size, I think indeed that we are very close. I drop you some pictures with the Hasbro Marvel Legend helm to compare.
View attachment 844387View attachment 844388
Is really smaller than the Hasbro.
The Marvel Legends helm that everyone knows:
View attachment 844391
The new helmet:
View attachment 844392View attachment 844393View attachment 844394
No bubble head anymore
There are many things to fix (eyes light, the back part.....), but this helmet is really good. It's the most size accurate I've ever seen !
The complete costume :thumbsup
View attachment 844406
")
Edit: sorry I just saw your reply to others! Nvm
Similar threads
- Replies
- 4
- Views
- 788
- Replies
- 7
- Views
- 750
- Replies
- 15
- Views
- 7,615
- Replies
- 1
- Views
- 188
- Replies
- 2
- Views
- 267