You are using an out of date browser. It may not display this or other websites correctly.
You should upgrade or use an alternative browser.
You should upgrade or use an alternative browser.
The Betty model, replica prop fix
- Thread starter srspicer
- Start date


This is looking great! I'm not a fan of Resurrection as an Alien film but loved the atmosphere of the Auriga and the design of the Betty.

Yes, that was me!Um....................Yeah..........UM..........!!!!
The are awesome to say the least. Thanks so much!
Is your CGI the one in the alternate ending as well, where it lands on Earth?
My original version had some pretty cool butterfly-wheeled landing gear like on a B-52, but I was asked to change it to skids / feet because it wasn't "sci-fi" enough. :-D
Kun28, I think screen caps will be your best source for the cockpit.
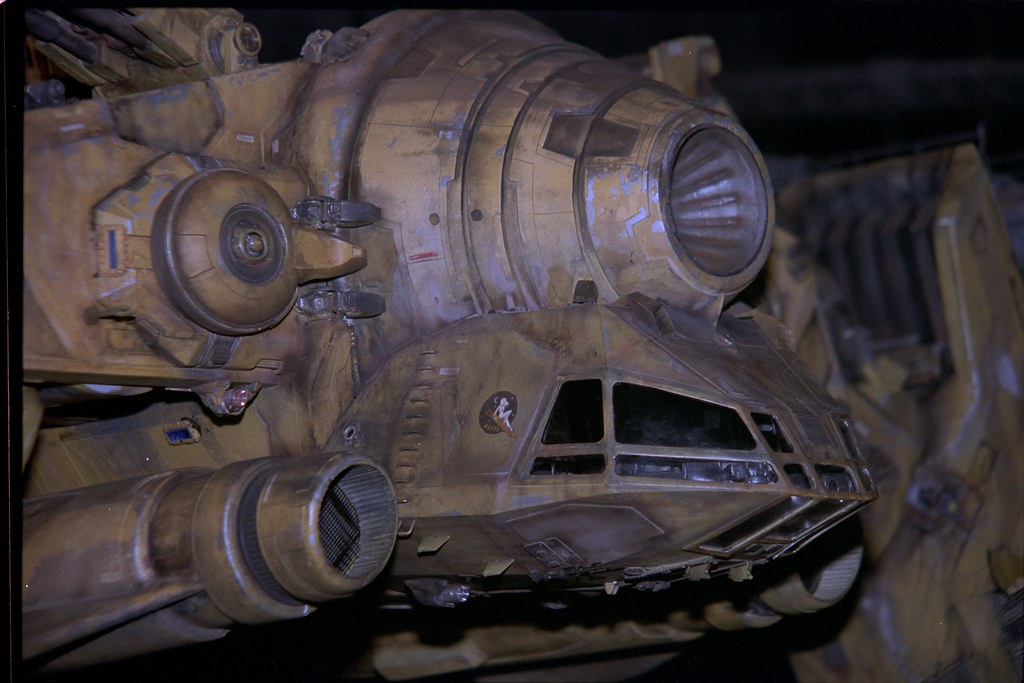
I finally have some progress to show. I received the first batch of printed parts. All parts, accept one, are perfect. One part has a warp on an interior wall, but is easily fixed. A slight learning curve for parts design. I fitted the engine to the wing and it fits as I intended. The small wings on the bottom also fit perfectly.
I finally have some progress to show. I received the first batch of printed parts. All parts, accept one, are perfect. One part has a warp on an interior wall, but is easily fixed. A slight learning curve for parts design. I fitted the engine to the wing and it fits as I intended. The small wings on the bottom also fit perfectly.
Attachments

barney five
Sr Member
always liked that ship !
Fantastic Project")
Fantastic Project
More progress.
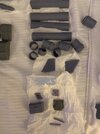
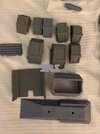
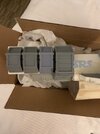
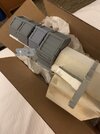
I have replaced the damaged and uneven styrene with new straight sheets for mounting the boxes to. The client will be doing all of the finish painting. With that in mind, I will be making as many part as possible to be removable to allow for better finish painting. The boxes have been cleaned enough to allow them to fit on the sides and next to each other.
Thanks for looking!
Ok, back at my shop after 8 months out of state for work! Progress;
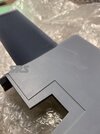
I did a test fit of the secondary engines, and the smaller one needs to be about 20% larger. I added an interior wall to the large engine for support when I add the detailing. Locator discs were added so they can be removable.


I located and keyed the engines and added details, more details will be added later.


You can also see that I added the Panavise mount the client supplied.


More soon, thanks for looking!
I did a test fit of the secondary engines, and the smaller one needs to be about 20% larger. I added an interior wall to the large engine for support when I add the detailing. Locator discs were added so they can be removable.
I located and keyed the engines and added details, more details will be added later.
You can also see that I added the Panavise mount the client supplied.
More soon, thanks for looking!
drusselmeyer
Master Member
You might want to reference earlier posts on the RPF. There was a studio scale build back in 2011.


Similar threads
- Replies
- 11
- Views
- 1,112