More work done...finally.
I went back to the support walls to correct the detailing. The shape and proportions need adjusting. I drew a template as a guide to make Tham all the same.
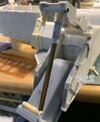
The next item to take are the main engine pods. These were complicated to design but worth the effort. There were a few issues with a test print of the first part, but after adjustments they printed very nicely. These are what they looked like when I received them, lots of support trees.
Lots of clean up before I can test fit them, but that is how I designed all of the parts.
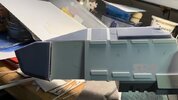
You can see the 'stepped' shape of the pods. I was unable to get the pod to be a smooth shape and accurate. I have a lot to learn in 3D design. I have allowed a lot of wall thickness so I can remove those steps and have nice tapered, smoothed wall. I also fit the pivot arms as well. These will be just pinned so they can be painted separately and then assembled.
Now that the arms are fitted, I can create the engine nozzle boxes that are in the end of each pod before the pods are permanently glued.
Now all of the pod parts can be assembled. There are six parts for each pod. I designed alignment pockets and holes to allow for a good fitment. Once assembled, they were cleaned and made smooth. No turning back now.
There is a lot of detailing that needs to be applied to the surface of the pods. There are layers of plating and other items. This is just the start.
There is a little more info on my website. Thanks for looking!
")