Too Much Garlic
Master Member
What post nr did he post that? Looks like one of the pictures I forgot to re-save after my external HD just deleted a bunch of pictures. I need to go back through the thread again to get everything.
I don’t remember how far back it was, but it was a while ago for sure.What post nr did he post that? Looks like one of the pictures I forgot to re-save after my external HD just deleted a bunch of pictures. I need to go back through the thread again to get everything.
Never compared those closely. Not sure.
No worries, I left for the night too.Don't mind me... I'm just being tired and noticed the screw orientation on the chest...

 www.facebook.com
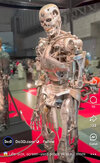
It's really amazing how much the bright lighting conditions that endo is in washes out the finish. And I wish someone would fix his eye positions.That endo really hits all the right marks. I keep getting surprised every time I see it.
You can see pretty clearly in a lot of pictures of the feet that the joint you're talking about starts from the same type of knuckle pulleys they used for the hands in T1. Then, they ground or machined a flat on it to make welding a clevis (fork) to it easier. Lastly, there is a round bushing-like object welded right above where the clevis meets the pulley. And that's how they did it. I have one more picture of ref that I took that shows this really clearly, but I got very close on my first 3D model simply by looking at the feet photos we've all been looking at foreverNice. I was wondering if it was damage on the feet as they are now on the EMP one when you showed that picture, but cool to see it's in the movie.
Another question. What reference did you use to make the "egg-shaped" part connecting to front forks of the upper and lower pistons. I say "egg-shape" as that's how the shape is on the LFS, however, yours look really different.
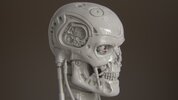
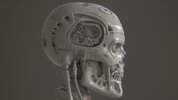
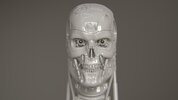
That last image is getting really close to the look of T1 ending scenes. Good job on the lighting!A little more, just for fun.
It looks like a scene from T1, at least I tried, but still, the difference in proportions is visible if you compare it with the frame from the movie. Although I averaged the shapes, taking the best from T1 and T2.That last image is getting really close to the look of T1 ending scenes. Good job on the lighting!
Really awesome bud!!!Can't wait to see what you do with it. Here's mine and where I'm up to.
BenView attachment 1478056
I think you should make the round cut-out a bit more wider - more shallow - and go higher up the side of the fork. You barely have it go past the bevel edge. It looks to go a third or almost half up the side on the original.Some of the recently tweaked parts including slightly improved toe tip, the new clevis/fork with the curved cut underside, and some test hex screws with the sockets “ground down” and chamfered:
View attachment 1900185
-Dana