SaphyreDaze
New Member
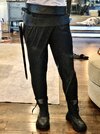
With some . modification those could definit work!This group has been fantastic! Thank you for all the resources and reference images. As I’m not a seamstress, I’ve been hunting for pants that might work.
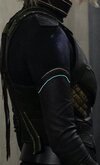
Based on the recent set photos Sophia posted, I think these might be really close. Belt is removable and since I’m short I think the length will still hit the boots right.
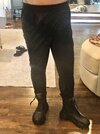
ZANZEA-Women-High-Waist-Belt-Pocket-Pants-Casual-Leopard-Printing-Solid-Wrap-Trousers
what do y’all think?
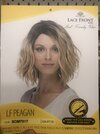
Also I was randomly browsing Etsy and came across some pretty decent looking wig options. I still want to wait and see the WiF version when it drops but options are nice!
This item is unavailable - Etsy
Find the perfect handmade gift, vintage & on-trend clothes, unique jewelry, and more… lots more.
 www.etsy.com


")