skeplin
New Member
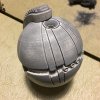
Sharing the results of my latest project! I found a Star Wars Thermal Detonator ornament on Thingiverse by AprilStorm (http://www.thingiverse.com/thing:185165). After sizing it up to 130%, I printed it on my XYZ Da Vinci 3D printer.

Several coats of automotive primer along with vigorous sanding yielded a nice smooth surface. I applied a grey gloss coat and then several coats of acrylic from my airbrush starting with gunmetal, then to silver, and copper for the accents. Finally, a little bit of weathering with some watered down black.


I wanted to take it one step further, so I decided to light it. I used an Adafruit Trinket and four Neopixel LEDs along with a push button to allow different animated light sequences.


And the video:
[video]https://www.facebook.com/pinearmory/videos/vb.1609889162579341/1733996153501974/?type=2&theater&notif_t=like[/video]

Several coats of automotive primer along with vigorous sanding yielded a nice smooth surface. I applied a grey gloss coat and then several coats of acrylic from my airbrush starting with gunmetal, then to silver, and copper for the accents. Finally, a little bit of weathering with some watered down black.


I wanted to take it one step further, so I decided to light it. I used an Adafruit Trinket and four Neopixel LEDs along with a push button to allow different animated light sequences.


And the video:
[video]https://www.facebook.com/pinearmory/videos/vb.1609889162579341/1733996153501974/?type=2&theater&notif_t=like[/video]

