Star Wars The Force Unleashed II - General Rahm Kota WIP

Re: Rahm Kota TFU2 - WIP

I did some shaping and sanding on the handguard test pull today. I will not be wearing this as there were several flaws caused by problems with the mold, which have now been fixed. This test piece does allow the opportunity for experimentation though.

I plan on priming this and trying out Rub & Buff to see if that may be viable. You can see how soft and flexible the Smooth-Cast® 45D came out. It's what I was hoping for in the handguards. A material that would look rigid but flex when the hand flexes. Soft as it is, it still sands very nicely. The only concern may be if it can take the priming/finishing without cracking the paint. We'll see.

The advantage of a production block mold is I can try out different urethane materials.

Much more to come.

kota_handguard71.png

kota_handguard75.png

kota_handguard76.png

kota_handguard77.png


~ Vonnor
 
Re: Rahm Kota TFU2 - WIP

I started on the vambraces today, beginning with the hard model for the elbow guards. They are symmetrical so I only need one. I used Sintra 3mm for the base and 2mm for the edging, bonding the layers together with Azek PVC cement. Great stuff that Azek, water based and slow set allowing plenty of time to position the parts. I used the 3mm cutout as a jig to align the parts while I pressed them with a board and some iron weights. I painted the edge of the jig as it too was PVC and I didn't want it to stick to the finished model.

By tomorrow this will bond as if one piece of PVC and be easy to heat-bend to the curve of the arm. I already tested the bonding and thermal-forming on a scrap and it works fantastic. After this model is heat-bent to the proper curvature I will take a clam-shell mold and pour in some FeatherLite resin same as the shoulders.

One thing to note, although I had a plan to apply the slight waffle texture to the elbow guard and forearm plate models (see sketch below), two things dissuaded me. 1. The difficulty of scratch-weathering in the texture. 2. The machinist wanted over $250 just for the aluminum texture plate, due to having to fabricate a custom milling bit. I may explore the expense at a future revision. Just heat up the aluminum plate and the Sintra and press the texture into the plastic.

Stay tuned.

kota_vambrace01.png

kota_vambraces03.png

kota_vambraces04.png

kota_vambraces05.png

kota_vambraces07.png

TFU2_TexturePlate.jpg


~ Vonnor
 
Last edited:
Re: Rahm Kota TFU2 - WIP

Sometimes the stuff you have to make is boring and ugly, but necessary to the project.

I show the test handguard partially weathered in place on the armequin. I spritzed it with dark bronze metallic over heavy silver, but sanded too much of the bronze off. Another spritz-n-sand should do the trick. The handguard's flexibility neither suffers from, nor seems to want to crack, the metallic paint job. I was glad of that since it will be easier to get all the pieces a consistent finish.

More when I get there.

kota_vambraces08.png

kota_vambraces10.png

kota_vambraces11.png


~ Vonnor
 
Re: Rahm Kota TFU2 - WIP

Here is a photo-chop overlay of the vambrace armature with the game rendered model. I wanted to be sure I have a reference for scaling and fit. Notice the slight twisting of the armor as it goes up the forearm, which necessitates sculpting right and left separately.

Kota has skinny arms. :p

I hope to come close to this scaling but will need to leave a little rotational room from about 7cm above the wrist to the elbow bend, so they may be a bit fatter than the reference.

kota_vambrace_overlay01.png

kota_vambrace_overlay02.png


~ Vonnor
 
Re: Rahm Kota TFU2 - WIP

The parts are done! :D

Work completed by Mars CNC - Fresno, CA. Blueprints by Bill Costigan, Vonnor Design.

tfu2_kota_parts.jpg

tfu2_kota_saber_frame.jpg


~ Vonnor
 
Re: Rahm Kota TFU2 - WIP

I just got the parts today and I have to say they came out brilliantly.

Here's the same layout from a couple pages back with some small parts. The filename of the image gives the formation away. :)

Also here's a showing of the saber holster frame for the back of the bando. It still needs the stiff leather lining shown on the game renders. Gonna see if fiberglass resin will soak into the thin brown lambskin I still have left over from the hilt wrap. :cool

Stay tuned.

kota_belt01.png

kota_bandoleer01.png

kota_bandoleer02.png


~ Vonnor
 
Re: Rahm Kota TFU2 - WIP

Thanks Semper. :)

I marked off the right ARM-ature for laying on the clay. The solid axial lines show the divide between vambrace halves and are opposite each other through the mass center of the arm. Notice they are skewed a bit toward the back of the body. The dashed axial lines show the vertical centerline as the arm is hanging at rest. I also marked the elbow pit and point and the top/bottom center of the wrist for reference and to help the alignment as the clay piles up.

There is a great deal of forward thinking involved in building rigid articles of clothing. The dimensions of body parts are never the same at rest as in motion, and especially at the full-range end of flexion and extension. I'm finding that compromises must be made to strike a balance between accuracy and wearability, to say nothing of comfort (which would shoot accuracy all to hell). As an example, I will have to cheat the inside arm a half-inch shorter to allow me to scratch my nose and eat a sandwich. :p

I'll post some rough sculpt pix tomorrow.

kota_vambraces12.png

kota_vambraces13.png

kota_vambraces14.png

kota_vambraces15.png


~ Vonnor
 
Re: Rahm Kota TFU2 - WIP

Hey man, just came across this thread- very cool project and it's looking great! I really appreciate the thorough recording of your sculpting/molding/casting process. Thank you! Excellent work, I look forward to watching this build come together!
 
Re: Rahm Kota TFU2 - WIP

Some random thoughts on this stage of the project:

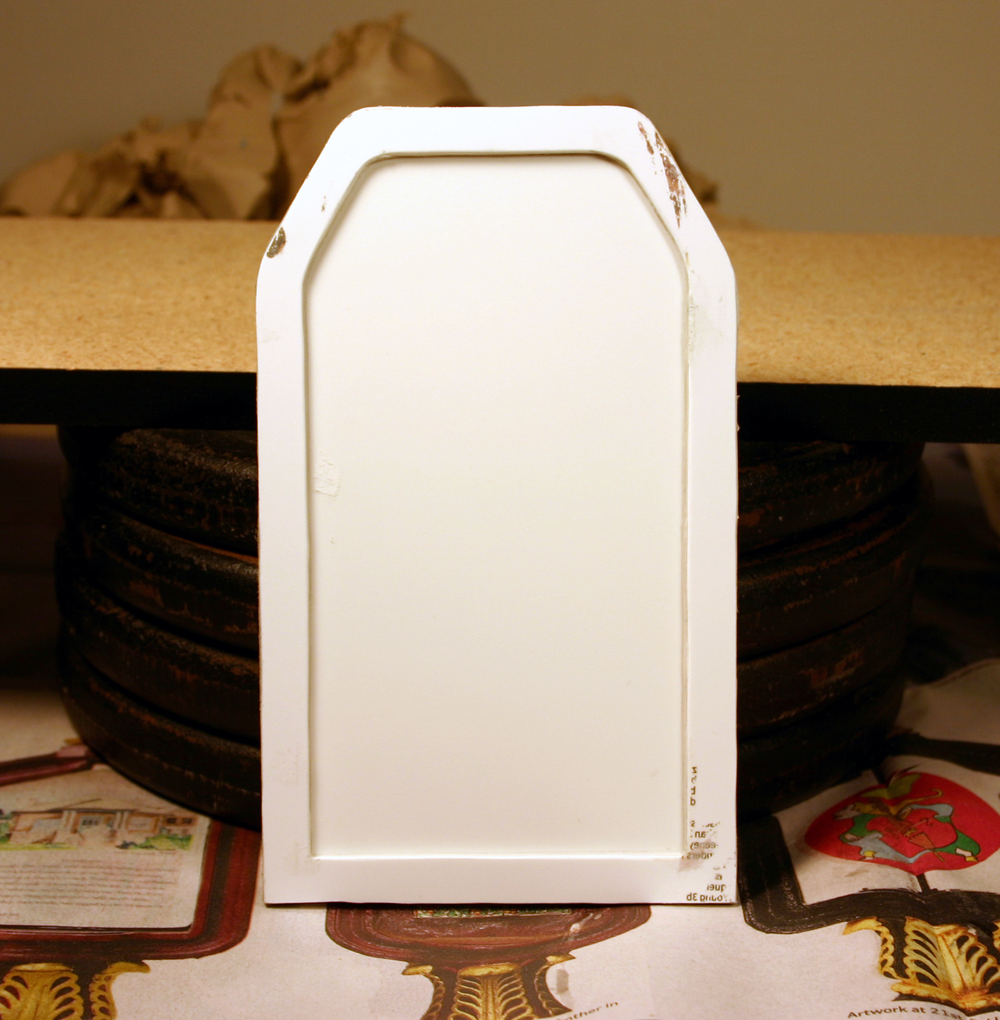
Up to this point, the armor pieces that have been built have been caps of a sort. The shoulders and handguards kind of just sit on or stand off of their respective body parts. The arms are the first to "wrap around" a body part. These and the torso armor have to leave some space between the plastic and the skin. If they don't, then the costume wearer (in this case, me) won't be able to move or breathe.

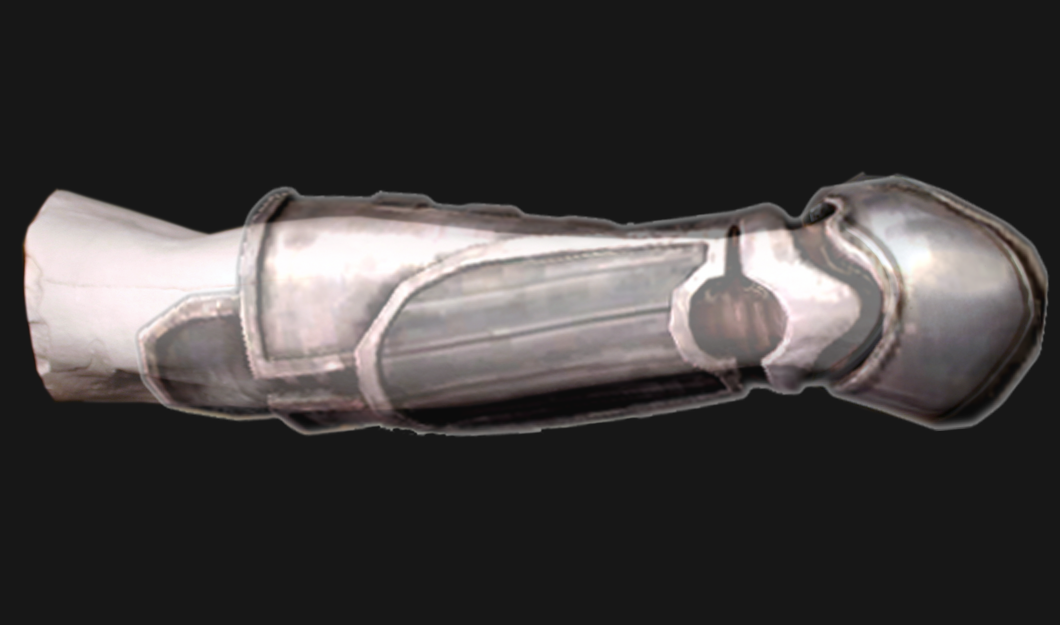
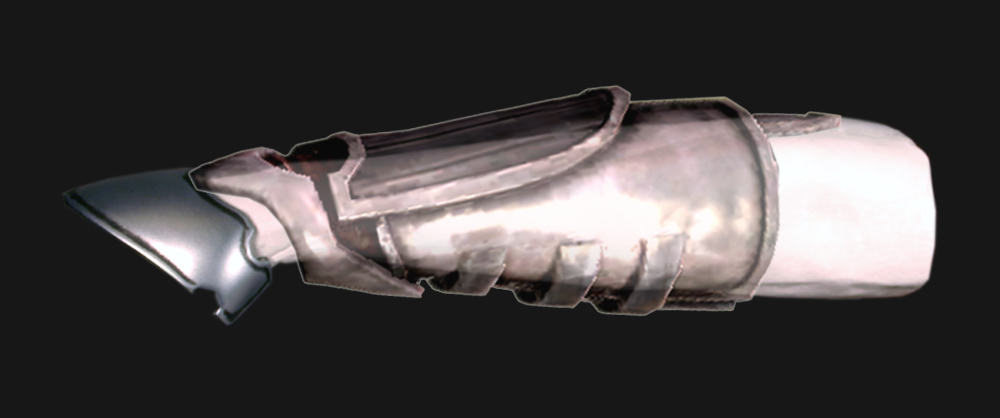
For the arms (and torso as well), I gave a lot of thought to several factors. First and foremost, the finished elements need to look like the game renders. Secondly, they need to look like the game renders while the wearer is moving. Third, the wearer needs to be able to move, preferrably the way the CG model moves or as close to that as possible. Lastly, the armor should not present any health hazards to the wearer for the duration of the 'cosplay' (used in its most literal definition).

I had some concerns that numbers one and two above might suffer for the other requirements (I still have some for the torso, but more on that later).

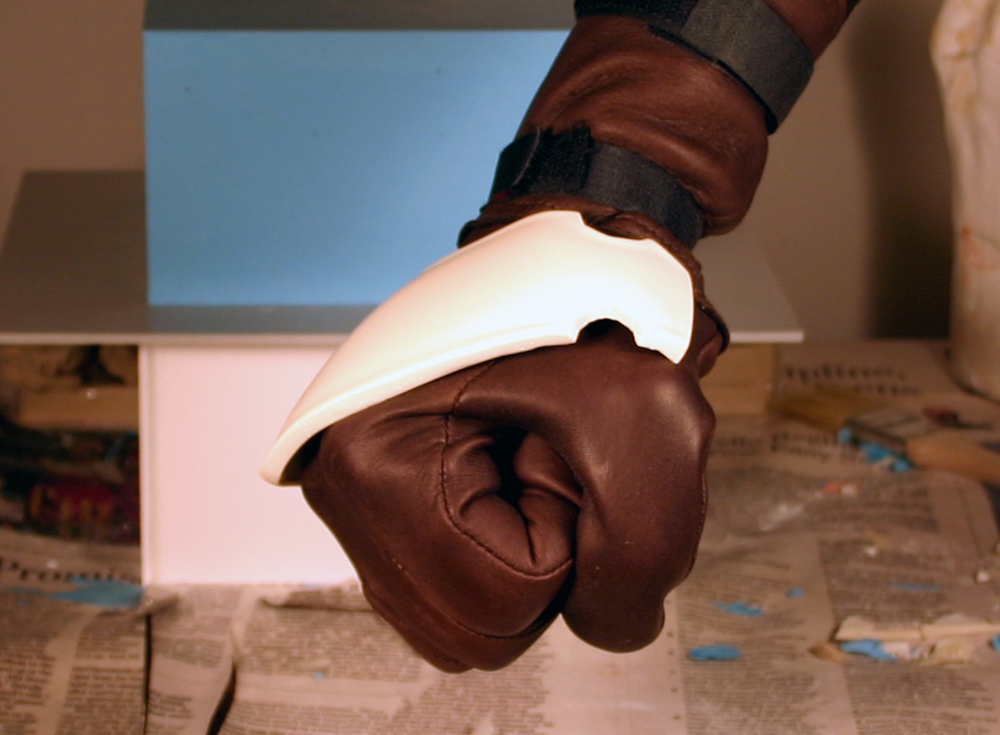
The CG game model armor elements have the luxury of being flexible along any axis. They can twist, stretch and contract as the body twists, stretches and contracts. The live armor parts cannot. This requires study of body motion for the part in question. For the arms, that means bending at the elbow and twisting at the wrist. It means paying attention to the limitations of the rigid part while wearing the armor. The key is knowing how far to limit the range of motion of the body. As the elbow bends, for example, it will reach a point beyond which if the rigid element is built to accommodate such a motion range, accuracy will fall below acceptable limits set by the costume crafter. On the other hand, preserving 100% accuracy may very well limit range of motion to a point where acceptable human functionality suffers.

It's finding the balance point between these two factors that's the trick.

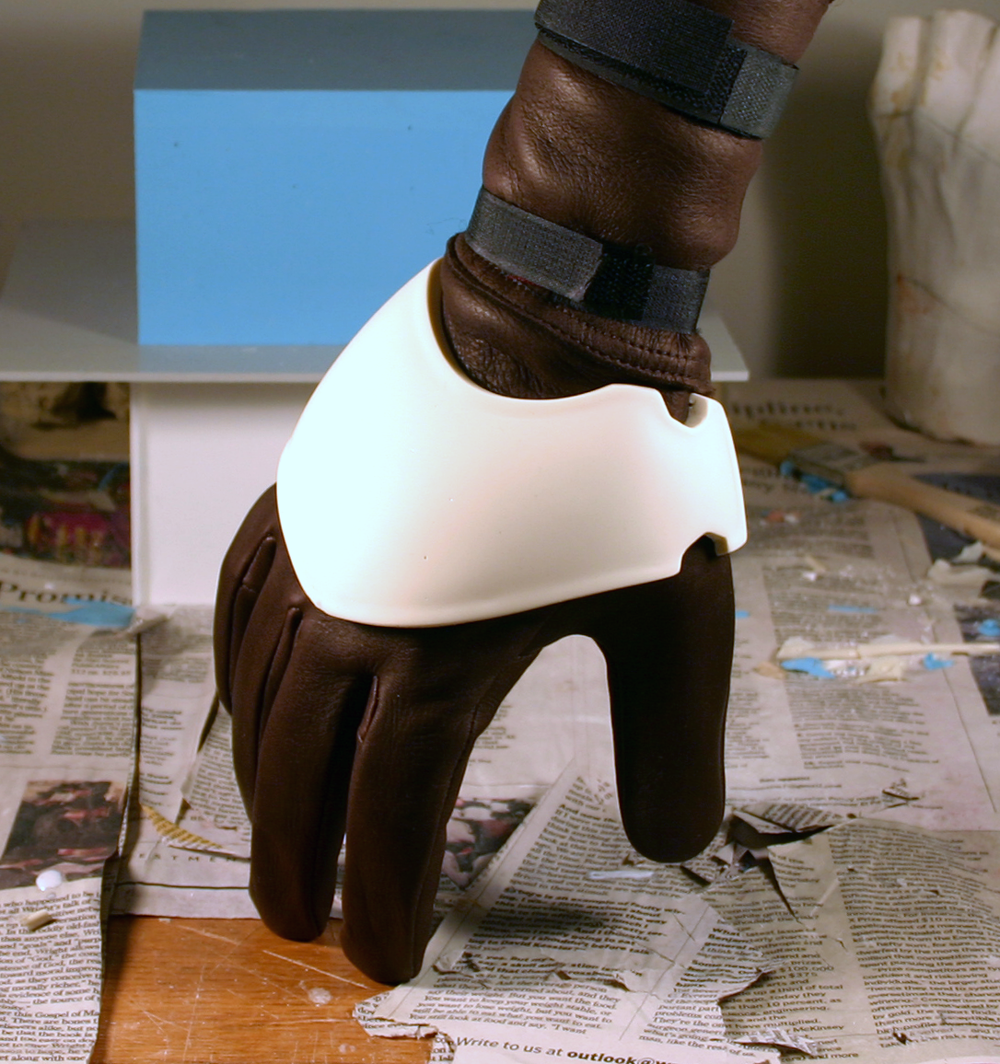
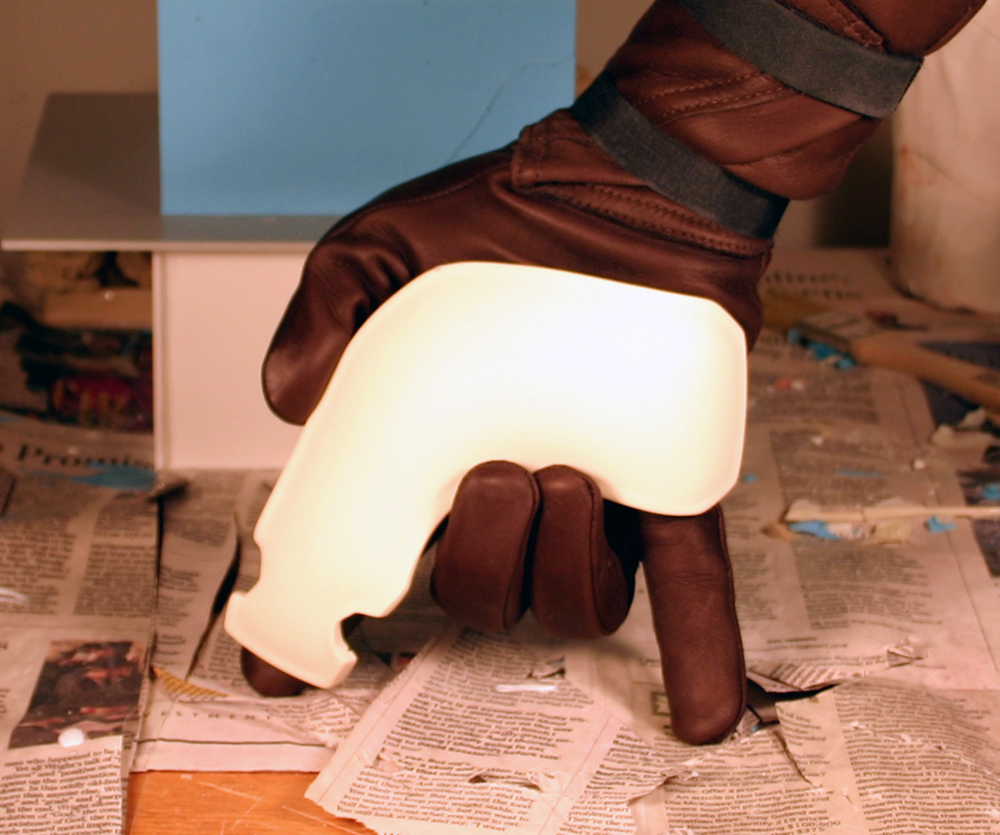
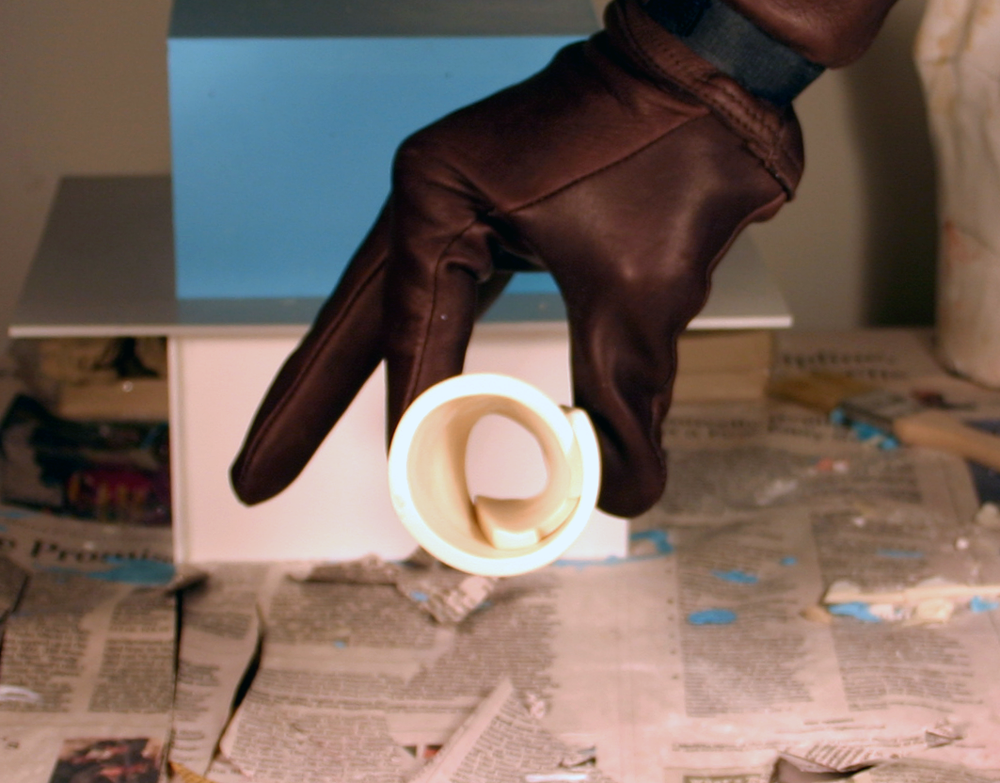
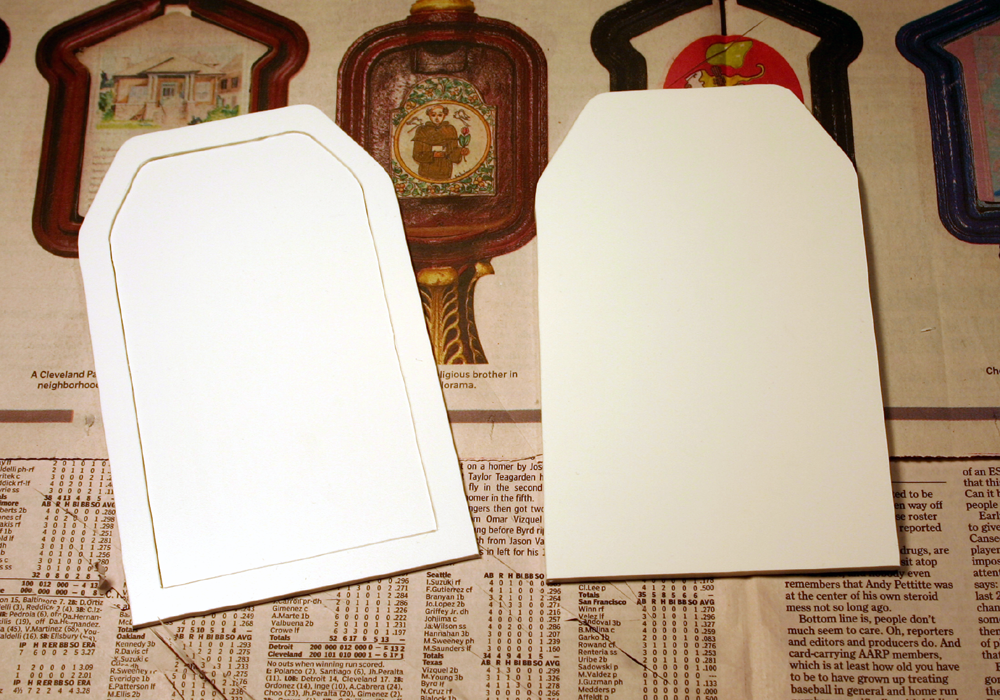
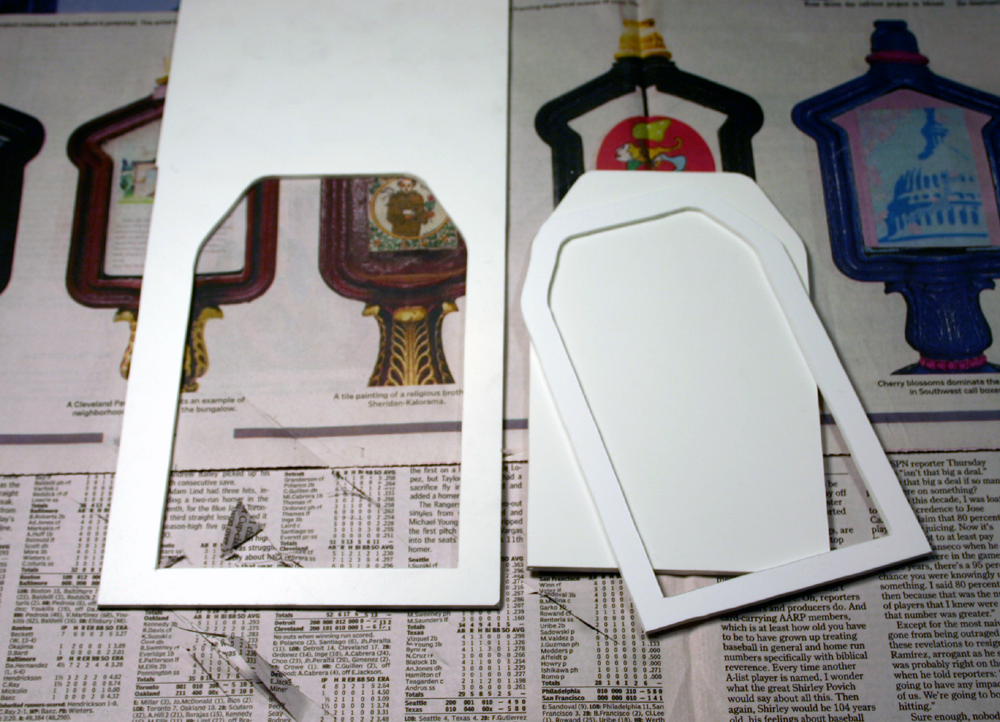
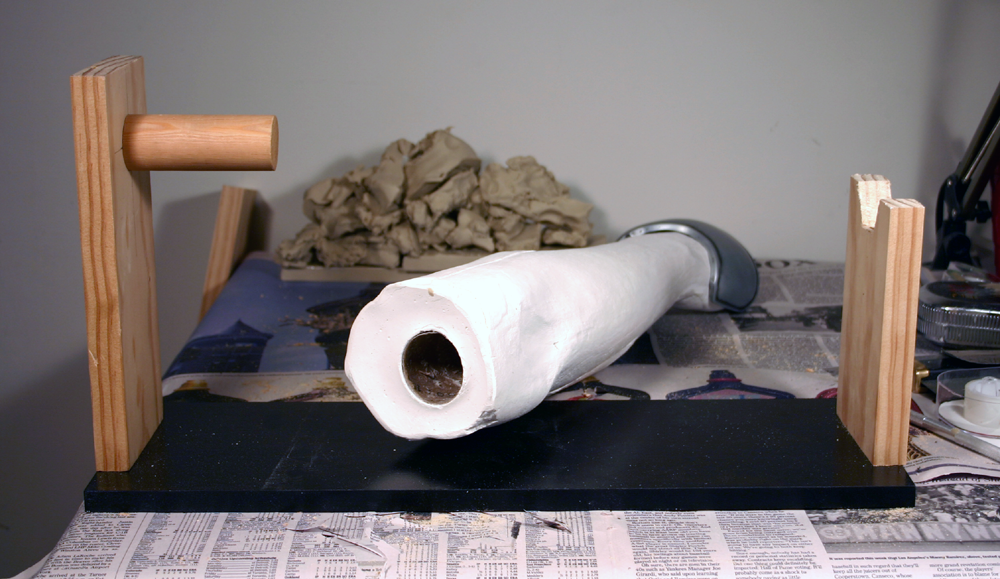
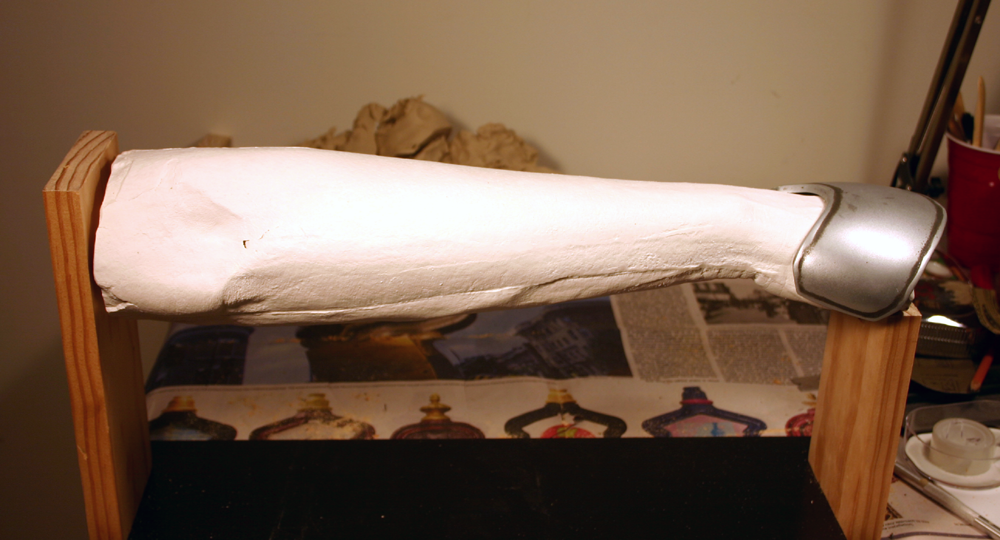
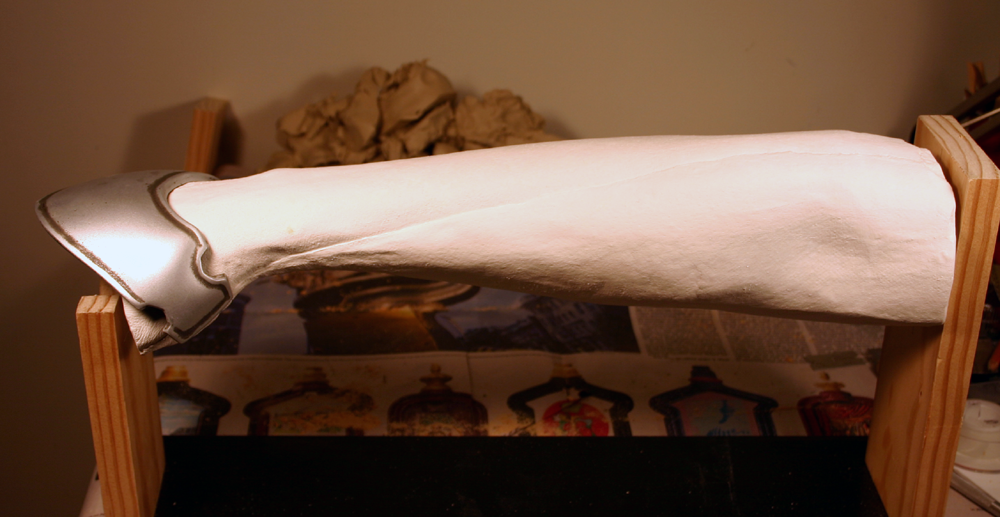
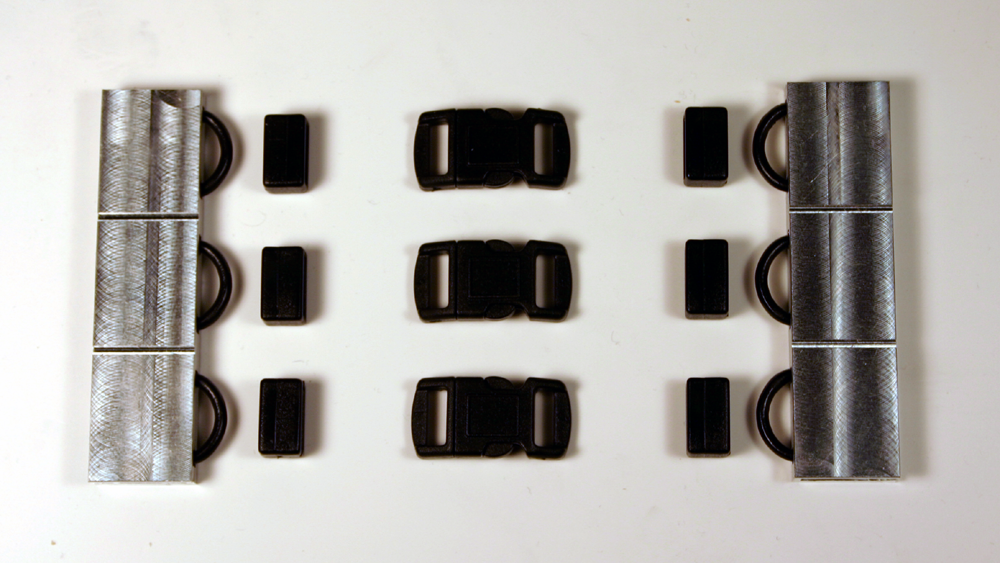
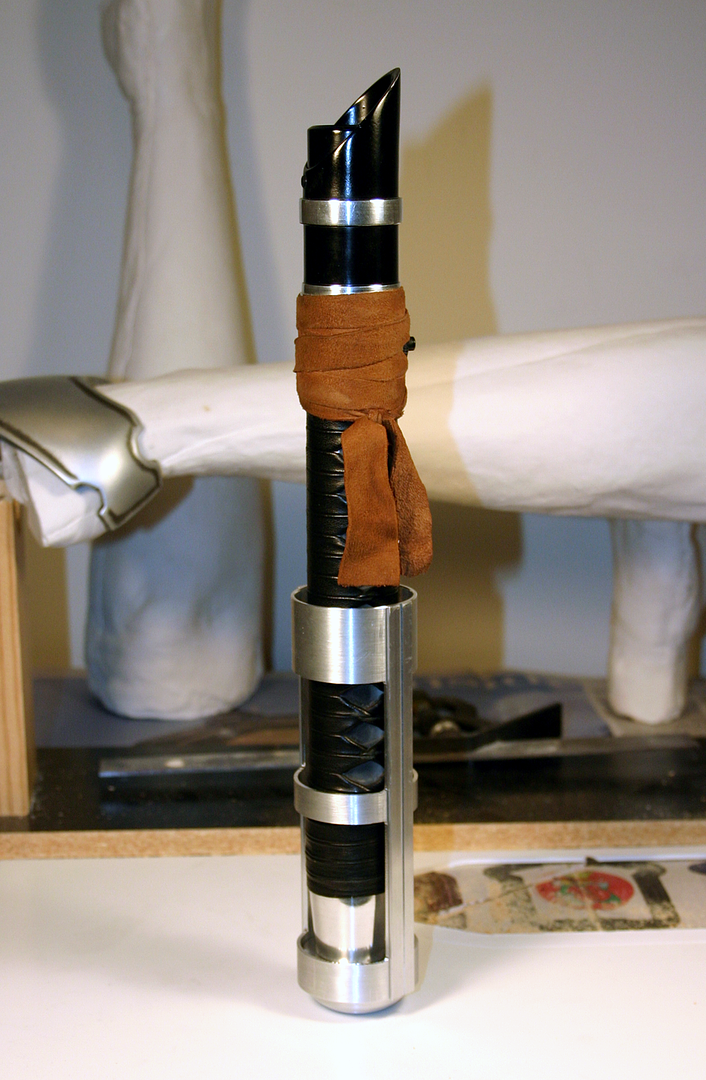
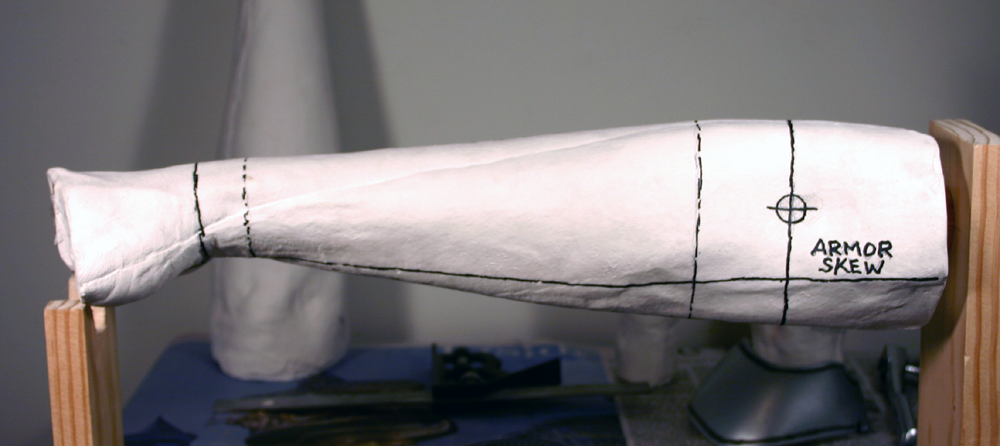
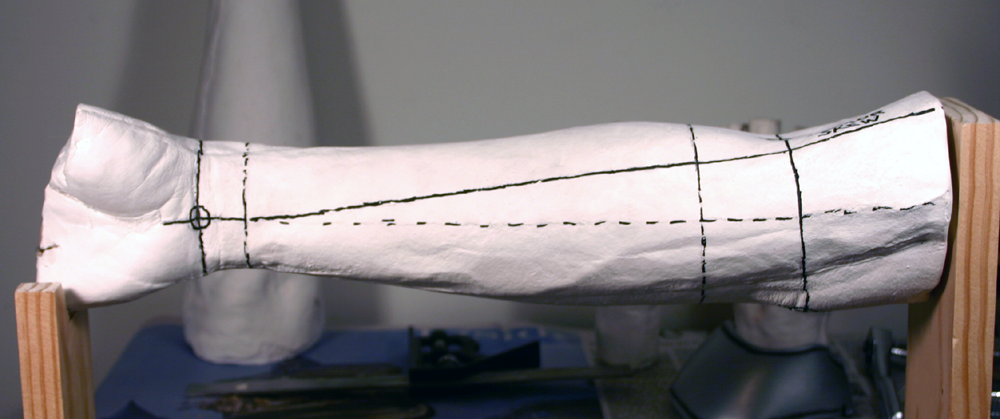
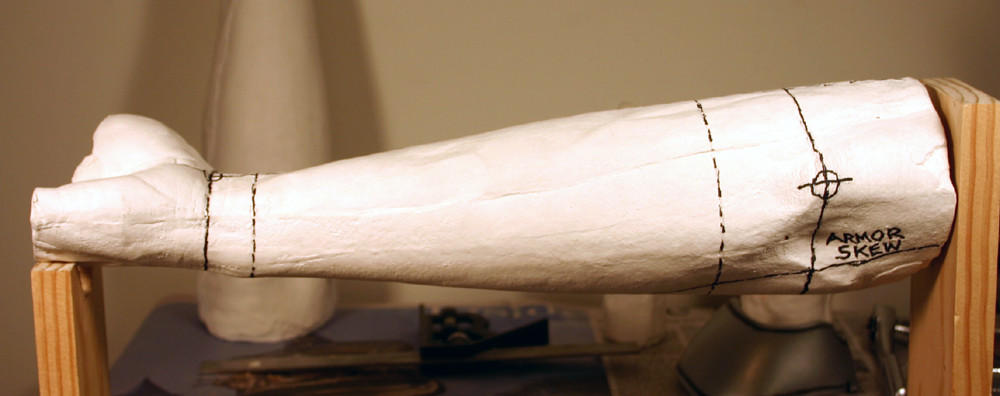
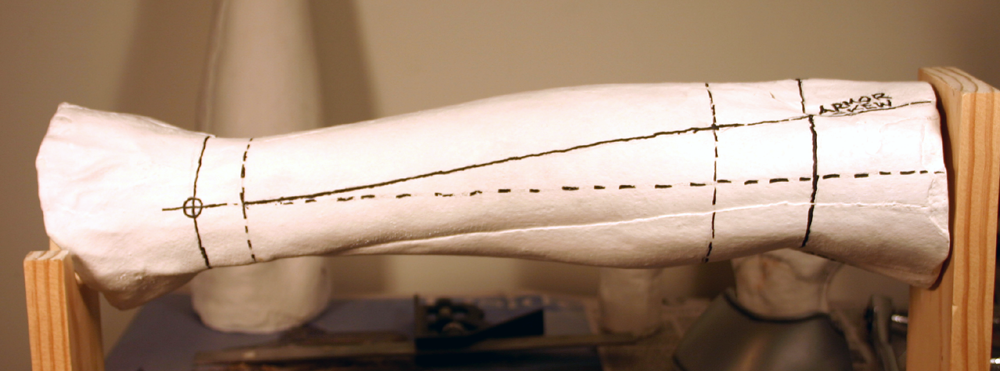
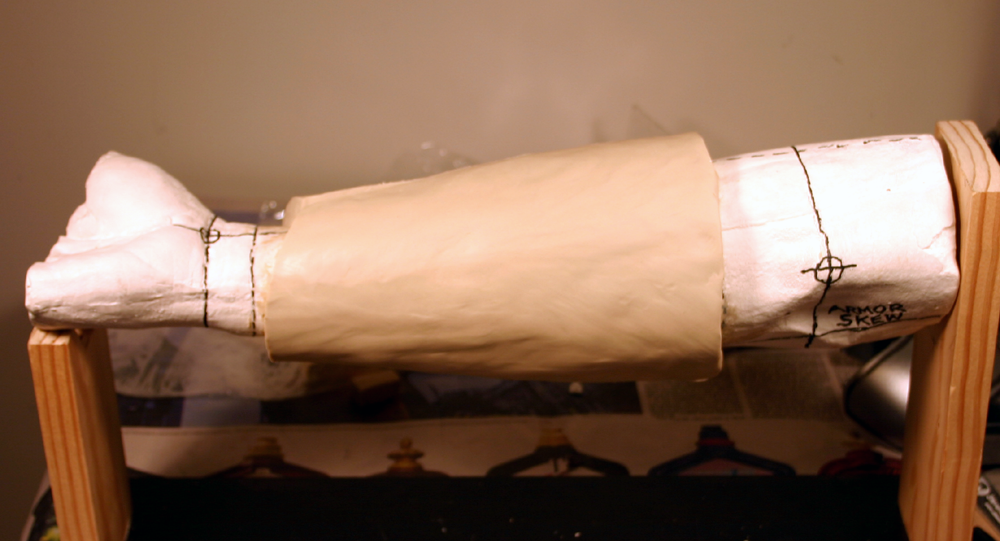
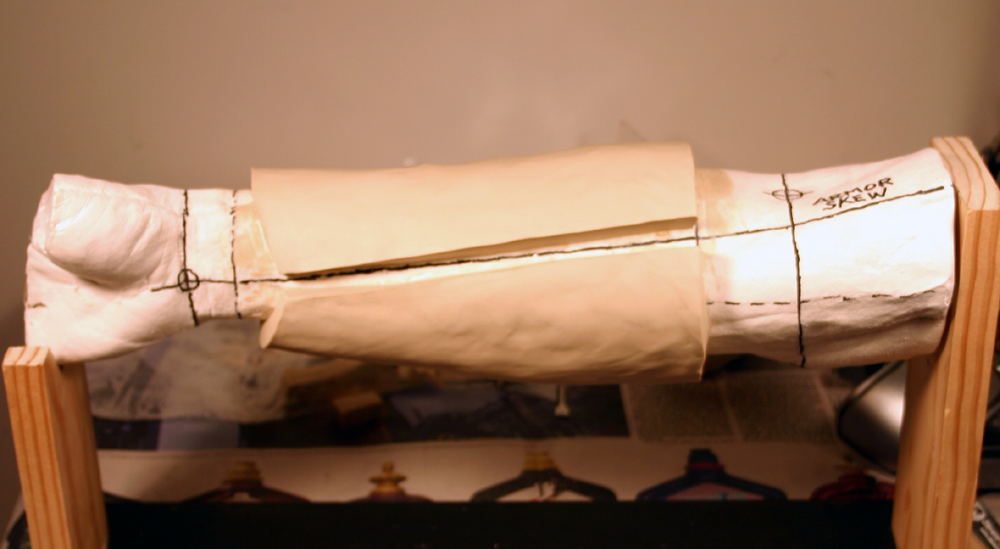
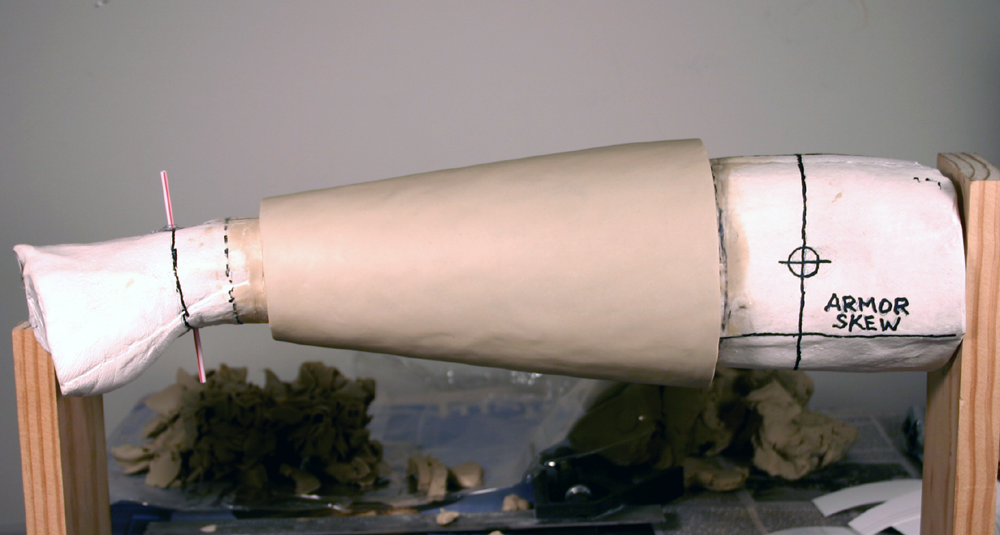
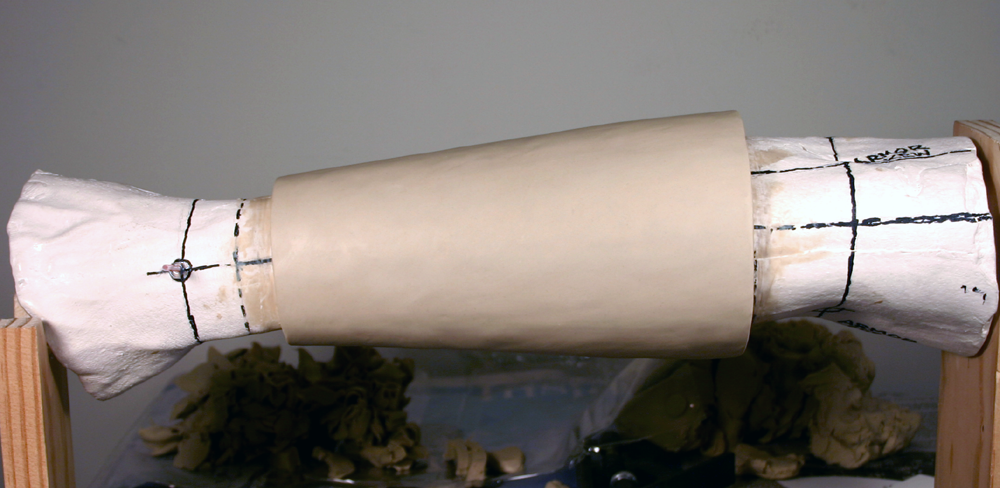
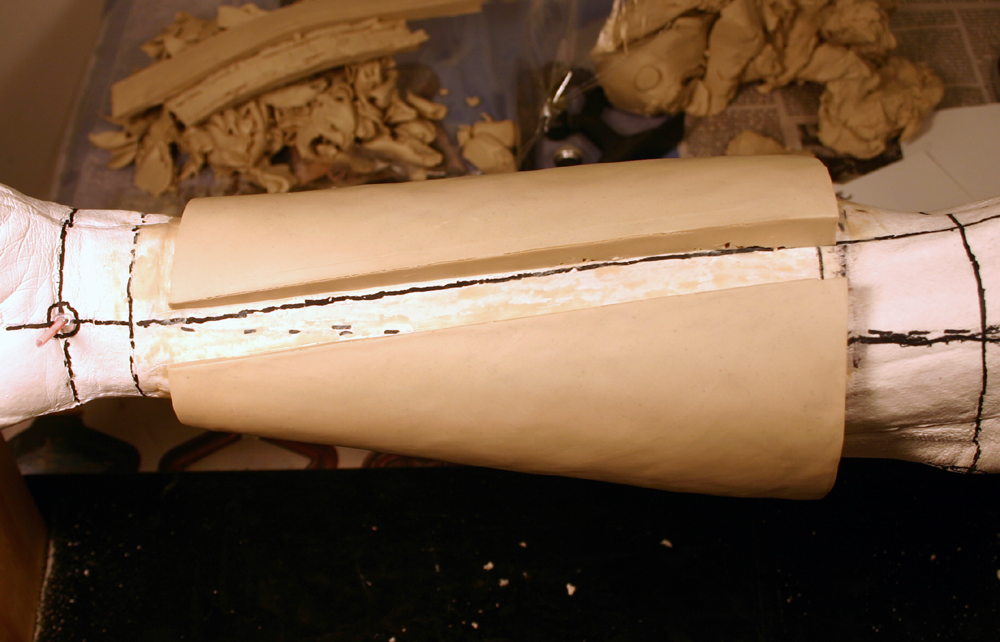
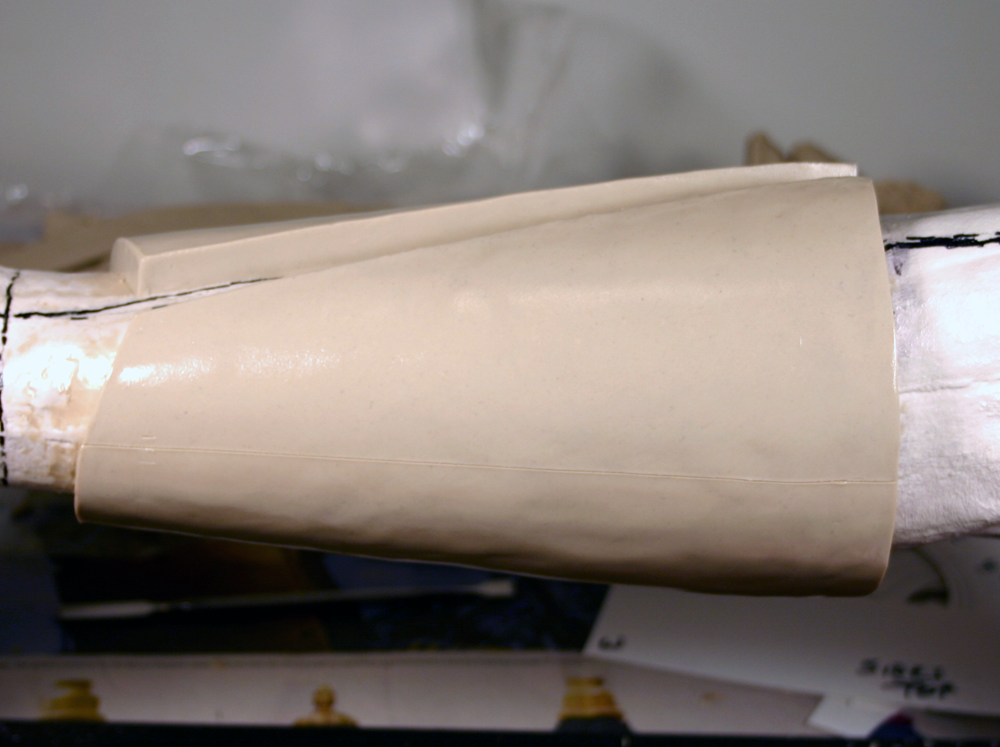
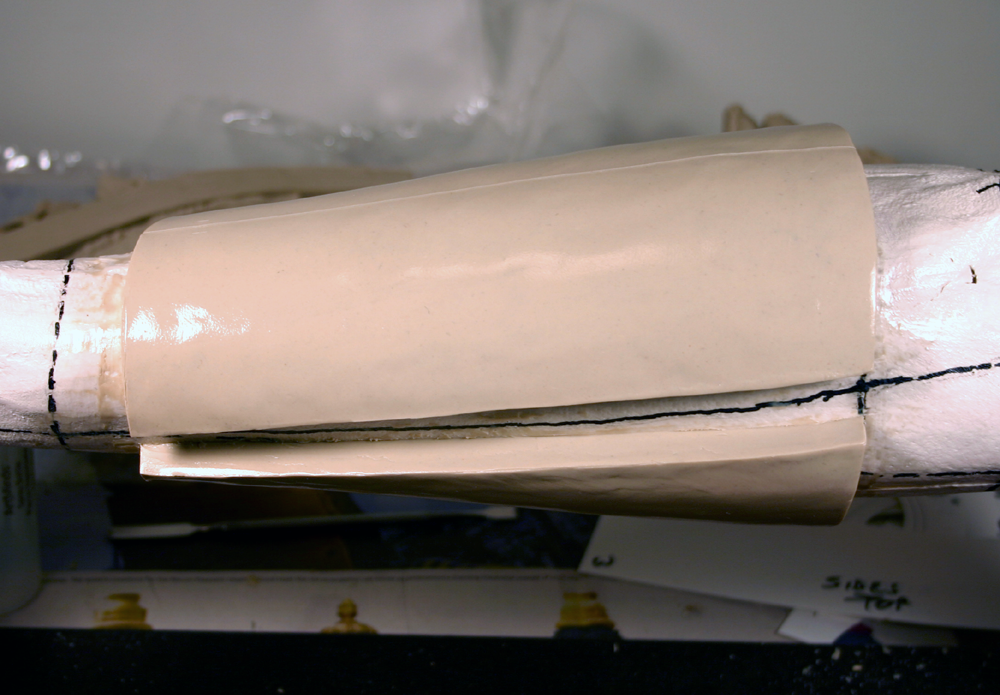
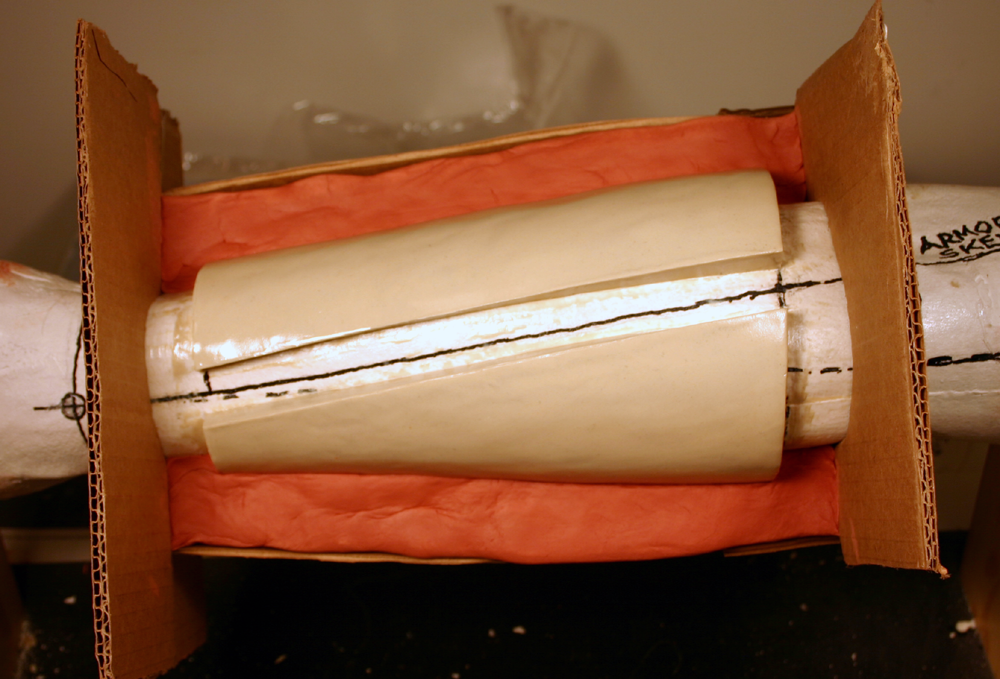
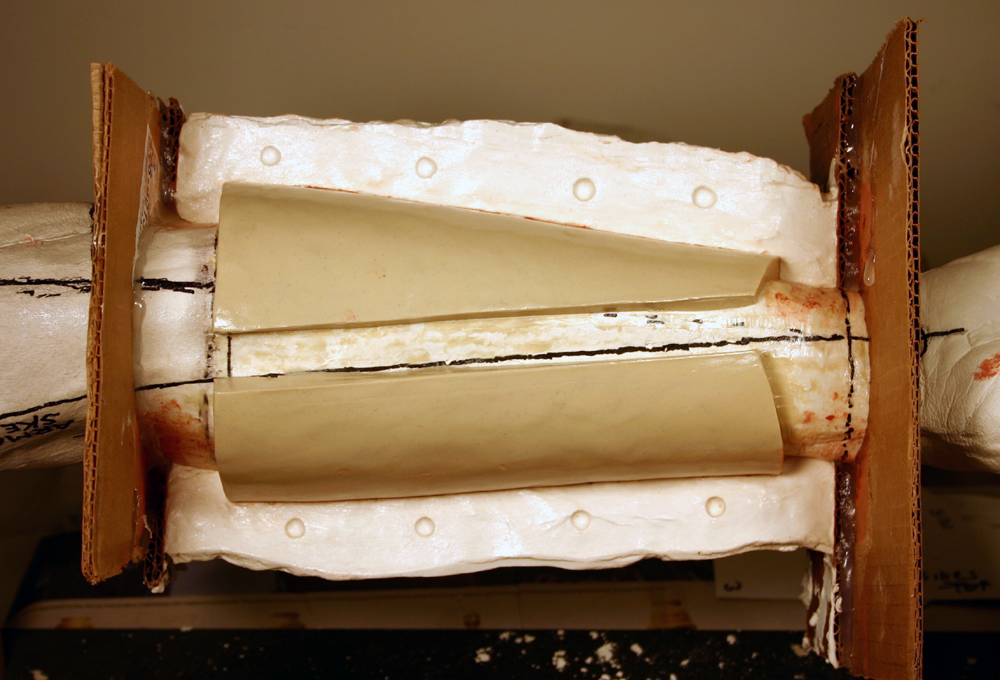
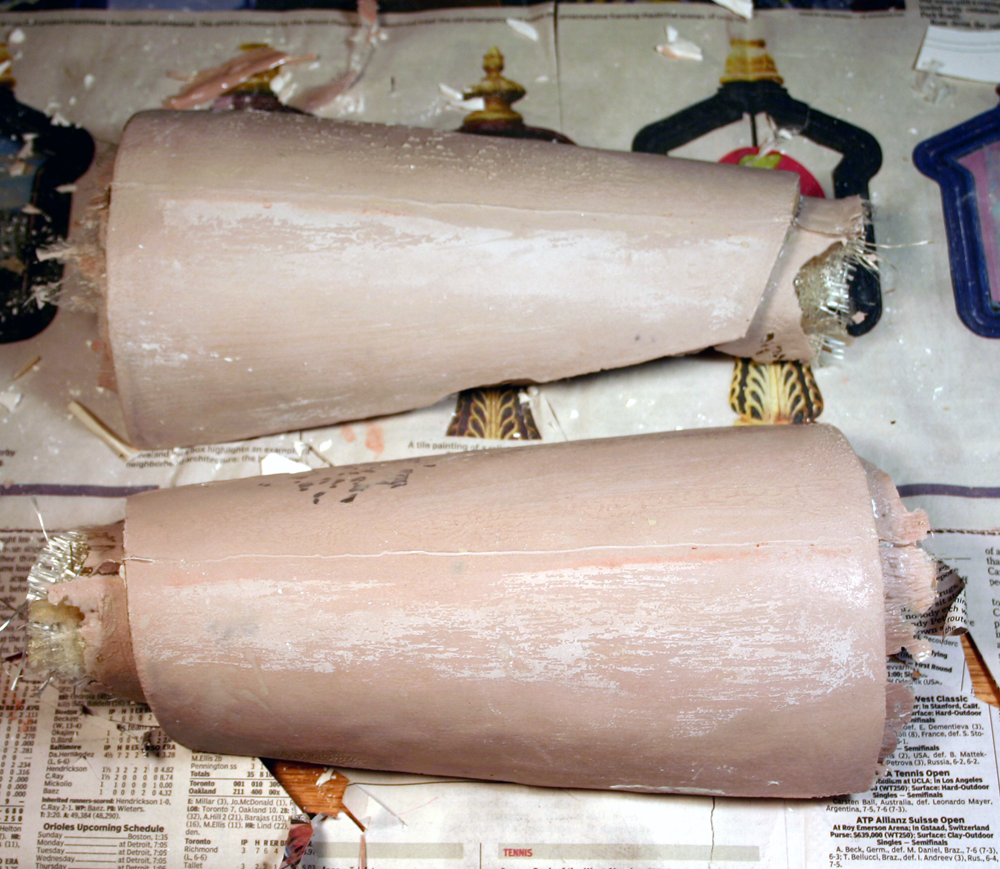
For these vambraces, the plan is to have the main front & rear halves hold snug to the forearm at their lowest point just above where the wrist clip wraps around the wrist. To hold snug, I will have a soft neoprene band wrapped around the forearm and the plastic armor squeeze this band as snug as possible without cutting off circulation during normal wear. This is the key to the mounting system and can be spirit-gummed to the skin if necessary. The neoprene band will be a couple inches wide and 1/4" thick. Limiting the width of the band will allow for some twisting at the wrist, as the armor assembly will rotate around the forearm freely above the squeeze band. The assembly skew mentioned in the last post also allows for some forearm pronation while the elbow is bent. Without the skew twist the elbow guard would dig into the upper arm and prevent any bent-elbow pronation. Supination is no problem as you can see, since the elbow guard would rotate outward around the arm.

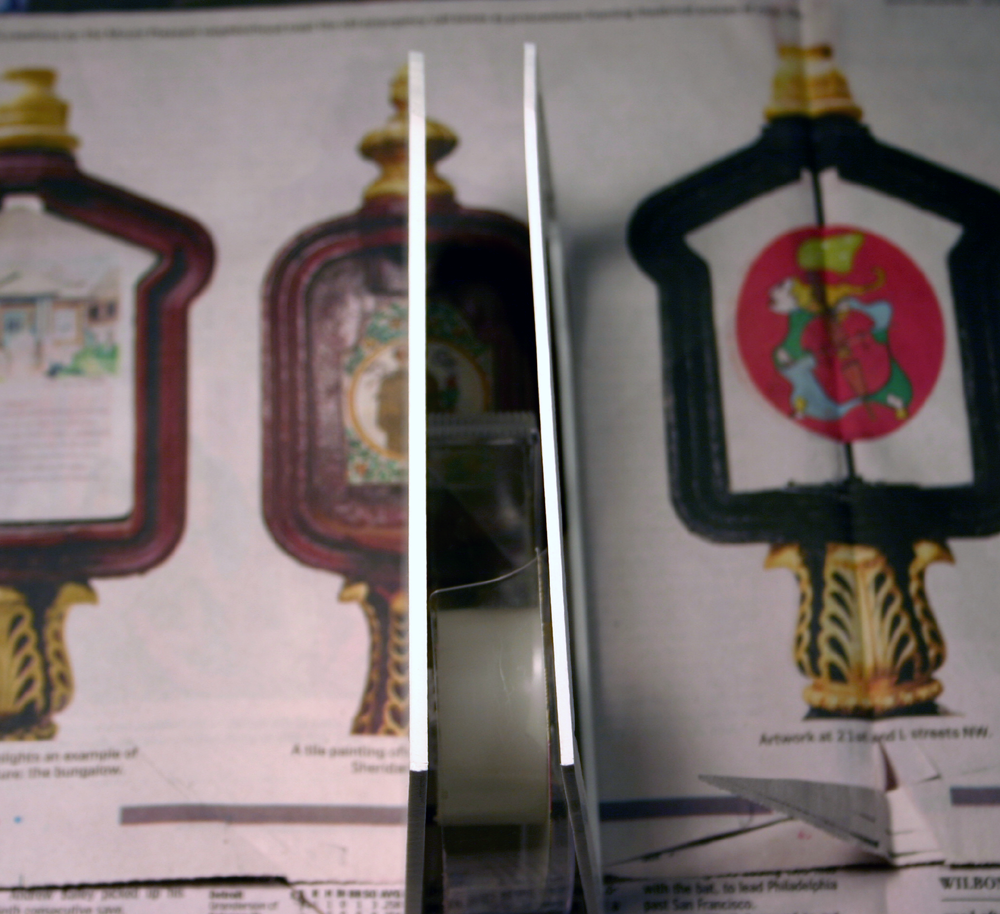
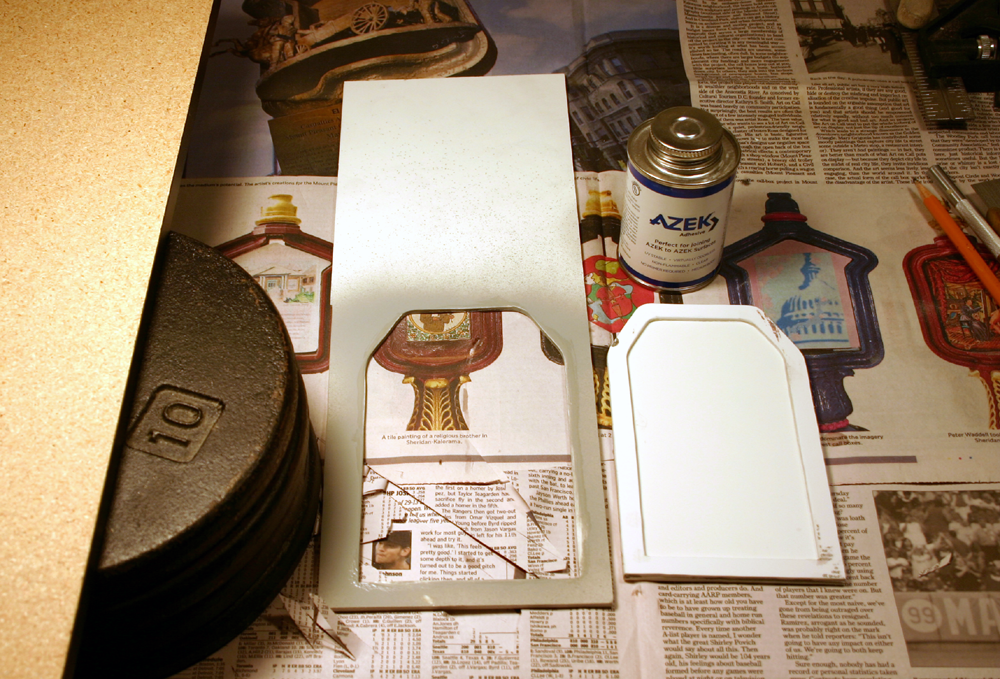
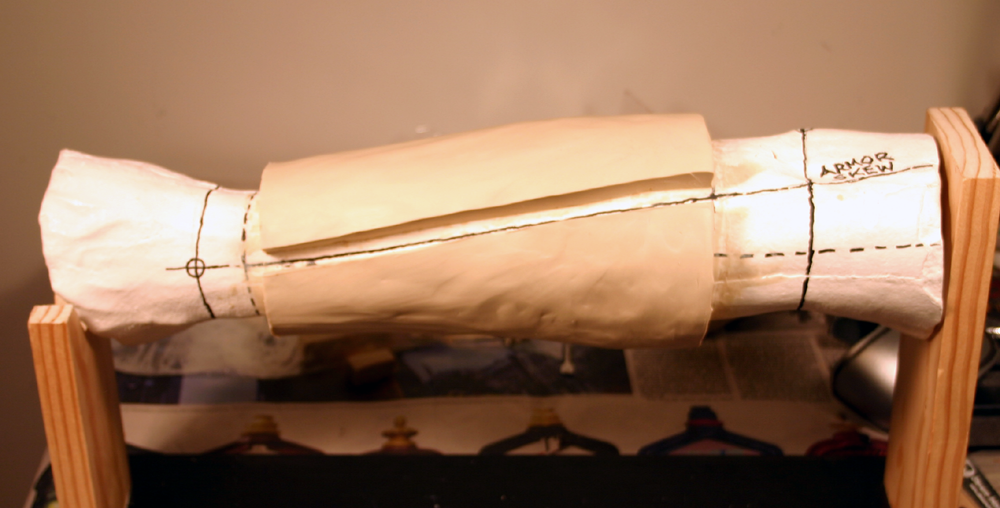
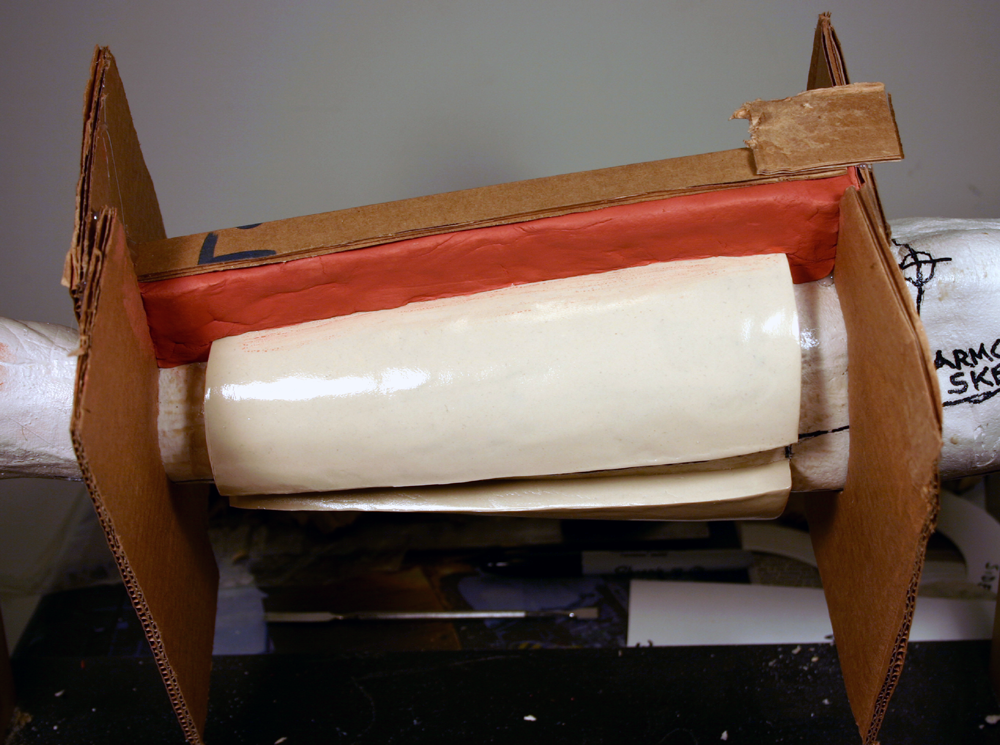
So given the necessary 1/4" squeeze band (and corresponding 1/4" spacing off the skin through the upper half of the assembly) and the approximate 1/4" thickness on the front/back vambrace halves, the sculpt for those parts should come off the armature about half inch. When I visualized that I was pretty sure that would make the scaling too thick, but after checking the ratio of the CG render to the dimensions marked on the armature, 1/2" off the arm looks just about perfect. I realize the elbow guard has to fit between the main vambrace halves and the skin, but I can cheat both parts thickness to 3/16" where they join and still be OK.

I also discovered that the circumference of the forearm just below the elbow increases as the elbow is bent, but I believe the above design allows enough room.

All this postulating may sound ridiculous, but it sure beats having to re-sculpt the pieces.

More pix to follow.

~ Vonnor
 
Re: Rahm Kota TFU2 - WIP

I started on the right vambrace sculpt but rubbing a very thin layer of clay into the plaster so the heavier slabs would stick, then laying half-inch thick slabs around the whole arm between the previously marked wrist and elbow extents lines. This is just the first rough lay-on and appears a bit too thick at this stage. A lot of the bulk will come off as the final shape is refined. I will print out radial contour templates to help get the curves right (like I did on the shoulders). It also looks a little short, but according to scale it is OK. I believe the forearm plate and wrist clip will elongate the appearance of the overall assembly.

In order to get the shape and thickness of the wrist clip sculpt, the hard models of the front/rear main halves need to be completed first.

Keep it right here. :cool

kota_vambraces17.png

kota_vambraces18.png

kota_vambraces20.png


~ Vonnor
 
Re: Rahm Kota TFU2 - WIP

It looked short because it was too thick. I put the sculpt on an after-Thanksgiving diet today. Shaved a lot of the bulk off using a flat-edge metal scraper then smoothed the surface and edges. I also added back the previous cut-outs, just so I could work on the overall contours. Remember this is just the two main vambrace halves for now. After these are in fiberglass I'll add the edging, then fit them back on the armature and sculpt the wrist clip and thermal-form the sintra forearm plate.

Also, the three straps on the underside of the arm will be 2mm Sintra, epoxied in place. I'll cut in the slots and file a lead-in taper for each slot on the hard model. The sintra will allow enough flexibility to get the armor on and off, and enough rigidity to hold the structure in place.

Gonna try to take molds and get these in fiberglass by tomorrow. May be the last decent poly-resin handling day I get until the springtime.

kota_vambraces22.png

kota_vambraces25.png

kota_vambraces24.png

kota_vambraces23.png


~ Vonnor
 
Last edited:
Re: The Force Unleashed II - General Rahm Kota WIP

The project is moving forward once again after a brief time-out for family and some costume trooping last week. To make the skewed split cuts in the sculpt, and to insure they were straight and parallel, I laid a tailor's tape measure on the clay and scored down both edges. I scaled the overall length and cut in the curves on the underside at the wrist. I sprayed clear-coat on it and will take a plaster mold tomorrow. Notice the guide lines along the sides. Those are for the water-clay walls. I intend to cast the fiberglass/rondo hard model in one piece rather than two. It will be much easier to do the final shaping and smoothing before cutting the halves apart.

Like the shoulder bells, the edge trim will go on the hard model.

kota_vambraces26.png

kota_vambraces27.png

kota_vambraces28.png

kota_vambraces30.png

kota_vambraces31.png


~ Vonnor
 
Re: The Force Unleashed II - General Rahm Kota WIP

Here goes plus one mold, minus one scul... er... wait a sec... ;)

I cut cardboard end walls and hot-glued them onto the ARMature, then pressed on side mold walls using water-based clay. The clay walls were a bit flimsy so I reinforced them with "L" folded cardboard strips. You'd be surprised how strong of a structure you can put together with folded cardboard and hot glue.

After spraying the exposed surfaces with mold release I mixed up some Hydrocal very fat (heavy on the powder, light on the water) and blobbed it onto the sculpt. I had to do two layers of plaster for both sides since my mixing container wasn't very big. After pouring the first side I pulled off the clay walls and cleaned up the edges of the mold. I ground some divots into the edges for registry keys then painted vasolene along the exposed plaster before spraying more mold release and pouring (well more like sloshing and gooping) the second half.

After it set up a few minutes it came apart with just a little hand pressure.

I've never had a mold separate so cleanly! I was very happy. The original sculpt is almost salvageable even, just in case my one-piece mold cast idea fails. :D

More to come.

kota_vambraces33.png

kota_vambraces34.png

kota_vambraces35.png

kota_vambraces36.png

kota_vambraces37.png


~ Vonnor
 
Re: The Force Unleashed II - General Rahm Kota WIP

Since the weather has turned cold and having no semi-indoor location to lay up fiberglass, I decided to work on the soft costume parts. I'll still do some sculpting and mold making but I do want to get the leather ordered and build the shirt and pants too before Springtime.

Here are the patterns and cutouts for the loin guard and hip pad. The floor shot shows the color very accurately (held the pieces up to the monitor). The leather is calfskin suede from Tandy Leather. The Kama is a first cut and will likely be re-done. I think it needs to be a bit fuller and more pointier at the bottom. The camera really washed it out too. It's a bit darker than it looks.

As a side note, that one photo clearly illustrates why I am on a diet to loose 30 before taking the torso cast. :unsure

kota_leather01.png

kota_leather02.png

kota_kama02.png

kota_kama03.png


~ Vonnor
 
Re: The Force Unleashed II - General Rahm Kota WIP

Being blessed with a warm and calm winter day today, I laid up the fiberglass in the right vambrace mold. It was only 60°F so the resin and bondo needed a ton of hardener, for example I used 16 drops of MEKP for one ounce of resin where I'd normally use 8-10 during the summer. Even with the hot mix I still had 15-20 min working time per cup.

This is a [gel-coat / 3-layer-glass / gel-coat] laminate with a 50/50 bondo/resin gelcoat.

Having attempted a layup in a 360 wrap-around mold, I have to say I won't do it for the other arm. It was way too difficult to maneuver the brush and the fiberglass-cloth strips in the small opening. Upon breakout I noticed a lot of flaws. The gelcoat pulled away from the mold in a few places, and some of the edges had bad air bubbles. It will take a bit of effort to repair but I think it's workable.

Again I will add the edging to the hard model.

kota_vambraces38.png

kota_vambraces39.png


~ Vonnor
 
Re: The Force Unleashed II - General Rahm Kota WIP

Sometimes the smallest costume parts are the most fun to make. :D

I made the list at work yesterday. The smiley points to the following build.

kota_xmax_todo.png

kota_greeblie02.png

kota_greeblie03.png

kota_greeblie01.png

kota_greeblie04.png

kota_greeblie06.png

kota_greeblie07png.jpg

kota_greeblie08.png

resin_cure.gif

kota_greeblie09.png

kota_greeblie10.png

kota_greeblie11.png

kota_greeblie12.png

kota_greeblie13.png


Always reuse your molds. :cool

Happy Holidays to all.

~ Vonnor
 
Re: The Force Unleashed II - General Rahm Kota WIP

I think the bandoleer buckle bolts were the most fun parts to make so far. After comparing these pix to the references I need to take a little more off the tops and bottoms of the corner bolts. Other than that they came out nice.

I also stuffed, backed, and turned the hip pad and loin guard. No mounting or weathering on them yet. Notice the hip pad takes and holds a curved shape due to the backing being stretched a bit across the width as the edge seams were sewn.

More to come.

kota_bandoleer04.png

kota_bandoleer05.png

kota_leather04.png


~ Vonnor
 
Back
Top