Darth Mule
Sr Member
Scroll Down for update on post #19
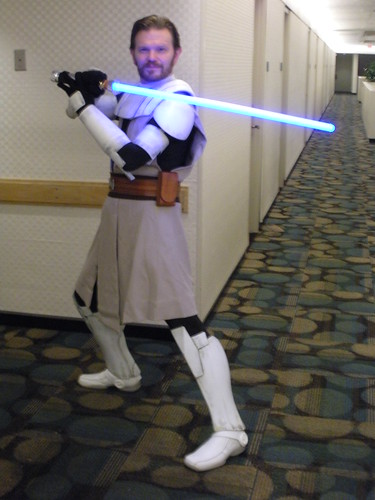
My newest personal venture. I started this wanting to do the previous series version with the full clone trooper armor, but once I fell in love with the new series, it was all over. Less bulk and cooler armor.

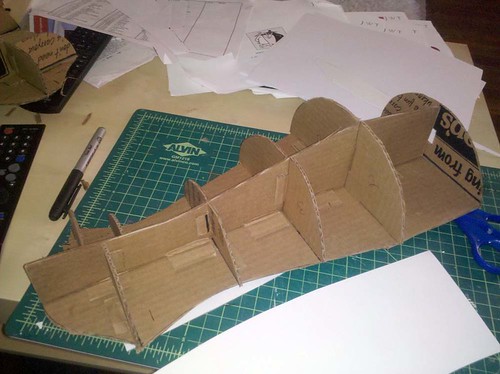
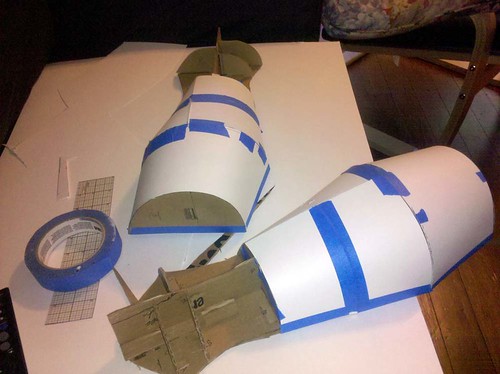
I started with this as a pepakura file from SPC: Armorhttp://skipspepakuracostumes.blogspot.com/search/label/Armor. He has some amazing stuff. He does charge around $8 bucks per file, but trust me. It's worth it. You get what you pay for and the free stuff is mostly crap unless you're doing Halo.
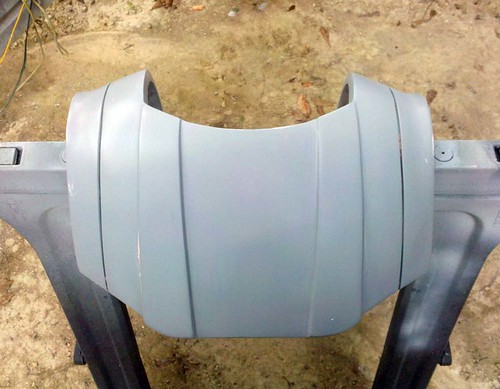
after getting the pep built and fiberglassing the insideI started to clean, shape, and bondo everything. The pauldrons cleaned up beautifully. Although I have learned one important lesson with the pepakura... Only glass one side so you can remove the paper afterward. The paper tended to come through during sanding and cleanup and caused a few problems. Alternatively, you could just glass the outside since, in theory, you won't need to clean the inside much. I should note that after I layed the silicone to reproduce these I nearly discarded the master outside where it was in the 90s for about 3 days this week. The heat (I assume) caused the buildup to separate further from the paper. Good thing I already have my cast.

The chest was the scab I couldn't stop picking. I glassed it, sanded and bondoed it, cleaned, shaped, and generally labored over it before I looked at some reference pics that I should have been looking at the whole time. Turns out the pepakura file was slightly off. The three ribs to the sides of the center section ran fully from back to front. The series armor actually only does this on the two outside ribs. A few minutes with the trusty Dremel fixed this, but now the neck opening was too wide. I took a half inch out of the center front to compensate and cobbled it back together. Then I added half inch to the outside edges to bring the shoulders back to a respectable width. I also cleaned up and altered the appearance of the two outside ribs. I also decided to remove the entire back section to make it easy to get on and off, an idea inspired by Chris' (defyitall) armor. I plan on replacing it with magnets. Finally I'm back to where I was before I ripped everything apart and this is ready to go under the rubber.

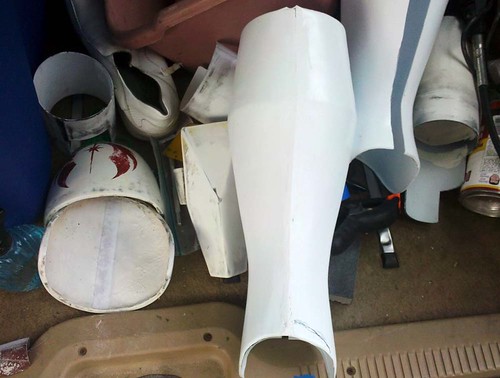
I was trying not to take on too much with the legs. I have a plan, but it requires a lot more space and equipment than I currently have. So for now I will settle for temporarily altering my OSCS clone shins. What I did here is secure enough to stay put, yet will be able to be ripped off with some effort. I plan to eventually sell my whole armor set in the near future and get one of the animated sets in its place. I just like the look better... I digress... I basically used scrap styrene to construct some quick and dirty knees to attach to the shins. Turned out pretty well IMO. Will definitely do the trick until I can make some permanent legs.

The belt is mostly finished. I still need a buckle and to finish the pouches. I got a really nice shape out of them but stopped short of gluing the backs together as I started thinking of different ways to make getting my belongings out of them more easily with a drop down function of sorts. The pouches are fairly thin and while they will easily fit a cell phone, cash and whatever necessities, getting your hand in to get them out may be problematic.

Next up will be dealing with the soft parts. I plan to use under armor for the bodysuit and the tunic is in the final mock-up stage. I'll have to get some pics of that soon, but I since I lose what outside workspace I have in a couple weeks, the armor has taken precedence. Still have to worry about the arms, but I may have a lead on that.
My newest personal venture. I started this wanting to do the previous series version with the full clone trooper armor, but once I fell in love with the new series, it was all over. Less bulk and cooler armor.

I started with this as a pepakura file from SPC: Armorhttp://skipspepakuracostumes.blogspot.com/search/label/Armor. He has some amazing stuff. He does charge around $8 bucks per file, but trust me. It's worth it. You get what you pay for and the free stuff is mostly crap unless you're doing Halo.
after getting the pep built and fiberglassing the insideI started to clean, shape, and bondo everything. The pauldrons cleaned up beautifully. Although I have learned one important lesson with the pepakura... Only glass one side so you can remove the paper afterward. The paper tended to come through during sanding and cleanup and caused a few problems. Alternatively, you could just glass the outside since, in theory, you won't need to clean the inside much. I should note that after I layed the silicone to reproduce these I nearly discarded the master outside where it was in the 90s for about 3 days this week. The heat (I assume) caused the buildup to separate further from the paper. Good thing I already have my cast.

The chest was the scab I couldn't stop picking. I glassed it, sanded and bondoed it, cleaned, shaped, and generally labored over it before I looked at some reference pics that I should have been looking at the whole time. Turns out the pepakura file was slightly off. The three ribs to the sides of the center section ran fully from back to front. The series armor actually only does this on the two outside ribs. A few minutes with the trusty Dremel fixed this, but now the neck opening was too wide. I took a half inch out of the center front to compensate and cobbled it back together. Then I added half inch to the outside edges to bring the shoulders back to a respectable width. I also cleaned up and altered the appearance of the two outside ribs. I also decided to remove the entire back section to make it easy to get on and off, an idea inspired by Chris' (defyitall) armor. I plan on replacing it with magnets. Finally I'm back to where I was before I ripped everything apart and this is ready to go under the rubber.

I was trying not to take on too much with the legs. I have a plan, but it requires a lot more space and equipment than I currently have. So for now I will settle for temporarily altering my OSCS clone shins. What I did here is secure enough to stay put, yet will be able to be ripped off with some effort. I plan to eventually sell my whole armor set in the near future and get one of the animated sets in its place. I just like the look better... I digress... I basically used scrap styrene to construct some quick and dirty knees to attach to the shins. Turned out pretty well IMO. Will definitely do the trick until I can make some permanent legs.

The belt is mostly finished. I still need a buckle and to finish the pouches. I got a really nice shape out of them but stopped short of gluing the backs together as I started thinking of different ways to make getting my belongings out of them more easily with a drop down function of sorts. The pouches are fairly thin and while they will easily fit a cell phone, cash and whatever necessities, getting your hand in to get them out may be problematic.

Next up will be dealing with the soft parts. I plan to use under armor for the bodysuit and the tunic is in the final mock-up stage. I'll have to get some pics of that soon, but I since I lose what outside workspace I have in a couple weeks, the armor has taken precedence. Still have to worry about the arms, but I may have a lead on that.
Last edited:


