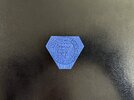
It looks to me like the "tricorner" might be pewter? That has a similar blue-silver colour, and would be pretty easy for the prop department to cast a whole schwack-load of.
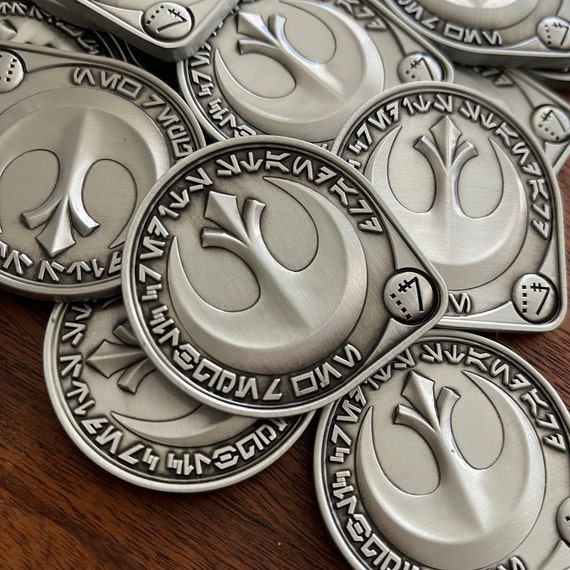
Also, it looks to me like the details on the screen-used coins are embossed, whilst yours are mostly debossed. I'm curious - genuinely curious, this isn't a backhanded criticism - as to why you opted for debossing.
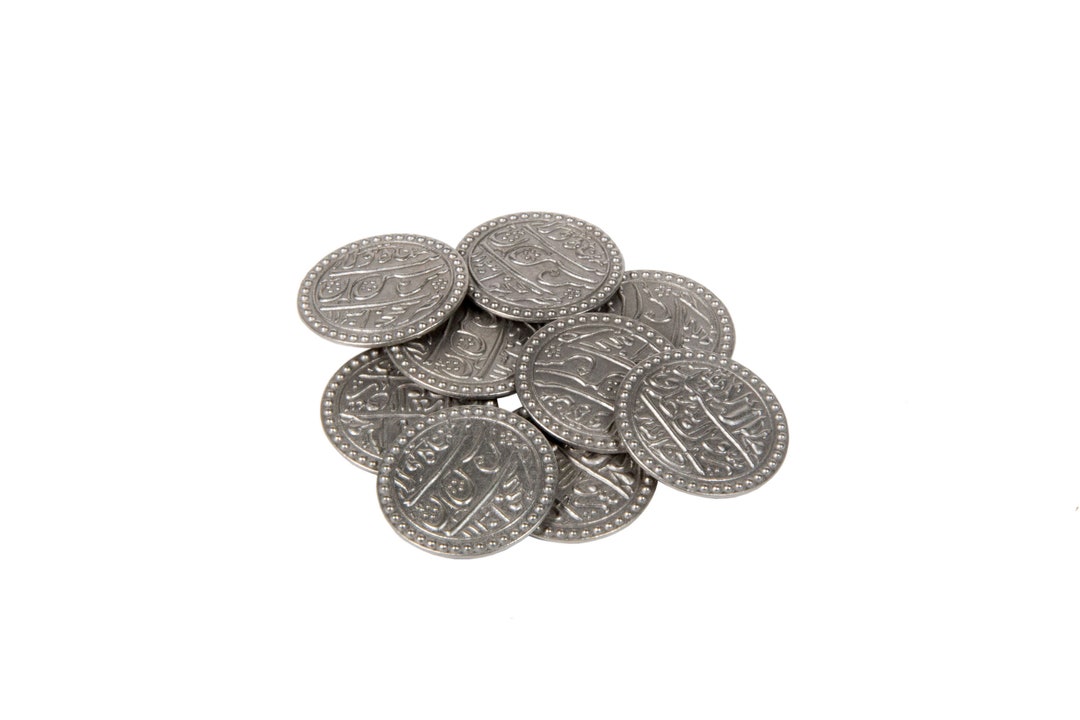
As far as the color, I'm making mine with a 3D printer so I have to find a filament color that matches.
The ones I looked at that were labeled "gunmetal" or "pewter" looked too much like the filament I'm using for the silver tear-dropped shaped coin.
So I decided to emphasize the blue a little more. The filament I used has some aluminum particles in it for highlights and to provide some gray so it more closely matches the color in the well-lighted scene at the butcher shop.
It's a good question why I'm using what I call "engraving" for the the text and other details.
I appreciate you asking.
I've found that 3-d printed small embossed details don't stand up to handling. There isn't enough cohesion in the filament layers to withstand even a minimal amount of rubbing. It just breaks off.
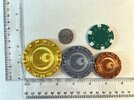
The lettering is just too small on all the credits except perhaps the tear-dropped shaped one on the bottom where it just has "New Republic".
That brings up another issue with 3d printing. Whenever possible, I prefer to print my replicas as a complete item rather than two halves that I have to glue afterwards. I think that the inevitable seam doesn't look good. So I start the print with the bottom of the item on the print bed and keep going until I reach the top.
Printing small embossed details on the bottom of the a 3d printed item is even more difficult since the first layer has to adhere to the print surface (to anchor the item) *AND* to the rest of the item. That's fraught with problems.
So to make things look consistent on the top & bottom, I used engraving for the details on both sides. I found those to print very consistently with good quality.
The other discrepancy with the show credits is that they have a raised lip. That's easy enough to do on the top with a 3d printer, but on the bottom it raises the rest of the item off the print bed which is much trickier to print. So I chose to represent those lips where I could with insets and borders that were consistent on the top and the bottom.
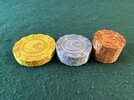
Here's a couple of photos of my replica of the Batuu Spira "gift cards" found at Galaxy's Edge. I took some liberties to make a multi-denominational set of credits (I think, so far, there are only gold & silver versions). On the top, the lettering and other details are large enough that embossing them was okay and can withstand handling.
The gift cards have wording on the back (legalease rather than something in-universe) so I decided to engrave the denomination along with a border on the bottom to make them look more interesting. Engraving these details on the bottom of the print works a lot better.
My $100 value credit's color is most similar to the original $100 gift card:

")