Space 1999 Eagle Transporter Build Club (PIC HEAVY!)

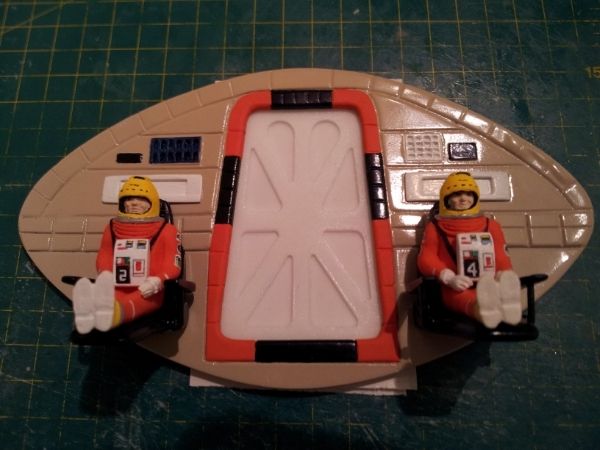
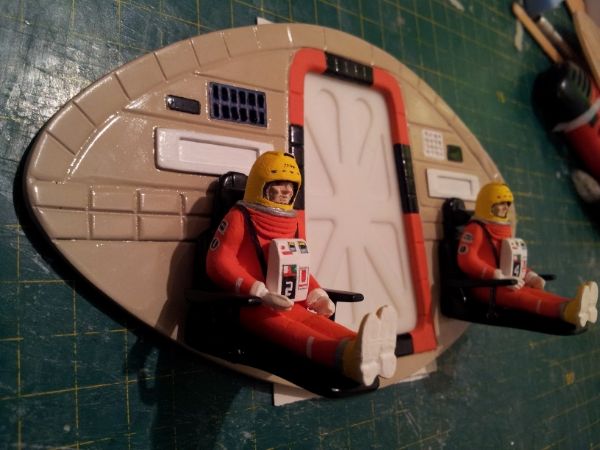
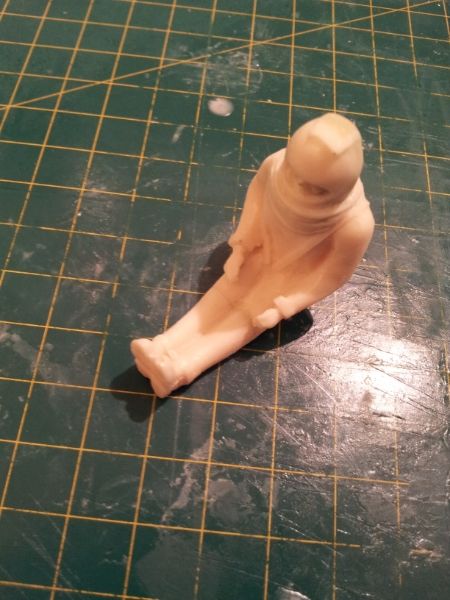
Okay, the pilots are cast and assembled! I have removed all the flashing from them all and applied Milliput where needed - mostly where the lower legs (cast seperately) have been attached to the rest of the figure. There will be minimal cleanup required but I have taken pains to do most of it for you. :)

20130920_214754_zps4677fbf9.jpg


That just left the front and back packs to mould and cast.

20130920_210357_zps0be4605e.jpg


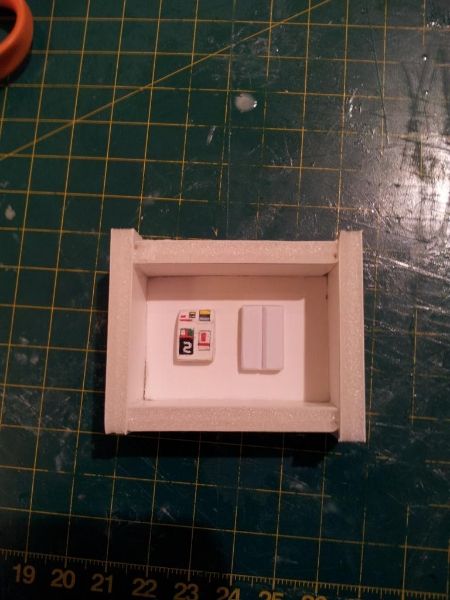
I am just waiting for the silicon to cure and I will cast these tomorrow morning. So if you are waiting for your pilots, I can ship them to you tomorrow afternoon! I will put up a post tomorrow of the finished pilot with both packs and then back to the domed cockpit wall/ceiling structure.
 
Hi all! Here is the state of play: the pilots are cast and painted up, the chairs are cast and painted up and the back wall is cast and painted up. This is how they look together.

20130922_000903_zps69145401.jpg


The figures are all hand painted, including the patches and front 'n' back packs.
20130922_000916_zpse76fd0d2.jpg


This will look ten times better when the domed walls/ceiling are finished and added.

20130922_000935_zps161a256e.jpg


Thanks for looking in, and feel free to comment/critique! :)
 
Looks really good. I always wondered why they chose to have them sit like that, you'd think they'd have them bent kneed like in most vehicles.
 
I just don't know what to say. What words can convey the image of me cheering like a teenage girl in the audience seeing The Beatles on The Ed Sullivan Show? :lol

I don't know what kind of small brush you're using, Darren, to paint the small details. That's always been a weakness of mine. But it doesn't help when I can't find an ultra-fine brush that doesn't buckle on contact like a sprig of dental floss would. :unsure

I don't know how I ever got so proficient with a crow quill point pen, but a brush always felt like a bicycle with the training wheels taken off to soon. Maybe it's just me...I wouldn't want to be caught blaming my tools! :lol


Looks really good. I always wondered why they chose to have them sit like that, you'd think they'd have them bent kneed like in most vehicles.

Hmm..if I had to justify a reason, I'd say it was to convey a sense of cramped space, maybe?
 
Nice build sir. But if you do build the whole transporter, where are you going to display it. If and when you finish the whole thing it will be huge and would probably look good built into a coffee table? Anyway, congratulations a a wonderful project. I've always liked the shape of the Eagle, and if I won a lottery, I would build a 1:1 scale version and add it to the house as accommodation.(Lol)
 
Nice build sir. But if you do build the whole transporter, where are you going to display it. If and when you finish the whole thing it will be huge and would probably look good built into a coffee table? Anyway, congratulations a a wonderful project. I've always liked the shape of the Eagle, and if I won a lottery, I would build a 1:1 scale version and add it to the house as accommodation.(Lol)

Hi, Nick!

Firstly, thank you for your great comments; they are much appreciated!
It's a daunting task, I know but if you have a spare year to read through the thread :lol. I think at one point we were discussing that very dilemma! The idea was to build a coffee table out of a large aquarium type thing and sit the eagle inside on a bed of grey sand or something. Maybe even add some lighting to illuminate the exterior.
Anyway, thanks for your post, and glad you enjoyed the thread!
Darren
 
A coffee table display would be astounding.

By the by, I got my first good look at a 44" buildup last weekend. Mindblowing. I really hate to say that this is firmly on my bucket list now but I think it is. :lol
 
The idea was to build a coffee table out of a large aquarium type thing and sit the eagle inside on a bed of grey sand or something. Maybe even add some lighting to illuminate the exterior.

Wait a minute, Darren: I thought we all agreed how cool it would be if you built a hydraulic lift which would rise up through your kitchen floor! :cool
 
Wait a minute, Darren: I thought we all agreed how cool it would be if you built a hydraulic lift which would rise up through your kitchen floor! :cool

Well if my kitchen was over a basement, I would turn the whole basement into a hangar and then I could have Several eagles rising through the floor!!!
 
Well, if the whole thing is inside an aquarium as the base, I'd think the top should be painted to look like the lift elevator itself. Even better is if the inside of the top is a piece of inset glass as well, representing the 'hole' that the elevator goes down into.
 
This is all reminding me now of how I was possibly going to display mine (assuming it ever gets built beyond shoebox-storage phase! :lol ). Might you possibly do something like this, Darren?
spmotd0265.jpg

(not sure why image isn't showing...) :confused
 
Hi Folks. After a pretty torrid few months I’m slowly trying to get back into the swing of things including my Eagle build. All of the parts are now complete and using blu-tack and cotton wool props I’ve managed to try the main body assembly to see how it looks. Obviously, just being held together like this it looks a bit wonky (and one of the temporary pins has fallen out of the forward landing gear) but after finally finishing all the parts I just wanted to get an impression of how she will shape up when assembled in earnest. The light grey areas are parts from the original AMT kit, albeit substantially modified. The beige parts are resin replacements (command module and thrusters). The white parts are scratch-built from styrene, supplemented by dark grey kit-bash parts and aluminium sections. Finally the gold parts are the custom brass etched elements. Because of the way it is propped together it is not possible to show the engine/thruster bell inserts or the passenger module landing gear which like the main landing gear is fully working. I’ve also added a picture of the resin replacement command modules. I couldn’t make my mind up over the look of the rear section so made each piece into the two styles I was interested in labelled Mark 2 and Mark 1 respectively. The first, inspired by the Roberto Baldasari design, is based on my earlier modification of the AMT CM. The second favours a rounded back piece with an inset door. Both fit the main model (Mark 1 requires a simple ‘skirt’ to ensure a snug fit with the forward walkway. While the resin CM’s look great compared with the AMT original their weight meant that connection using magnets alone (even when the original smaller magnets were supplemented with larger ones) was no longer feasible and so removable pins now connect them to the main hull via the explosive bolt brackets, allowing the module to be fixed or detached as required. The magnets connecting the passenger module to the spine work fine however which is a relief. This allows the passenger module to be fully detached and its landing gear extended. Now that the parts are done, all that is left is final clean up and priming ahead of painting and assembly. Since I need to practice my airbrushing skills in order to make the best of this I’ll be picking up another kit in the meantime. Cheers for now. 1.JPG2.JPG3.JPG
 
Back
Top