Avanaut
Sr Member
I'm one of those guys who saw Space 1999 before Star Wars. The Eagle made a lasting impression and, like many, I considered Alan Carter the coolest space pilot there ever was.
Excited to finally have an Eagle of my own, I got my Round2 Eagle from the first batch in January 2016. At least I think it's from first batch, it was a pre-order purchase. I had some extra money at the time and I bought both aluminium upgrade sets and the sensor discs from Mike Reader.

The aluminium reaction control (RCS) thrusters. I could never paint something like these to look the part. These are beautiful! Furthermore, I just love the Eagle design for having them at all. I mean, you don't orienteer in space with magic, it's rocket science! Literally.
Being busy with work I was able to start the build in the summer. It was fun, I liked the quality of the kit and how it went together. The size, 22 inches, was excellent. Impressive model all around. Mine, being an early stamp, still suffered from minor tooling issues before they were straightened out. I replaced the window glasses with smoke tinted styrene but I left the orienting thruster blocks as they were, I did not cut them shorter.
To make the build a little more challenging, I decided to install some lights to the model. There aren't many lights on the Eagle and I thought it would be nice if I improvised a little. It wasn't the best of decisions I have made with my scale models and I ended up having some problems with that. There was a moment where I was just tired and couldn't figure out how to make the wiring travel from the landing pad pods to the fuselage and cross the passenger pod in the middle, so I just cut some corners.
The challenge with the wiring was the building and painting order. This thing has to be painted in sub-assemblies and I had to design the wiring with connector points to accommodate that. I made the wires go outside the pods to the fuselage, in plain sight. It turned out a bit ugly here and there but at the end of the day, for the most part, the wiring is neatly obscured by the landing gear pods once in place.
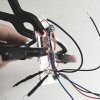
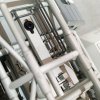

From left: 1: I almost lost it at this point. The wiring was pretty simple but because of the passenger pod in the middle I had to make arrangements to cross the pod with exterior wiring. 2: The electrics cross the pod through these steel rods. They actually look pretty cool under the spine, making it look busy. You can also see a couple of small switches on the top. 3: The landing pad pod connectors. The pods still come off.
At this point I took a breather from the build because I was a bit annoyed by the wiring issues.
I also gave up having an internal power source on this. It's a bit inconvenient, to be honest, and if I ever make another one (which I may yet), I'll definitely do my best to solve that and have an independent light-up Eagle.
Despite the challenges, the model now sports cockpit lights, landing lights and four red lights on the fuselage inside the cages. I think they have something to do with maintenance, like maintenance status indicating lights or the likes. I've yet to decide if they are useless or not.
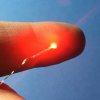
Microleds, I'll never build another lit miniature without them.
I have never been happy with my paintjobs. I have had some problems with the quality of matte pigment used. I'm old school and I use Humbrol enamels. The models tend to turn out a little 'soft' to my taste. I don't know how to explain it better, I think it has to do with the matte pigment buildup on several layers, even if they are very thin. It happens despite sanding in between layers. So, I decided to paint this first with gloss and clear flat only as the last overspray. It was a nerveracking experience because I was not used to do that. Great idea to try it first on a model I had spent weeks building!
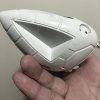
Gloss painted head. I had moments of doubt but it worked out fine in the end.
The panelworks were painted subtly and I tried to keep the paint scheme generally simple. In retrospect, it could have been bolder. Eventually it all turned out great and the model has a very nice and clean flat/semi-gloss sheen to it.
When it came to the passenger pod I did not know which to choose from. The red rescue stripes look nice, but I had had a bad experience with red paint on white just a while earlier. It's such a strong pigment and I didn't want to risk smearing it accidentally. The orange VIP looks great but it didn't feel right in the end. I wanted to have something because plain white was just too plain. So, I decided to make my own tweak to the paint scheme and made stripes similar to the rescue pod, only in cool gray.
The cool gray stripes on the pod indicate a civilian craft. Think of, say, the first civilian versions of the Hummer. It was a hard core military vehicle but due to it's popularity, it was offered as a civilian version at some point. Same thing with this. The backstory is that a few of these were made and they where used as campers of a sorts. The passenger pods were equipped like high end caravans or motor homes, hence the name Eagle Tourer. What a way to travel, eh?
I know, this doesn't make sense with the Moon not on Earth's orbit and global chaos going on, but I still like the idea.
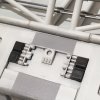
The idea for the grey stripes indicating a civilian craft came partially from losing the four little parts on the landing gear sprue that were supposed to go on top of the passenger pod. I know I'm not the only one having done that. Not being able to do a faithful model anyway, there were options to choose from. So, not knowing what the lost parts should actually look like I planted some from the spares box. Tank tread parts look good enough.

The eagle mid-paint process, the passenger pod top windows still masked. The engine bells are still not finished today and the overall weathering is very light.
I still need to make the weathering heavier but I can't just yet. Renovations at home, everything in cardboard boxes, tools, paints... everything. Excuses, excuses... I ran out of time with this just a couple of days too soon. I'll finish it in March earliest when I can unbox everything.
A closeup of the Eagle taking off. A steep lighting angle reveals every mistake I made, seams aren't perfect. I installed custom springs so that the Eagle would sit a little lower than with stock springs.
To be continued...
Last edited by a moderator:

