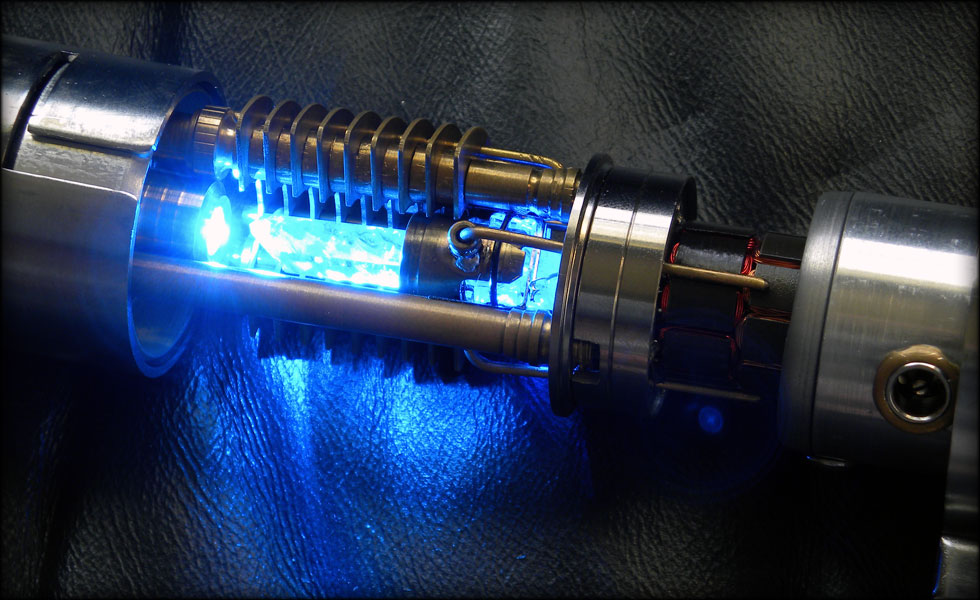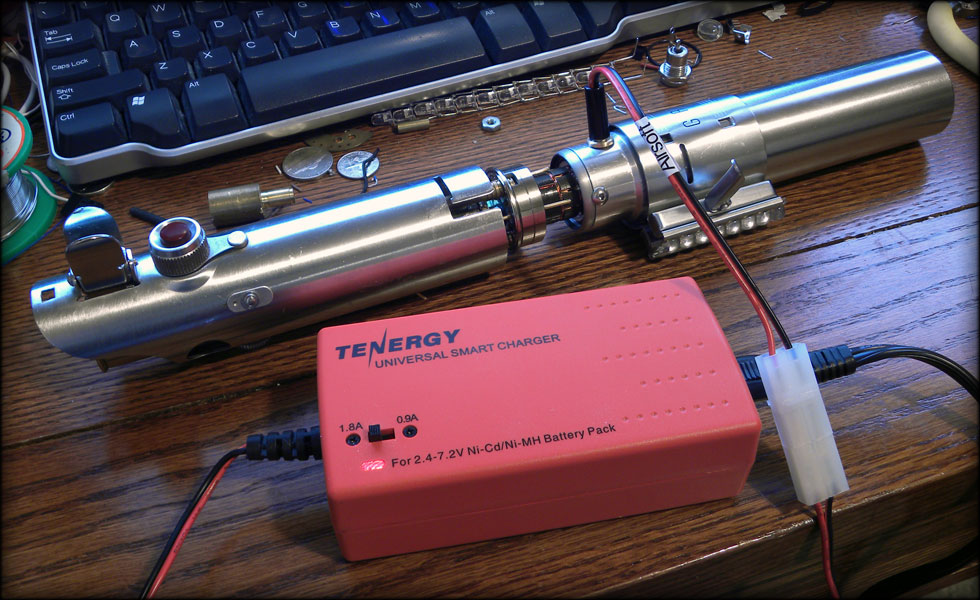
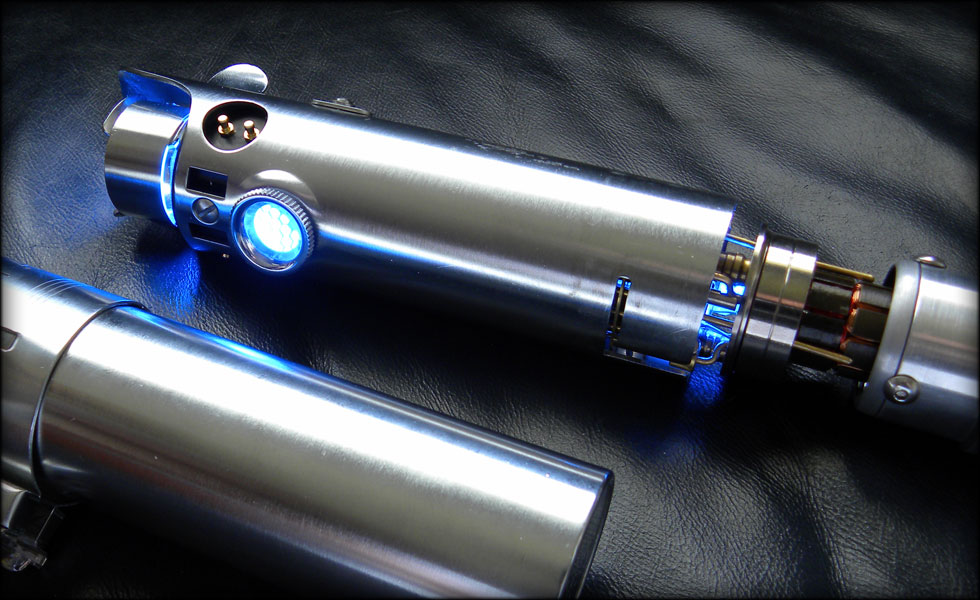
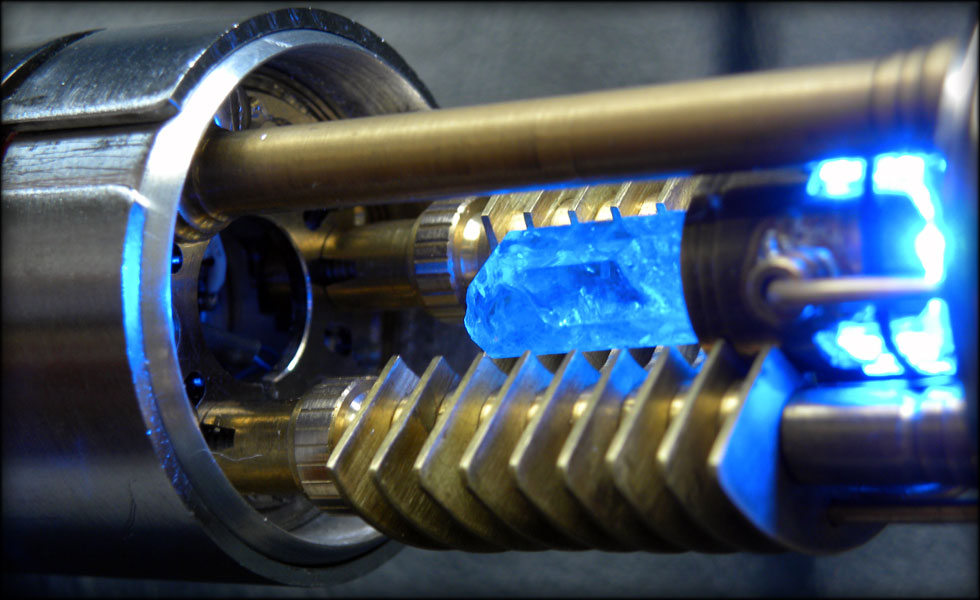
ROCK! First try, the charging circuit is happy, all my wiring fits, the new grounding scheme works with the crystal mount, and so far no smoke.
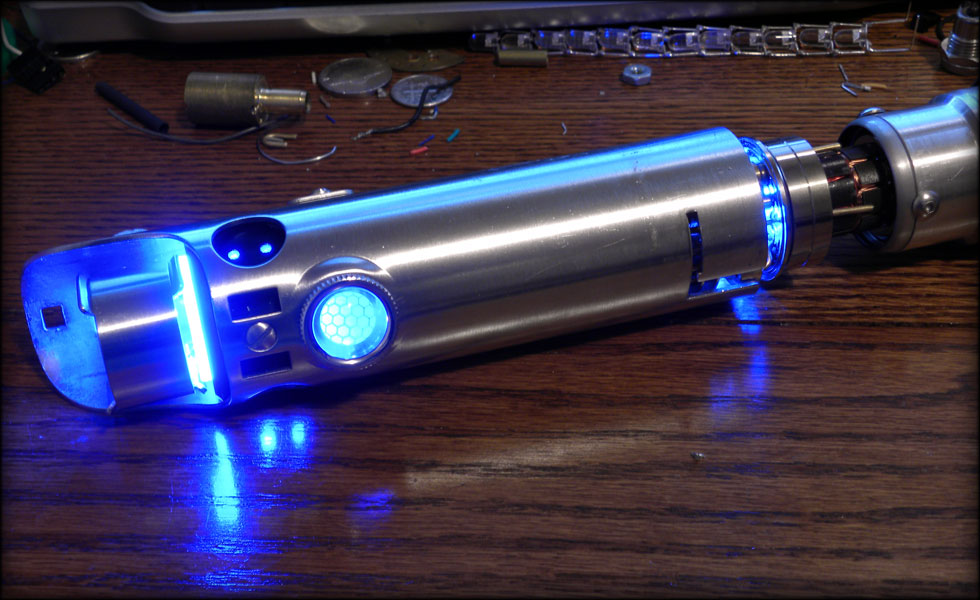
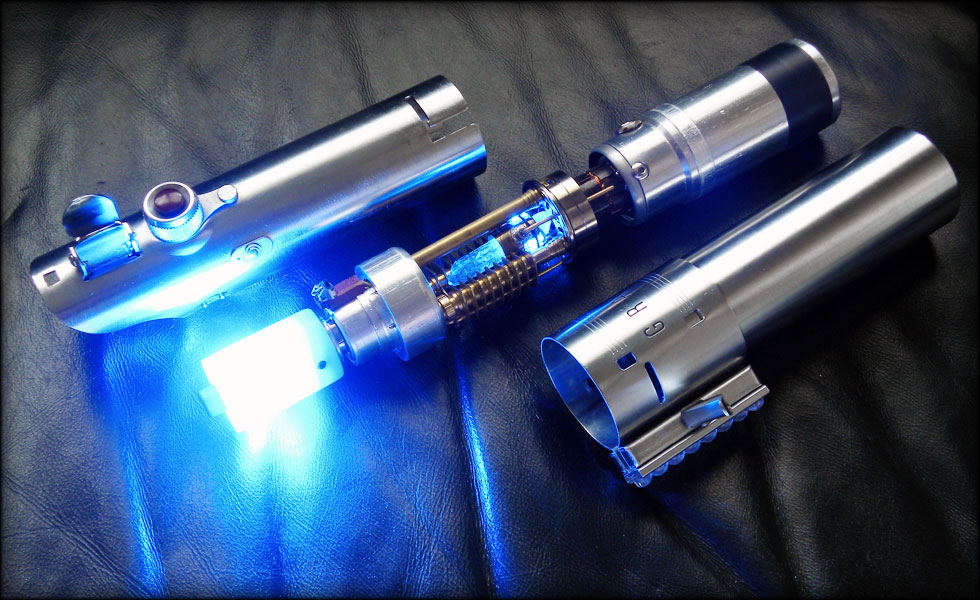
It's getting there!
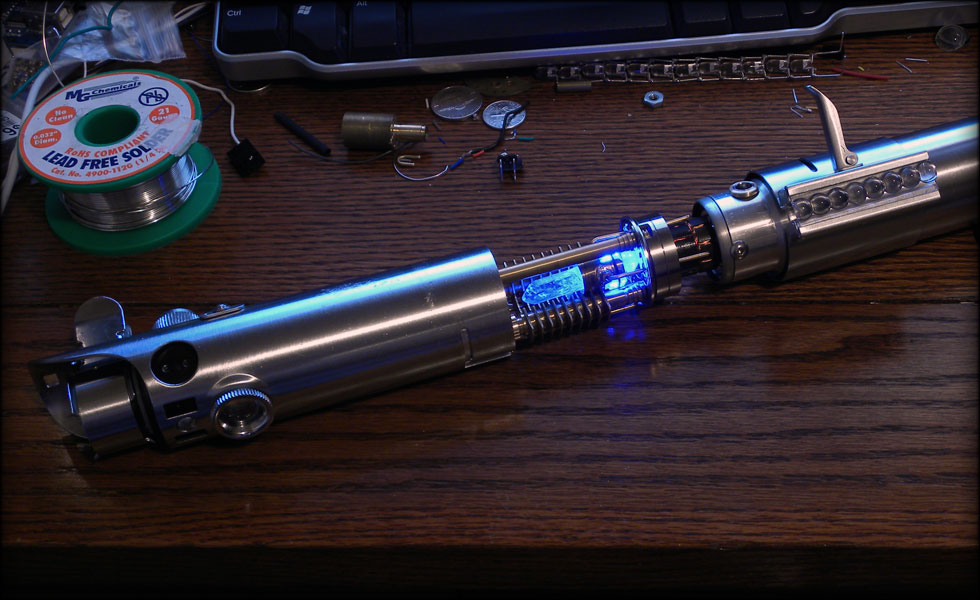
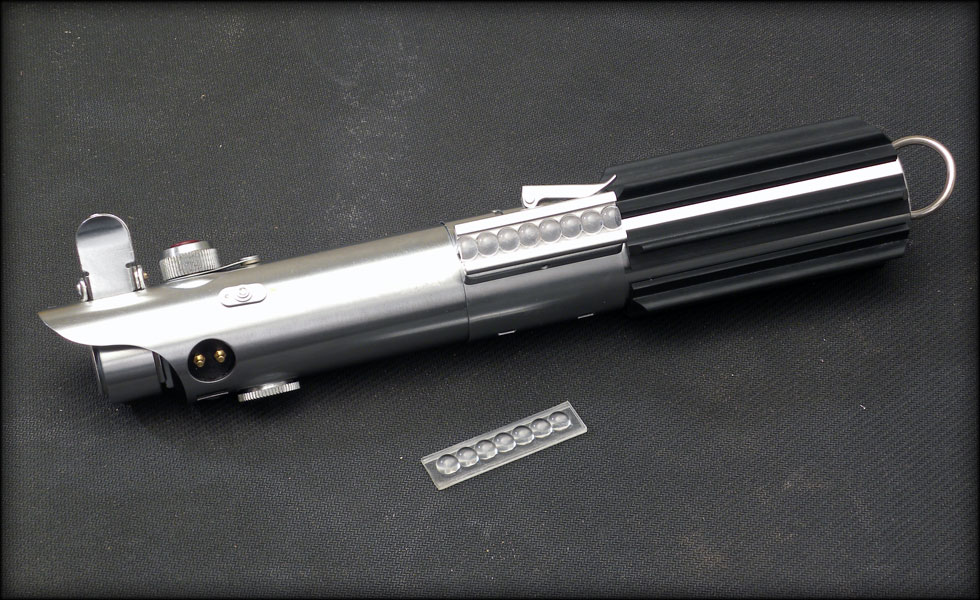
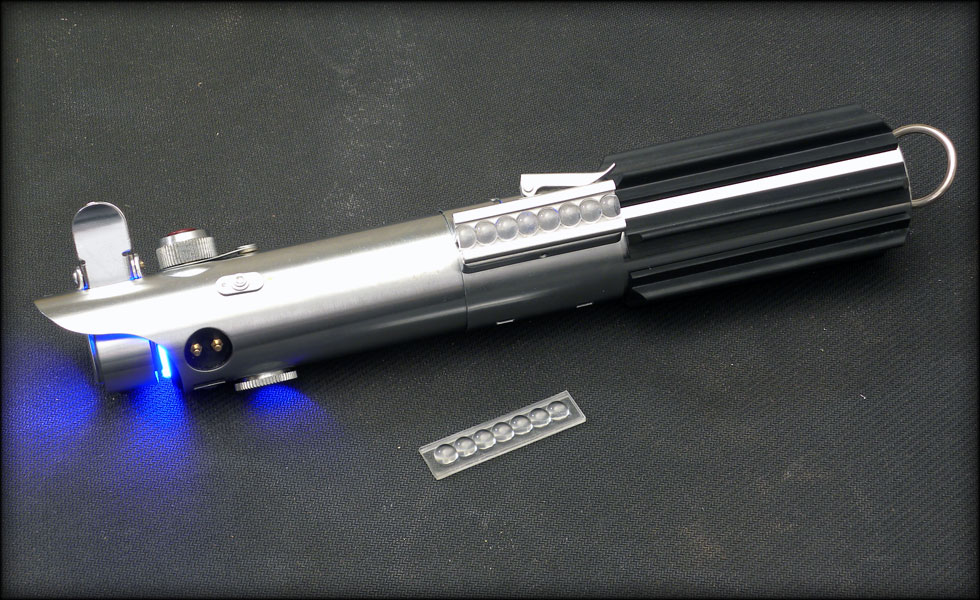
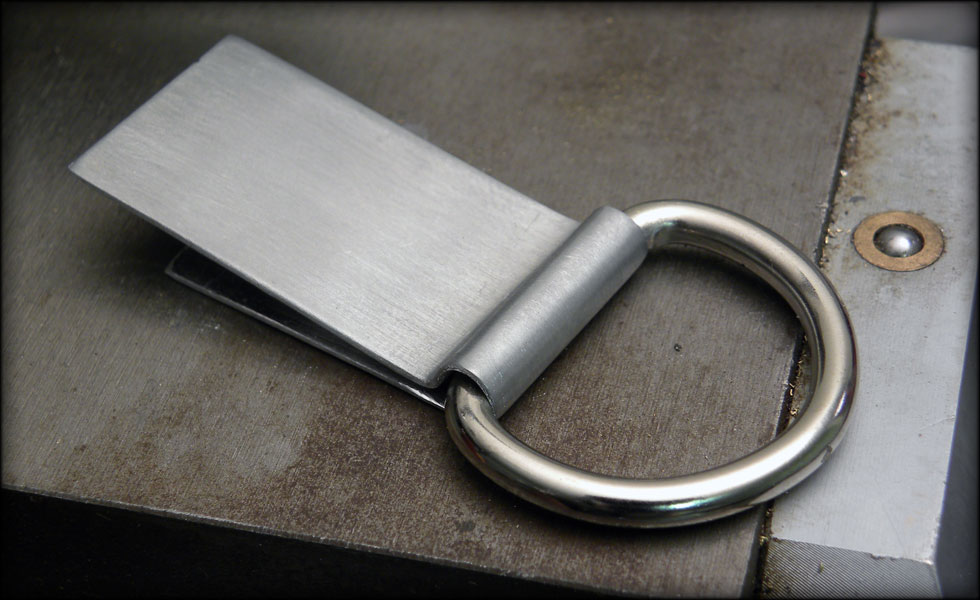
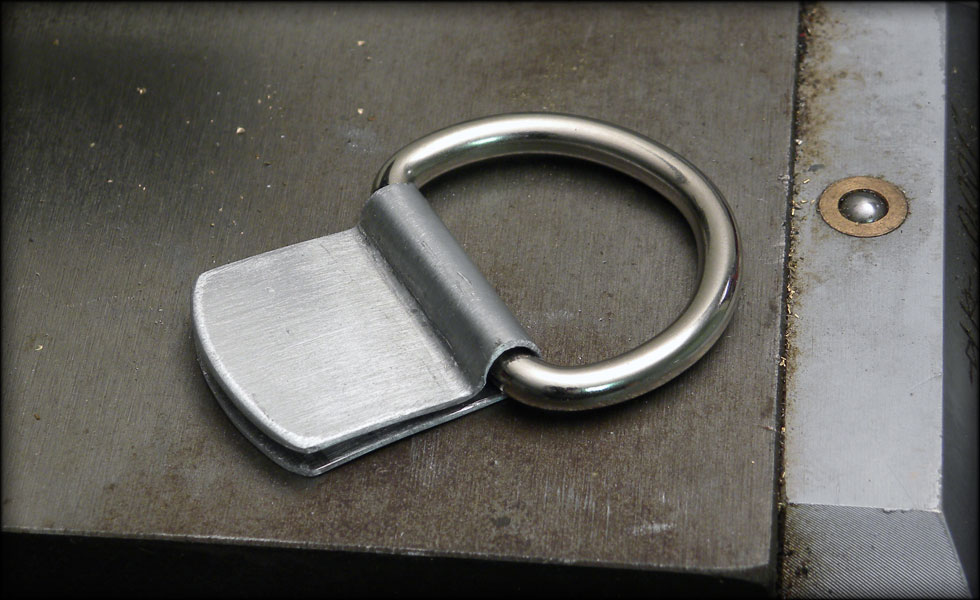
Grips, D ring, main blade left to go.
Last edited:
") .
.This looks truly amazing. Just one thing though. What's with the incorrect bubble strip. Yours has 8 bubbles, it should be 7
SO COOOOL.
Ready you say? Hm! The adding of Yoda's soundboard ... I must have missed?
HHHUUMMMM, HHUMMMM SCHWOUSCH HUMMM! (Lightsaber sound FX :lol)
-Chaim

 (also kicking myself a bit for discarding those old hard drives...:cry) Beautiful work.
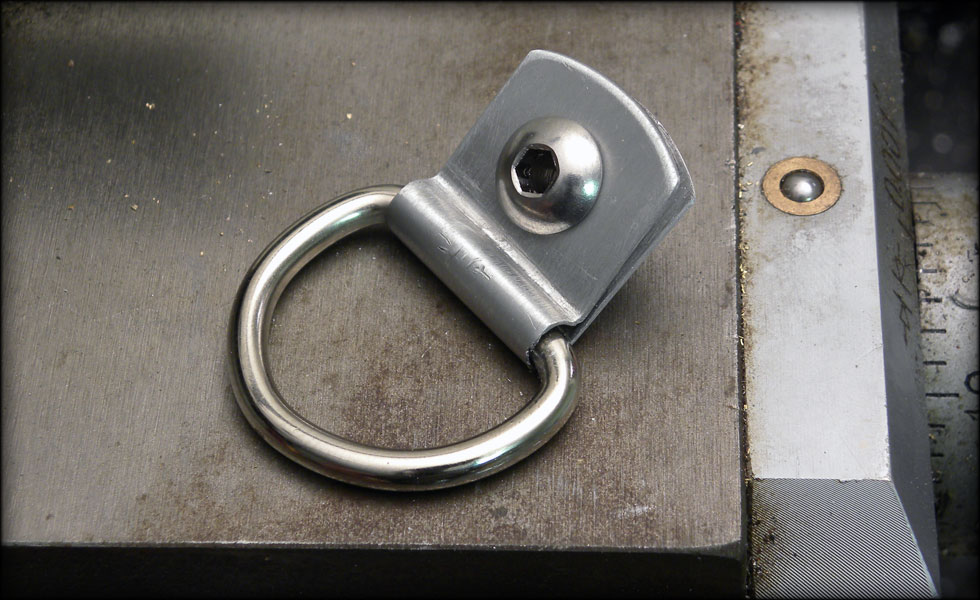
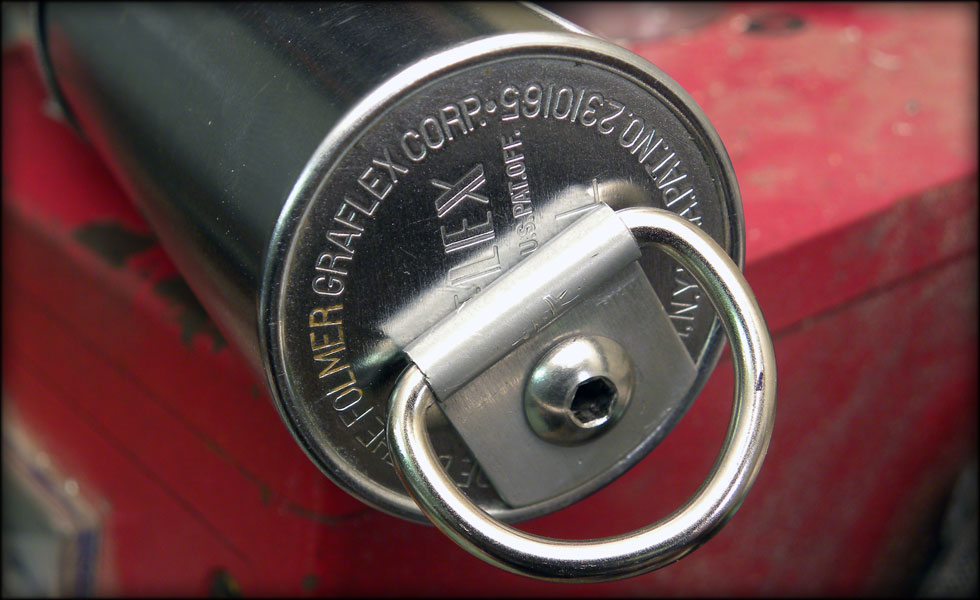
Congratulations on that D-Ring!!! Excellent job! Nice trick!!!
For your ESB version you could have 2 speaker holes :love
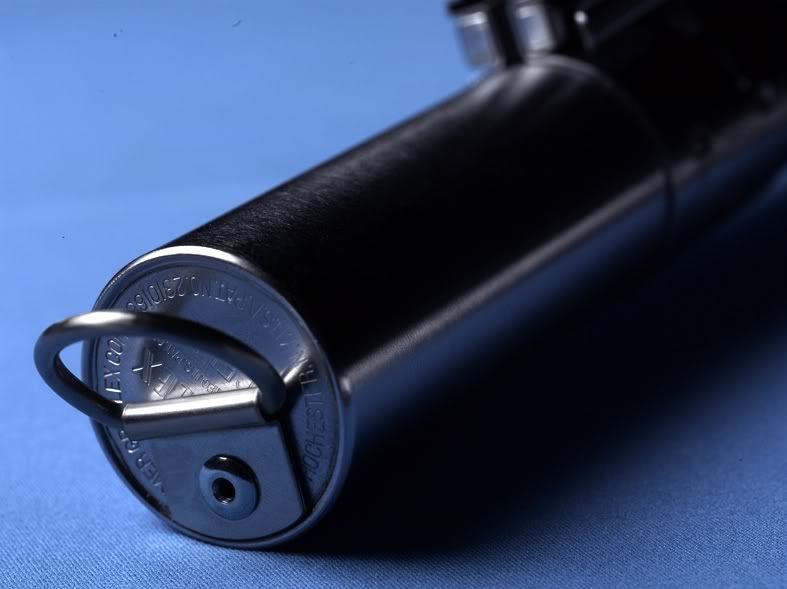
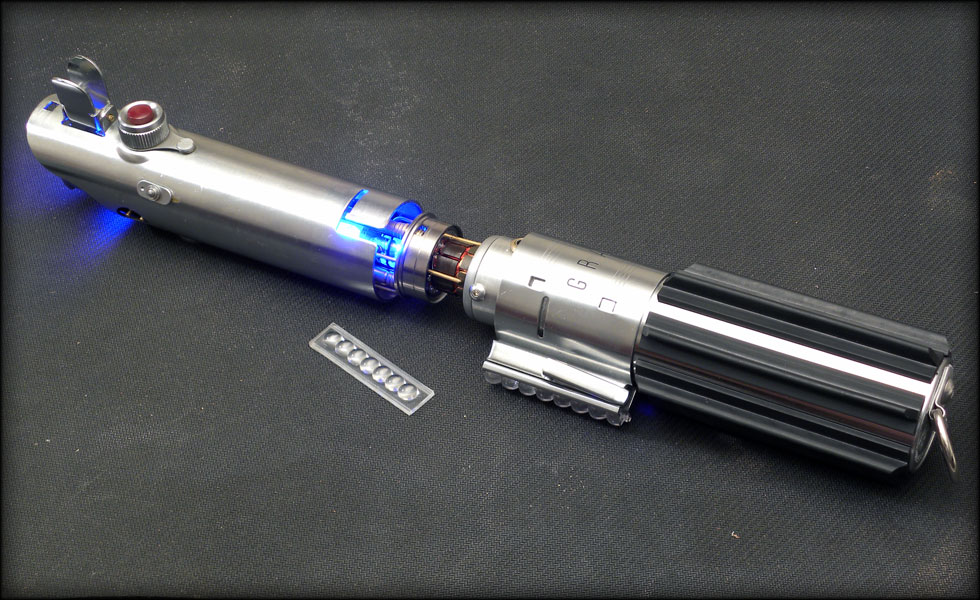
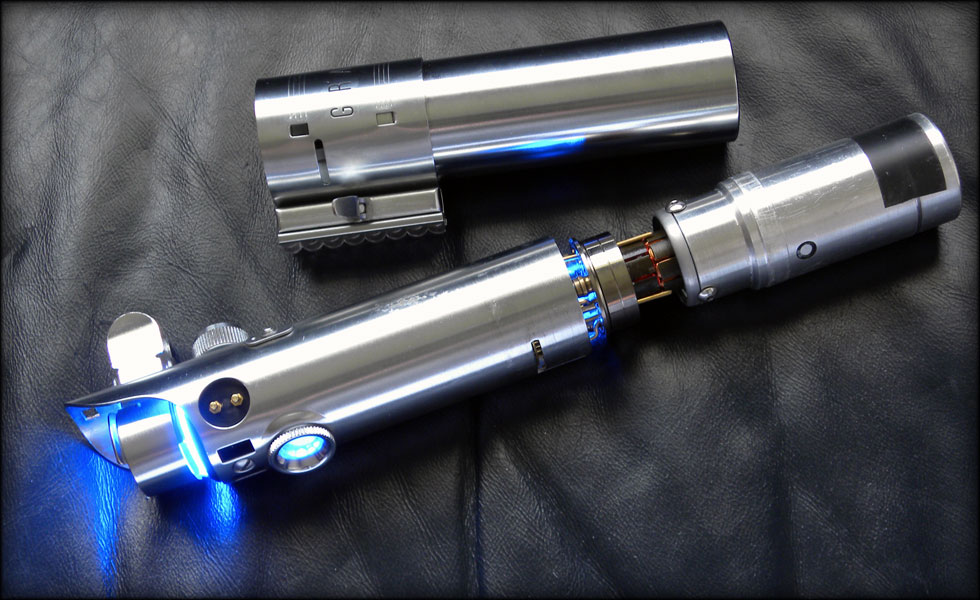
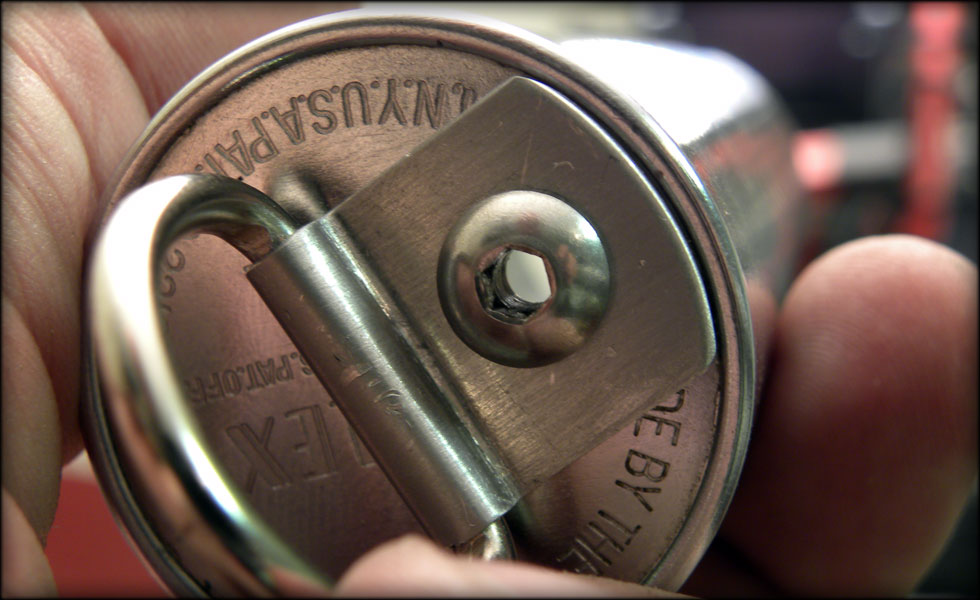
You did line up that D-Ring Clip with your Graflex Clamp ... yes?
-Chaim
Man I'm inspired to do something like that...wowwwwwww.
I just found this site/thread and read through it at work...and I registered an account just to post this:
absolutely best piece of work I have seen on a lightsaber...ever.
I wish I had all of those nice tools so that I could practice this stuff myself, I love building things but cant afford the 'toys' to custom form my own pieces to such high quality.
One thing I would do if this was my build: a cut-away on the body of the graflex to show off the inner work without taking it apart. Kind of like the Starkiller saber in TFU but maybe have it similar to the ejection port on a rifle (a small hinged door) that could be like a quick "field maintenance" access hatch.
again...Awesome work.