You are using an out of date browser. It may not display this or other websites correctly.
You should upgrade or use an alternative browser.
You should upgrade or use an alternative browser.
Slothfurnace's ANH Luke Graflex Saber chassis. PICS, Step by step.
- Thread starter slothfurnace
- Start date
JoMamma_Smurf
Master Member
I'm sure if you get a hold of parksabers.com they'll sell you a bottom.
cayman shen
Master Member
Awesome work.
And I am so glad the newbie quoted the entire first post because I didn't quite look at all 40 photos the first time around. Sheesh.
Yeah, Subaru, maybe you can edit your post? It took about a year for this thread to load.
Excelsior
Well-Known Member
Thanks Slothfurnace--I'd appreciate the pic. If a source for that kind of tubing could be found, I imagine it would make a lot of Graflex 2-cell owners very happy. If I could ask, what brand/type of cutting wheels did you use? I don't mean to pry, but I need to cut a piece of stainless steel tubing as well, and seeing as I haven't done anything like this before, I just want to make sure I know what I'm doing.
Last edited:
Organic Mechanic
Sr Member
Wow...I'm just...holy...duuuuuuuuuuuuude!
DARKSIDE72
Sr Member
A work of art... ") thumbsup
thumbsup
thumbsupVegas Vader 2
Well-Known Member
fantastic!!thumbsup
thumbsupwhoa! awesome!
Thanks everyone!
Well, I am waiting for a shipment from the graflex shop and the TCSS both, so while I wait, I decided to work on the actual crystal mount and lighting setup.
Previously, I had a pretty poor light, taped up in there for illumination. That's not the Slothfurnace way, so here we go machining some custom parts...
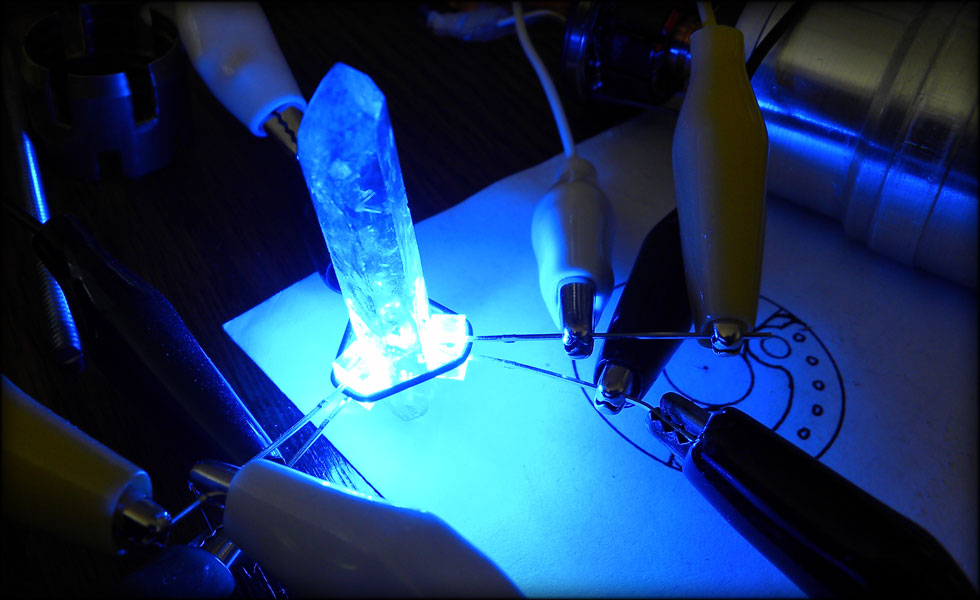
I found some "super bright" rectangular LEDs at radio shack, and whittled them down almost to the diode.
You can see the small rubber o ring I have tossed on there to keep them together while I test for lighting. It's MUCH brighter than what I had.
However, these pictures do NO justice to how BLUE these LEDs are, they look cyan in the photos, but it's a beautiful deep blue in person.
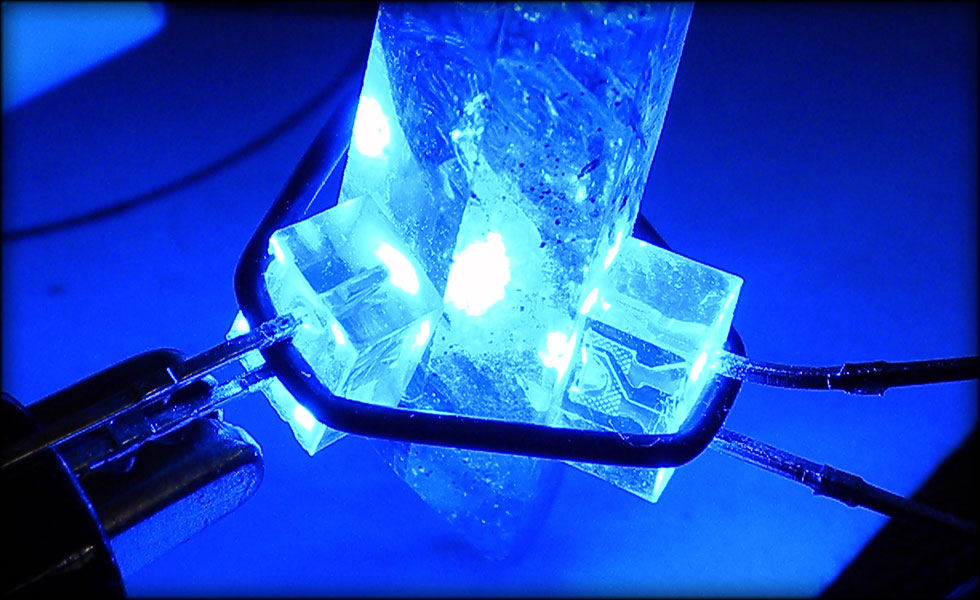
So I set aside the first mounting ring I made and machined one that accepts my LEDs and O ring in vertical slots for the LEDs, and a ring inset for the O ring.
here you can see the way it goes together.
It's MUCH cleaner, cooler, and brighter than what I had before. I will solder the ground leads from the LEDs to the brass, and use the positive leads to form a concentric ring around the whole setup, and solder a solid wire to that, and lead off to the battery pack.
Looks like Tony Stark's workshop
Outstanding stuff, I think you've really done justice to the design of the SW Universe. Wish I had your talent!
haha, thanks! That's a huge compliment!
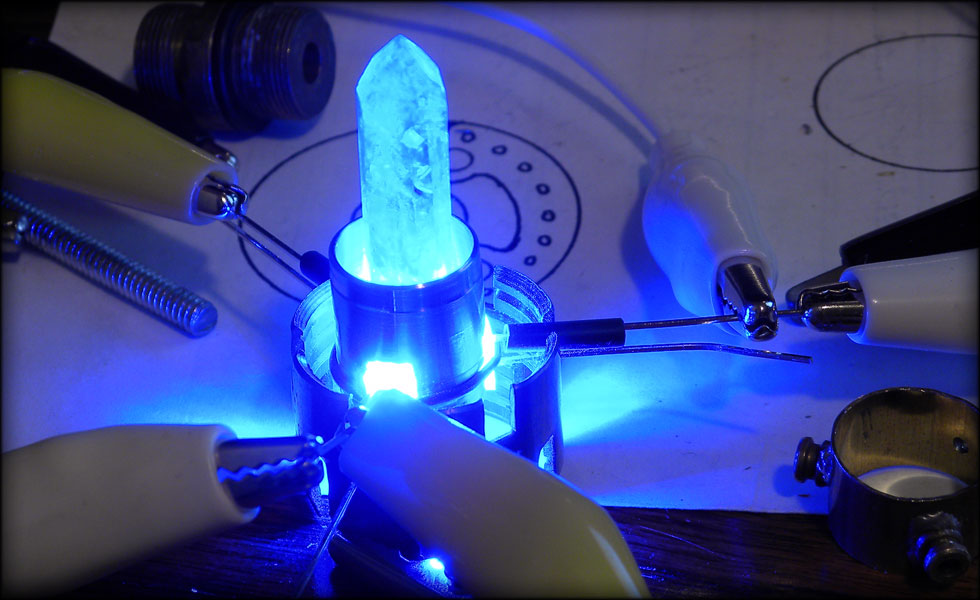
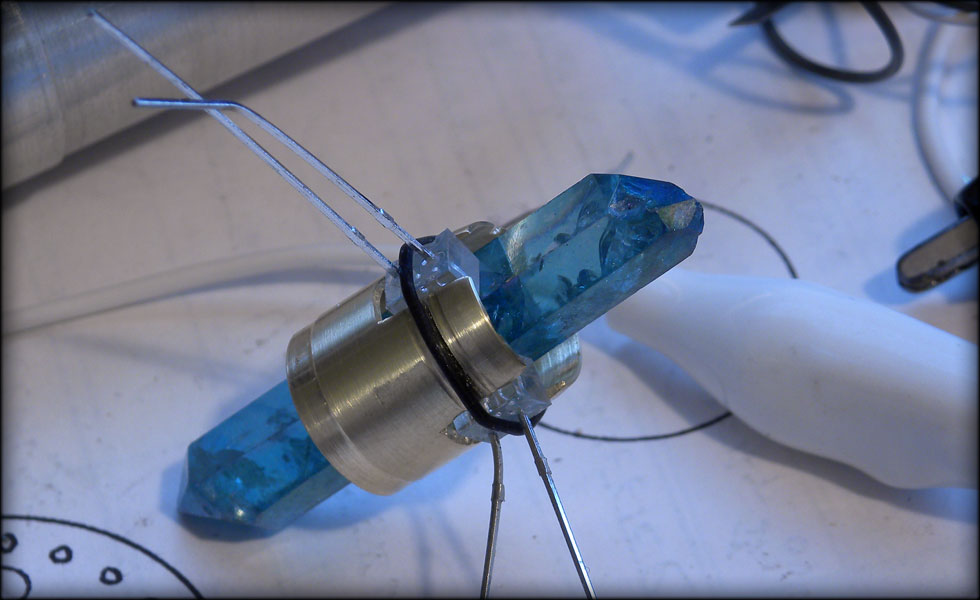
And now, today, I soldered on the wire mounts for the prongs, and set it in the chassis, to test fit. The crystal is NICE and snug in there now, both being held in by the prongs and the LEDs.
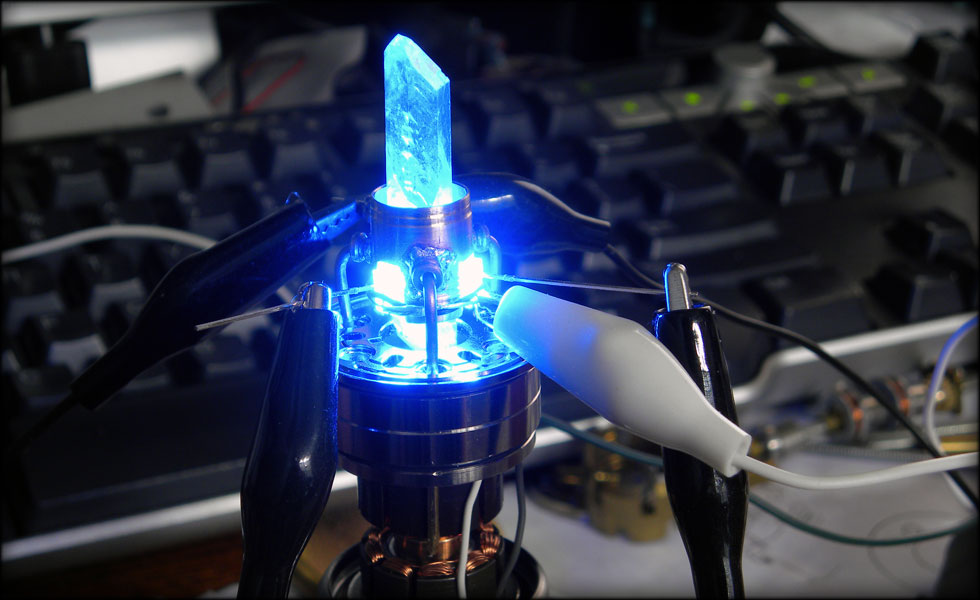
Next, I will have to trim a bit out of my radiator for this to fit snug, and maybe shorten the radiator by a section or two.
Darth Lars
Master Member
Great idea for the LEDs! Nice build-up! There is a balance to the design -- the parts make sense and it is not too complicated.
Similar threads
- Replies
- 5
- Views
- 937
- Replies
- 52
- Views
- 1,530