You are using an out of date browser. It may not display this or other websites correctly.
You should upgrade or use an alternative browser.
You should upgrade or use an alternative browser.
SE ROTJ boba fett 98% finished
- Thread starter welshwarrior123
- Start date
welshwarrior123
Well-Known Member
Re: SE ROTJ boba fett
Thanks for the compliments guys. The jet pack build wasnt nearly as easy as the pictures show, if your on TDH and follow the thread on there you would see the problem I had.
The jet pack didnt fair so well with the parcel force delivery men :angry. The pack looked like it had something heavey placed on it or even been dropped, the back was full of cracks like this:

So it was about a week before I even got to painting it, fiberglassing and filling the cracks. But all fixed and now with the added FG its even stronger so no complaints.
Thire: Not exactly sure what you mean buddy, if you mean the stuff I used to level out the join or fix the gauntlets with its just regular body filler")
Thank for the coments though, first real paint job on something worth alot of money so a bit nervous, Glad it looks okay. Ive removed the masking fluid now off of the yellow so will get a picture of that up tommorow, then onto the blue :wacko
Cheers.
Welsh
Thanks for the compliments guys. The jet pack build wasnt nearly as easy as the pictures show, if your on TDH and follow the thread on there you would see the problem I had.
The jet pack didnt fair so well with the parcel force delivery men :angry. The pack looked like it had something heavey placed on it or even been dropped, the back was full of cracks like this:
So it was about a week before I even got to painting it, fiberglassing and filling the cracks. But all fixed and now with the added FG its even stronger so no complaints.
Thire: Not exactly sure what you mean buddy, if you mean the stuff I used to level out the join or fix the gauntlets with its just regular body filler
Thank for the coments though, first real paint job on something worth alot of money so a bit nervous, Glad it looks okay. Ive removed the masking fluid now off of the yellow so will get a picture of that up tommorow, then onto the blue :wacko
Cheers.
Welsh
welshwarrior123
Well-Known Member
Re: SE ROTJ boba fett
Hey guys, Been really busy lately starting back up at college and have also been hit with a bug :sick But I have still been slowly working on the pack.
I did something that most people usually leave till last, but it was playing on my mind and wanted to see if I could do it with out ruining the pack, so I went ahead and weathered the yellow. Basically I just blasted it with some black from the airbrush :lol


Now I know what your thinking, Ive ruined it..... But I sorta knew what I was doing. And with some 1500 grit sandpaper I began to carefully sand, removing most of the black to create dirt and damage,

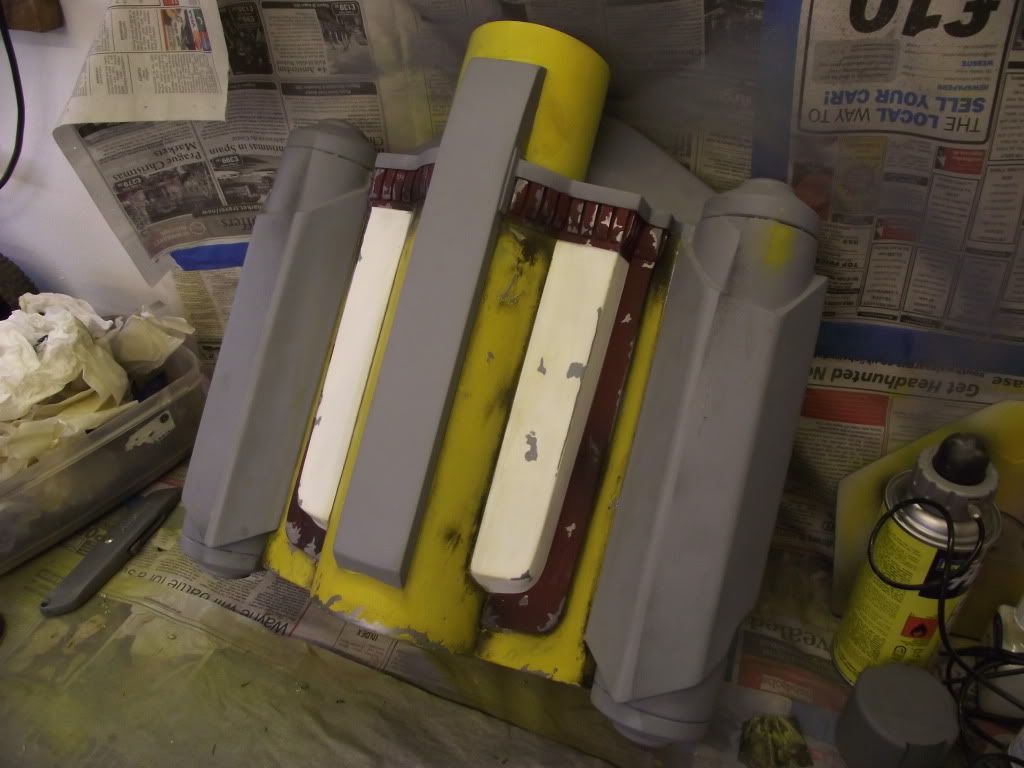
I then went on to the top tube section. I had to sand off the old yellow, then went through the sandpapers till I got a smooth finish. A first coat of silver was applied.
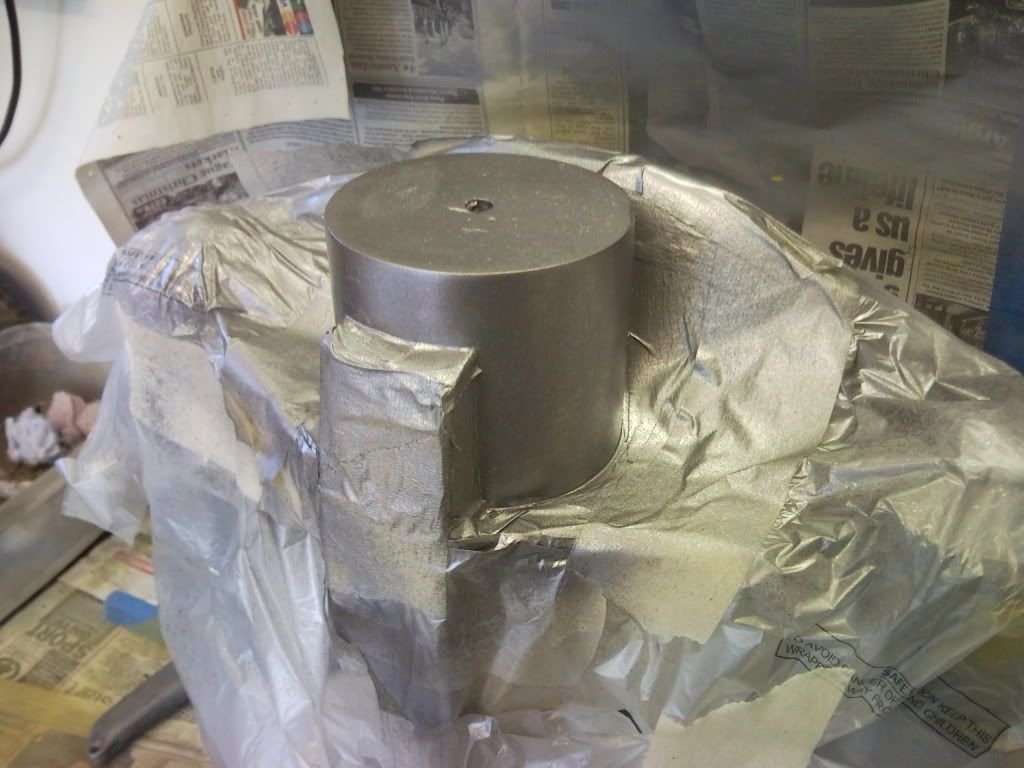
The silver was then masked for the black strip and damage masked off, The strip was then hand painted with enamel.


The black was then masked off, aswell as more damage then sprayed with humbrol yellow. I had a little bit of bleed at the bottom but that will be sorted when the blue layer is applied :rolleyes

I also painted the top detail section, which is just placed on in the pic.

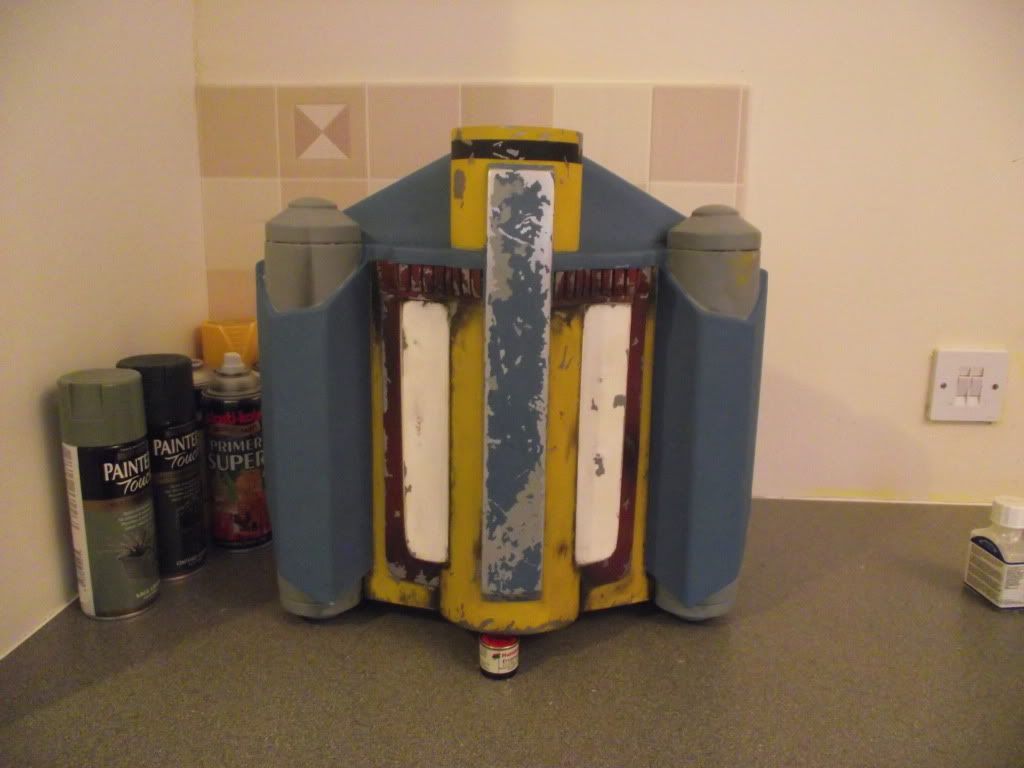
And finally an outside shot with the WIP missile attached for looks, this gives a more accurate look to the colours which im pretty happy with.

So that's pretty much all I have done, onto the last main colour now so shouldn't be long till the main body is finished. Kinda wish I had this finished for halloween as I got a big party coming up, might put this on hold to try and through something together, looking at guy from daft punk not even finished this one yet and im think about more cossies lol.
Thanks for looking guys,
Comments and criq welcomed,
Welsh
Hey guys, Been really busy lately starting back up at college and have also been hit with a bug :sick But I have still been slowly working on the pack.
I did something that most people usually leave till last, but it was playing on my mind and wanted to see if I could do it with out ruining the pack, so I went ahead and weathered the yellow. Basically I just blasted it with some black from the airbrush :lol
Now I know what your thinking, Ive ruined it..... But I sorta knew what I was doing. And with some 1500 grit sandpaper I began to carefully sand, removing most of the black to create dirt and damage,
I then went on to the top tube section. I had to sand off the old yellow, then went through the sandpapers till I got a smooth finish. A first coat of silver was applied.
The silver was then masked for the black strip and damage masked off, The strip was then hand painted with enamel.
The black was then masked off, aswell as more damage then sprayed with humbrol yellow. I had a little bit of bleed at the bottom but that will be sorted when the blue layer is applied :rolleyes
I also painted the top detail section, which is just placed on in the pic.
And finally an outside shot with the WIP missile attached for looks, this gives a more accurate look to the colours which im pretty happy with.
So that's pretty much all I have done, onto the last main colour now so shouldn't be long till the main body is finished. Kinda wish I had this finished for halloween as I got a big party coming up, might put this on hold to try and through something together, looking at guy from daft punk
not even finished this one yet and im think about more cossies lol.Thanks for looking guys,
Comments and criq welcomed,
Welsh
darthgordon
Sr Member
Re: SE ROTJ boba fett
What I'd like to say is great work for a 17 year old... but let's face it, that's great work for a 35 year old. You've definitely got talent.
What I'd like to say is great work for a 17 year old... but let's face it, that's great work for a 35 year old. You've definitely got talent.
Zurginator
New Member
Re: SE ROTJ boba fett
That's pretty impressive. You're made good out of some crap.... and then some better out of some good.
That's pretty impressive. You're made good out of some crap.... and then some better out of some good.
gwizah
New Member
Re: SE ROTJ boba fett
Wow, that's some amazing work. I used to hang out on TDH and built a jango back in 02'. I remember getting some gauntlets and a TERRIBLE helmet from a guy on Ebay and ******, I feel ya on having to fix all those lil' bits. The helmet looked like thisnext to a store bought licensed Jango helm)

and here's what I was able to salvage:

Still terrible...But not AS terrible.
Wow, that's some amazing work. I used to hang out on TDH and built a jango back in 02'. I remember getting some gauntlets and a TERRIBLE helmet from a guy on Ebay and ******, I feel ya on having to fix all those lil' bits. The helmet looked like this
next to a store bought licensed Jango helm)
and here's what I was able to salvage:
Still terrible...But not AS terrible.
welshwarrior123
Well-Known Member
Re: SE ROTJ boba fett
Hey guys been really busy lately and totally forgot about my thread on here :confused
Cheers for the compliments guys, means alot that some one appreciated my work :lol
Gwizh - Wow, no offence mate but that helmet was poor, looks like a totally different lid now tho. If that is fiberglass on the outside I feel for you mate, that must have been a pain to sand. Love to see it painted up tho now.
Right on with the update, I only just got back to working on this the weekend just gone, but ive pretty much finished the main body. So where I left off.
I had all the colours laid down apart from the blue, so I masked the JP and primered it. I also killed 2 birds with one stone by using the primer as the grey damage.


After I had masked all of the grey damage, I then sprayed it with silver paint and began to mask all of the silver damage.


I then began to paint the blue, but had problems with my airbrush So I only managed to finish the middle section of the JP.

Making fluid gently removed to reveal the damage underneath.

I then went ahead after I sorted my airbrush out, and covered the entire piece in blue. I then waited an hour untill the paint was tacky and removed the masking tape.


Once the paint was then completley dry, I then began to remove the rest of the masking fluid to give me this,


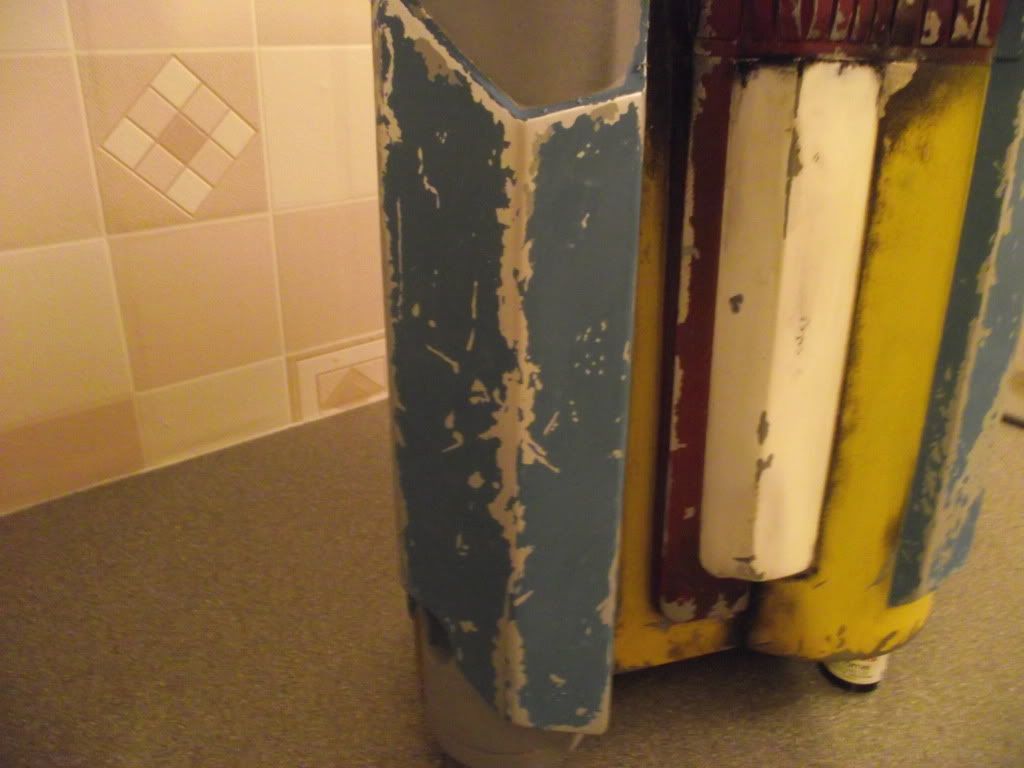


So there it is, really happy that the blue is done as I thought it would be more difficult than it was. I plan on hand painting the tops of the tanks and decals so that should be done in the next couple of days, along with the rocket, thrusters and door panel, it can then be all mounted up to the harness
So what do you guys think :confused
Thanks for looking,
Welsh
Hey guys been really busy lately and totally forgot about my thread on here :confused
Cheers for the compliments guys, means alot that some one appreciated my work :lol
Gwizh - Wow, no offence mate but that helmet was poor, looks like a totally different lid now tho. If that is fiberglass on the outside I feel for you mate, that must have been a pain to sand. Love to see it painted up tho now.
Right on with the update, I only just got back to working on this the weekend just gone, but ive pretty much finished the main body. So where I left off.
I had all the colours laid down apart from the blue, so I masked the JP and primered it. I also killed 2 birds with one stone by using the primer as the grey damage.
After I had masked all of the grey damage, I then sprayed it with silver paint and began to mask all of the silver damage.
I then began to paint the blue, but had problems with my airbrush So I only managed to finish the middle section of the JP.
Making fluid gently removed to reveal the damage underneath.
I then went ahead after I sorted my airbrush out, and covered the entire piece in blue. I then waited an hour untill the paint was tacky and removed the masking tape.
Once the paint was then completley dry, I then began to remove the rest of the masking fluid to give me this,
So there it is, really happy that the blue is done as I thought it would be more difficult than it was. I plan on hand painting the tops of the tanks and decals so that should be done in the next couple of days, along with the rocket, thrusters and door panel, it can then be all mounted up to the harness
So what do you guys think :confused
Thanks for looking,
Welsh
Devilstar2k2
New Member
Re: SE ROTJ boba fett
Very nice.
Very nice.
ALPHA D UNIT
Active Member
Re: SE ROTJ boba fett
Just Wowthumbsup:thumbsup
Just Wow
thumbsup:thumbsupwelshwarrior123
Well-Known Member
Re: SE ROTJ boba fett
(Blows dust off of topic , cough* cough*
Hey guys, thought I would bring back the dead with a good ol' necro post hehehe.
Well ive been busy these last few weeks, with college finals and of course painting up my first ESB lid for our good old friend radar, ive sort of been neglecting my own Boba. After news that my lid has actually shipped yesterday ( thanks Gav) and also a few extras with it due to the time I had to wait for it, I decided to brush the dust of my fett and start it back up again.
So I took my JP, and decided enough was enough, it needed to be finished. I glued on the small greeblie piece, hand painted the decals and sanded the thruster down. After a good wet sand, I painted them up and weathered them like the tank tops. I ran out of air propellant so there not as weathered as I would like but they look good enough. The piece that I want to get now is an ALI stabilizer and LED set up to complete the pack. I dont know if I posted the pick before but I also painted the creators watermark on the back of the pack, kinda nifty I think


Ive also been busy with my helmet, even though I dont even have it. As ive posted before, Ive got my ali RF topper aswell as the LED circuit board for it. I know also have an Ali RF stalk, BM visor and a beautiful Stormrider helmet interior. I did have photos on my phone of me prepping them but I lost my phone the other week....and by lost I mean it went through the was

And I also started work on some of the interior pieces, also took some good snaps which show off the awesome details of these pieces.


So thats it for now, fingers crossed now my helmet gets here asap as im now itching to start it. So the next picture update I will have will be of the lid, that will then be a full wip as I document how to prep, cut, install the pieces and finally paint the piece, so prepare for a picture onslaught lmao.
Cheers,
Welsh
(Blows dust off of topic
, cough* cough*Hey guys, thought I would bring back the dead with a good ol' necro post hehehe.
Well ive been busy these last few weeks, with college finals and of course painting up my first ESB lid for our good old friend radar, ive sort of been neglecting my own Boba. After news that my lid has actually shipped yesterday ( thanks Gav) and also a few extras with it due to the time I had to wait for it, I decided to brush the dust of my fett and start it back up again.
So I took my JP, and decided enough was enough, it needed to be finished. I glued on the small greeblie piece, hand painted the decals and sanded the thruster down. After a good wet sand, I painted them up and weathered them like the tank tops. I ran out of air propellant so there not as weathered as I would like but they look good enough. The piece that I want to get now is an ALI stabilizer and LED set up to complete the pack. I dont know if I posted the pick before but I also painted the creators watermark on the back of the pack, kinda nifty I think
Ive also been busy with my helmet, even though I dont even have it. As ive posted before, Ive got my ali RF topper aswell as the LED circuit board for it. I know also have an Ali RF stalk, BM visor and a beautiful Stormrider helmet interior. I did have photos on my phone of me prepping them but I lost my phone the other week....and by lost I mean it went through the was
And I also started work on some of the interior pieces, also took some good snaps which show off the awesome details of these pieces.
So thats it for now, fingers crossed now my helmet gets here asap as im now itching to start it. So the next picture update I will have will be of the lid, that will then be a full wip as I document how to prep, cut, install the pieces and finally paint the piece, so prepare for a picture onslaught lmao.
Cheers,
Welsh
welshwarrior123
Well-Known Member
Re: SE ROTJ boba fett
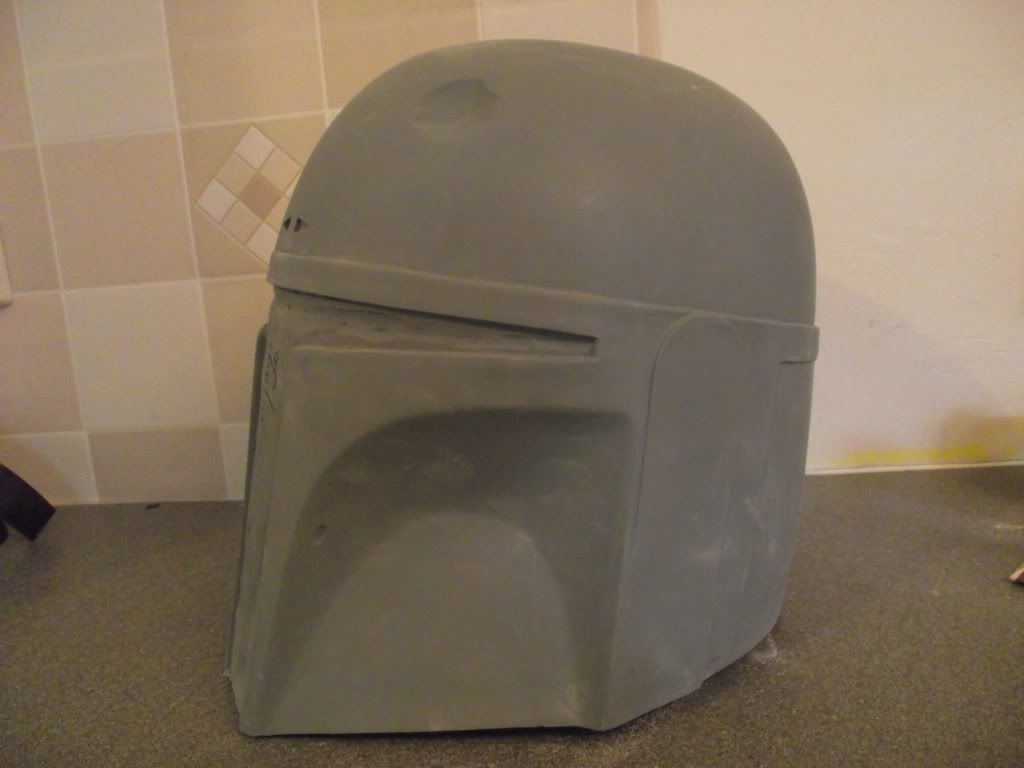
Well I got home today to find a lovely big box, after ripping it open and serching through all the packing peanuts I managed to find this beauty...with a couple of other pieces.

I also received a beautiful stainless steel Borden connector (the little bit on Boba's cheek), its going to pain me to drill out the cast Borden in the helmet but I really like shiny things. Also in the kit was all the ear pieces and the MQ1 circuit board.

I actually did manage to get a start on the lid, only to the point of removing the excess flashing on the underside of the lid. This is a pretty much easy and straight forward job, simply using the cutting wheel on my dremel, I carefully cut the piece out.

If you want to save your cutting disk and not have them shatter, the best way to cut out the piece is to really take your time. Dont try and go through on your first pass as the stress on the wheel will cause it to crack, gently keep going over the lines to achieve a nice smooth cut.


Next up will be cutting out those infuriating key slots, then to screw the ears on and cut the visor out, job done ready for paint :b
Updates soon,
Welsh
Well I got home today to find a lovely big box, after ripping it open and serching through all the packing peanuts I managed to find this beauty...with a couple of other pieces.
I also received a beautiful stainless steel Borden connector (the little bit on Boba's cheek), its going to pain me to drill out the cast Borden in the helmet but I really like shiny things. Also in the kit was all the ear pieces and the MQ1 circuit board.
I actually did manage to get a start on the lid, only to the point of removing the excess flashing on the underside of the lid. This is a pretty much easy and straight forward job, simply using the cutting wheel on my dremel, I carefully cut the piece out.
If you want to save your cutting disk and not have them shatter, the best way to cut out the piece is to really take your time. Dont try and go through on your first pass as the stress on the wheel will cause it to crack, gently keep going over the lines to achieve a nice smooth cut.
Next up will be cutting out those infuriating key slots, then to screw the ears on and cut the visor out, job done ready for paint :b
Updates soon,
Welsh
cayman shen
Master Member
Re: SE ROTJ boba fett
Wow, I'm just seeing this thread. You've got some seroious skills!
Wow, I'm just seeing this thread. You've got some seroious skills!
welshwarrior123
Well-Known Member
Re: SE ROTJ boba fett
Thank you Caymen, appreciate you comment
Well I had some free time today, so I decided to have a go at fitting that lovely Borden to the lid. Having seen a reference photo of how the original was attached, i decided to try it.
I first had to remove the original cast piece to replace with the SS one.

I used the sanding rotary drum on the dremel to sand most of the Borden down, then used some 150 grit sandpaper to get it flat and flush with the rest of the cheek.

Then using my dremel, I drilled out the hole, making sure it was bigger on the outside and smaller on the inside, this was so the Borden would not fully fit through, yet remained in the position I wanted it to be.

I then cut down a screw, and permanently glued it to the back of the Borden.

Then I pushed the Borden into the hole, and using a washer and nut I secured the Borden in place.

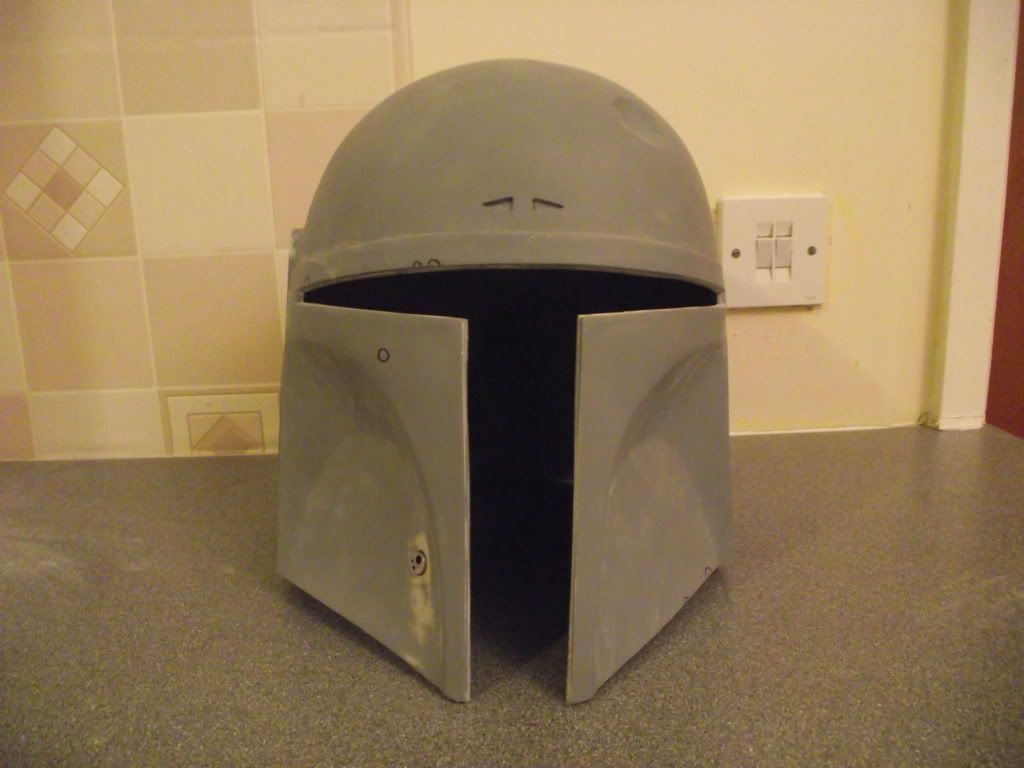
And there is the installed Borden, also removable for when you want to paint the lid. Also if you cant tell, I also went ahead and cut out the visor :b This is just a straight up cut, so I still need to hit it with the sanding block to get it nice and level.
Next up will be the ears, as I seem to have misplaced my needle files lol. And I need to go and buy some more nuts and bolts for the ears and the visor. But its coming together nicely, I even put my Stormrider Kit in it earlier and I almost had to change my underwear :b
Thanks for looking,
Updates soon,
Welsh
Thank you Caymen, appreciate you comment
Well I had some free time today, so I decided to have a go at fitting that lovely Borden to the lid. Having seen a reference photo of how the original was attached, i decided to try it.
I first had to remove the original cast piece to replace with the SS one.
I used the sanding rotary drum on the dremel to sand most of the Borden down, then used some 150 grit sandpaper to get it flat and flush with the rest of the cheek.
Then using my dremel, I drilled out the hole, making sure it was bigger on the outside and smaller on the inside, this was so the Borden would not fully fit through, yet remained in the position I wanted it to be.
I then cut down a screw, and permanently glued it to the back of the Borden.
Then I pushed the Borden into the hole, and using a washer and nut I secured the Borden in place.
And there is the installed Borden, also removable for when you want to paint the lid. Also if you cant tell, I also went ahead and cut out the visor :b This is just a straight up cut, so I still need to hit it with the sanding block to get it nice and level.
Next up will be the ears, as I seem to have misplaced my needle files lol. And I need to go and buy some more nuts and bolts for the ears and the visor. But its coming together nicely, I even put my Stormrider Kit in it earlier and I almost had to change my underwear :b
Thanks for looking,
Updates soon,
Welsh
DL 44 Blaster
Sr Member
Re: SE ROTJ boba fett
You have done an absolutely friggin' fantastic build on this costume!!! The amount of work put into getting the pieces from start to your finished product is astounding!! Really, reallllly nice job man!! Keep up the great work:thumbsup
You have done an absolutely friggin' fantastic build on this costume!!! The amount of work put into getting the pieces from start to your finished product is astounding!! Really, reallllly nice job man!! Keep up the great work:thumbsup
welshwarrior123
Well-Known Member
Re: SE ROTJ boba fett
So I have been managing to find time to work on the helmet, and yesterday and today I managed to get the brunt of the prep work done.
Like I said I wanted the helmet to have removable ears, to do this I firstly marked out where I wanted the screws to be in the helmet, then using my dremel I drilled them out (should have used the drill but I was being lazy)

I then placed the ear cap on the helmet, and simply poked a pen through the previously drilled holes to mark where I needed to drill the ear cap. Again using the dremel I drilled two small channels for the screw to fit into

I then cut the heads off of two screws, and just glued them in the holes I drilled.

Once dry, I then placed the ear pieces onto the helmet and simply secure them using a washer and nut.


I repeated this for all the other pieces minus the ear cap section, knowing that I wanted a RC set up I didn't want the inside to be cluttered with two many nuts and bolts. I then gave the lid a quick wet sand and primer, and attached the RF stalk and visor to see how the assembled lid will look like.
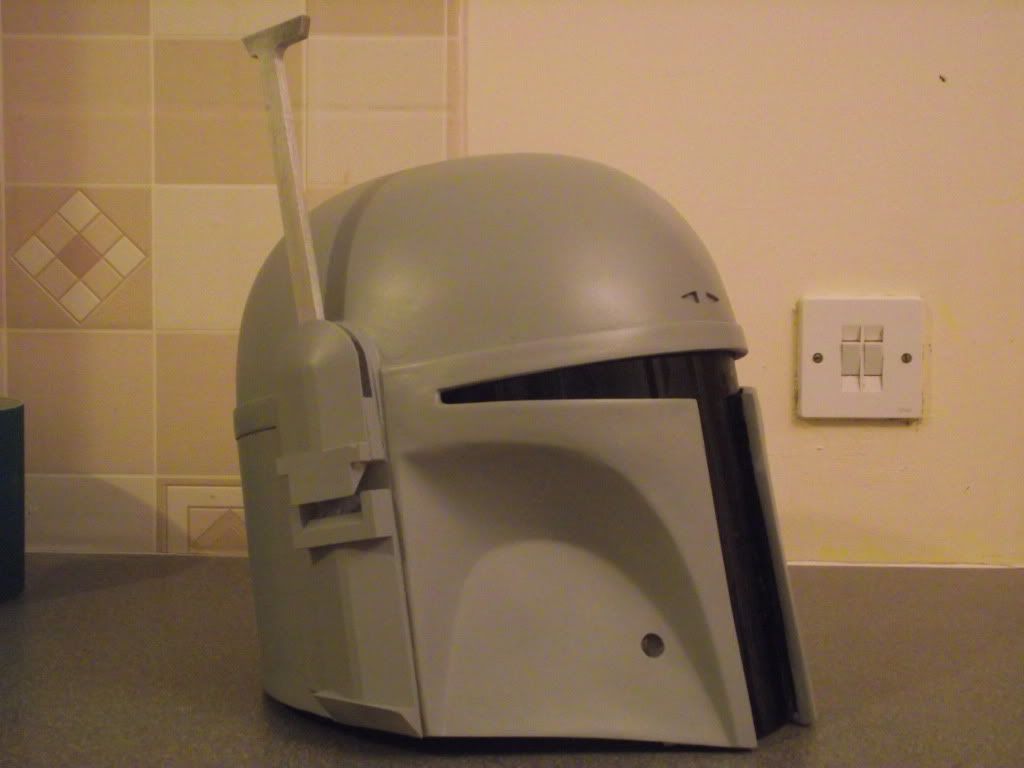


When I find the time now Ive just got to cut out those key slots, and there are one or two blemishes on the lid that need to be sanded out, but other than that I should be able to paint this thing before the month is out :lol
Cheers,
Welsh
So I have been managing to find time to work on the helmet, and yesterday and today I managed to get the brunt of the prep work done.
Like I said I wanted the helmet to have removable ears, to do this I firstly marked out where I wanted the screws to be in the helmet, then using my dremel I drilled them out (should have used the drill but I was being lazy)
I then placed the ear cap on the helmet, and simply poked a pen through the previously drilled holes to mark where I needed to drill the ear cap. Again using the dremel I drilled two small channels for the screw to fit into
I then cut the heads off of two screws, and just glued them in the holes I drilled.
Once dry, I then placed the ear pieces onto the helmet and simply secure them using a washer and nut.
I repeated this for all the other pieces minus the ear cap section, knowing that I wanted a RC set up I didn't want the inside to be cluttered with two many nuts and bolts. I then gave the lid a quick wet sand and primer, and attached the RF stalk and visor to see how the assembled lid will look like.
When I find the time now Ive just got to cut out those key slots, and there are one or two blemishes on the lid that need to be sanded out, but other than that I should be able to paint this thing before the month is out :lol
Cheers,
Welsh
Robert A Fett
New Member
Re: SE ROTJ boba fett
Hey guys,
first post here, I dont know if there is an intro thread but i'll do it here aswell. My names lewis, im a 17 year old currently studying Art and graphic design with the hope of one day becoming an effects artist, one day :lol
Hi there Lewis
are you really only 17 years old?!!! You have natural talent to be able to do the work you have.
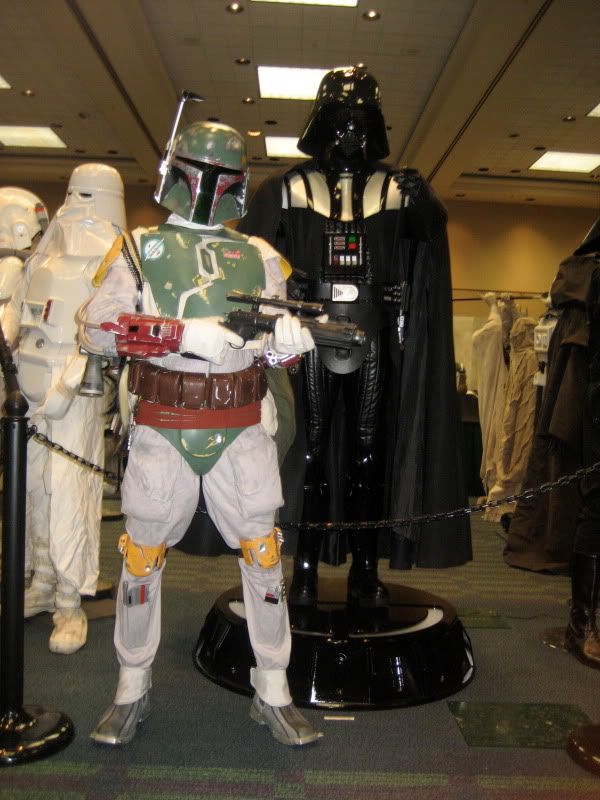
I don't want to state the obvious here, but do you visit bobamaker.co.uk? In my opinion his armour is the best ever produced outside of ILM. I thought i recognisd the flightsuit as one of theirs?
Are you working towards having an exact replica of the actual filming costume rather than 'screen accurate' which is always far from the actual filming costume/prop?
Bobamaker sells all the prop/armour parts and if you wanted an actual machined metal missile gauntlet go to RBS replicas. (google the name)
Keep up the great work- i'm sure we can expect great things from you in the future!
slave1pilot
Sr Member
Re: SE ROTJ boba fett
You do very good work.
I'll be following this thread to see how it progresses.
Hang in there.
You do very good work.
I'll be following this thread to see how it progresses.
Hang in there.
Similar threads
- Replies
- 10
- Views
- 918
- Replies
- 3
- Views
- 609
- Replies
- 0
- Views
- 889
- Replies
- 0
- Views
- 152