Saw Gerrera Partisan build (WIP)

Finished painting and weathering the canisters. Painted with Sierra Gold Sahara Beige spray paint and then dry brushed with the usual grunge colors in various layers. My original reference images as a 'style guide' for the weathering here:

15134695_10157709106700627_1909512855742104834_n.jpgFA1_E5120-_A83_D-4_DF1-8_F06-609234_D7_E251.jpg

And my cans here, with something of a context shot clipped to the now-weathered ammo belt:

5D3_5296_small.jpg5D3_5302_small.jpg5D3_5304_small.jpg5D3_5306_small.jpg

And for fun, in comparison next to my Anovos Shoretrooper:

5D3_5309_small.jpg

I enjoy the process of dry brushing on the weathering layers - there's a lot of satisfaction in seeing the final piece starting to 'pop' with the implication of a history and a story...

Dan
 
Last edited:
The clothing layers are coming along as well behind the scenes. I've weathered the kama and the trousers. Again, photo ref from the Star Wars Launch Bay exhibit at Disney World last November:

5D3_4794_small.jpg

And my kama and trousers:

5D3_5312_small.jpg5D3_5313_small.jpg

The weathering here is a combination of dry brushing various dirt colors with acrylic paint and some real-world hiking use. I took some sand paper pads to the seams of the pants (which, of course, were ordered brand new) to get a little wear fraying in addition to the dirt coloring layers. I'll get a bit more real-world hiking in with the pants when I'm doing the shirt as well. The shirt will be another post with lots of additional description in a few weeks...

Dan
 
After a three-week hiatus birding in South and Central America I'm getting back to work on this and other builds. Today I did the final fitting for the custom leather work for the bandolier.

5D3_5515_small.jpg5D3_5517_small.jpg5D3_5516_small.jpg

I had a local leather worker who specializes in Star Wars work (yes, lucky for me!) do the work and she did a fantastic job, paying very good attention to the details in the various reference imagery available from the Rogue One Blu-ray. I've got a week or two of working/kneading and weathering the leather and then permanently attaching the 'body cam' greeblie. I'll get a few images posted of what it all looks like as worn then.

I've got some boot work to do and weathering of the shirt and the helmet, and I'll finally be ready to put it all together for a full-up fitting. More WIP to come...

Dan
 
This is an amazing overview of your build. I have decided to take on this project as well. I have another build for my Son before I can start, but I will use my time for research and development between now and start time. Thank you for everything you have found out on this. Incredible work.
 
Thanks, everyone, for the encouraging comments as this has been progressing. I really am right near the end now and will be posting a bunch of detailed wrap-up WIP images in just a couple more weeks. But a bit of business travel and a NASA proposal stand in the way before I can finally get there. I'm hoping to have this all finished and final documentation images done by mid-June - I'm going to premier this in public at the Denver Comic Con June 15-16.

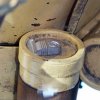
In the mean time, and before the next short gap in postings, one little detail that I've not bothered with until now is the metal rod-like thingy hanging from his belt on the left side:

ROGUE_04a_small.jpg

We never see it very well, but in the behind-the-scenes extras on the Blu-ray there is one short view that's just a bit more in focus. From that I cobbled together a likeness from an aluminum rod, a bit of just slightly larger diameter stainless steel tube slipped over that, a bit of aluminum tape, an O-ring, and a Zerk fitting:

5D3_5576_compare_small.jpgROGUE_04a_compare_small.jpg

Until we see the actual prop somewhere someday this will be 'good enough' I think...

Dan
 
The shirt is done and ready to go as well. As I mentioned a while back up in post #31 I settled on this Rothco Vintage BDU shirt as a good base to work on:

https://www.amazon.com/Rothco-Vinta...=1507123487&sr=8-2&keywords=bdu+vintage+olive

Some of the alterations to bring it more in line with this character's shirt include: (1) remove the collar; (2) remove the epaulettes; and (3) remove the main buttons and replace them with a hidden velcro closure (there are no buttons in Star Wars). I also dyed the entire shirt to a slightly darker shade to better match the overall look with the helmet, pants, and other elements.

Looking at the various views of this guy on screen there were some minor additions to make as well:

(1) 'epaulette' strips running the length of the arms (and presumed across the back); (2) new minor epaulettes near the front shoulders; (3) metallic dangly thingy on left arm 'epaullete' strip; (4) a velcro attachment strip on the right shoulder for the shoulder bell; and (5) dangly fabric loops that show from under the leather bandolier. The metallic dangly bit isn't exactly correct, but the only views of this thing are rather small and blurry and I can't make out much more detail, so - good enough. The dangly fabric loops are slightly lighter than the main shirt so I used some left over fabric from the alterations before I dyed everything. They are just velcroed into adjustable positions as needed for best show and fit.

Reference:

ROGUE_03a_detail.jpgROGUE_11a_annotated.jpgROGUE_09b_small.jpg

The altered Rothco shirt:

5D3_5580_small.jpg
5D3_5581_small.jpg5D3_5582_small.jpg5D3_5584_small.jpg

Dan
 
Finis!

5D3_6058_small.jpg5D3_6070_small.jpg5D3_5952_small.jpg

Well, as finished as anything like this can ever be - of course, I will continue to spot little things here and there that I'll want to touch up. But the build had dragged on long enough and I really wanted to post some pics of the final thing this evening finally. It was a long day today, doing both an outdoor stills and video shoot as well as an indoor studio shoot to document the basic look. HUGE thanks to my friend Jim Arthurs for all his fantastic help on the shoot.

I'll post a few more pics over the next day or two, and then eventually some snippets from the video, but that'll take a few weeks to get through everything.

There's a story of frustration from today - all this work to finish up and then to arrrange a really busy day for all the photo/video documentation and I forgot to bring a piece of the costume with me! I'll let you try to guess what it might have been before I reveal the 'fix'...

Dan
 
WELL DONE!

I love it. You’ve done a brilliant job!

Do Tam Posla next!

I can’t guess what you left out... was it the helmet and your head just looks like that?

N.


Sent from my iPhone using Tapatalk
 
Okay, a few more images:

5D3_6028_small.jpg5D3_6042_small.jpg5D3_6108_small.jpg5D3_6121_small.jpg

So, in the process of running around the day before the shoot putting all my gear in order to be sure I didn't forget anything, I must have looked at that darned right shoulder bell five different times thinking to myself "Don't forget to bring that". And so, of course, I'm 100 miles from home in the middle of setting up for the studio shoot and realized that I forgot to bring it! Argh! :-( When I got home after an already very long day I had to set up a makeshift lighting setup, put the shirt and shoulder bell on, and then shoot about a hundred shots of myself in various positions close to what we had earlier in the day so I could digitally reconstruct that right shoulder as best I could. All's well that ends well I guess...

So, no - my head doesn't normally look like that.

And yes, the Tam Posla character is pretty darned interesting as well. This was my very first costume build and I learned a lot, but next up is finishing off my Biker Scouts - all three of them...

Dan
 
This came out amazing!! It’s amazing the detail you got with the little screen time we have! Job well done!!


Sent from my iPhone using Tapatalk
 
Just posting what I received today.
They did a very good job making this gloves sample by just using pictures as references.

Still not 100% accurate. I will have them make me a second sample.

Please comment.

Az
20180723_194539.jpg20180723_194533.jpg20180723_194522.jpg20180723_194353.jpg20180723_194344.jpg20180723_194546.jpg20180723_194602.jpg
 
Wow, thanks for sharing these photos, Az! These gloves look quite nice indeed - some very nice work there. My eye spots just a couple minor nits that I'll point out (relative to the reference in one of my first posts on page 1 of this thread) but overall these are great.

o I'd like that thumb to be a bit shorter and less 'pointy' toward the tip.

o I'm pretty sure that the Comm link you have there is sized correctly, so both that item and my eyeball sense of the scale of the 'window' in which it fits relative to other features on the glove is that that window needs to be a little larger.

o The second seam on the wedge area on the gauntlet also needs to protrude a bit (like the upper one in the one photo). Preferably with an unfinished seam, according to at least one of the reference images.

o The four sew lines on the gauntlet might just possibly be spaced a little tighter/closer together.

Those are all at the minor correction level I'd think - this is really quite good already. You'll probably want to get feedback from the pilots on the Rebel Legion as they will have the most refined eye for these details and will be your biggest customer for these.

Thanks again for the look at the WIP!

Dan
 

Your message may be considered spam for the following reasons:

If you wish to reply despite these issues, check the box below before replying.
Be aware that malicious compliance may result in more severe penalties.
Back
Top