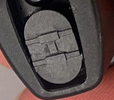
I figured out why I was confused. My kit only came with one of these greeblies so I reached out to Justin to see how I can get another.This should help you with the vented pommel. The static is the same except those silver pins go in place of the D ring.
-
Welcome to the Project Runs Forum!
This forum is intended for interest gauging and active runs. Due to the transient nature of this forum, please keep all research and ongoing discussion in one of our main forums so your information is not lost.
Only Premium Members can start a new run.
You are using an out of date browser. It may not display this or other websites correctly.
You should upgrade or use an alternative browser.
You should upgrade or use an alternative browser.
Limited Run SaberBay DARKSABER season 3 finish now available (limited quantities) saberbay.com
- Thread starter Saberbay
- Start date
Battery was a high discharge version ?So I got everything wired up, but speaker is crackly and the blade isn't very bright. Proffie board also gets hot. Battery was at full charge. Any easy fixes on this or do I just need to take it all apart and try again?
Gauge of wires?
slaggedheap
New Member
Edit: My bad - was caught in spam filter.Email update sent out earlier for those waiting for their installed units
Will be emailing those who expressed interest more details
I’m waiting on an install but didn’t get an email
MMcFett
Member
I think I used 24Battery was a high discharge version ?
Gauge of wires?
haven't received any email (waiting on 2 weathered/installed units)Email update sent out earlier for those waiting for their installed units
Will be emailing those who expressed interest more details
Last edited:
CHeck spam filter and check your PayPal emailhaven't received any email (waiting on 2 weathered/installed units)
If you did not get them then email us with your invoice number or PayPal email
Justin@saberbay.com
Reckreational
New Member
I’m still a little confused on how to wire the switch pcb. i’m planning on running 2 data lines, one for the blade, and one for the crystal, pixel strip over the board, and the switch neopixels. does that mean i use the Do pad to chain to the rest of accent pixels or do I have to use both the Do and the Din pads?
Yes you would us DO to put them in series, in turn making them individually assessable using subblades with proffieI’m still a little confused on how to wire the switch pcb. i’m planning on running 2 data lines, one for the blade, and one for the crystal, pixel strip over the board, and the switch neopixels. does that mean i use the Do pad to chain to the rest of accent pixels or do I have to use both the Do and the Din pads?
But you need to make sure that the chamber led is RGB not RGBW
RGBW pixel have a little yellow spot in them
Reckreational
New Member
got it. and Im working through the install following Goth 3Designs’ guide and I’m wondering how he managed to connect power to everything despite not having the switches wired up and the circuit seemingly terminating at the pixel strip. did he connect the pcb and chamber pixel power lines to another pad cause the strip is connected to the Batt+ pad already but he has power to the chamber pixel and they dont seem to be chained together.Yes you would us DO to put them in series, in turn making them individually assessable using subblades with proffie
But you need to make sure that the chamber led is RGB not RGBW
RGBW pixel have a little yellow spot in them
I just cannot for the life of me find a good way to chain everything together.
Attachments
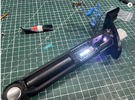
Here’s my install for anyone who wants an idea of what the process is like. I didn’t include every detail of hilt/chassis prep, so if you have questions feel free to ask away. I will try to answer any questions I can for installation or assembly. Hope everyone else is, or will soon be, enjoying their saber as much as me!
maly93 Hello, I sent you a message with a question. Thank you!
imawilliamray
New Member
got it. and Im working through the install following Goth 3Designs’ guide and I’m wondering how he managed to connect power to everything despite not having the switches wired up and the circuit seemingly terminating at the pixel strip. did he connect the pcb and chamber pixel power lines to another pad cause the strip is connected to the Batt+ pad already but he has power to the chamber pixel and they dont seem to be chained together.
I just cannot for the life of me find a good way to chain everything together.
I can't speak to how Goth3D did it, but you'll probably have to create some joints to split off the + line. I personally joined the main blade and crystal chamber together, joined the button power and kill switch together, and then joined those all together. It was definitely the least clean part of my install and the main thing I struggled to figure out.
Slight aside - don't skip wiring up the non-pixel white LEDs on the switch PCB. I figured "oh I'll just set the pixels to white" and skipped the regular white LEDs. I completely regret that because the RGB pixels can't really get a good "white" color on their own.
satoshi71100
New Member
sabertrade can't make a straight blade? 
Does anyone else have this problem? Thanks


Does anyone else have this problem? Thanks
DonPabloSancho
New Member
Yeap mine is slightly off as well
satoshi71100
New Member
that's a shame ! she are cute! like everything else! but it just piqued my eye at the momentYeap mine is slightly off as well
DonPabloSancho
New Member
Doesn’t really bother me though. I don’t notice it when I’m swinging it around. This is easily be fav out of all that I’ve built so far
No issue with mine, maybe use a heat gun to straighten it out?sabertrade can't make a straight blade?
Does anyone else have this problem? Thanks
View attachment 1703184View attachment 1703185View attachment 1703186
Using a heat gun won’t do anything. Was recommended to bend it over my knee and hold it for a minute or two to try and straighten it outNo issue with mine, maybe use a heat gun to straighten it out?
Similar threads
- Replies
- 0
- Views
- 765
- Replies
- 61
- Views
- 9,622
- Replies
- 668
- Views
- 137,403
- Replies
- 2
- Views
- 751
- Replies
- 603
- Views
- 101,460