Ressikan (or Kataanian) Flute and Box - Walking the Line

Astyanax

Sr Member
RPF PREMIUM MEMBER
Hi all:

Last year was my first opportunity to participate in the RPF Secret Santa thread, and it was a lot of fun! What I did not expect was that this became an opportunity to push myself in ways that I had not expected, and to learn several new skills!
  • How to sand metal to a fine polish
  • How to make easy circular masks
  • How to make tassels
  • How to tie a whipping wrap
  • How to easily transfer a printout to styrene plastic
  • How to sponge paint
  • How to spatter (not splatter) paint
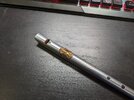
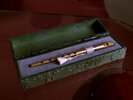
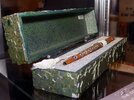
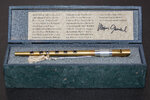
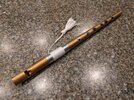
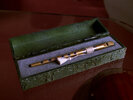
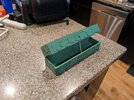
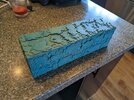
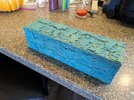
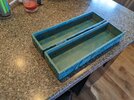
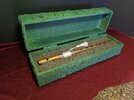
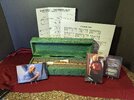
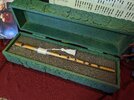
I built Picard's Ressikan Flute and storage box from the Star Trek: The Next Generation Season 5 episode "The Inner Light". The Ressikan flute played by Picard is a relic that was very special to him, and the prop made an appearance a few more times (with changes) after that (including the movie, Star Trek: Nemesis).

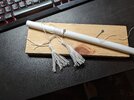
PXL_20231205_195336287.jpg

My interpretation of the Ressikan flute and box.

I hope to use this thread over the next few days to document my full build, as I took photos all along the way. I also intend to share a few thoughts about some of the decisions that were made along the way.

BACKGROUND:

The original prop was not playable. It was a piece of rolled sheet metal modeled after the original “Clarke Tinwhistle.” This means that Patrick Stewart had to fake it, and the music was dubbed in later. But it is so similar to the real Clarke that a playable version is an option, for a very small sacrifice of accuracy. In fact, some RPF users have used the same whistle to make their own, and Morgan Gendel (one of the TNG Ressikan flute’s creators), made several replicas based on the Clarke whistle. The Clarke is as accurate as you can get if you want it to play music. And yes, it CAN play Picard's Kataanian tune!

PXL_20231110_004147165.jpg
A "200th Special Edition" Clarke Original
Tinwhistle in the key of D.

You might also notice that the Ressikan flute looks a little different in subsequent episodes. It also looked different in Star Trek: Nemesis and later as offered at auction, with metal grommets around the finger holes and such. This is due to the fact that the flute was modified several times during TNG’s run before it was finally sold at auction for $45,000. I chose not to go for the newer look, but instead opted to stay mostly with the purity of how it looked at the end of the original episode when Picard took it out of the box and held it to his heart.

Star.Trek.The.Next.Generation.s05e25 - The Inner Light.mkv_snapshot_43.37_[2023.11.29_17.50.10].jpg
Picard with the flute,
his gift from the people of Kataan.
lessons-hd-509 (1).jpg
Screencap from Season 6
episode "Lessons".​
DSC04213.jpg
Original prop sold at auction
after many modifications.
2014-05-26_Replica_of_'Ressikan_flute'_by_Morgan_Gendel_IMG_1458.jpg
Morgan Gendel's replica.

WALKING THE LINE:

There's hardcore accuracy on one end of the spectrum, and then there's in-universe idealization on the other. I chose to walk that tightrope, by getting as close as I possibly could to prop accuracy, but I did NOT want to sacrifice any aspects that would make it feel more real to the character of Picard himself. I was aiming for a Kataanian artifact for one type of museum, NOT a collectible prop for another type of museum!

As an example, although the first prop version of the flute is more shiny than my final version, it's supposed to look and feel a bit older, not so pristine. The last versions of the prop were certainly more dulled!


In the next day or so, I will post step-by-step photos of my process, along with any useful observations I found along the way.

Hope you enjoy! This was truly a labor of love that I approached very slowly and carefully, because I love that episode so much. Although it was a gift, I also made a second flute at the same time for myself. :)
Bill
 
Last edited:
I've mentioned in other threads that this is one of my favorite props, and I always love seeing what people do with it. I'm excited to see your take! I like that you're targeting the early version but playable, very reasonable stance.
 
CREDIT:

I want to thank the following users who posted their own builds on the RPF and contributed to the build threads, and from whom I borrowed much inspiration (or otherwise ripped off shamelessly)!
The build threads:


And another shout-out especially to Hylo133, who gave me some awesome pointers on color choices and how to pull off the spattering on the box!
 
THE FLUTE:

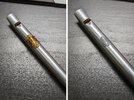
This version of the Clarke whistle has an elaborate plastic seal on the top. I thought it would be a simple matter to remove. It was not!

Once I pulled off the metal top seal with some pliers, I found there was some kind of resin glue that held it on the flute, and it was not coming off! (Perhaps J-B Weld?)

PXL_20231110_004157636.jpg

The glue held on like it was one piece with the flute, so I spent the better part of an hour using hard blades to cut it off. I found I had much better luck just settling in with sandpaper and elbow grease.

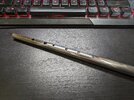
Once I managed to get that off, I found that the flute has been finished with three layers: A shiny clearcoat on top of a satin grey/silver paint, on top of primer. I wet-sanded the whole thing with 400-grit.

PXL_20231110_040558309.jpg

I don't have a picture of the underside at this point, but the flute has a very coarse seam on the bottom, with one layer almost overlapping the other. I know some other Ressikan flute makers have worked to hide that seam, but I thought the rustic-ness of it added to its charm. The original prop was made from a piece of rolled sheet metal, and the seam on the Clarke whistle makes the flute seem more hand-made. I liked that. And if our own flutes don't hide their seams, why should the Kataanians'?

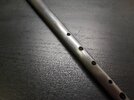
Knowing that I would be showing bare metal around the holes of the flute, I proceeded to wet-sand over the holes with 600, 800, 1200, 1500, and 2000 grit sandpaper, which provided a beautiful mirror finish in that area. I thought bare metal would work better than painting chrome all over the whole thing, and I wanted as few layers as possible.

PXL_20231111_193544161.MP.jpg

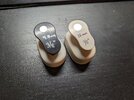
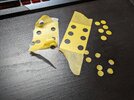
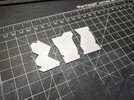
Each hole was going to need a circular mask around it (some of varying sizes) so that the bare metal would show through. I did not want to hand-cut my own masks, so I picked up these hole punches from Amazon:

PXL_20240227_022625947.jpg

These two sizes (3/8" and 1/2") provided the masks I needed to cover my holes.

Punching through masking tape was my first idea. It did not work well, because the blade of the punch wants to grab the tape, not cut it. So I stuck a piece of the masking tape on parchment paper and punched through that, with much better results. I now had stickers!

PXL_20231114_005904463.jpg

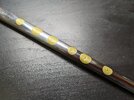
Using tweezers, I very carefully placed my circular masks.

PXL_20231114_013408043.jpg

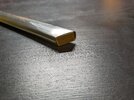
There is also a nicely finished wood block in the mouthpiece. It was necessary to mask that off too.

PXL_20231114_013436642.jpg PXL_20231114_013414579.jpg

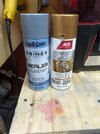
For prime, I chose Dupli-Color Sealer Primer, which is a very fine primer that can create a very thin layer. For the "gold", I went with ACE Hardware Antique Gold; I wanted a darker-toned gold that wasn't excessively shiny.

PXL_20231114_014823360.jpg

Then I attempted to paint the flute rather quickly, not planning to wait too long between layers. I did this because I knew I would want to remove the masks while the paint was still soft, so that my masked lines would be sharpest. On a low-humidity day, the paint sets faster and I knew I could get away with it.

PXL_20231114_015450680.jpg PXL_20231114_021738485.jpg

And then I peeled off the masks and let it dry several days. The gold paint went on the flute a little grainy, but I liked the texture regardless.

PXL_20231114_021825641.MP.jpg

Once fully dry, I buffed the whole flute very roughly with a very soft rag to increase the shine just a bit. There were a couple spots on the wood mouthpiece block where gold paint had leaked through, but some alcohol and swabs cleaned that right up.

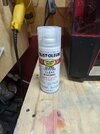
After that, I re-masked the wood parts only, and clear-coated the whole flute with Rustoleum Crystal Clear.

PXL_20231114_035540595.jpg

This did have the effect of taking away some of the shine, but it really needed the protection if it was going to be handled! The bare metal parts still looked good!

With the main body of the flute complete, it was time to put all the details on it.

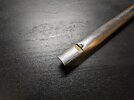
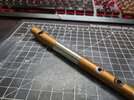
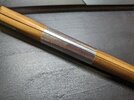
I started with a carefully cut piece of aluminum tape. The flute tapers from large to small diameter, so a rectangle of tape was not going to work. I cut a piece of paper to the shape I thought might work (kind of a conical trapezoid), and test-fit and re-cut over and over until I had a template I liked.

I then traced around the template onto a piece of the aluminum tape, and cut it out. It took a lot of practice; I had to do this several times before I got it right. I was so glad the clearcoat protected the finish! The seam for the tape is on the bottom, aligned to the seam of the flute.

PXL_20231116_012400138.jpg PXL_20231204_174424765.jpg

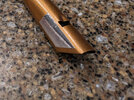
I did the same with the silver polygon shapes on the sides of the mouthpiece: template, then tape. It also took several tries!

PXL_20231205_052649457.jpg

At this point, I decided to quit while I was ahead, shift gears, and work on the box (will post that soon)!

After the box was mostly completed, I came back to the flute and went hunting for tassels and thread. I had no luck finding tassels I liked, because most of them were far too fine a thread material, and didn't look right. I realized I was going to have to make the tassel myself. I focused first on a thread for the wrap, and landed on Size #3 DMC Pearl Cotton thread, which has a subtle shimmer to it (which is what I was seeing in the reference photos). It also seemed to be approximately the same gauge as the thread on Picard's flute.

For the wrap, I settled on a "whipping" wrap and knot. I really wanted the wrap to be self-contained, tight, and with hidden knots. This video helped me accomplish that:


The tassels were going to be of the same material, so I found this video to learn the technique:


After that, it was much practice.

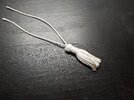
PXL_20231205_024949001.jpg

And then, after five or six attempts of tassels and wraps, I was producing results I liked!

PXL_20231205_033213748.jpg

The front end of the wrap was left with a few inches of thread dangling, as is seen in the prop. I used a rather crude couple knots to join the tassel to the dangling thread at the right distance.

PXL_20231205_052326059.jpg

This "crudeness" of the joined knots is intentional, because it can be seen in the prop quite a bit. I do not think it was an elaborate connection at all, but more of "however you can join these things" tie-up.

000011.jpg

At least that's the case for the first version. Subsequent mods of the flute show not only a much longer string to the tassel, but also a cleaner knot.

DSC04203.jpg

But I was aiming for the first appearance look: rustic is better! I also dabbed some white glue on those knots to really secure them.

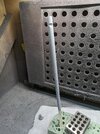
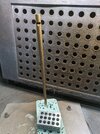
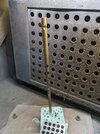
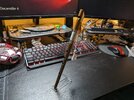
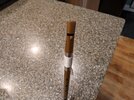
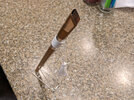
And with that, the flute was done! I picked up a pen stand from Amazon to display it vertically

PXL_20231205_052410634.jpg PXL_20231205_052614786.jpg PXL_20231205_052620319.jpg PXL_20231205_052641141.jpg

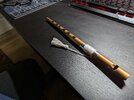
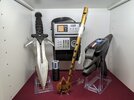
And, having made two, I placed one in my own Star Trek collection!

PXL_20231205_053132496.MP.jpg

Next post will be about the box, which was a much bigger project!

Thanks for reading!
Bill
 
Last edited:
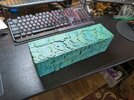
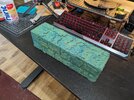
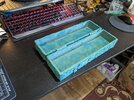
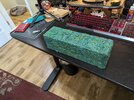
THE BOX:

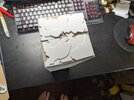
The box for the Ressikan flute is a mishmash of geometric layers, as well as many painted layers:

lessons-hd-509 (1).jpg

To begin, I picked up some pieces of 3-1/2" and 1-1/2" width of 1/4" thick poplar boards from Home Depot.

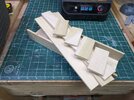
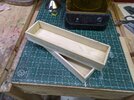
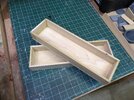
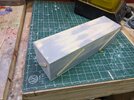
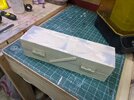
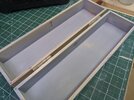
Using online auction pics of the original prop box as a reference, I planned a box that was 12-1/2" long, 3-1/2" wide, and 3-1/2" tall. That necessitated two equal halves at half height, sized as you see here:

PXL_20231107_041139763.jpg

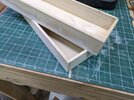
Then I assembled the box halves using a nail gun and wood glue:

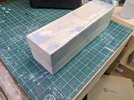
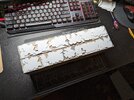
PXL_20231107_041035297.jpg PXL_20231108_004449198.jpg PXL_20231112_004913324.jpg

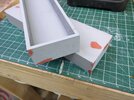
Next, I Bondo'd all the seams and imperfections I could find, and sanded everything to 400 grit smooth.

PXL_20231108_181532437.jpg

I even thought I could inset some 5/32" magnets into the corners, but those proved too weak to be very effective.

PXL_20231112_004922552.jpg

What followed was about three rounds of primer, spot putty, and sanding again. I made sure top also cover up all my nail gun holes. These repeated steps helped me hide pretty much all the wood grain in the finished product.

PXL_20231112_234146756.jpg PXL_20231113_204210597.jpg

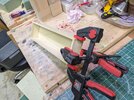
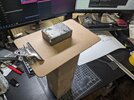
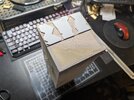
Next, I wanted to sand both halves even with each other (to prevent lips and overlaps) so I hot glued popsicle sticks to hold the box stiff and closed for my sanding. This was to also help me get my hinges aligned properly.

The hinges were acrylic self-adhesive from Amazon.

PXL_20231113_215649840.jpg PXL_20231113_221904378.jpg

Then I selectively removed popsicle sticks from each side, sanding the two halves even with each other.

PXL_20231113_223703975.jpg PXL_20231113_223656245.jpg

One more round of putty and sanding, and I was ready to work on the decoration of the box. I took a break at this point to go back to work on the flute. :)

For the layered patterning of geometric shapes on the box, I spent quite a few hours looking at not only the auction photos, but also Hylo133's very helpful thread on his build. Between those two sources, I believe I have gotten the shapes VERY close to authentic.

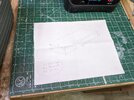
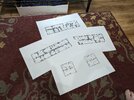
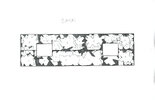
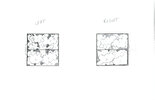
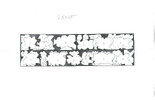
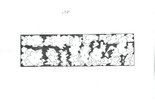
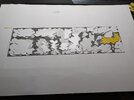
The first step was to sketch the shapes on actual-size printouts of the box faces. I also numbered them by what I determined to be their layers.

PXL_20231122_054309978.jpg

Once I was done, I had these five patterns, which can be printed at 1:1 on 11"x17" paper for anyone who wants to make an attempt!

BRWDCA2662D2233_0000003844.jpg BRWDCA2662D2233_0000003845.jpg BRWDCA2662D2233_0000003846.jpg BRWDCA2662D2233_0000003847.jpg

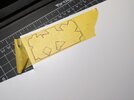
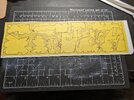
I next selected my plastic, which is a cheap "No Parking" sign from Home Depot. I had to buy two.

PXL_20231122_164050322.jpg

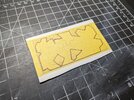
To transfer the pattern onto the plastic, I FIRST MADE COPIES of the pages!

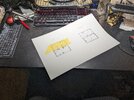
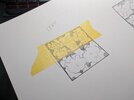
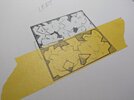
Then I placed a piece of masking tape over the surface I was going to start with and traced the bottom layer of plastic, using a thin Sharpie and a ruler.

PXL_20231122_162555893.jpg PXL_20231122_162925885.jpg

I net carefully peeled the tape off the paper and laid it on the back of my sign plastic:

PXL_20231122_164238625.jpg

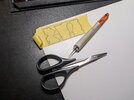
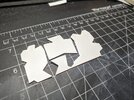
And then I cut through the pattern, using a combination of Lexan scissors and the Exacto knife "snap and score" technique.

PXL_20231122_165318104.jpg

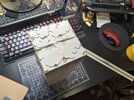
I then laid the shapes on the surface, eyeballing them to follow my pattern, and glued them down with CA glue.

PXL_20231122_170208264.jpg PXL_20231122_170636133.jpg

Once layer down! Here's the next:

PXL_20231122_170959994.jpg PXL_20231122_171109173.jpg PXL_20231122_171147501.jpg PXL_20231122_172433587.jpg

One layer on one side done! I sanded this surface with 400-grit sandpaper, which helped clean up the cuts quite nicely. And then I went on to Layer 2, which is the next level up, using the same technique (and again sanding the surface clean):

PXL_20231122_181246680.jpg

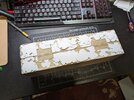
I repeated this process for all the sides, in most cases having to do three layers.

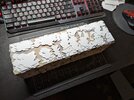
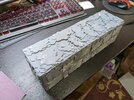
PXL_20231122_223117648.jpg PXL_20231126_201338608.jpg PXL_20231127_211252538.jpg PXL_20231127_232642611.jpg
PXL_20231127_232714366.jpg PXL_20231127_234136320.jpg PXL_20231127_234554707.jpg PXL_20231127_234706566.jpg

And then I gave the whole box a light primer coat and sanded once more! This was a light sanding, still at 400-grit, and I looked closely for any flaws to fix now with Bondo Spot Putty.

PXL_20231128_171331288.jpg

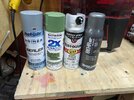
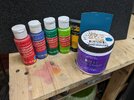
These are all the paints I used for coloring the box:

PXL_20231204_171916356.jpg PXL_20231204_175052777.jpg

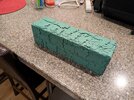
To start, I gave the whole box a "primer" coat of Rustoleum Painter's Touch 2x in "Moss Green," inside and out.

PXL_20231130_011953973.jpg PXL_20231130_012013734.jpg

Next, I lightly sponged on the entire box with Behr "Antigua," aiming for 40%-50% coverage.

PXL_20231202_185905286.jpg PXL_20231202_185909702.jpg PXL_20231202_185923853.jpg

Following that, I sponged on just a bit of thinned Apple Barrel "Apple Tart", aiming for maybe 10% coverage. That gives a yellow-green you see here:

PXL_20231202_222927735.MP.jpg PXL_20231202_222939689.jpg PXL_20231202_223012175.jpg

I then decided to quit while I was ahead, and locked it all in by giving the whole box a layer of matte clearcoat. I went back to working on the flute!
 
Time for spattering! This is not to be confused with "splattering", which is what you do for blood or mud. "Spatters" are carefully placed dots of paint using one of several different techniques.

After watching this video...


...I gave it some practice, and came to the conclusion that my preferred technique was to hold a wood dowel horizontal about 8-10" above the surface, and tap it with the paint-saturated brush. Different strengths of tapping and wetness of the brush gave me different dot sizes. I used a medium-sized round brush. I also used the toothbrush technique in some areas for variety.

PXL_20231203_233024004.jpg PXL_20231203_233029076.jpg PXL_20231203_233100836.jpg

These were my colors:
  • Behr Antigua, darkened with AB Navy and Black. Thinned about 50% (medium coverage).
  • Behr Antigua, darkened MORE with AB Navy and Black. Thinned about 50% (light coverage).
  • AB Grass Green, darkened with Black. Thinned about 50% (medium coverage).
  • AB Bright Red, darkened with Black to very dark red. Thinned about 50% (light coverage).
  • MT Yellow Ochre, thinned more than 50% (light coverage).
When this was all done, I dusted the whole box with a VERY light coat of Rustoleum 2X Moss green again, to mute all the colors just a enough to tie it all together, and then gave it another layer of matte clearcoat.

PXL_20231204_165732353.jpg PXL_20231204_170012411.jpg

Paint job done!
 
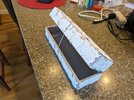
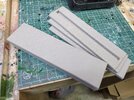
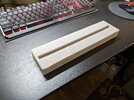
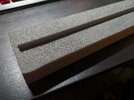
For the interior of the box, I cut three grey polyethylene foam pads (0.4" thickness from Amazon) to fit the box. I cut the hole for the flute in the top layer only, with a VERY sharp X-acto knife. And then I hot-glued the pads together.

PXL_20231204_045515952.jpg PXL_20231204_165533315.MP.jpg

I gave the pad a light dusting of Behr Metallic "Soft Iron" satin spray (it's what I had), to give the foam it's characteristic slightly shiny finish.

PXL_20231204_180355572.jpg

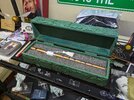
A little bit of hot glue to hold the pad in, and the box was done!

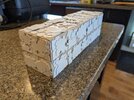
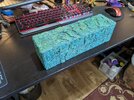
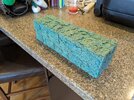
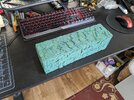
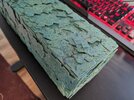
PXL_20231205_143925642.MP.jpg PXL_20231205_185031276.jpg PXL_20231205_185723916.jpg PXL_20231205_195345506.MP.jpg
 
This is really awesome work! Great to see it all come together!

And glad I was able to be of help. This is such a fun prop to build.
 

Your message may be considered spam for the following reasons:

If you wish to reply despite these issues, check the box below before replying.
Be aware that malicious compliance may result in more severe penalties.
Back
Top