Sym-Cha
Master Member
Re: (Re)finishing a Vader Saber
Hi Clutch,
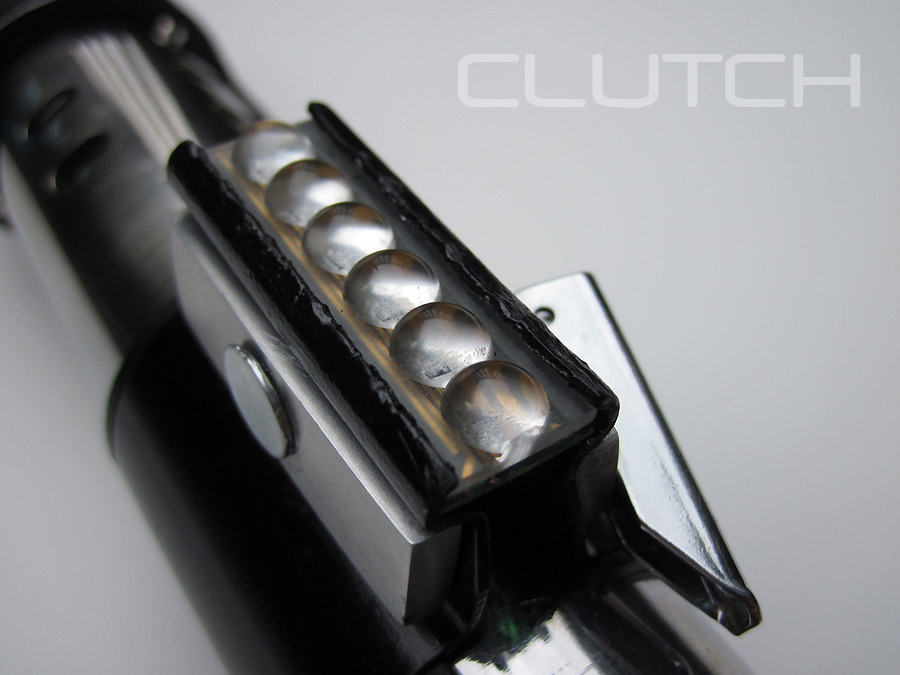
It does seem that the bubbles lay on top of the real MPP clamp or perhaps just stuck in one side of the clamp not both, also if you look to the first lightsaber MPP picture then there are no bubbles present at all!!!
So someone must have realised this and then they were added to the MPP for the second photograph? :confused
In the pictures of the real ROTJ MPP you can clearly see them stuck underneath the clamps with an additional part of the calculator board.
Also the endcap on a real MPP is straight with the rest of the body, and this is also a perfect 'tell' to distinguish a replica form a real MPP, so the T-track grips lay totally flat
-Chaim
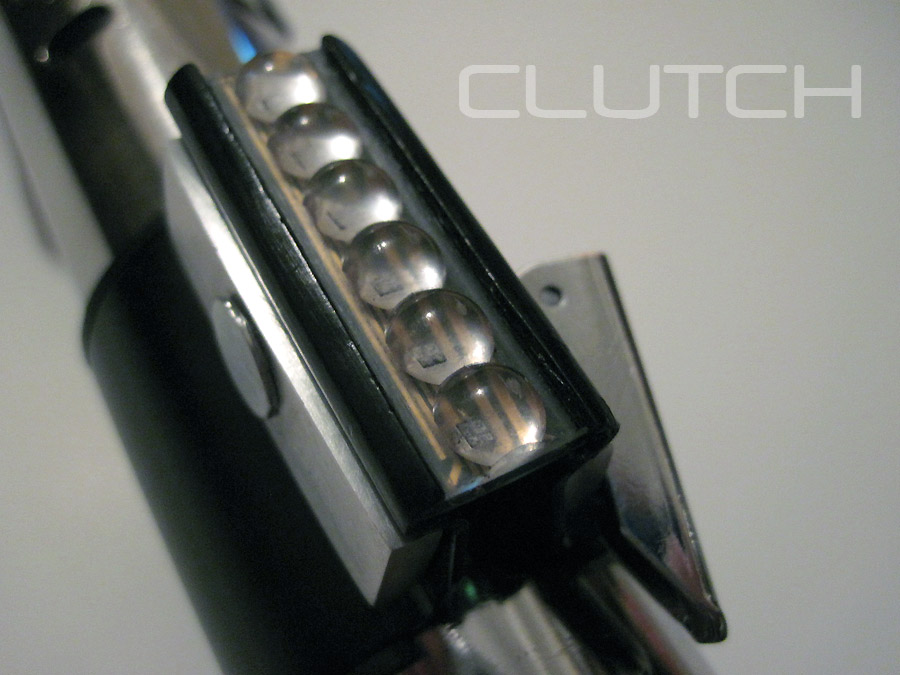
Hi Clutch,
It does seem that the bubbles lay on top of the real MPP clamp or perhaps just stuck in one side of the clamp not both, also if you look to the first lightsaber MPP picture then there are no bubbles present at all!!!
So someone must have realised this and then they were added to the MPP for the second photograph? :confused
In the pictures of the real ROTJ MPP you can clearly see them stuck underneath the clamps with an additional part of the calculator board.
Also the endcap on a real MPP is straight with the rest of the body, and this is also a perfect 'tell' to distinguish a replica form a real MPP, so the T-track grips lay totally flat
-Chaim