Question about the paint process when using McKenzie transparent iridescent paints

modelerdave

Sr Member
I haven't used these paints on any other project, and before I dive into the 1/350 refit (that's at least a year off), I wanted to use them on something with a less complex pattern.

I have a Mobius 1/72 Orion space clipper that I want to use these paints on in lieu of more standard blues reds, golds, etc. paneling. I saw photos of someone else who had done this and it looked great, though I have been unable to find those pictures since. I know it's not the way the studio model was painted but that doesn't concerned me.

I have the model primed and base coated with Krylon flat white. I will do some polishing with a 4000 grit sanding pad to get the finish even smoother, but here's where I have questions. This will also help me whenever I get around to the refit, so thanks for any guidance.
  1. Should I put a gloss or satin coat down first? I would prefer not to because one of the effects I am looking for is specular highlighting or variation in sheen. In other words, I would like the flat white areas to keep the matte finish and have the iridescent panels have a gloss finish.
  2. If I don't put down a gloss coat, what is the best way to handle decals? Should I try to spot-paint a gloss finish to help them better adhere and reduce the chance for silvering? Then spot-paint a matte finish when they're dry?
I was going to start experimenting but then decided before I go fumbling around I should probably ask the experts here who have done this before!

Thanks for any help you can provide!

(I painted the body and wings separately because I didn't want the grainy "splash" problem when using a rattle can and trying to get coverage into a 90 degree angle.)

6sCt3sah.jpg
 
Looks like it’s might be a lot of experimenting on different scraps. Trial and error. I’ve never tried this but I’m definitely interested.
 
Looks like it’s might be a lot of experimenting on different scraps. Trial and error. I’ve never tried this but I’m definitely interested.
Yeah, I was hoping for some guidance from others who built the Enterprise refit but no such luck apparently. I am having trouble getting a smooth satin finish on the wing assembly. The main hull came out great with the satin, but the wings are slightly pebbly. I may not have let the base white coat dry long enough. I'm going to give it another day to really dry and then I'll lightly sand it back smooth. I'll repaint if I have to, but I hope not.

The MacKenzie iridescents I have are the acrylics. I did some tests and they seemed a little grainy. That may be just the way it is with iridescent paints since I'm guessing the pigments are relatively large compared to regular paints in order to get that shimmering from different angles effect. I did order one of the Mackenzie lacquers to do a comparison. It just got here but I'm not ready to test it yet.
 
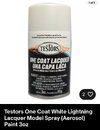
This is definitely out of my wheelhouse but if it were me I’d give this a shot as a base coat. I’ve tested it on some scrap and I plan on using it for my Enterprise refit 537 scale when I get around to it. As a base coat I think.
 

Attachments

  • IMG_5504.jpeg
    IMG_5504.jpeg
    495.4 KB · Views: 52
I honestly have never heard of McKenzie paint before, so I have no idea how well they go on, I assume you will be using an airbrush. Do you want to put a clear coat on top of the base before adding the iridescent? I believe I have seen 350s both with the aztec pattern on a clear coat and some that the iridescent is applied directly over the base. Both looked good. If it were me, I would probably put a thin coat of matte or satin and then the aztec pattern. Air brush is the key though... no rattle can clear coats. I also use rattle cans for the base coat on occasion, in my opinion they are a bit more aggressive and attached to the surface better than any of the airbrush base coats that I have tried... but after that, rattle can is usually tabu.

If you want to keep the base white matte, then I would avoid a gloss coat. If I remember correctly, the iridescent colors are not perse glossy, they only gleam when the light hits them just right... but again that may very well differ depending on the iridescent paints being used. At least for the 350 Refit, the decals should go on after the iridescent aztecing. Before sealing that all in, I would still do a couple spoons with aztec iridescent patterns and different clear coats to see which works best, just to be on the safe side.
 
Last edited:
Unfortunately I'm not at that stage in my refit build yet, I'm still in lighting and interior hell. I made the bright decision to go with a completely bespoke custom made Arduino controlled rig that I'm doing myself. Did I mention this is the first time I'm lighting a model or working with Arduino... Ever.

As far as the paint job, my understanding is that you want a super smooth base. It doesn't actually need to be gloss, but you want to sand it as smooth as the proverbial baby's bottom. If you look up Ian Lawrence Enterprise Refit build, you should find his build log,with a wealth of information.

As far as decals go, my plan is to avoid them entirely. I'm going to try to paint as many of the markings as humanly possible, and I'm planning to have custom dry transfer decals made for what's left. The dry transfers are not cheap, but it's totally terrible in comparison to how much I've spent on the rest of the project (I'm very far north of a grand at this point).
 
you want a super smooth base.
Very true. Especially for the 350 refit saucer section... it is huge and everyone will be looking at it at just the right angle to immediately see any imperfections. The base coat is important, a lot of base paints go on too thick or dry to fast. For projects that need a perfect finish, I like to use a leveling thinner (about 1:1 ratio). Don't ask me how it chemically differs from normal thinner, but I can recommend it. It makes the paint dry slower and with that gives the paint a chance to smooth itself out, saving you sanding work later. What ever brand you choose, make sure it explicitly says "leveling", I like to use the leveling thinner from Mr. Hobby, not because it is better than all the rest, but only because it is the first one I tried and was happy with the results.

1736673250492.png


custom made Arduino controlled rig that I'm doing myself. Did I mention this is the first time I'm lighting a model or working with Arduino... Ever.
Good for you! :) I love putting an arduino in my models, it just gives you soooooo many options. I usually code everything on my arduino and then export the code to an ATmega328 chip (which is the same chip on the arduino), and put that in the model instead of a whole arduino... it is cheaper and requires less space. If you are planning a lot of various patterns, then you might want to consider hooking up a Texas Instruments TLC5940 LED controller chip to the arduino. It gives the arduino 16 more PWM pins to work with, and if that is not enough, you can just forward the wires to another TLC5940 adding another 16 pins, and again and again. This is limited only by the amount of current you are running into your model. I have a diagram in my Argo build, if you are curious.
 
Last edited:
If you look up Ian Lawrence Enterprise Refit build, you should find his build log,with a wealth of information.
Yes, Ian's work is great, definitely a great research source. After you mentioned it I wanted to revisit some of that. I noticed that his website (http://www.ianlawrencemodels.com/) is no longer available, but his YouTube channel is still up.

modelerdave check out this YouTube channel at about 9 minutes, he goes into using different iridescent paints and matte clear coat vs others... just what you were asking about. If I am not mistaken, the "Taxidermy Paint Company" that he is talking about is the McKenzie colors that you mentioned in your title.

And, last but not least, here Orbital Drydock listed his method:

1) I use Tamiya Fine White Primer as the base coat. Wet sanded with 800-1000grit. Clean up work on the aztecs is very light & only where needed. I lightly wet send with 2000grit for the clean up.

2) Alclad Klear Kote all sheens are lacquer. I believe the transparent medium is an acrylic, similar to Tamiya clear acrylic.

3) That's a pretty interesting idea. Kind of similar to the different metal finishes on the NX-01. There might be one issue. When you final clear coat after decals, you might loose the variations in sheen. Test, Test, Test.......

If you go the full acrylic aztec route, it's safe to top coat with future. If you go Alclad lacquer aztecs, definitely top coat with Alclad lacquer.
 
Last edited:
Yes, Ian's work is great, definitely a great research source. After you mentioned it I wanted to revisit some of that. I noticed that his website (http://www.ianlawrencemodels.com/) is no longer available, but his YouTube channel is still up.

modelerdave check out this YouTube channel at about 9 minutes, he goes into using different iridescent paints and matte clear coat vs others... just what you were asking about. If I am not mistaken, the "Taxidermy Paint Company" that he is talking about is the McKenzie colors that you mentioned in your title.

And, last but not least, here Orbital Drydock listed his method:
Thank you! This is great info.
 
Very true. Especially for the 350 refit saucer section... it is huge and everyone will be looking at it at just the right angle to immediately see any imperfections. The base coat is important, a lot of base paints go on too thick or dry to fast. For projects that need a perfect finish, I like to use a leveling thinner (about 1:1 ratio). Don't ask me how it chemically differs from normal thinner, but I can recommend it. It makes the paint dry slower and with that gives the paint a chance to smooth itself out, saving you sanding work later. Make sure it explicitly says "leveling", I like to use the leveling thinner from Mr. Hobby, not because it is better than all the rest, but only because it is the first one I tried and was happy with the results.

View attachment 1895455


Good for you! :) I love putting an arduino in my models, it just gives you soooooo many options. I usually code everything on my arduino and then export the code to an ATmega328 chip (which is the same chip on the arduino), and put that in the model instead of a whole arduino... it is cheaper and requires less space. If you are planning a lot of various patterns, then you might want to consider hooking up a Texas Instruments TLC5940 LED controller chip to the arduino. It gives the arduino 16 more PWM pins to work with, and if that is not enough, you can just forward the wires to another TLC5940 adding another 16 pins, and again and again. This is limited only by the amount of current you are running into your model. I have a diagram in my Argo build, if you are curious.

MLT is magical stuff. I don't know what they put in it either, but it's saved a build on several occasions when I got a little too enthusiastic on the trigger.

Thanks for the tip on the LED controller, I'm my specific application, it's not needed, since I'm using an Adafruit Grand Central M4 board which has a crap-ton of outputs (and I'm also using addressable LEDs for as many functions as possible). The board is rather large (for an Arduino), but I'm putting it in the base.

I'm sad to hear Ian's website is no longer available, I wonder if it can be found on the Way back Machine? His passing was definitely a loss for the community, he was an incredible builder.
 
His passing was definitely a loss for the community, he was an incredible builder.
very. :(
The board is rather large (for an Arduino), but I'm putting it in the base.
No intention of high-jacking the thread, but this may be interesting for Dave's build as well... I tried a couple pre-made boards back in the day, some were good, others less good... but nothing that could not be recreated on an arduino for a fraction of the price. Don't get me wrong, it is not the price that turned me away... developing is a lot of work and the boards were (for the most part), worth every penny. The downside is that you have to accept whatever the board gives you. On top of that, they are usually difficult if you want to integrate them into a larger concept, ie. make an LED somewhere else on the model that blinks at exactly the same frequency as the one on the pre-made board.

I usually have 3 little connection holes on the model surface or the base, that are attached to the microcontroller inside the model , each hole a little thicker than a needle. That way if I decide to tweak my code years later, all I need to do is hook up an arduino to my model and upload the new code.
 
Last edited:
Ok, last post for today and then you guys will be free of my jabbering. ;)

I found it strange that I could not tag Orbital Drydock on the post above. His profile says active but not around for a while. Not being able to tag someone usually does not mean anything good. I hope everything is ok with him. At any rate, he did quite a few 350 Refits, and on his youtube channel he has a nice guide how to use the aztec mask that he had for sale. Here is the video with the undersaucer, but there are others that touch the topic, so make some popcorn before starting.

I remember, he actually made a spacedock to scale with the 350 Enterprise (the one you see in the motion picture... hence the name) but I cannot find any posts to that anymore but there are some of his 350 builds here if you do a search.
 
Back
Top