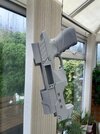
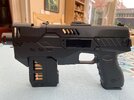
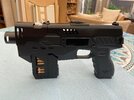
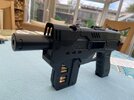
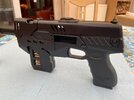
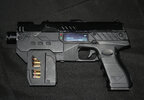
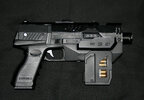
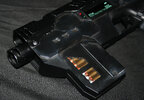
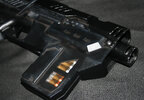
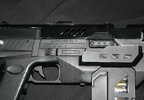
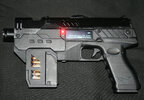
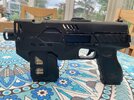
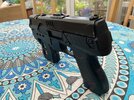
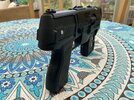
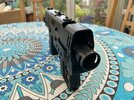
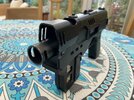
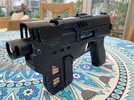
Props3D - Dredd 2012 interactive Lawgiver

wayouteast

Sr Member
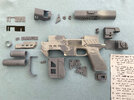
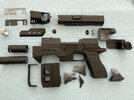
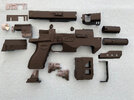
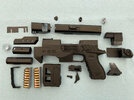
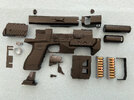
After 175+ hours of printing on my basic little Elegoo Mars printer I finally have all the parts printed for Props3D 's fantastic interactive Dredd Lawgiver and I can finally start to build this beautiful replica. I shall be using his brilliant build thread as well as the videos he's generously making available on his YouTube channel to those of us who are embarking on our own builds!

Printed-parts-marked.jpg


My electronic skills being extremely basic, I cheated and ordered the electronics for the kit ready-built (thanks to BeakZ for those!) so I hope I can do them justice with the 3D printed parts and integrate the interactive functions (OLED display with ammo counter, voice recognition for changing fire mode selection, neopixel LED muzzle flashes, accurate sounds, ID check and reload) perfectly into the finished gun.

The various parts of the gun were all printed using Elegoo grey ABS-like resin, which is tougher and less brittle than standard resin, and they seem quite resilient, even the thinner and more delicate parts. I used a 0.03mm layer height and 8s exposure (60s for bottom layers). All the parts were orientated and supports added in PrusaSlicer and sliced in Chitubox. I only had a couple of failed prints along the way (due to me orientating the parts wrongly the first time around) and mostly the parts printed up really well.

Because I have the first model Elegoo Mars, which only has a very small print volume, I had to cut the two largest parts (the main body of the gun and the rear shroud) in two to fit on the print plate. I did this in Meshmixer. Even then, the available print volume for the resultant split parts was so limited that I couldn't print them at their optimal orientation and had to place them in the 'best available' position (often the only way they'd fit). This left some larger than I would like horizontal overhangs which, despite adding as many supports as I could fit there, didn't print perfectly. In general, though, those parts printed really well, and once they're securely attached to each other I'm pretty sure I'll be able to fix the 'damaged' areas with some judicious filling, sculpting and sanding. I'm hoping they won't be visible at all on the finished piece. The problem areas are ringed in red on the photo.

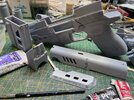
All the parts have been cleaned up, dry-fitted, filed and sanded, drilled and tapped for screws, and a final dry fit done to ensure they all fit together and the moving parts have clearance to move against each other. The parts are beautifully engineered and required minimal clean-up, and they print as well in resin as they obviously do in plastic. They all feel nicely sturdy and the gun has a nice heft in the hand for a resin model.

Today, I've pinned and glued the parts of the main body together and glued the rear shroud halves too. I've also added some small magnets to the front of the magazine and its socket in the front of the frame. The clever magazine locking mechanism that Chris has designed feels quite secure anyway, but the magnets will hopefully just give the magazine a bit more 'grip' at the front and prevent any chance of it falling out and breaking when I'm punishing perps! :D

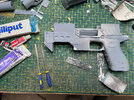
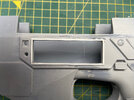
Tomorrow I'll dry-fit the gun together again and start to fix the misshapen areas from the printing with a combination of Milliput (for the larger gaps) and JB ColdWeld, especially where structural strength is a factor. I think the toughest area is going to be the back part of the OLED display frame which has a 'sag' in it and doesn't quite match up. The parts there are quite thin and will need to be sculpted to exactly match the straight edges of the forward part. I think a new frame of 1mm styrene strip around the whole aperture will help cover any deficiencies in my repair as well as helping strengthen the join, and be the key to getting a clean result. Here's hoping!

Thanks to Chris (Props3D ) and Paul (BeakZ ) for their amazing work on this beautiful prop! I'll update this thread occasionally along the way as the build progresses.
 
Latest progress on the Props3D Lawgiver build...

IMG_3281.jpeg


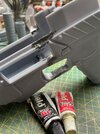
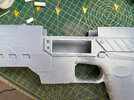
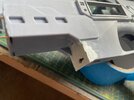
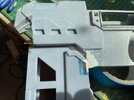
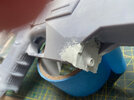
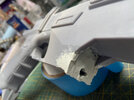
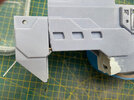
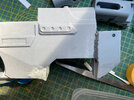
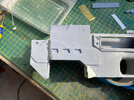
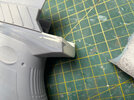
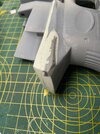
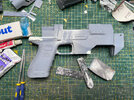
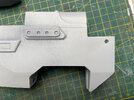
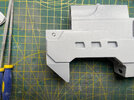
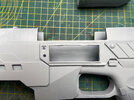
To get to this point has required lots of filling. Lots of sanding and filing. Lots more filling... etc. etc... The parts themselves are really excellent, and beautifully designed for easy construction. But printing them on my very small and rather old resin printer had left me with some areas where the print had warped or drooped due to horizontal overhangs. These have all needed to be fixed and the larger areas re-sculpted. Additionally, the main body and rear upper cowl had to be split into two parts to fit on my build-plate so these needed to be firmly and securely attached to each other and the join hidden.

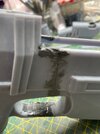
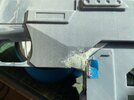
Firstly, the two halves of the main body were drilled and pinned using 1.5mm brass rod. The same technique was also used to join the front part of the body (which is designed to be printed separately) as well. The parts were glued together firstly with a liberal application of Superglue gel. The two halves of the cowl were also glued together using a steel rule to ensure they were aligned. Any resulting gaps were then filled. I primarily used JB Weld ColdWeld 2-part epoxy due to its strong adhesive quality and strength even when used for small and quite delicate parts (like the frame around the OLED aperture).

At this stage, structural strength was the main objective rather than aesthetics, so I didn't worry too much about the horrible globby roughness of the first filling - that would hopefully be fixed at the next stage (I thought while crossing my fingers!).

IMG_3184.jpeg IMG_3182.jpeg

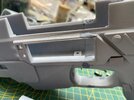
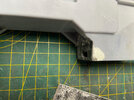
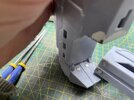
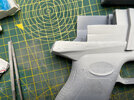
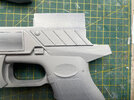
Once the parts were cured and secure I started the long process of refining the joins and re-sculpting the missing or warped details. The main areas where I needed to do this were the vertical sides of the magazine holder, the rear of the body under the slide, and the frame around the OLED. For this I used silver-grey Milliput (for ease of sculpting) in the first instance, followed by ColdWeld and/or P980 fine grey filler to refine details and edges. It was just a matter of filling, sanding and filing, priming, filling again, sanding and filing... and rinse and repeat. With each iteration, there was less to fix and eventually I got to a point where I was wet sanding to finish the surface more than re-shaping. Around the OLED aperture, I used thin 1mm styrene strip as a frame which helped give a nice clean result.
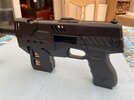
IMG_3186.jpeg IMG_3187.jpeg IMG_3190.jpeg IMG_3191.jpeg

When sculpting the magazine housing I did this with the magazine in place to ensure a nice fit. I taped the parts of the magazine that would be in contact with the new sculpt and covered the tape with silicon grease to avoid the Milliput/JB Weld sticking to it. I also sculpted around a plastic tube to make sure the mag-release pin could still work. Once the new sculpted details had mostly cured I could wriggle the magazine out to allow the new parts to fully cure. I used the same technique where I needed to sculpt the back of the body to match the back of the slide.

At each stage of the work I used Tamiya grey fine surface primer only on the parts I was working on to unify the surface and show where more work was needed. I find it the best primer for this since it dries REALLY quickly and reveals imperfections clearly.

IMG_3193.jpeg IMG_3194.jpeg IMG_3195.jpeg IMG_3196.jpeg IMG_3200.jpeg IMG_3201.jpeg IMG_3202.jpeg IMG_3223.jpeg IMG_3225.jpeg IMG_3227.jpeg IMG_3228.jpeg IMG_3230.jpeg IMG_3232.jpeg IMG_3235.jpeg IMG_3238.jpeg IMG_3241.jpeg IMG_3242.jpeg IMG_3243.jpeg IMG_3244.jpeg IMG_3245.jpeg

I also did a dry fit of all the parts at this stage (including the electronics caddy) and did a little bit of fettling to ensure they all fitted together and the moving parts (slide, magazine release and trigger) moved freely. I also drilled and tapped a couple of extra screw holes to enable me to firmly attach the slide housing from the inside.

When I thought the parts were as good as my skills could get them I gave everything a final wet sand and then primed everything with a flat black primer (Citadel Chaos Black from a rattle can - which is a really nice primer). Inevitably there were a few more bits of filling and sanding to do before another priming coat.

IMG_3247.jpeg IMG_3257.jpeg IMG_3261.jpeg

Finally, I masked off the inside of the body, magazine and grip and painted all the parts in either matt black (body, magazine and slide) or satin black (barrels, trigger, top cowls and sights). There was a particular order for some of these. For instance, I noticed in one still from the movie that there is a fine silver mesh behind the three lozenge-shaped holes in the side shroud on the right of the body. So I needed to paint this separately and attach the steel-painted mesh from the back. It will be glued to the body when the gun is assembled. The ID plate and switches, on the other hand, were glued in place before priming and painting. I also painted the bullets at the same time.

IMG_3270.jpeg IMG_3274.jpeg

I'm really happy with the results so far. The next thing to do is to start assembling the gun, integrating the various electronic components as I go.

IMG_3275.jpeg IMG_3278.jpeg IMG_3281.jpeg IMG_3284.jpeg IMG_3285.jpeg
 
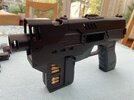
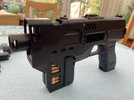
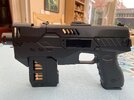
I've just put the finishing touches to the Props3D interactive Lawgiver, and I couldn't be happier with the result!

Lawgiver-left.jpg


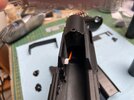
The assembly of the gun and the incorporation of the various electronic components went quite smoothly, although there were a couple of points where I had to do a bit more sanding to the interior of my resin-printed parts to get the electronics to fit comfortably. It's a very tight squeeze in there even with the very clever design of the main caddy and the various mechanical components - there’s a voice-recognition board, an Arduino Nano, a DS player with a micro SD card, 2 speakers and an amp, a neo-pixel 7-LED circle, 2 mini-switches (for the trigger and the reload) and the OLED display, not to mention the LIPO battery voltage converter hidden in the grip! Chris and Craig (Props3D) have done an incredible job of making everything fit so well into a pretty tiny space. The only thing that I couldn't quite get to fit (I suspect due to the less exact nature of printing with resin) was the display holder that slots into the frame to secure the OLED screen from the back. The screen itself fits so well, though, that I was able to secure it in place quite safely with a couple of strips of electrical tape.

Adding the functionality to the printed and assembled gun was made SO much easier by my having bought the main caddy and the other components pre-assembled. It might be cheating a bit(!) but I wasn't confident in my ability to wire all the boards and connections correctly. Paul (BeakZ) did a fantastic job on assembling and wiring everything to make a pretty much 'drop-in' kit, with only a couple of very small and easily-made adjustments needed on my part. Thanks Paul!

Once I was sure that the electricals would fit I spent a happy couple of hours putting everything together.

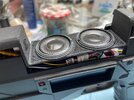
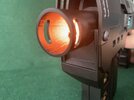
The lens was slipped into the barrel and secured with a tiny bit of canopy glue around its circumference. The inner barrel ring was then inserted which holds it firmly in the correct position inside the barrel.

IMG_3287.jpeg

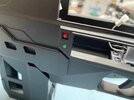
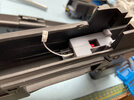
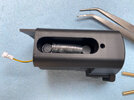
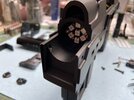
The LED cluster that gives the muzzle flash was screwed into the front of the body and its wiring fed through to the interior. The red and green LEDs next to the OLED display were inserted into their holes, making sure that they are as flush as possible to the inside wall of the body (since the end of the OLED display will cover them and needs to be flat against their backs. The wires were pushed into the small cavity at the front of the gun with just enough remaining free to allow them to be connected later.
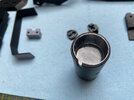
IMG_3309.jpeg IMG_3310.jpeg IMG_3314.jpeg IMG_3312.jpeg

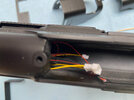
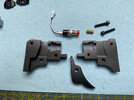
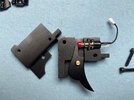
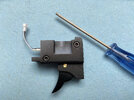
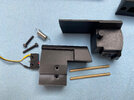
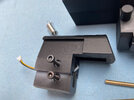
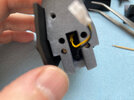
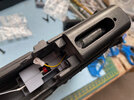
The trigger mechanism was assembled, as was the cocking/reload unit, and the wires from their respective switches fed into the main interior of the gun. The brass rails and spring for the reload were also attached at this point and both units attached to the main body of the gun.

IMG_3290.jpeg IMG_3291.jpeg IMG_3294.jpeg IMG_3304.jpeg IMG_3296.jpeg IMG_3297.jpeg IMG_3299.jpeg IMG_3301.jpeg IMG_3306.jpeg

The OLED screen was pushed gently into place from the inside at this point and (in my case, as mentioned above) secured with black electrical tape from the back.

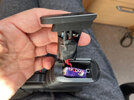
Moving to the grip, I connected the power converter, main switch and battery together and taped the converter board to the grip plate, before feeding the main power wire up through the grip and into the interior. Finally, the grip plate was screwed into place.

IMG_3316.jpeg

Then all the JST connectors were connected and the function tested before final assembly. This was the moment of truth! With a huge sense of relief I saw the OLED illuminate and the ID check worked, as did everything else. It was a real thrill to hear and see the lawgiver come to life at this point! Although the kit arrived from Paul already trained, I'd already done a bit more training of the voice recognition to help it react to my (horribly un-Dread-like) voice.

Everything being well, the main caddy was gently inserted almost all the way into the body of the gun from the top, ensuring that none of the wires already in place were pinched or trapped. I didn't press it all the way in, and I used more electrical tape to secure a couple of the wiring harnesses in place against the caddy/board to minimise the space they took up and make sure they were routed correctly to allow the caddy to be pushed fully home.

IMG_3331.jpeg

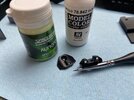
All that was left was to fix the barrel and the top shroud(s) in place. This also secures the caddy too. But I had one last little painting job to complete first, which was to carefully paint the night-sights with UV-reactive luminous paint.

IMG_3289.jpeg

While those were drying I assembled the magazine, inserting the bullets and the acrylic window-holder first and then the windows themselves. Once the sights were dry I fixed them, the barrel and the shrouds in place and the lawgiver was done (well, almost!).

IMG_3275.jpeg IMG_3278.jpeg IMG_3285.jpeg

I decided at this point that although I loved the pristine look of the finished gun, it definitely needed a bit of weathering and 'battle damage' to match my helmet (and the general dystopian vibe of the Dredd universe). Some more photos of the completed lawgiver follow in the next post.
 
Last edited:
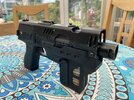
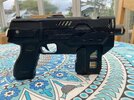
Some beauty shots of the finished Props3D Lawgiver. Thanks to Chris for a beautifully designed and engineered prop, Craig for the amazing coding and functionality, and Paul for putting together the electronics for me. Once again, I hope I've done justice (!) to your skills and generosity!

Lawgiver-with-props.jpg

Lawgiver-left.jpg Lawgiver-right.jpg Lawgiver-left-cu.jpg Lawgiver-right-cu.jpg Lawgiver-rightside-cu.jpg Lawgiver-low-ammo.jpg Lawgiver-muzzle-flash-orange.jpeg Lawgiver-muzzle-flash-white.jpeg Lawgiver-night-sights.jpeg

In natural light...

Lawgiver-natural-light-1.jpeg Lawgiver-natural-light-2.jpeg Lawgiver-natural-light-3.jpeg Lawgiver-natural-light-4.jpeg Lawgiver-natural-light-5.jpeg Lawgiver-natural-light-6.jpeg Lawgiver-natural-light-7.jpeg Lawgiver-natural-light-8.jpeg

And videos of the functionality...

ID check fail and pass...

Voice-activated firing modes...

Low ammo warning and reload...
 

Your message may be considered spam for the following reasons:

If you wish to reply despite these issues, check the box below before replying.
Be aware that malicious compliance may result in more severe penalties.
Back
Top