vistaVision
Sr Member
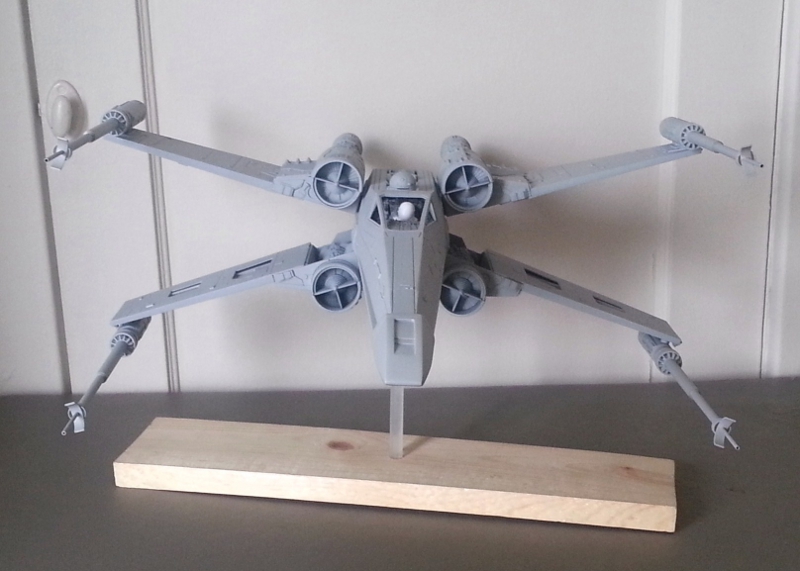
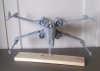
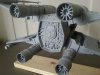
Near studio-scale in size, but not so near in detail. I started the project years ago when a Salzo kit was difficult and expensive to acquire as Mike wasn’t actively producing his excellent kits at the time. Inspired by PHArchivist's 2006 thread, I wanted to rebuild the toy into a reasonable display model without going overboard. I did not light the model, and used only one actual donor kit part for detail. Model is show here with first coat of primer, revealing to me a few areas that need some attention before I can begin painting.
Mods made:
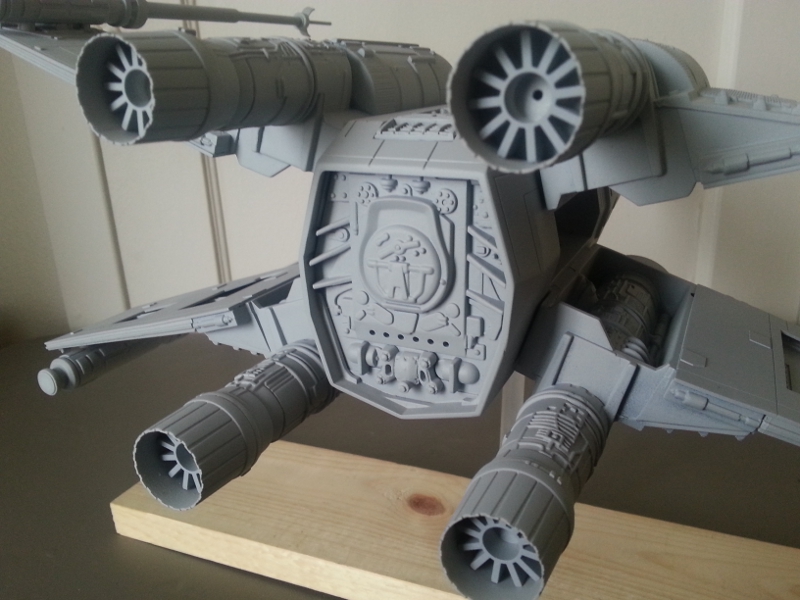
Droid strip was replaced with a casting, I think from Frank Cerney. The strip had to be thinned in depth and slightly shortened to fit.
Most of the sound-effects speaker holes in the back plate were filled, and the “action feature” lever hole was also filled. The correct Panzerspahwagen donor kit provided the detail part to fill in the blank space where the lever had been.
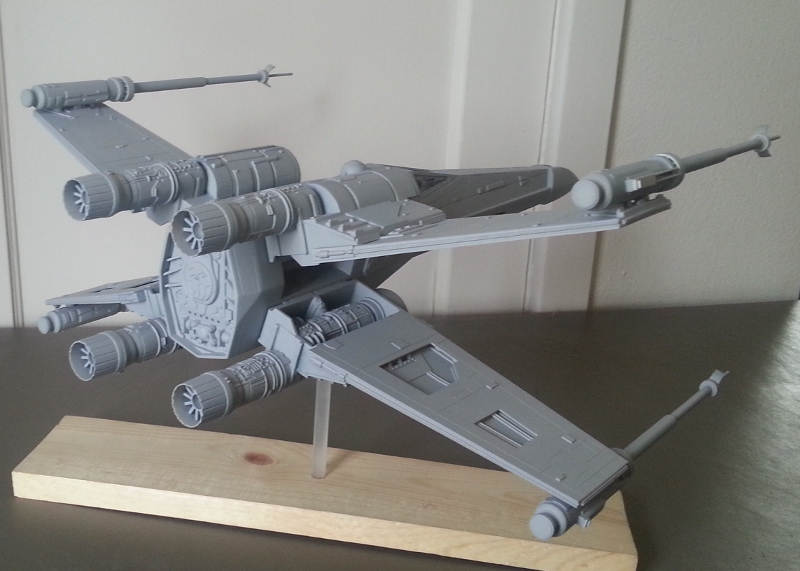
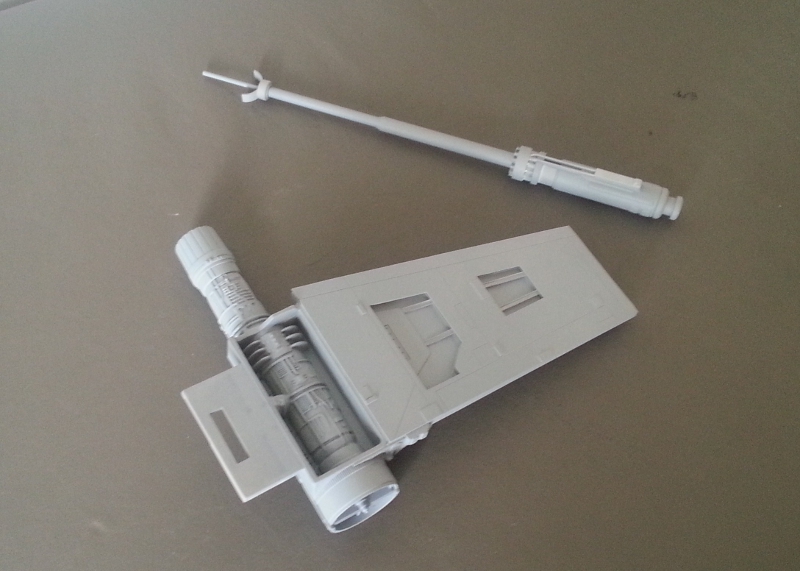
I removed the back end of the toy’s engines and replaced them with modified phantom jet engine “turkey feathers” castings, again from Frank. As the toy’s engines are a bit smaller than correct studio scale, I had to reduce the length and diameter of the castings to properly fit. I simply removed two of the “feathers” and then reshaped them to the correct diameter by softening the resin castings with a heat gun. A little ACC to glue them back together and after some primer, an invisible splice! I also made a facsimile of the heat sink details for the engine interiors from styrene tube and strips.
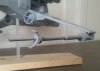
After removing more “action” levers, buttons and handles the bottom of the craft was covered over with a very non-canon plate to hide the holes. It’s on the bottom, not very visible, so I took the easy road with a covering plate instead of repairing the holes. I also created a 0.375 inch diameter “sleeve” to receive the x-wing’s acrylic mounting rod (for display). The sleeve was made from a 2-inch long styrene tube solidly bonded into the inside of the fuselage with a copious amount of PC-7 epoxy. I removed all of the original moving wing mechanism parts and fitted pockets into the sides of the fuselage to accept the modified wings. I then added some detail to suggest some sort of functional wing mechanics.
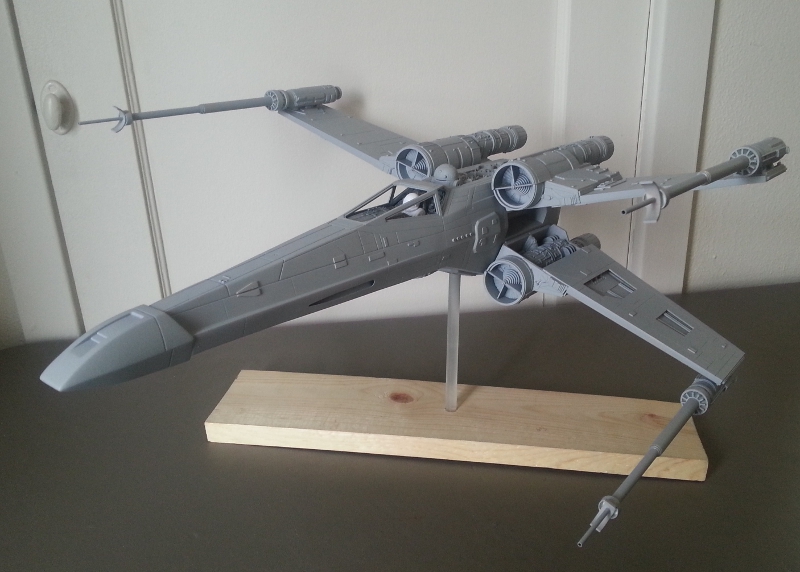
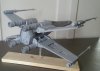
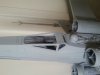
The fuselage was bonded closed, and modified to accept the droid strip. I also fitted a resin cockpit interior, opened up the rear windows, and created a new canopy frame from laminated styrene sheet material. I grafted in new side plates that featured torpedo tubes that provided much more detail than the toy’s torpedo tubes that were merely suggested by shallow grooves and paint. A few panel lines were scribed or re-scribed, the electrical connector tubes on both sides below the cockpit were added with small styrene tubing and several detail chips were located on the fuse body. I didn’t modify the shape of the nose cone, but I did fill in the landing gear hole in the bottom.
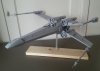
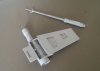
I added some inside wing details and then installed scribed styrene wing plates to suggest the original’s layered wing look. The wing parts were all securely bonded and fixed together with machine screws to prevent wing-droop. I added a few scratch built details to the leading edges of the wings and modified the cannons with built up styrene heat sinks and other details, and replaced the horrible soft vinyl/plastic tubes with aluminum and brass telescopic tubing.
Right now the pilot is an armless unmodified 1:24th scale NASCAR driver. I plan on re-sculpting him into a proper X-Wing pilot unless I can find a casting somewhere. If anyone has a line on a spare pilot casting (either “realistic” or ILM-style) please let me know, I’d be interested.


Mods made:
Droid strip was replaced with a casting, I think from Frank Cerney. The strip had to be thinned in depth and slightly shortened to fit.
Most of the sound-effects speaker holes in the back plate were filled, and the “action feature” lever hole was also filled. The correct Panzerspahwagen donor kit provided the detail part to fill in the blank space where the lever had been.
I removed the back end of the toy’s engines and replaced them with modified phantom jet engine “turkey feathers” castings, again from Frank. As the toy’s engines are a bit smaller than correct studio scale, I had to reduce the length and diameter of the castings to properly fit. I simply removed two of the “feathers” and then reshaped them to the correct diameter by softening the resin castings with a heat gun. A little ACC to glue them back together and after some primer, an invisible splice! I also made a facsimile of the heat sink details for the engine interiors from styrene tube and strips.
After removing more “action” levers, buttons and handles the bottom of the craft was covered over with a very non-canon plate to hide the holes. It’s on the bottom, not very visible, so I took the easy road with a covering plate instead of repairing the holes. I also created a 0.375 inch diameter “sleeve” to receive the x-wing’s acrylic mounting rod (for display). The sleeve was made from a 2-inch long styrene tube solidly bonded into the inside of the fuselage with a copious amount of PC-7 epoxy. I removed all of the original moving wing mechanism parts and fitted pockets into the sides of the fuselage to accept the modified wings. I then added some detail to suggest some sort of functional wing mechanics.
The fuselage was bonded closed, and modified to accept the droid strip. I also fitted a resin cockpit interior, opened up the rear windows, and created a new canopy frame from laminated styrene sheet material. I grafted in new side plates that featured torpedo tubes that provided much more detail than the toy’s torpedo tubes that were merely suggested by shallow grooves and paint. A few panel lines were scribed or re-scribed, the electrical connector tubes on both sides below the cockpit were added with small styrene tubing and several detail chips were located on the fuse body. I didn’t modify the shape of the nose cone, but I did fill in the landing gear hole in the bottom.
I added some inside wing details and then installed scribed styrene wing plates to suggest the original’s layered wing look. The wing parts were all securely bonded and fixed together with machine screws to prevent wing-droop. I added a few scratch built details to the leading edges of the wings and modified the cannons with built up styrene heat sinks and other details, and replaced the horrible soft vinyl/plastic tubes with aluminum and brass telescopic tubing.
Right now the pilot is an armless unmodified 1:24th scale NASCAR driver. I plan on re-sculpting him into a proper X-Wing pilot unless I can find a casting somewhere. If anyone has a line on a spare pilot casting (either “realistic” or ILM-style) please let me know, I’d be interested.
Attachments
-
 20150322_101228.jpg237.8 KB · Views: 1,201
 -
 20150322_101254.jpg269.8 KB · Views: 1,125
 -
 20150322_101524.jpg271.9 KB · Views: 1,120
 -
 20150322_101717.jpg276.3 KB · Views: 1,149
 -
 20150322_101906.jpg230.5 KB · Views: 1,142
 -
 20150322_102054.jpg239.7 KB · Views: 1,132
 -
 20150322_102647.jpg278.2 KB · Views: 1,139
 -
 20150322_102835.jpg259.8 KB · Views: 1,157
Last edited:
")


