No budget Rubies DL-44

Fly4v

Sr Member
Already did a simple repaint of my Rubies, removed the electronics and packed the inside with clay to add some weight then filled the screw holes with hot glue.

[url=https://postimg.org/image/7nlz2tcll/][/URL]

[url=https://postimg.org/image/nluosxre1/][/URL]

But I guess after looking at all the great DL-44 builds, it got to the point that the poor little Rubies didn't cut it anymore.

As the title states, this is a no budget build and will be scrounged parts and the bits of leftover sheet styrene. The curved parts will be from Paul Mitchell travel sized shampoo bottles and Gillette deodorant cases

[url=https://postimg.org/image/5vt07x0yh/][/URL]

I have already separated the scope from the pistol and have inserted the shampoo bottle pieces to build up the interior surface.
 
Last edited:
[url=https://postimg.org/image/4titpekq1/][/URL]

Here are the exterior scope parts cut from the rounded outer edges of the Gillette deodorant. Everything will be held together with super glue and hot glue.

It would have been easier to have started from scratch and completely build a upper part of the blaster since over 50% has to be filled in but have to work with limited resources and don't have enough styrene.
 
Last edited:
Ambitious project, you've got your work cut out for you (pun intended) but the final blaster will be something to be proud of. Looking forward to seeing your progress.
 
Thanks, James.

[url=https://postimg.org/image/6lbskbr89/][/URL]

I have been able to get the top of the blaster closed in. Decided to cut off the left side of the old sight since it will make matching the top much easier.
The rounded inserts for the scope fit well and match the contour with little effort.
 
Last edited:
This looks very promising indeed and will set a good example for those less fortunate to purchase the higher-end metal blasters or parts. :)

Chaim
 
The no budget mod it done.

[url=https://postimg.org/image/n93amy415/][/URL]

The scope isn't glued to the blaster.
The bottom of the scope mount is an inverted T that fits inside the original rubies bracket. The small piece between the scope and the blaster is a U clip that locks everything together.
I won't say it is easy to remove and reinstall.... It was the first time but after that..... well, it allows the scope to be safely stored for travel without the risk of breaking and stays together for use.
 
Last edited:
[url=https://postimg.org/image/fgcmuyqc9/][/URL]

[url=https://postimg.org/image/6lbskhbuh/][/URL]

[url=https://postimg.org/image/fgcmuzl7d/][/URL]

[url=https://postimg.org/image/f3l8otand/][/URL]

To finish the bathroom blaster off used the cap from one of my wife's DHC bottles to hide the hot glue mess at the open end of the scope.

Can't really tell from the photos, but while the stain black was tacky rubbed in some Burnt Blue on the scope and Burnt Dark Gray on the mount.

I'd like to get some brass rub and buff to add weathering on the scope rings.
But then I'd also like to add all the screws and ring mount on the bottom and before you know it... I'll want a metal one.
 
Last edited:
Perhaps a little weathering on the flashider etcetera to make it even more STAR WARS 'used future'?

Excellent build ... and yes the screen-accuracy bug has bitten you now ... alas there's no going back :)

Chaim
 
[url=https://postimg.org/image/izykkty7t/][/URL]

I thought I was done after the clear purple lens and some additional weathering.... But spent too much time looking at the ANH 3 greeblies and then saw the tea bottle top silver disk.

So it is back to the saga of how I wish my Rubies wasn't a Rubies.

I added some screws that I was able to dig up. They are sadly phillips and not standard, cut the groves in the front of the scope, added the range marks on the dial, and drilled the hole in the top of the flash suppressor.

[url=https://postimg.org/image/efce5btrt/][/URL]

For the new larger disk, tried a gatorade top but that was too flexible so I cut up the top of a glue stick. I also added milling marks to the side.

[url=https://postimg.org/image/cnjfafi4p/][/URL]

Started to carve the panel line details of a C96.

[url=https://postimg.org/image/s90qudend/][/URL]

Word to the wise. If you want to make a DL-44 just make one and then look at no others or "forever you will be on the path".....
 
Last edited:
Here are the sources I used to increase the accuracy of my build.
http://forum.rebelscum.com/t1110884/
http://www.therpf.com/f79/anh-hero-dl-44-discussion-three-anh-greeblies-found-118186/

This is the source for the larger "tea top" disk on a Rubies.
http://www.therpf.com/f79/new-forum-first-post-yes-another-han-solo-blaster-sorry-advance-233768/

Up to this point, the build has still been true to the no budget. But, eventually will buy an allen head screw for bottom of the barrel and the brass fittings for the handles.

[url=https://postimg.org/image/5kbjuws5l/][/URL]

[url=https://postimg.org/image/jdzwjz06h/][/URL]

[url=https://postimg.org/image/4usrijzbt/][/URL]

[url=https://postimg.org/image/57k5osuh5/][/URL]

The ski slope on the barrel, scope mount and the little screw on the handle are still major tells that it is a Rubies.
Maybe someday the fairy god mother of firearms will turn my little Rubies into a real DL-44.
 
Last edited:
With the rapidly approaching Solo movie I decided to dig out my DL-44 collection.


The top is the Jakk's Pacific Blaster Strike plug and play game. While the largest of the three, I believe it is the only toy version of the Greedo killer(ish) blaster on the market... and it is a fun video game.

The second is an unmodified Evike airsoft blaster. I assume that this is the correct general size for a DL-44 minus the deficiencies noted in the alternate DL-44 thread.
I love having a metal blaster and wish I had bought the metal side plate when the run was open. Eventually I will get wood grips but doubt I will do the refinish and retooling that others are so expertly completing.

The last is a modified Rubies which is kind of small next to the Evike.
It is nice having a plastic trash blaster to play with and I keep it on my desk. I should have kept the electronics and installed an LED even though the sound effects were bad. Since the rubies is still on the market at a cheep price, I may revisit this and do a better build.

 
Last edited:
...I believe it is the only toy version of the Greedo killer(ish) blaster on the market...

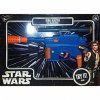
The Disney Parks Rebel Blaster is out there:

71H48owTtdL._SY355_.jpg
 
Did Disney return to making blasters?
I thought they had stopped just after they released the really nice park exclusive ANHish E-11.

It's from '15 if I remember correctly. I'm not sure if they still make them but you can get it on eBay. It makes a really good budget light and sound install for a Denix build. The sound font is the Greedo shot from the DVD release and the board fits right in the mag well with an aftermarket AAA battery pack. The speaker is surprisingly loud and the board can power a 10mm LED like a champ.
 
Last edited:
This thread is more than 6 years old.

Your message may be considered spam for the following reasons:

  1. This thread hasn't been active in some time. A new post in this thread might not contribute constructively to this discussion after so long.
If you wish to reply despite these issues, check the box below before replying.
Be aware that malicious compliance may result in more severe penalties.
Back
Top