cavx
Master Member
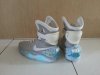
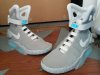
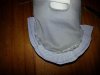
i know your probably going back to GITD rather than EL but have you tried the El system you made with this new bubble? Could look mint?!
If the back part was clear and back lit with white EL, yes it would.
- - - Updated - - -
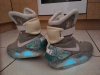
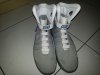
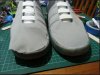
Looks like a cool idea any progress on the heel cup and mid sole molding ?
Not really. Need to finalize these bubbles first.