You are using an out of date browser. It may not display this or other websites correctly.
You should upgrade or use an alternative browser.
You should upgrade or use an alternative browser.
Nike Mag V2 Mod Discussion (Page 58 Shopping List)
- Thread starter Taff83
- Start date
-
- Tags
- back to the future
- Status
- Not open for further replies.
Vormz
Sr Member
Great thank you both very much....I printed both out. Cavx your template still doesnt look quite right. Im not sure I could be wrong. What do you think is the better option of the two
Maybe scale Vormz template by 10% since my shoe is a 9.5 ? What do you think ?
I'm glad to help
")
I think scaling by 10% is a good idea.
Hi all, a YouTube Tested video sent me here and please, please, please accept my apologies if this has been answered a million times over - I'm a newbie.
I bought some Chinese replicas of the Nike Mags and am finally getting around try and attempt to make them more accurate. Is there a single place that has all the info in how to go about changing them?
I'm looking at swapping all the LED's, getting a clear sole and making all the electrics work off one switch that I need to relocate into the ankle bit. The main problem I have is I have no knowledge whatsoever...unfortunately.
I have found a guy on eBay that sells the light-up Nike logo which I'm on the cusp of ordering but that's the only part I can source so far.
Any and all help or information would be wholly appreciated!!
Many thanks!
rhodrijen
Active Member
@Vormz that is a nice clean conversion. Well done. Hopefully I will get either a pair of the US8 soles sent to be or least a really good image taken with a rule and I make up some outriggers in this size.
Thanks Mark, I really appreciate.
I second this, yours are some of my favourites to look at Vormz!
Vormz
Sr Member
Wow, thanks a lot! That's sweet from modders like you guysI second this, yours are some of my favourites to look at Vormz!
ADUBZ
New Member
My pair, mostly opened by me [emoji14]I currently have a pair of MAGs opened up for the sock toe slim. If anyone wants pics, let me know by posting here.
I really appreciate your tuition and guidance through this art, thank you so much mate
Sent from my SM-N9005 using Tapatalk
cavx
Master Member
My pair, mostly opened by me [emoji14]
I really appreciate your tuition and guidance through this art, thank you so much mate
Sent from my SM-N9005 using Tapatalk
Your welcome. We got a lot done in 3 hours.
Both soles removed and in excellent condition.
All factory wires/battery removed.
Both uppers removed from the soles.
Both toe boxes removed for sock toe slim.
I currently have a pair of MAGs opened up for the sock toe slim. If anyone wants pics, let me know by posting here.
I'd be darn happy to see them cavx if you don't mind to much. After we spoke about the clear soles I started my conversions. I'm currently doing the led color correct mod. I feel like it's coming along nicely after the first one was completed.
I have been looking at a frame bye frame of the movie props and have decided to go sock toe (at least on this, my first pair) to see how I like it. I'm pretty confident that I can peel the "toe cap" from between the fabric, but pics are always helpful.
I'm still on the fence with the clear sole. I've honestly been thinking about molding my own. I've found a UV stable product that has a little hire shore hardness and I think I want to give it a try. Hope this doesn't offend.
cavx
Master Member
My mid soles and fabric have yellowed a bit, I wonder if they will come good after the clean
Sent from my SM-N9005 using Tapatalk
Probably not. I am going to suggest the yellowing is more from the products not being UV stable more than dirt.
Vormz
Sr Member
I wonder if it's possible to repaint them in the flat grey and re-splatter them
Sent from my SM-N9005 using Tapatalk
Yes, that's what I did using Angelus paints.
cavx
Master Member
Sock toe.
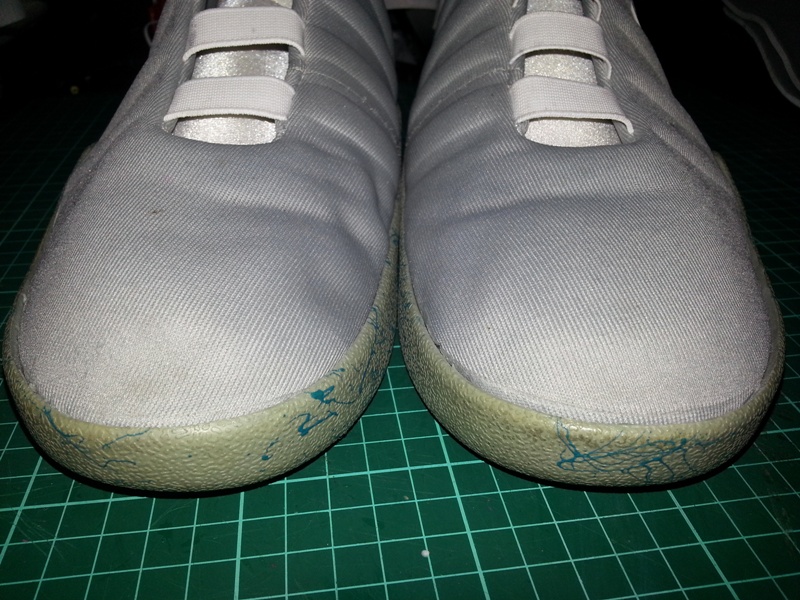
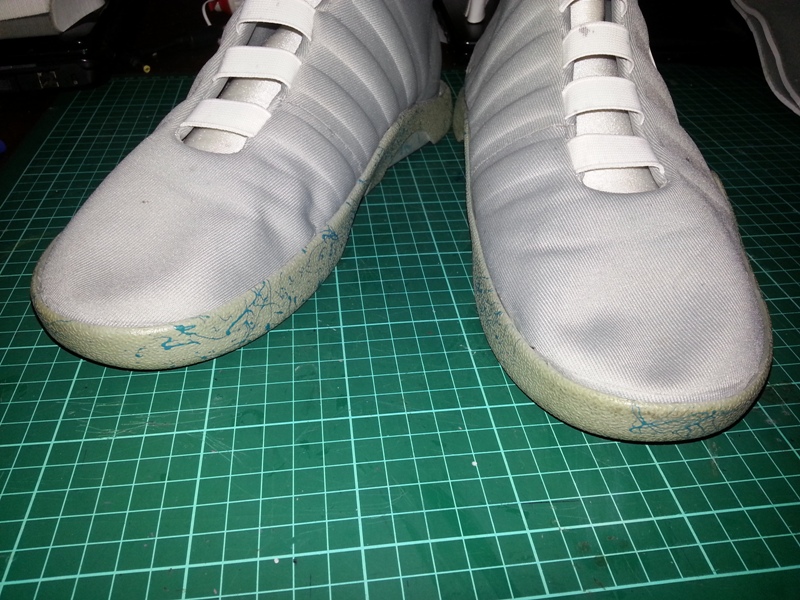
The difference I have done here is NOT to chop away the excess, rather glue it back in the same place, just without the toe box. All I have done is to separate the layers, remove the toe box and then glue the shoe back down.
The steps I have taken are -
1. Remove the upper starting at at the heel. Because this is a complete re-wire, the heel cup comes off to allow full access to the two holes that the wires feed through. I have removed the upper 3/4 the way from the sole leaving the EL side still attached. On my US8 display pair, I completely removed it and I think this way is better. I'll know for sure when I go to glue those uppers back down.
2. Remove the toe box. Once the upper is opened up, you can see the stitching that seals the toe box. Some people cut this excess off. I have elected NOT to do this, so the toe can slump like the movie shoe. The stitching is easily unpicked and then you can separate the layers. I also keep the inner layer. Some guys take this out. I think for a wear pair, you still need some extra fabric inside so your toe nail does not wear its way through the top layer. The toe box itself is a course weave looking something like bandage material. It is bonded with a foam and feels slightly rubbery. This layer should come away from the top and bottom shell layers. If it does not, a bit of heat will soften the glue and it should just peel away. It leaves foam on the inside surface. It is up to you if you want to sit there and pick all that off.
3. Fold and tuck, not nip and tuck. Something else I DO NOT do is remove the pink card board. I know alot of guy cut this away, but there is a reason it is there and that reason is to give the shoe shape. If I do remove this, I make sure I replace it with something else like plastic. You will have a glue line to work to, so just make sure you pull the fabric right over the cardboard and press it into the mid-sole. if you have those spring loaded clamps, use them. The pair in the photo still need the final edge gluing done.
I used what must be my favorite glue at this time - Tarzan's Grip - because it is both flexible and water resistant. Liquid super glues tend to be brittle and while I used to use them for everything, found this glue easier to use for this part of the operation and is especially good for gluing soles back on shoes. I have had to repair a pair of Colorado boots and I used this stuff to glue the soles (layer under the sewn layer) back on with great success. The only thing is it needs time to cure and you are best to leave the shoes for at least 12 hours.
Hope this helps. If you need more of a visual reference, watch my video on the sock toe slim mod.
Attachments


Last edited by a moderator:
chuck2003
Well-Known Member
Ok another question.....Im working on fitting the new soles from cavx to my shoe so once im done with the electronics in the first shoe I can just slap the new soles on and be done with it. Two things im noticing is the overall thickness of the soles are way to thick for it to fit properly so ive been working on sanding them down to the proper thickness. Second thing im noticing is the new soles is wider then the actual shoe. So im not sure if I should try and force the soles to glue to the shoe even though they are wider. Or I was also thinking of maybe cutting the outriggers off dremmel the bottom part of the soles so it fits the width of the shoe and then glue the outriggers back to the sole.... Any one have anythoughts ?
Also where can I buy wire tape from for the buckle EL pannel ?
Also where can I buy wire tape from for the buckle EL pannel ?
- Status
- Not open for further replies.
Similar threads
- Replies
- 12
- Views
- 855
- Replies
- 0
- Views
- 1,079
- Replies
- 62
- Views
- 8,030