My Latest Hellboy Prop - A Completely 3D Printed Samaritan

I'm with Koipond on this. Sh*peways is a great alternative. I think $150 is reasonable (I've seen less for more, and more for less—depends on the seller).

Hate to be the bearer of bad tidings but there are a couple problems. First, Sh*peways has a STRICT no weapons policy- anything that looks even remotely like a weapon will be flagged and deleted unless it's smaller than 10cm in any dimension. (They DO enforce it too.) Second, looking at the model above it would cost a LOT more than $150 to print. I'd guess that it would cost maybe $500 to print even in PL2000 (the nylon that SW calls strong flexible, which is among the cheapest) and that may be a conservative number. The cost of printing on an consumer-type ABS or PLA machine can't compare to doing it at a print vender.

The model COULD be hollowed out and printed at a place like Ponoko- they don't have a restriction on gun-look items but they are much more expensive than SW. You could also contact dr slurpee here on the forum because he is setting up a printing service geared at prop hobbyists.

(The replica is very well done though!)
Thank You,

But I think you may have missed what we were chatting about. The Samaritan was designed and printed by 2 of us on our school's printer. I was gauging interest from people if I was to sell a kit, what people thought it might be worth (this is my 1st time thinking about selling something). We were chatting about $150 ish, and if we'd still make enough profit to make it worth our time.

I need to get some downtime on our printer and do a test to see how long and how much filament exactly this would use. When we did the prototype, it was all over the place and we weren't paying much attention.

Once we get our 2nd printer, I think this will be more viable and I will let people know.

Thanks for the advice and the compliments.

- - - Updated - - -

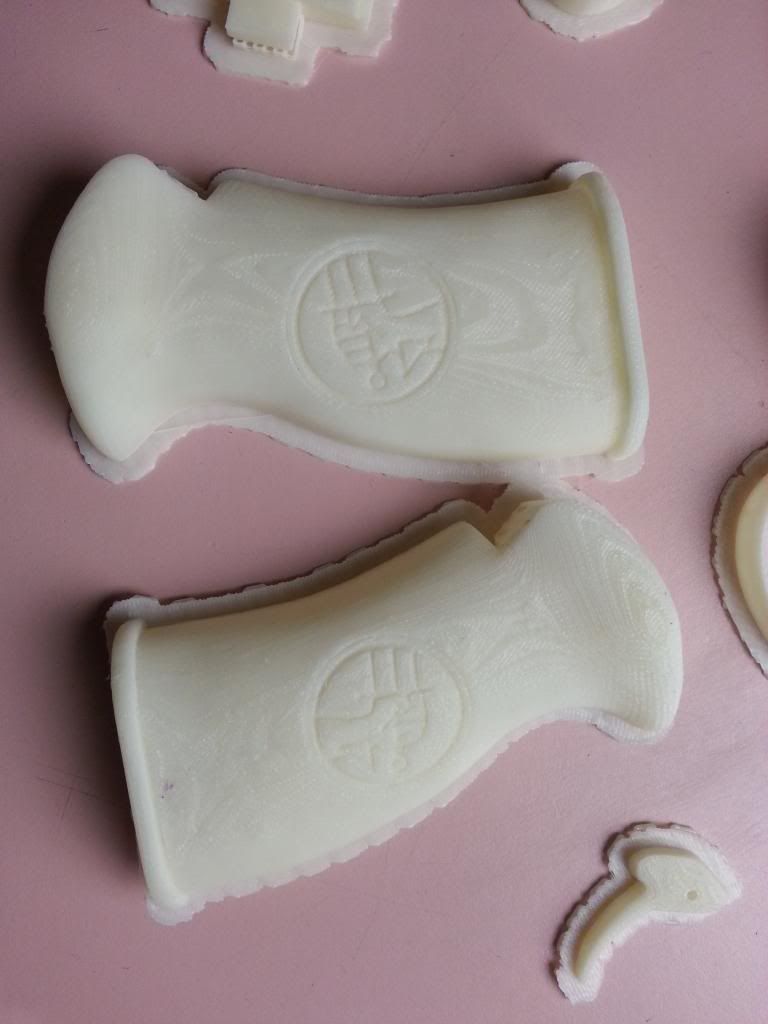
that is fantastic! So you were actually able to PRINT the wood grain in the handle?! apparently the resolution on the makerbot is getting much better.

It was a happy fluke, it oriented that way and worked out well. And yes, the resolution on the new Makerbots is awesome!

- - - Updated - - -

- - - Updated - - -

Shut up and take my money!
-Terry

See above, it'll take some time. They seem to want me to teach kids, not make plastic "props". Will let you guys know soon

- - - Updated - - -

This is amazing how long did it take to print? I'm really thinking of getting a makerbot 2 and after reading this I think I will be lol great job.

To be honest, I can't remember exact time. We did it in pieces, as we had them ready, and didn't pay much attention to it. Gunna do another one, from scratch soon. Will take pics, show assembly, etc.
 
It was a happy fluke, it oriented that way and worked out well. And yes, the resolution on the new Makerbots is awesome!

So by the wood grain being a "fluke" I'm guessing that the layers are an accidental artifact... That's very cool and lucky. Are the an artifact of the Model, the way it was converted into a .STL, or the layers the printer layed down? Mostly curious in case I want to try and recreate that fluke. It'd be super handy if I wanted to make something wood grain if I could simply use the existing contours of the model like that (since that is essentially how most wood grain is oriented IRL).
 
So by the wood grain being a "fluke" I'm guessing that the layers are an accidental artifact... That's very cool and lucky. Are the an artifact of the Model, the way it was converted into a .STL, or the layers the printer layed down? Mostly curious in case I want to try and recreate that fluke. It'd be super handy if I wanted to make something wood grain if I could simply use the existing contours of the model like that (since that is essentially how most wood grain is oriented IRL).

It's more in how extrusion printers work. They have very high vertical resolution (the up and down axis, or Y axis), but they don't have as great horizontal resolution. Our grips were simply rounded and smooth, see the render on the 1st page. So this was the printer's best attempt at re-creating our rounded grips. Normally I'd sand these with some 80 grit to smooth them, but in this case it was perfect.

Good luck, lemme know if you need anything
 
Thank You,

But I think you may have missed what we were chatting about.

No, I didn't miss that at all but a folks above were talking about printing at SW as an alternative and I wanted to point out that it wouldn't be a viable alternative.
 
It's more in how extrusion printers work. They have very high vertical resolution (the up and down axis, or Y axis), but they don't have as great horizontal resolution. Our grips were simply rounded and smooth, see the render on the 1st page. So this was the printer's best attempt at re-creating our rounded grips. Normally I'd sand these with some 80 grit to smooth them, but in this case it was perfect.

Good luck, lemme know if you need anything

That was a good explanation; though I understand how 3DP resolution works, but I think the explanation was good and will hopefully help others understand. I just wanted to understand at what stage the step layering was induced. I had imagined it was something like what you explained. Also to clarify; the up/down axis on the makerbot is not the Z-axis? That is interesting, as the print orientation is usually an x/y plane driven by motors and the z (height) axis based on height of the extrusion head (also motor driven, but slightly different as it doesn't move as often).
As somewhat of a side note, I don't think your printers x/y (or whatever the print bed plane is) necessarily has a resolution problem. If it can produce repeatable parts and curves (the individual curves that look like wood grain do not look pixelated to me, but perhaps you did smooth that part), then it means that those step resolution artifacts are caused by the translation between the .stl and the end product. If the vertical axis does indeed have a high resolution, then there should be no reason that each of the layers can't be as close together as two points are from each other on a curve. But it is obviously more complicated than that as it is something that I have seen repeatedly on different non-industrial printers (I've used several industry printers that don't have the finishing problems typically seen in printers <$3k.
The project looks great, I look forward to seeing more work from y'all. Also if you are interested in a good finish, have you played around with acetone baths at all? This is a product that I think looks really cool, but have never used and haven't checked in on in several months. It looks like there are a few home brew tutorials out there(1, 2, 3)
 
Last edited by a moderator:
i'd be very interested in getting a kit, between $150-200 would be fantastic, but why not use the version you have printed and make molds of the individual parts? you could use a cheaper material and sell the pulls as a kit for around the same price unpainted and unsanded. Food for thought, either way it looks amazing!
 
At one shop where I worked we used a lot of gap filling primer since the resolution was so low. At times at least three coats.

I'd be curious as to what the maker bot material is like as compared with shapeways 3D print material and SLA material.
 
. Also to clarify; the up/down axis on the makerbot is not the Z-axis? That is interesting, as the print orientation is usually an x/y plane driven by motors and the z (height) axis based on height of the extrusion head (also motor driven, but slightly different as it doesn't move as often).

As somewhat of a side note, I don't think your printers x/y (or whatever the print bed plane is) necessarily has a resolution problem. If it can produce repeatable parts and curves (the individual curves that look like wood grain do not look pixelated to me, but perhaps you did smooth that part), then it means that those step resolution artifacts are caused by the translation between the .stl and the end product. If the vertical axis does indeed have a high resolution, then there should be no reason that each of the layers can't be as close together as two points are from each other on a curve. But it is obviously more complicated than that as it is something that I have seen repeatedly on different non-industrial printers (I've used several industry printers that don't have the finishing problems typically seen in printers <$3k.

The project looks great, I look forward to seeing more work from y'all. Also if you are interested in a good finish, have you played around with acetone baths at all? This is a product that I think looks really cool, but have never used and haven't checked in on in several months. It looks like there are a few home brew tutorials out there(1, 2, 3) Still Extruding: Vapor Treating ABS 3D Printed Parts - YouTube


Yes, Z is up and down, my bad, I was working in 3ds Max and typing the reply, looking at MAX's Y axix =) . The Z axis, if it has a gradual round on it, will produce almost contour lines like result, in my experience, all the time. This model was super high-res and the .stl was also...

Thanks for the kind words.

I've played around with acetone baths, didn't find it did much. The new Makerbot is more than high-res enough for me. The acetone fumes are scary as hell and I found on most models it just kinda "melted" them a bit and smoothed them a bit...
 
I've played around with acetone baths, didn't find it did much. The new Makerbot is more than high-res enough for me. The acetone fumes are scary as hell and I found on most models it just kinda "melted" them a bit and smoothed them a bit...
Yeah I'm not a fan of the fumes, though the one on kickstarter looked like it might have used a different material. I'm hopeful that in the future at home simple finishers will become easier, better, cheaper, etc. because no matter how high of resolution printers become it will always be faster to print at a lower resolution, and if a lower resolution saves you hours, and a finisher can give you the look in minutes... It's neigh impossible to predict what the future will hold, but it's always fun to try :)
 
As part of my 3D Fabrication & Prop Design class that I teach, We've decided to give our Makerbot Replicator 2X a real workout.
Where is this school?! You should seriously consider doing a skillshare I would totally pay to take an online "3D Fabrication & Prop Design" class

We're really trying to make this easy to print and will share the files on Thingiverse once I've printed and tested them all.
Are you still planning to put these on Thingiverse?

Hate to be the bearer of bad tidings but there are a couple problems. First, Sh*peways has a STRICT no weapons policy...
The model COULD be hollowed out and printed at a place like Ponoko- they don't have a restriction on gun-look items but they are much more expensive than SW. You could also contact dr slurpee here on the forum because he is setting up a printing service geared at prop hobbyists.
I'm not personally a fan of shapeways for large parts because of cost, and how much they take. You could still post the files on shapeways and add a "Donate" button so that people who download the file can donate money directly to you (I would totally do that).
Another crazy idea would be to sort of crowd source (or forum source) the printing of these parts. There are several users on this forum that have printers (or access to them), several even specifically have the Replicator 2, so you could easily keep consistency of quality etc. To spell it out: Find 1-3+ printers in each nation/region where you expect to have sales, work with them to make sure they can print the kits to the quality you want. And whenever you need to fill an order for a kit contact the closest RPF-printer and give them the shipping info, pay them for the print and take a cut for the school. It's sounds like a win/win/win. I'm sure there are several members on the site that would love to be involved in the "forum sourcing" of this kit *cough cough* like me *cough cough*
note: my printer (reprap Prusa) isn't currently operational, but I've set aside every evening next week to work on it (really doubt it'll take that long), so I should have it operational by the end of the week.
 
Starting to get the files ready for a kit. I'm new to this, so any advice you have on pricing, shipping, payment, etc, etc is appreciated. My thought is this would be a multi piece kit (12-15 parts) that are unfinished. The buyer would have to glue and assemble the kit. A small piece of threaded rod and a couple nuts are needed, not sure if those should be included or not?...

Thanks

IMO if it is a kit it should include all of the parts. The only thing that doesn't make sense in the kit is tools, glue, paint, sandpaper, etc. If the nut and threaded rod don't add more than an ounce I would say add them. But maybe that's just me. Also did you see my comments/questions above? I've been hammering this thread a little today, sorry ;)
 
Where is this school?! You should seriously consider doing a skillshare I would totally pay to take an online "3D Fabrication & Prop Design" class


Are you still planning to put these on Thingiverse?


I'm not personally a fan of shapeways for large parts because of cost, and how much they take. You could still post the files on shapeways and add a "Donate" button so that people who download the file can donate money directly to you (I would totally do that).
Another crazy idea would be to sort of crowd source (or forum source) the printing of these parts. There are several users on this forum that have printers (or access to them), several even specifically have the Replicator 2, so you could easily keep consistency of quality etc. To spell it out: Find 1-3+ printers in each nation/region where you expect to have sales, work with them to make sure they can print the kits to the quality you want. And whenever you need to fill an order for a kit contact the closest RPF-printer and give them the shipping info, pay them for the print and take a cut for the school. It's sounds like a win/win/win. I'm sure there are several members on the site that would love to be involved in the "forum sourcing" of this kit *cough cough* like me *cough cough*
note: my printer (reprap Prusa) isn't currently operational, but I've set aside every evening next week to work on it (really doubt it'll take that long), so I should have it operational by the end of the week.

School is in Canada (high-school, don't want to say much more :(). Not sure how I could do an online version. It's such a hands on class, we do design, 3d modelling, fabrication, basic mold making, painting, aging, nerf guns, etc. Basically everything I've learnt here :)

As far as Thingiverse goes, I've been told that if I post it, it'll be removed. They seem to have the same policies on realistic guns that shapeways do.

As far as crowd sourcing the print jobs, that's a real cool idea. I hadn't thought about it much. We have 1 Rep2X and I'm about to order a 2nd. I was hoping that by doing a limited run of these kits I'd be able to maybe buy another one with the proceeds. Being a public school, we have zero money and as a teacher that wants to do cool stuff, we need to do a lot of unpaid volenteer time and come up with imaginative ways of funding courses.

I'll definitely think about your idea some more though - thanks much

re: the school name: Say no more, I totally get it. I seriously wish we had classes that cool in High School.

re: the online class: check out some of the skillshare courses that people have done. There are a lot of really cool ways to teach digitally. What most people do for hands on skills, is to record one project that encompasses the key elements, break it up into individual segments, and then post them to the class. People will take them at their leisure (these are interactive but not live), as they watch the videos or do the assignments/activities they will ask questions, etc. Your roll as the teach is review their work and answer their questions. Most people that I've talked to have said that within a few weeks (~2-10 hours/week of work on your part depending on how many people enroll, which you can control) the class tutorials get refined quickly. They also have a class on how to give them. I totally get if you don't have time for this, but I for one would love to take it, and I'm sure it would help with the overall curriculum as well; not to mention help the prop/3D-printing community as well :)
 
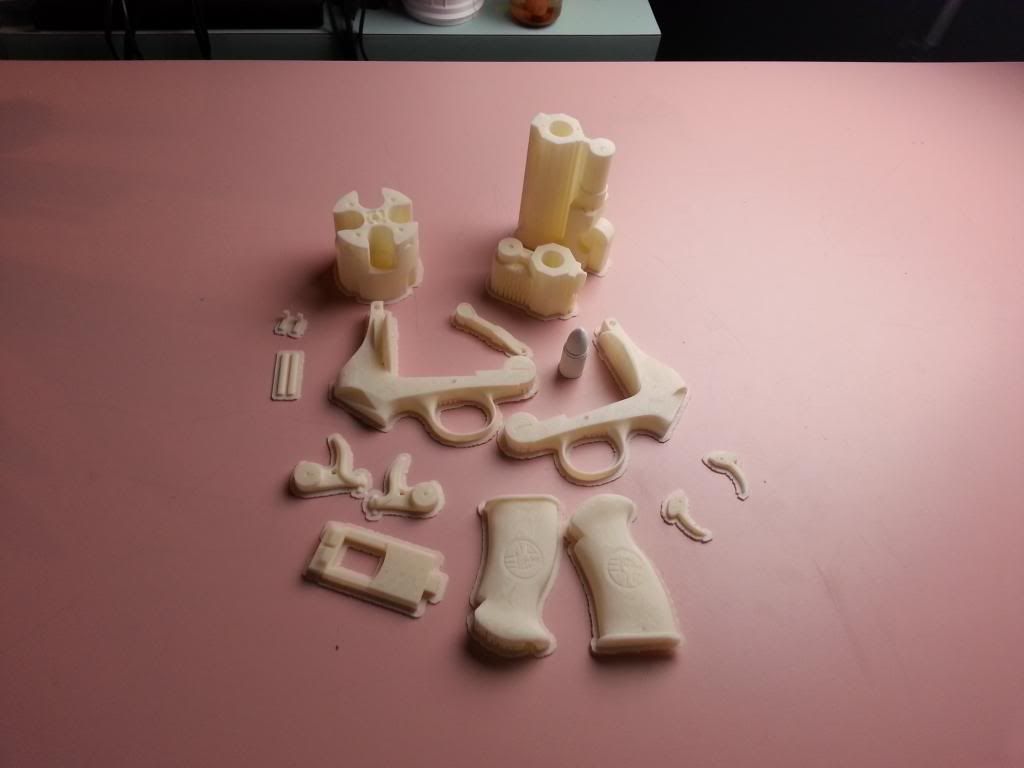
I've printed off a final version of the Samaritan that I'm intending on selling a limited run. I'm wondering if I can get some advice on how to proceed from here. My guess is that I post an INT thread in the Junkyard? And then people tell me if they're interested or not? But do I take payment from there or a deposit? Or do I then start a FS thread?

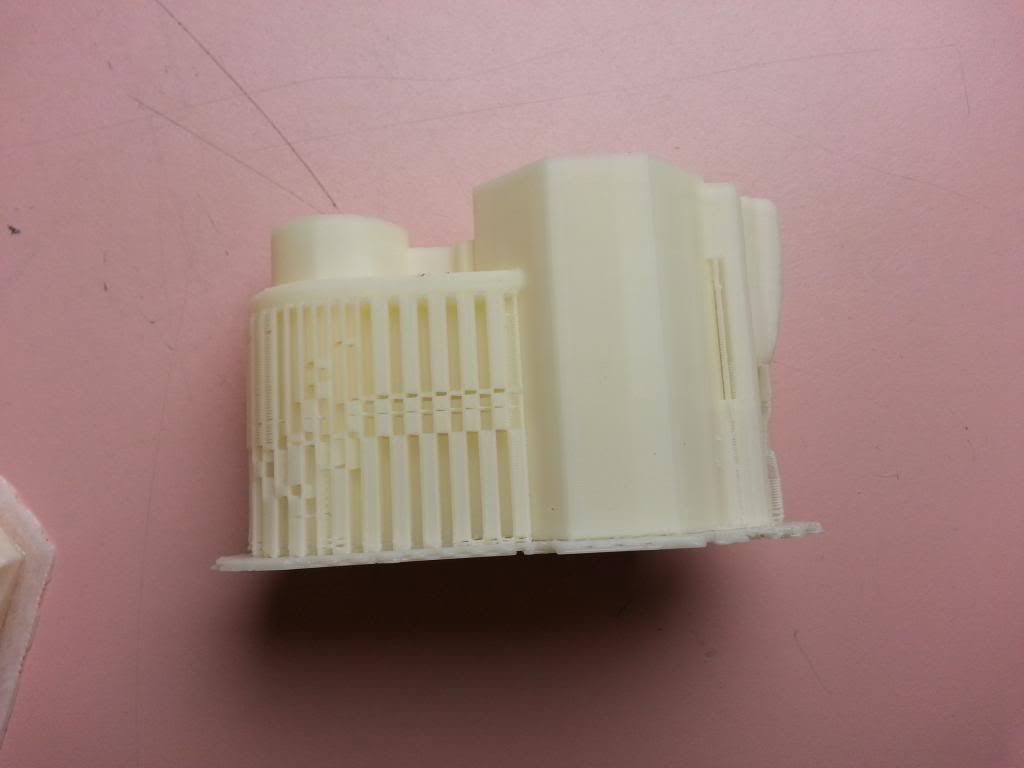
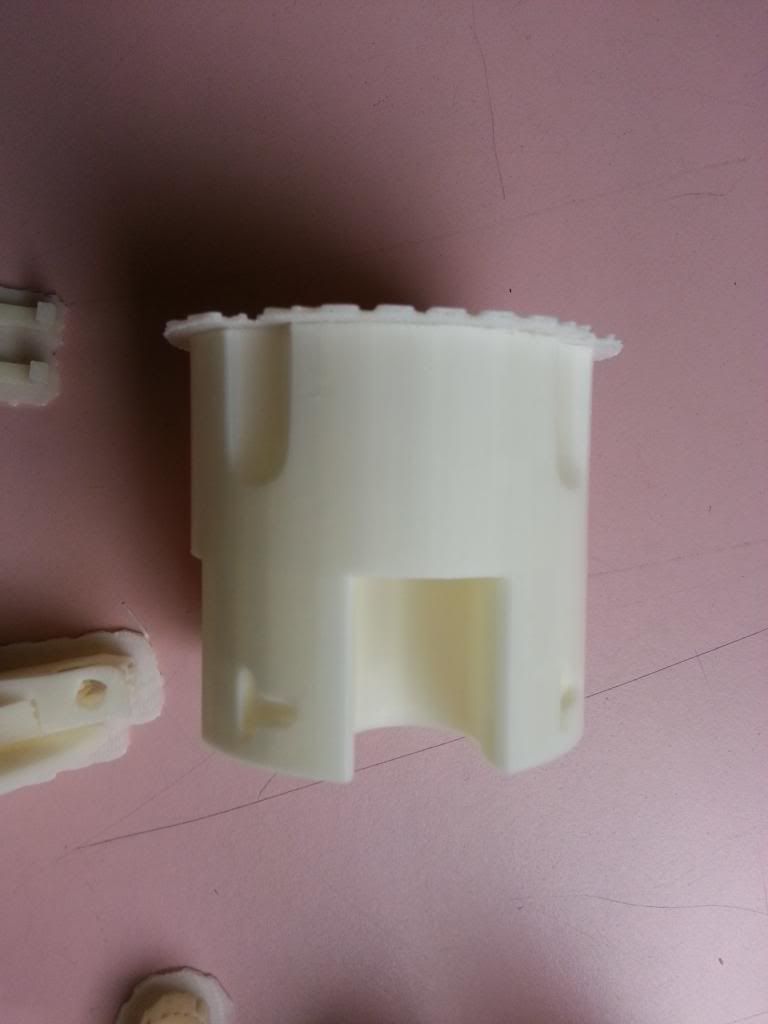
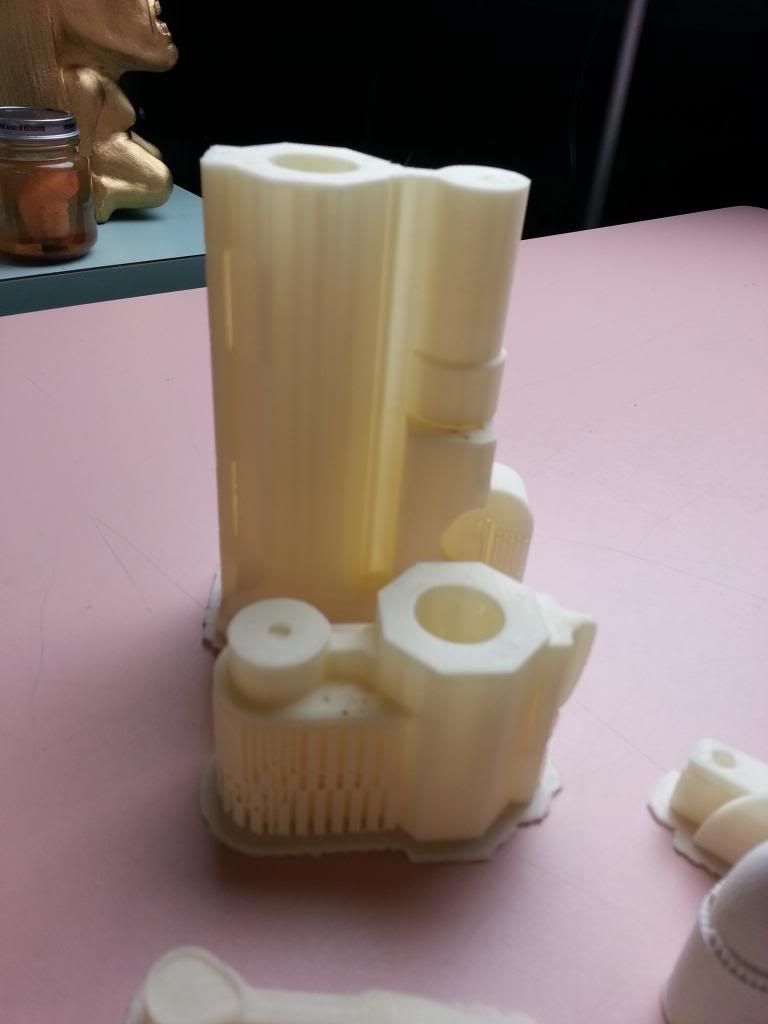
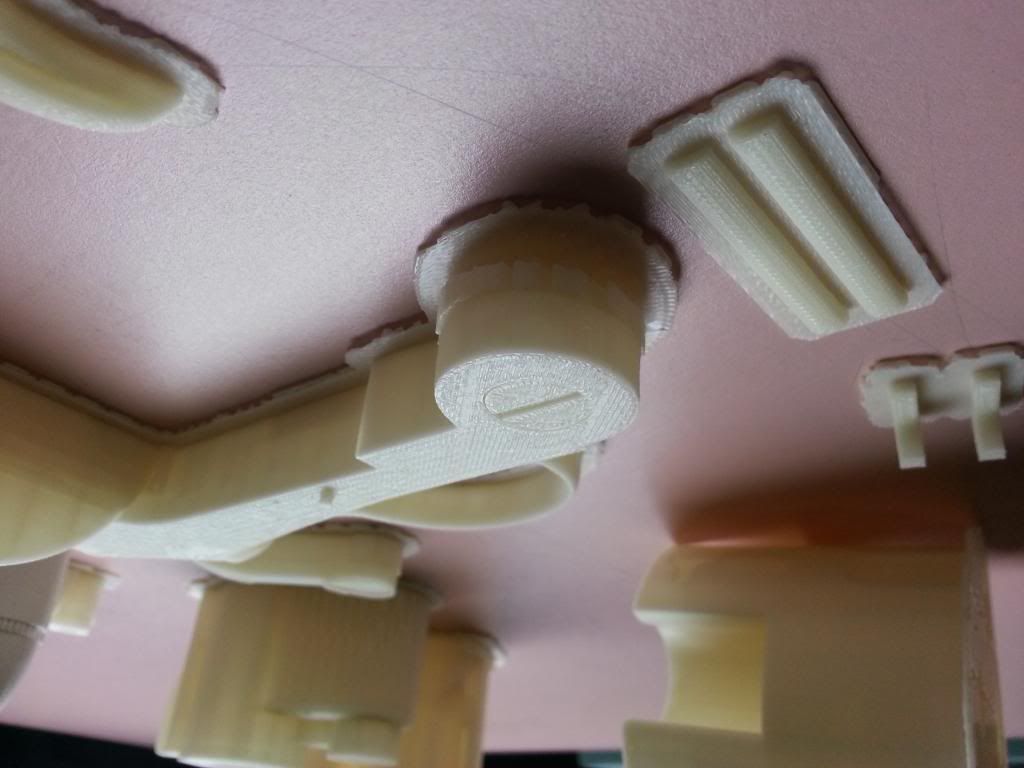
The parts will be shipped in parts as shown. There is a small piece of threaded rod and a nut that I will include. All support material and rafts will be left on.

I'm planning on doing 10 and pricing them somewhere between $150.00 and $175.00 plus shipping. All proceeds will go to buy our school another 3D printer.

I'm open to all feedback and advice, thanks.


Should add, will come with 4 bullets too. Also, colors will vary wildly depending on what ABS I've got. Am planning on mostly white, but I've got a roll of purple I need to use:) . A purple Samaritan :lol . Since I'm assuming everyone is painting, color shouldn't matter.
 
Last edited:
Back
Top